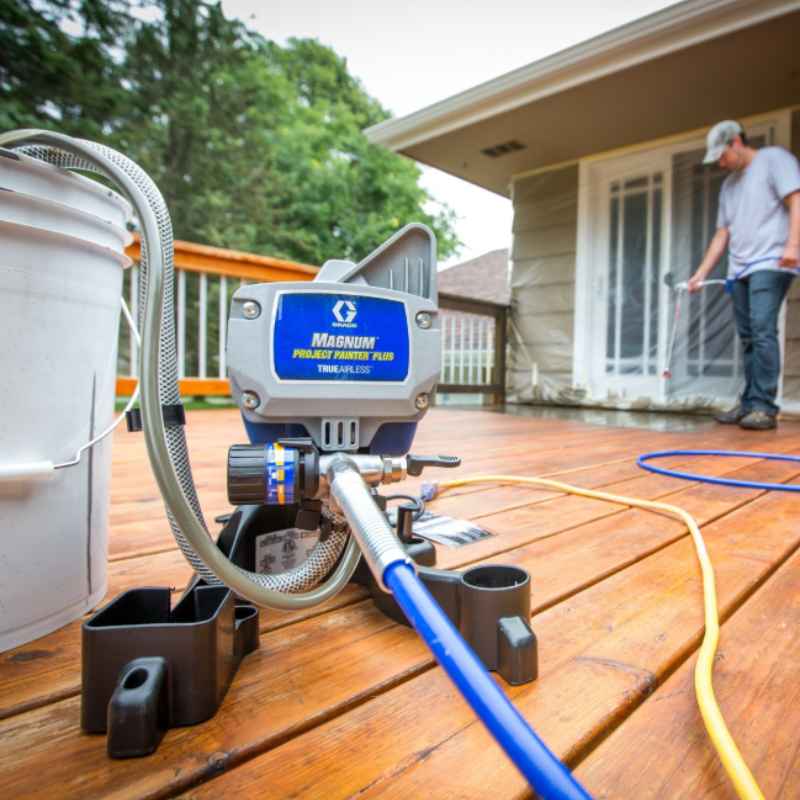
How To Use Graco Magnum Project Painter Plus Like A Pro
Graco Magnum Project Painter Plus use involves understanding its setup, proper spraying techniques, and effective cleaning. Mastering these steps ensures efficient application and professional-looking results for various painting projects, from walls to fences.
Understanding Your Graco Magnum Project Painter Plus
Let’s start with the basics. What exactly is this sprayer doing? It’s an airless paint sprayer.
This means it doesn’t use air to atomize the paint. Instead, it uses high pressure. The machine pumps paint through a small tip.
This tip breaks the paint into a fine mist. This mist then sprays onto your surface. This is different from spray cans or guns that mix paint with air.
Airless spraying is great for covering large areas quickly. It also lays down a very even coat of paint. This is how you get that smooth, professional finish.
The Project Painter Plus is designed for homeowners and DIYers. It’s built to handle a good range of paint types. This includes latex, oil-based paints, and even stains.
The main parts you’ll interact with are the pump, the hose, the spray gun, and the spray tip. The pump is the heart of the machine. It’s what creates the pressure.
The hose connects the pump to the gun. The gun is what you hold. It has a trigger to control paint flow.
The spray tip is crucial. It determines the fan width and the amount of paint that comes out. Choosing the right tip is key for different jobs.
Think of it like using the right tool for a specific job. Each part works together. Understanding this makes you feel more in control.
Graco is a big name in paint sprayers. They’ve been around for a long time. This means they know what they’re doing.
Their machines are generally built to last. The Project Painter Plus is a good entry-level model. It balances power with ease of use.
You don’t need to be a professional painter to use it. But you do need to respect it. It’s a powerful tool.
And like any powerful tool, it needs to be used correctly. That’s where this guide comes in. We’ll make sure you feel confident.
My First Time With an Airless Sprayer: A Sticky Situation
I remember my first big painting project. It was a backyard fence. It was weathered, gray, and huge.
I thought, “A paint sprayer will make this so fast!” So, I bought a sprayer similar to the Magnum Project Painter Plus. I set it up. I was so excited.
I pulled the trigger. Paint went everywhere! It sputtered.
It dripped. It looked like a Jackson Pollock painting, but not in a good way. My fence looked worse.
I was covered in paint. My dog even got a little splattered. Panic set in.
This was supposed to be easy!
I had skipped a few steps. I hadn’t properly thinned the paint. Or maybe I didn’t clean the tip well enough the first time.
I hadn’t tested the spray pattern on cardboard. I was too eager. The frustration was real.
I felt defeated. I almost gave up and went back to my brush. But then, I took a deep breath.
I reread the manual. I watched a few online videos. I learned about pressure settings and tip selection.
I realized it wasn’t the sprayer’s fault. It was my lack of understanding. After I slowed down and followed the steps, things changed.
The fence started looking good. The paint went on smoothly. It was a huge relief.
That experience taught me that patience and knowledge are the best painting tools.
Getting Ready: What You Need
Before you even think about spraying, gather these things:
- Paint: Make sure it’s suitable for airless sprayers. Check the paint can label.
- Thinner (if needed): Some paints might need a little thinning. Follow the paint maker’s advice.
- Buckets: You’ll need two. One for paint, one for cleaning.
- Drop cloths: Lots of them. Cover everything you don’t want painted.
- Painter’s tape: For edges and trim.
- Primer: Essential for a good finish, especially on raw wood or dark colors.
- Safety gear: Eye protection, gloves, and a respirator mask are a must.
- Rags: For wiping up spills.
- Wire brush: For cleaning the pump and gun.
Setting Up Your Sprayer for Success
Setting up the Graco Magnum Project Painter Plus is a critical step. Do it right, and your painting will be smooth. Do it wrong, and you’ll fight with the machine.
First, find a good spot for the sprayer. It needs to be near an outlet. Make sure there’s enough space around it.
You don’t want to be cramped. Also, make sure the area is well-ventilated. This is for your safety and the quality of the paint job.
Next, let’s talk about the paint. Most latex paints for walls will work straight from the can. But for thicker paints, or if the manual suggests it, you might need to thin it.
Use the thinner recommended by the paint company. Add it slowly and mix well. You’re looking for the consistency of milk.
Too thin, and it won’t stick. Too thick, and the sprayer will struggle. It might clog.
It might not spray evenly. You can test this by pouring some paint from your stirring stick. It should flow off in a steady stream, not clump.
Now, connect the hose to the pump. Make sure it’s secure. Then, connect the other end to the spray gun.
Attach the spray tip to the gun. Ensure it’s locked in place. You want everything snug.
Next, place the intake hose into your paint bucket. Make sure it’s fully submerged. Some sprayers have a suction tube.
Others have a hose you put directly into the can. Follow your sprayer’s specific instructions.
Prime the pump. This is super important. It pushes the paint from the bucket up into the hose and gun.
Most sprayers have a valve or lever for priming. You’ll usually put the sprayer in the “prime” or “idle” position. Then, you’ll run the pump.
Paint will start flowing back into the bucket. Keep doing this until you see paint running smoothly through the hose and back into the bucket. This removes air from the system.
It ensures the paint is ready to go when you pull the trigger.
Choosing the Right Spray Tip
The spray tip is like the nozzle on a garden hose. It changes how the water comes out. For paint sprayers, it affects the spray pattern and how much paint you apply.
- Number system: Tips have numbers like 517 or 413.
- First digit: This tells you the fan width. A ‘5’ means about 10 inches wide. A ‘4’ means about 8 inches wide. Use a wider fan for big walls. Use a narrower fan for smaller things.
- Last two digits: These numbers (17, 13) relate to the orifice size. A larger number means a bigger hole. This lets more paint through. Thicker paints need bigger orifices.
- Common choice: For walls, a 517 or 617 is often a good start. For trim or furniture, a 311 or 411 might be better.
Always check your sprayer’s manual or the paint manufacturer’s guide for recommendations.
The Art of Spraying: Technique Matters
Now for the fun part: spraying! But it’s more than just pulling a trigger. Good technique makes your finish look amazing.
First, test your spray pattern. Use a piece of cardboard or scrap wood. Adjust the pressure.
You want a nice, even fan shape. No heavy edges or drips. This is called the “overspray pattern.”
Hold the spray gun perpendicular to the surface. Don’t angle it. Keep it moving.
Start your trigger pull before you reach the edge of your painting area. Then, smoothly sweep across the surface. Release the trigger after you pass the edge.
This creates clean lines and even coverage. Overlap each pass by about 50%. This ensures no gaps and a uniform coat.
Keep your wrist straight. Move your whole arm. This helps create a consistent fan.
Don’t just wave your wrist around. That leads to uneven coverage. Also, maintain a consistent distance from the wall.
Too close, and you’ll get drips. Too far, and the paint will be too thin and dusty. About 10-12 inches is a good starting point for most wall painting.
Adjust as needed.
Spray from top to bottom when painting walls or large vertical surfaces. This way, any drips can be caught by the areas you haven’t sprayed yet. For horizontal surfaces like ceilings or decks, spray in one direction.
Then do the next section, overlapping the previous one. Work in manageable sections. Don’t try to spray the whole room at once.
This prevents the paint from drying too soon.
When you finish a section or need a break, release the trigger. It’s also smart to move the sprayer’s intake hose to the unpainted area. This way, it’s always drawing from a fresh supply of paint.
This makes the process more efficient. It also helps keep the paint flow steady.
Quick Scan: Spraying Dos and Don’ts
| DO | DON’T |
|---|---|
| Use a respirator mask. | Spray without eye protection. |
| Move your arm smoothly. | Just move your wrist. |
| Overlap passes by 50%. | Leave wide gaps between passes. |
| Keep the gun perpendicular. | Angle the gun towards the surface. |
| Test your spray pattern first. | Spray directly onto your main job without testing. |
Dealing with Paint Consistency and Pressure
Paint consistency and pressure are like the engine and fuel for your sprayer. Get them right, and everything runs smoothly. Get them wrong, and you’ll have problems.
The Graco Magnum Project Painter Plus has a pressure control knob. You’ll find it on the unit. Start with the lowest recommended pressure for your paint.
Then, slowly increase it until you get a good, even spray pattern. The paint should atomize well. It shouldn’t be spitting or running.
If the paint is too thick, you’ll see an uneven pattern. It might look like little dots or lines. The edges of the spray fan will be heavy.
This is when you might need to thin the paint a bit more. Remember, thin gradually. Mix thoroughly.
Test again. It’s a trial-and-error process, but worth it. Always refer to the paint manufacturer’s recommendations for thinning.
Some paints, like certain latexes, might not need thinning at all.
On the other hand, if you set the pressure too high, you can waste paint. You might also get more overspray. This means paint particles flying everywhere.
It can make cleanup harder. It can also lead to a less even finish if you’re not careful. Find that sweet spot.
It’s where the paint sprays evenly without sputtering or excessive overspray. This pressure will vary depending on the paint type and the spray tip you’re using. A smaller orifice tip might need less pressure than a larger one.
Pay attention to the sound of the pump. If it’s straining or making odd noises, your pressure might be too high, or the paint might be too thick. If it’s running constantly and not building pressure, the paint might be too thin, or there might be a leak.
These are all signs you can learn to read. They help you understand what the sprayer is telling you.
Observational Flow: Adjusting Pressure
1. Start Low: Set the pressure control to its lowest setting.
2. Test Spray: Aim at scrap material and pull the trigger.
3. Observe Pattern: Look for a fine mist with even coverage.
4. Increase Slowly: If the pattern is uneven or splatters, turn the pressure up a little.
5. Re-test: Check the spray pattern again.
6. Repeat: Continue adjusting until you get a smooth, consistent fan.
7. Avoid Excess: Don’t set pressure higher than needed for a good pattern.
Real-World Context: When to Use Your Sprayer
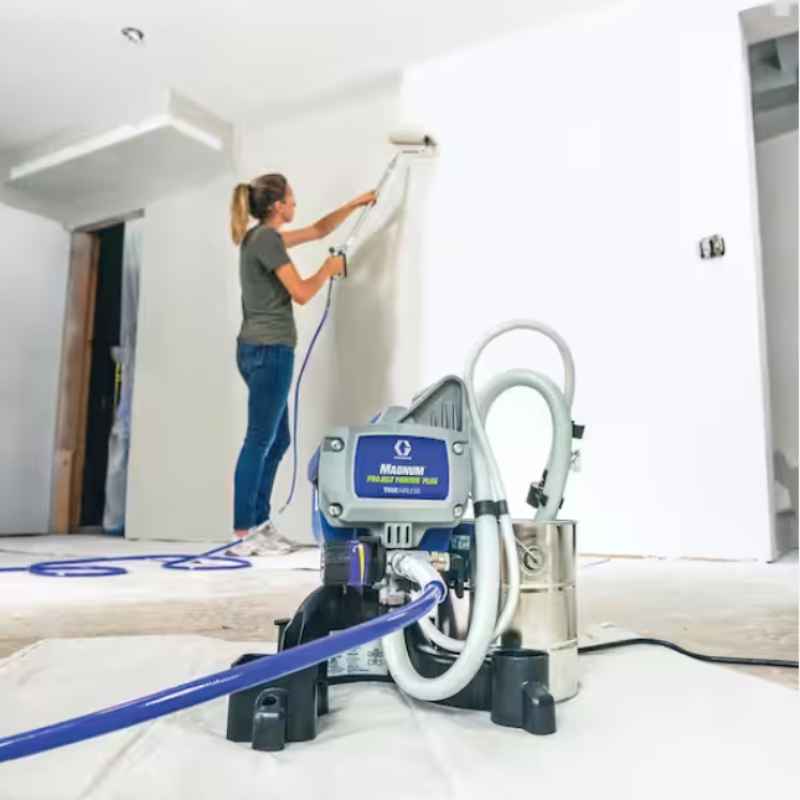
Your Graco Magnum Project Painter Plus is perfect for many situations. Think about painting walls in your home. Whether you’re redoing a bedroom or painting a whole house, a sprayer saves tons of time.
It covers large, flat surfaces quickly. This is its sweet spot.
Exterior siding is another great application. Wood, vinyl, or stucco can all be sprayed. You get even coverage on all the nooks and crannies.
Fences, decks, and sheds also benefit greatly from spraying. It’s much faster than brushing or rolling them. The finish is usually more uniform, too.
Don’t forget furniture! While fine woodworking might need a different type of sprayer, for things like dressers, tables, or chairs, your Project Painter Plus can give a factory-like finish. Just make sure to prep well.
Mask off areas you don’t want sprayed. Use a finer spray tip for more control.
Other projects include: garage doors, gutters, or even large interior trim work. The key is to assess the surface. Is it large?
Does it have a lot of texture? Is efficiency a priority? If you answered yes to these, spraying is likely a good choice.
However, there are times when spraying might not be the best option. Very small jobs, like a single door or a small piece of furniture, might be quicker with a brush or roller. Rooms with a lot of tight corners, built-in shelves, or delicate trim might be better suited for careful brushing and rolling.
Also, consider the environment. If it’s very windy outside, you’ll have too much overspray. If you can’t properly ventilate an area indoors, spraying might not be safe.
Contrast: Spraying vs. Traditional Methods
Spraying:
- Pros: Fast for large areas, even finish, covers texture well.
- Cons: Needs masking, can be messy, requires practice, potential for overspray.
Brushing/Rolling:
- Pros: More control for detail work, less prep, good for small areas.
- Cons: Much slower for large jobs, can leave roller marks or brush strokes.
What This Means for You: When It’s Normal vs. When to Worry
Understanding what to expect is crucial. When you’re spraying, a slight buzzing sound from the pump is normal. A steady flow of paint when you pull the trigger is also good.
A fine, even mist is what you’re aiming for. If you see paint running down the surface immediately after spraying, that’s a sign it’s too thick, or you’re holding the gun too close, or you’re spraying too much in one spot. This is fixable.
If the sprayer starts making loud grinding noises, or if the paint flow is inconsistent (sputtering, then stopping), that’s a sign something’s not right. It could be a clog in the tip or the gun. It could be an issue with the pump’s valves.
It could be that the paint is too thick and isn’t being picked up properly. This is when you need to stop and investigate.
A lot of overspray outside is normal. But if you’re getting paint on surfaces you intended to protect, you need to improve your masking. Or perhaps you need to reduce the pressure or adjust your technique.
If the paint finish looks rough or dusty, it’s often called “dry spray.” This happens when the paint is too thin, the pressure is too low, or you’re holding the gun too far away. It means the paint particles are drying before they hit the surface.
If you notice the paint isn’t sticking well after it dries, that’s a bigger issue. It could be the paint wasn’t compatible with the surface, or the surface wasn’t prepped properly. Priming is often the solution here.
Trust your instincts. If something feels off, it probably is. Don’t force it.
Take a break and figure it out. That’s part of learning.
Quick Fixes and Tips for a Pro Look
When you’re using your Graco Magnum Project Painter Plus, these tips can make a big difference:
- Prep is Key: Always clean your surfaces. Dust, grease, or old peeling paint will ruin your finish. Sand any rough spots.
- Prime, Prime, Prime: Don’t skip primer. It helps paint adhere better. It also makes your topcoat color truer, especially if you’re going from dark to light.
- Work in Sections: Paint one wall or one side of the fence at a time. Work from top to bottom.
- Feather Your Edges: When you stop spraying, slightly arc your spray pattern away from the edge. This blends the edge into the next pass more smoothly.
- Clean as You Go: Wipe up any drips immediately. Clean the spray tip if it looks clogged.
- Don’t Overwork It: Once the paint is applied, let it dry. Trying to fix wet sprayed paint often makes it worse.
- Consider Two Coats: Most projects look best with two thin coats rather than one thick one. This ensures durability and a uniform color.
- Watch the Weather: For exterior jobs, avoid spraying in direct sunlight or when it’s too hot or humid. This can cause the paint to dry too fast.
Stacked Micro-Sections: Easy Wins
Masking: Use good quality painter’s tape. Press it down firmly to avoid paint bleed.
Ventilation: Always ensure good airflow, especially indoors. Open windows and doors.
Safety First: Wear your respirator. Paint mist can be harmful if inhaled.
Tip Maintenance: Clean your spray tip frequently during use. A clogged tip ruins your spray pattern.
Paint Strainer: Always strain your paint before putting it in the bucket. This catches any dried paint bits that could clog the sprayer.
Cleaning Your Sprayer: The Most Important Step
This is where many people fall short. Cleaning your Graco Magnum Project Painter Plus properly is vital. If you don’t clean it, it won’t work next time.
It might not work even after just one use if you don’t clean it right. It’s not hard, but it takes time. Plan for it.
First, relieve the pressure. Always do this. Follow your sprayer’s instructions for depressurizing the gun.
Then, disconnect the intake hose from the paint. Place it in a bucket of clean water (for latex paint) or a solvent (for oil-based paint). You’ll also need a second bucket for waste water/solvent.
Run the sprayer in “prime” mode. Now, instead of paint, clean water or solvent will cycle through the system. Let it run until the water or solvent coming out is completely clean.
This flushes out the pump, hose, and gun. You’ll need to cycle through several buckets of clean water or solvent.
Next, clean the spray gun thoroughly. Take off the spray tip and guard. Use the cleaning tools that came with your sprayer.
Scrub inside the gun and the tip. Make sure no paint residue is left. Rinse everything again.
Reassemble the gun and tip. Run a little clean water or solvent through it one last time.
Finally, store your sprayer properly. Some people like to leave a little bit of storage fluid (like Pump Armor) in the pump to prevent corrosion. Check your manual for specific storage instructions.
A clean sprayer is a happy sprayer. It will be ready for your next project.
Quick-Scan Table: Post-Job Checklist
| Step | Action |
|---|---|
| 1. Depressurize | Release all pressure from the gun and system. |
| 2. Flush Intake | Place intake hose in clean water/solvent. |
| 3. Prime System | Run sprayer until clean water/solvent exits. Change buckets often. |
| 4. Clean Gun & Tip | Disassemble and scrub all parts thoroughly. |
| 5. Final Rinse | Run clean water/solvent through reassembled gun. |
| 6. Store | Follow manual for proper storage. |

Frequent Questions About the Project Painter Plus
Can I spray latex paint with the Graco Magnum Project Painter Plus?
Yes, absolutely! The Graco Magnum Project Painter Plus is designed to spray most latex paints for interior and exterior use. You might need to thin certain thicker paints slightly.
Always check the paint manufacturer’s recommendations for spraying.
What is the best way to clean the spray gun?
After flushing the pump and hose, disassemble the spray gun. Use the cleaning brushes provided with your sprayer to clean the inside of the gun and the spray tip. Rinse all parts thoroughly with water (for latex) or solvent (for oil-based paint) until they are completely clean.
How do I prevent drips when spraying?
Drips usually happen when you spray too much paint in one spot, hold the gun too close to the surface, or have the pressure set too high for the paint. Practice moving your arm smoothly and consistently. Release the trigger after you pass the edge of your spray area.
Ensure your paint consistency and pressure are set correctly.
What happens if my sprayer clogs?
If your sprayer clogs, stop spraying immediately. Relieve the pressure. Check the spray tip and gun for blockages.
Often, a small piece of dried paint or debris is the cause. Clean the tip and any clogged parts. If it persists, you may need to run a cleaning cycle again or check the pump inlet screen for debris.
How long does the Graco Magnum Project Painter Plus last?
With proper use and regular, thorough cleaning, your Graco Magnum Project Painter Plus can last for many years. These machines are built for durability. Consistent maintenance, especially cleaning after each use, is the most critical factor in its lifespan.
Can I spray stains and varnishes with this sprayer?
Yes, you can spray stains and some varnishes with the Graco Magnum Project Painter Plus. However, you must use the correct spray tip size for these materials, as they are often thinner than paints. Always check the product label to ensure it’s suitable for airless spraying and consult your sprayer’s manual for recommended tip sizes.
Conclusion: Your Painting Journey
Using your Graco Magnum Project Painter Plus can seem daunting at first. But by understanding its parts, preparing correctly, and practicing good technique, you can achieve professional results. Remember to always prioritize safety and cleaning.
These steps are non-negotiable. Each project will help you get better. Don’t be discouraged by minor issues.
Learn from them. Soon, you’ll be painting with confidence and ease. Enjoy your beautifully painted surfaces!
Sponsored / affiliate links. As an Amazon Associate I earn from qualifying purchases. I may earn additional commission from eligible campaigns.