Shorter Downrod For Ceiling Fan: Essential Upgrade for Perfect Airflow
A shorter downrod for your ceiling fan is essential when the fan blades are too close to the ceiling or floor. It ensures proper air circulation and safety by maintaining the ideal distance from the blades to the room’s highest point of occupancy. This simple swap improves comfort instantly.
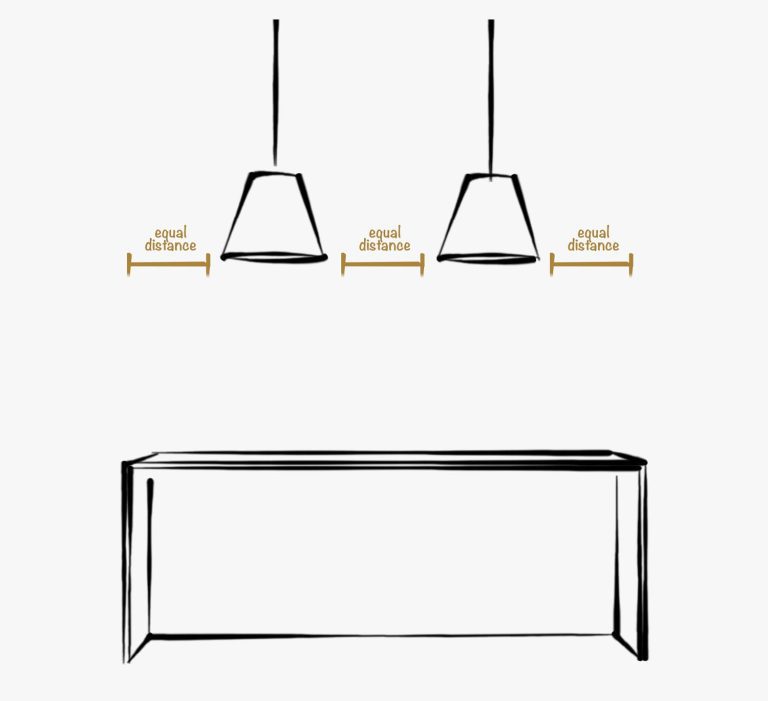
Have you ever installed a new ceiling fan, only to realize the blades look awkwardly high or, worse, that you feel no breeze at all? This is a super common problem, especially in rooms with lower ceilings. That metal pipe connecting the fan motor to the ceiling mount is called the downrod, and choosing the right length is crucial for comfort and safety. Don’t worry if yours is too long or too short right now! We are going to walk through exactly why you need the right size and how easy it is to swap out that shorter downrod for ceiling fan needs. By the end of this guide, you’ll have the confidence to make this simple upgrade yourself and enjoy perfect airflow.
Why Ceiling Fan Height Matters So Much
Ceiling fans are more than just decoration; they are functional tools for moving air. If they are hung at the wrong height, they just spin uselessly or even become a hazard. Getting this right affects how cool you feel and how safe your home is.
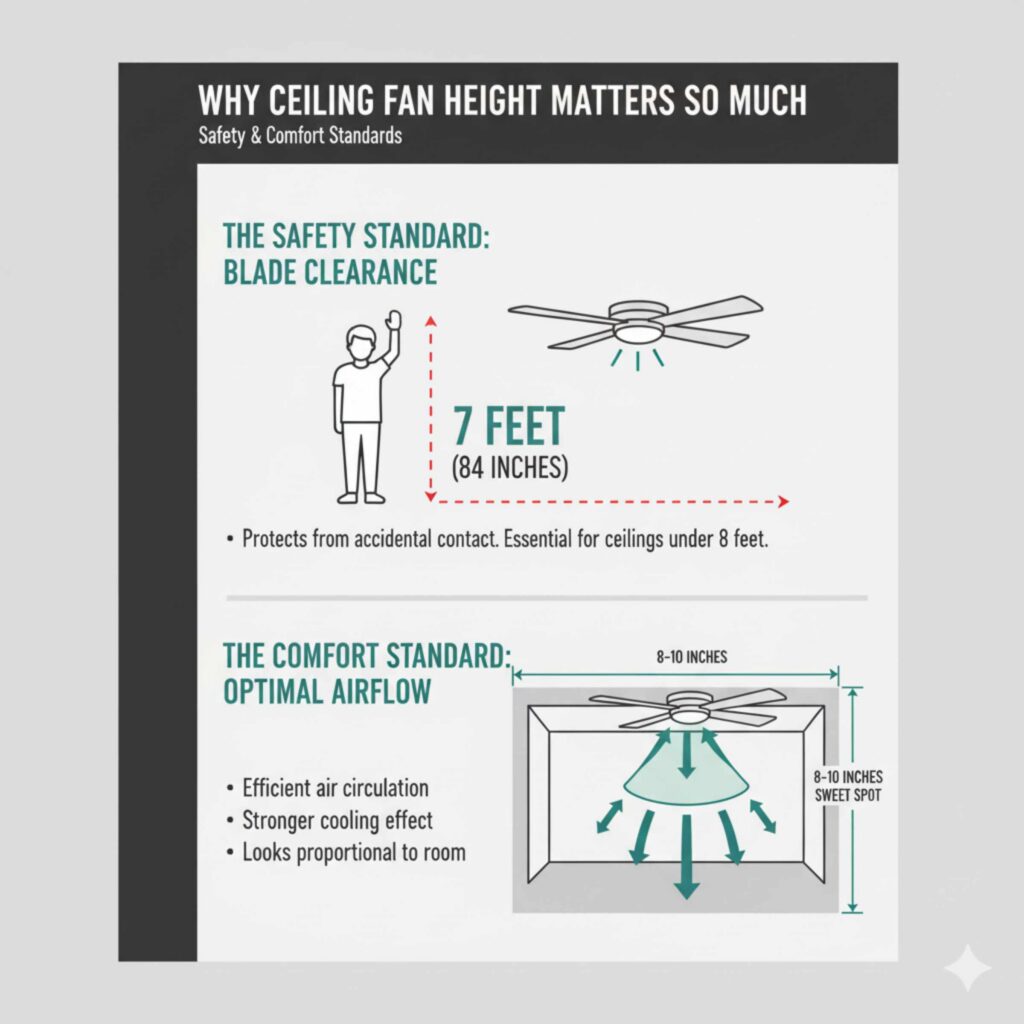
The Safety Standard: Blade Clearance
Safety is always step one, my friends. When hanging a fan, there are official guidelines for how high or low those blades can be.
The National Electric Code (NEC) is very clear on this. They require that the bottom edge of the fan blades must be at least 7 feet (84 inches) above the floor. This rule protects tall folks from accidentally brushing the moving blades. If your ceiling is lower than 8 feet, you almost certainly need a flush mount or a much shorter downrod.
The Comfort Standard: Optimal Airflow
Beyond safety, the height directly impacts comfort. If the fan is too high, the air stream spreads out too much before it reaches you, making the cooling effect weak. If it’s too low, it can feel drafty right underneath or might just look out of place.
The sweet spot for most homes is having the blades about 8 to 10 inches below the ceiling. This allows the motor to pull air efficiently from above the blades and push it down effectively. If you have a high ceiling (10 feet or more), you will need a longer downrod, but for standard 8-foot ceilings, a shorter downrod for ceiling fan might be the perfect fit.
Determining If You Need a Shorter Downrod
Before you run to the hardware store, let’s measure and assess your current situation. A little measurement goes a long way in avoiding return trips!
Step 1: Measure Your Ceiling Height
Grab your trusty tape measure. Start from the floor and measure straight up to the ceiling. This is your total ceiling height.
Step 2: Measure the Existing Fan Assembly
Measure the distance from the ceiling (where the mounting bracket attaches) down to the bottom of the fan blade housing.
Step 3: Calculate the Ideal Downrod Length
We are aiming for that 7-foot (84-inch) minimum clearance from the floor to the bottom of the blades.
Here is a simple formula to help you figure out what you need:
Ceiling Height (in inches) – 84 inches (Minimum clearance) = Maximum allowable distance from ceiling to bottom of blades.
If your calculation shows the maximum allowable distance is less than your current setup, you definitely need a shorter rod. For example, if your ceiling is 96 inches (8 feet) tall, the maximum distance from the ceiling to the bottom of the blades should be 12 inches (96 – 84 = 12).
If your current fan assembly (from ceiling to blade bottom) measures 18 inches, you need to reduce that length by 6 inches. This means you need a shorter downrod for ceiling fan installation that accounts for the necessary space taken up by the motor housing and canopy.
Tools You Will Need for the Swap
The good news is that swapping a downrod is generally a straightforward DIY job, provided you turn the power off first!
Safety Glasses (Always!)
Screwdriver Set (Phillips and Flathead)
Wire Strippers/Cutters (Just in case)
Voltage Tester (Crucial for safety!)
Step Ladder (Sturdy one, please!)
Your New Shorter Downrod (Make sure it matches your fan’s diameter and color!)
Choosing the Right Shorter Downrod Size
Ceiling fan downrods are not one-size-fits-all. They must match the diameter of your fan’s mounting system and the motor housing size. You cannot just grab any generic rod; it must be compatible with your specific fan model.
Common Downrod Lengths
Downrods usually come in standard lengths that accommodate various ceiling heights. When looking for a shorter downrod for ceiling fan use, these are the common lengths you might encounter:
| Ceiling Height | Recommended Downrod Length | Typical Fan Mount Style |
| :— | :— | :— |
| 8 Feet | 3 to 6 Inches (or Flush Mount) | Hugger/Low Profile |
| 9 Feet | 6 to 12 Inches | Standard Short |
| 10 Feet | 12 to 24 Inches | Standard |
| 12 Feet + | 36 Inches or Longer | Extension |
Always check your fan manufacturer’s specifications. Many manufacturers offer “hugger” or “low-profile” mounts designed for ceilings under 8 feet, which might eliminate the need for a separate downrod entirely.
Understanding Downrod Compatibility
Most modern fans use a standard 3/4-inch diameter downrod system. However, some specialty or very old fans might use different sizes.
Diameter: Ensure the new rod fits snugly into the fan’s canopy and the motor ball assembly.
Wiring: The new rod must have a hollow interior or a pre-drilled hole to allow the electrical wires to pass through safely. You don’t want wires pinched between the rod and the mounting bracket!
For reliable safety information regarding electrical installations in the home, always consult resources like the Electrical Safety Foundation International (ESFI).
Step-by-Step Guide: Installing Your Shorter Downrod
Ready to tackle the swap? Take your time, follow these steps exactly, and you’ll be done before you know it. Remember, safety first means cutting the power!
Phase 1: Power Down and Preparation
1. KILL THE POWER: Go to your main circuit breaker panel and switch off the breaker that controls the power to the room where the fan is located. Do not just rely on the wall switch!
2. Verify Power is Off: Use your non-contact voltage tester to touch the wires coming from the ceiling box where the fan is connected. If the tester stays silent, you are safe to proceed.
3. Gather Supplies: Lay out your new shorter downrod for ceiling fan, tools, and a soft cloth to protect the fan blades.
Phase 2: Removing the Old Downrod
4. Support the Fan Motor: Ceiling fans are heavy. Have a helper hold the fan motor securely, or use a sturdy ladder placed directly under the fan.
5. Detach the Canopy: Unscrew the screws holding the decorative canopy (the part flush against the ceiling) and slide it down the existing downrod a few inches so you can see the mounting bracket and downrod connection.
6. Loosen the Downrod Screws: Look at where the downrod connects to the fan motor yoke. There are usually two set screws holding the rod in place. Use your screwdriver to carefully loosen these screws.
7. Remove the Cotter Pin (If Present): Many rods are secured with a clevis pin or cotter pin running through the yoke connection. Pull this pin out—sometimes pliers help here.
8. Separate the Motor: Carefully lower the fan motor assembly away from the mounting bracket. You will still have the wires connected.
9. Unwire the Fan: Gently untwist the wire nuts connecting the fan wires (usually black, white, and sometimes blue or green/copper) to the house wiring. Keep the wires separated.
10. Remove Old Rod: Now that the motor is free, slide the old downrod down and off the motor ball assembly.
Phase 3: Installing the New Shorter Downrod
11. Feed Wires Through the New Rod: Take your new, shorter downrod for ceiling fan and carefully thread the fan’s wires through its center. Make sure the wires come out the top end cleanly.
12. Attach New Rod to Motor: Slide the motor ball assembly onto the top of the new rod. Line up the holes, insert the clevis pin, and secure it with the cotter pin (or retaining clip).
13. Tighten Set Screws: Firmly tighten the set screws that hold the rod onto the motor yoke. These must be snug to prevent wobbling.
14. Attach Mounting Bracket (If Necessary): If your shorter rod requires a different mounting bracket (less common, but check instructions), install that now.
15. Hang the Fan Motor: With your helper supporting the fan, carefully lift the motor assembly and place the ball joint into the ceiling mounting bracket. Twist the ball until the groove locks into the tab on the bracket.
Phase 4: Reconnecting and Testing
16. Rewire Connections:Following standard practice:
Black (Fan) to Black (House)
White (Fan) to White (House)
Green/Bare Copper (Ground) to Ground wire and mounting bracket screw.
17. Tuck Wires:Gently push all connected wires back up into the ceiling junction box, making sure no insulation is pinched.
18. Slide Up Canopy:Slide the canopy up to the ceiling and secure it with its screws. This hides all the wiring.
19. Restore Power:Go back to your breaker box and turn the power back on.
20. Test:Turn the fan on low speed. Check for excessive wobble. If it wobbles, power down, re-check the tightness of the downrod screws (Step 13), and ensure the ball is seated correctly in the bracket (Step 15).
Troubleshooting Common Downrod Issues
Even when following the steps perfectly, sometimes issues pop up. Here are a few common hurdles when installing a shorter downrod for ceiling fan:
The Fan Wobbles:This is almost always due to loose screws at the downrod-to-motor connection or the downrod-to-bracket connection. Turn the power off and re-tighten everything firmly.
The Wires Won’t Fit:If the wires are too long and won’t tuck into the junction box with the new, shorter rod, you may need to trim the excess wire. Always cut and strip only one wire at a time and ensure you leave enough slack for future maintenance (about 6 inches above the box).
The Fan Doesn’t Turn On:Double-check that the wire nuts are tight and that the ground wire is securely connected. If the fan still won’t turn on, you may have accidentally disconnected a wire inside the motor housing itself during removal—power down and re-examine your connections inside the canopy area.
Hugger Mounts vs Short Downrods
When dealing with very low ceilings (under 8 feet), you face a choice: use a specialized low-profile fan or purchase a standard fan and adapt it with a very short rod or adapter.
Hugger or Low-Profile Fans
These fans are designed specifically for low ceilings. They mount almost directly to the ceiling bracket, often eliminating the downrod entirely. They are the safest and simplest choice for standard 8-foot ceilings if you want maximum clearance.
Using a Short Downrod (3 to 6 inches)
If you already own a beautiful fan that you love, but it came with a 12-inch rod, buying a 3-inch shorter downrod for ceiling fan adaptation is a great solution. This allows you to drop the fan slightly below the housing but still keep the blade clearance above the mandatory 7-foot mark.
Here is a quick comparison to help you decide:
| Feature | Hugger/Low-Profile Fan | Standard Fan with Short Downrod |
| :— | :— | :— |
| Installation Complexity | Very Easy | Moderate (requires wire routing) |
| Airflow Efficiency | Good, but slightly restricted | Excellent (optimized height) |
| Aesthetics | Blades very close to the ceiling | Balanced look, good airflow gap |
| Cost | Cost of a new fan | Cost of a replacement rod ($15–$40) |
When to Call in a Professional Electrician
While changing a downrod is a great DIY confidence booster, there are times when calling a licensed electrician makes the most sense.
1. Wiring Confusion:If you are staring at a nest of old, unlabeled wires in your ceiling box and aren’t sure which is hot, neutral, or ground, stop immediately. Wiring mistakes can be dangerous.
2. Ceiling Box Integrity:If the existing electrical box looks old, loose, or small, it might not be rated to support the weight and vibration of a ceiling fan. Ceiling fans require specialized, heavy-duty fan-rated boxes secured directly to a joist or brace. Do not skip this if your box is questionable.
3. High Ceilings (Extension Rods):While you asked about shorter rods, if you needed to install an extensionrod (over 3 feet long), the weight and leverage increase significantly. An electrician can ensure all mounting points are secure for the longer assembly.
Remember, your local building codes might have specific requirements for fan mounting hardware, so always double-check if you are unsure about the junction box structure.
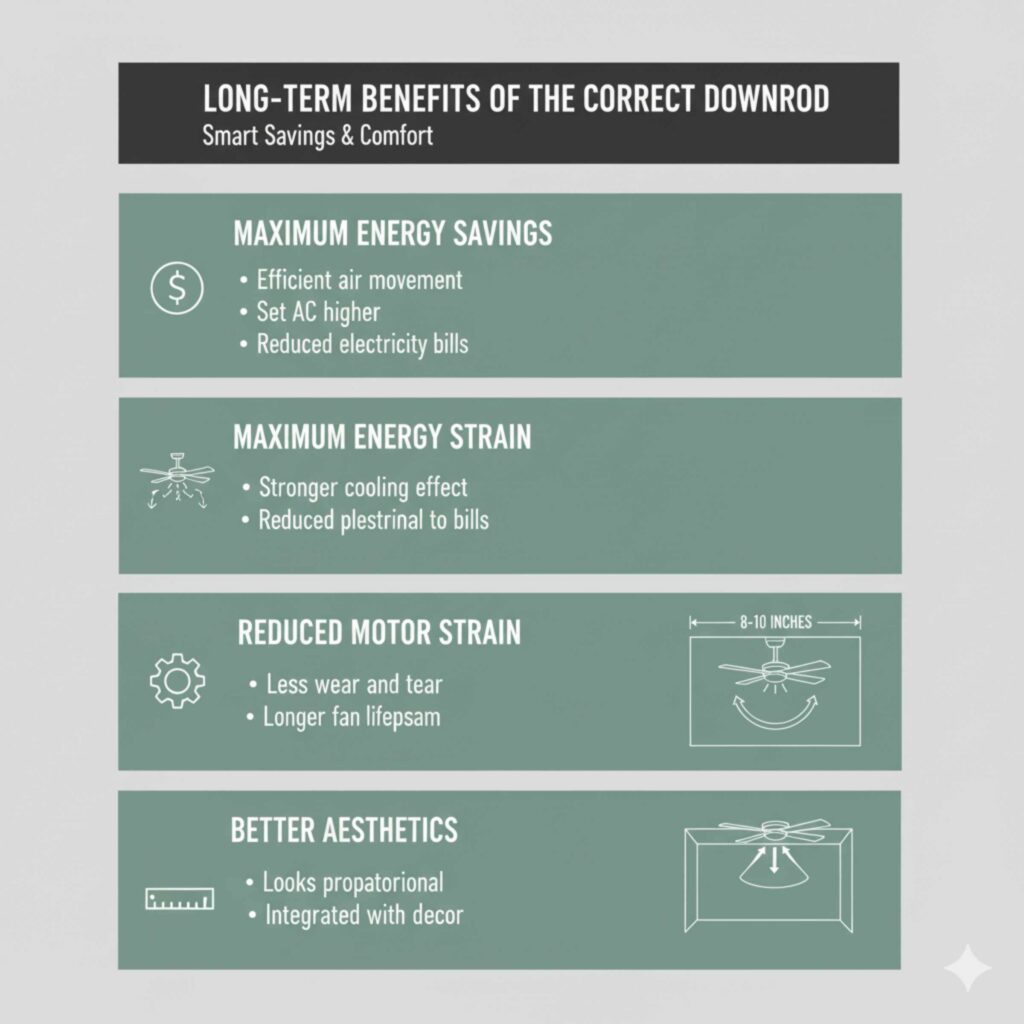
Long-Term Benefits of the Correct Downrod
Switching to the correct shorter downrod for ceiling fan use isn’t just about hitting the 7-foot safety mark; it delivers tangible benefits you’ll appreciate every summer.
Maximum Energy Savings:When the fan is at the optimal height (blades about 10 inches from the ceiling), it moves air most efficiently. This means you feel cooler faster, allowing you to set your air conditioner a few degrees higher, saving energy!
Reduced Motor Strain:A fan that is angled correctly (not hitting air turbulence against a low ceiling) runs smoother. Less strain means a longer lifespan for your fan motor.
Better Aesthetics A fan hung too high looks disconnected from the room. A fan hung just right feels integrated and proportional to the space.
Frequently Asked Questions (FAQ) About Ceiling Fan Downrods
Q1: Can I just skip the downrod entirely and attach the fan directly to the ceiling?
Only if you are using a fan specifically labeled as a “Hugger” or “Low-Profile” model. Standard fans require a downrod to allow the blades to spin without hitting the ceiling. Attaching a standard fan flush will cause vibration and severely restrict airflow.
Q2: Do I need to buy the downrod from the same brand as my fan?
Usually, no, as long as the diameter matches. Most residential fans use a standard 3/4-inch diameter downrod. However, if your fan is very old or high-end designer, check the manual. For safety, ensure the replacement rod comes with proper locking pins.
Q3: How do I know if my existing downrod is too short?
If the fan blades are less than 7 feet (84 inches) from the floor, your rod is too short, or you need a flush mount adapter instead. If the blades are less than 8–10 inches from the ceiling, you might be too close for optimal air intake, meaning you’d need a longer rod, not a shorter one.
Q4: What is the purpose of the canopy when changing the downrod?
The canopy is the decorative cover that hides the mounting bracket, the wiring connections, and the top of the downrod connection at the ceiling. When changing the rod length, you slide the existing canopy up or down the old rod, and then slide it up the new, shorter rod to cover the new connection point.
Q5: Can I paint my new shorter downrod to match my ceiling or fan?
Yes, you can paint it, but preparation is key! Use a metal-specific primer first, then apply two light coats of spray paint matched to your ceiling or fan color. Ensure the paint does not cake up inside.
Conclusion: Upgrade Your Comfort with the Right Shorter Downrod for Your Ceiling Fan
Choosing the correct shorter downrod for a ceiling fan is a small upgrade that delivers big results in safety, comfort, and airflow efficiency. When your fan is mounted at the proper height—meeting the 7-foot safety clearance and maintaining the ideal distance from the ceiling—it circulates air more effectively, looks better in the room, and operates with less strain on the motor. Whether you’re dealing with a standard 8-foot ceiling or fixing an awkward fan installation, swapping to the right downrod is a simple, affordable DIY project that instantly improves performance. By measuring carefully, selecting a compatible downrod, and installing it correctly, you’ll enjoy better cooling, lower energy costs, and a safer living space year-round!