Where to Put Handle on Bifold Door: A Complete Guide
Hey there! I’m so excited you’re here to dive into a topic that can make your home both functional and stylish: where to put the handle on a bifold door. A few years back, I installed bifold doors in my home’s closet, and figuring out the perfect handle placement was a bit of a puzzle. I tried different spots, talked to a carpenter friend, and even helped my neighbor with her bifold doors. Let me tell you, it was a fun journey that taught me a lot!
Let’s sit down together, and I’ll share everything I’ve learned about placing handles on bifold doors in a way that’s easy and engaging, like we’re chatting over a warm cup of cocoa. Whether you’re a DIY newbie or a seasoned homeowner, you’ll know exactly where to place that handle for a smooth, good-looking door. Ready? Let’s swing those doors open!
What Is a Bifold Door and Why Use One?
First, let’s talk about bifold doors. These are doors that fold in half when you open them, like an accordion. I put them in my closet because they save space. Unlike regular doors, they don’t swing out and take up room. They’re perfect for small areas like closets, laundry rooms, or pantries.
I love how bifold doors look modern and neat. They’re easy to install, too. My closet doors cost $80 each, and I got them at Home Depot. They come in wood, vinyl, or metal, so I picked wood to match my decor. Knowing how bifold doors work helped me decide where to put the handle for easy use.
Why Handle Placement Matters
Handle placement isn’t just about looks—it’s about function. When I first installed my bifold doors, I put the handle too high, and it was hard to pull. The wrong spot can make opening the door a hassle, especially for kids or elderly folks. I wanted my doors to be user-friendly for everyone in my house.
A good handle spot also keeps the door safe. If it’s too low, the door might wobble when pulled. It affects style, too. I placed my handle to complement the door’s design, and it looks sleek. Getting the placement right makes your bifold door both practical and pretty.
Standard Handle Placement for Bifold Doors
I learned there’s a standard spot for bifold door handles. Most handles go on the pull side of the door, about 36 inches from the floor. This is a comfortable height for adults. My closet doors have handles at this height, and it feels natural to grab them.
The handle usually sits on the panel that pulls the door open. For a pair of bifold doors, each door gets a handle on its outer panel. I placed mine 2-3 inches from the edge of the panel for a firm grip. This standard works for most homes, but I adjusted it slightly for my needs, which I’ll explain later.
Types of Bifold Door Handles
Not all handles are the same. Here’s what I found when shopping:
- Knobs: Round and simple, like the ones on my closet doors. They cost $5-$15 and need a single hole.
- Pulls: Long and modern, great for a sleek look. My neighbor used a $20 pull on her pantry door.
- Flush Pulls: Flat and recessed, perfect for tight spaces. I saw these in a friend’s laundry room for $10.
- Edge Pulls: Small tabs on the door’s edge. They’re subtle but tricky to install. I didn’t use them.
- Locking Handles: For privacy, like in a bedroom. I got one for $25 for my office closet.
I chose knobs for my closet because they’re easy to install and affordable. The type you pick affects where and how you place it, so I checked my door’s style first.
Factors to Consider for Handle Placement
Before drilling, I thought about a few things. Here’s what guided me:
- User Height: I’m average height, so 36 inches works. For kids, I’d lower it to 30 inches.
- Door Size: My closet doors are 80 inches tall. Taller doors might need higher handles for balance.
- Room Function: My closet gets daily use, so I wanted an easy-to-reach handle. A rarely used pantry might be less picky.
- Aesthetics: I placed the handle to look centered and neat. It matches my room’s vibe.
- Accessibility: My mom has arthritis, so I made sure the handle was easy to grip.
These factors helped me customize the placement. I measured twice to get it just right.
Tools and Supplies You’ll Need
I gathered my tools before starting. Here’s what I used:
- Drill: My cordless drill made holes fast. I already owned it.
- Drill Bit: A ⅜-inch bit for knob holes. It cost $5.
- Tape Measure: Measured handle height. Mine was $3.
- Pencil: Marked drilling spots. I used a sharp one.
- Screwdriver: Secured the handle. My $5 Phillips worked.
- Level: Ensured the handle was straight. I spent $4.
- Safety Gear: Goggles ($5) and gloves ($3) kept me safe.
- Handle Kit: Included the knob and screws. Mine was $10.
I spent $35 total, but the tools are reusable. Check your handle’s instructions for specific bit sizes.
Measuring for Handle Placement
I measured carefully to avoid mistakes. Here’s how I did it:
- Mark Height: I measured 36 inches from the floor and marked with a pencil.
- Find Edge Distance: I marked 2 inches from the panel’s outer edge for grip.
- Check Alignment: I used a level to ensure my mark was straight.
- Double-Check: I measured again to confirm the spot.
- Mark Both Doors: For paired bifolds, I marked the same spot on each pull panel.
This took 10 minutes. I used a tape measure and a level to be precise. It saved me from drilling the wrong holes.
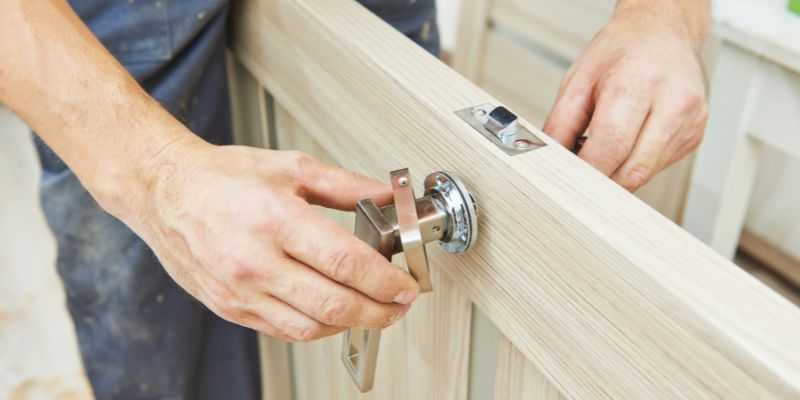
How to Install a Handle on a Bifold Door
Installing the handle was straightforward. Here’s my step-by-step:
- Tape the Spot: I put painter’s tape over my mark to prevent splintering.
- Drill the Hole: I used a ⅜-inch bit to drill through the mark. I went slowly to keep it clean.
- Clean the Hole: I sanded the edges with sandpaper for a smooth fit.
- Insert Handle: I pushed the knob’s stem through the hole from the outside.
- Secure with Screws: I screwed the knob’s base to the inside with my screwdriver.
- Test Grip: I pulled the handle to ensure it was tight and smooth.
- Repeat for Second Door: I did the same for the other bifold panel.
It took 20 minutes per door. I wore goggles and worked carefully. The result was a sturdy, easy-to-use handle.
Table: Handle Types and Installation Needs
Here’s a table I made to keep things clear:
| Handle Type | Hole Size | Tools Needed | Best For | Cost |
|---|---|---|---|---|
| Knob | ⅜ inch | Drill, screwdriver | Closets, simple look | $5-$15 |
| Pull | 1-2 inches | Drill, screwdriver | Modern rooms, pantries | $10-$30 |
| Flush Pull | 2×1 inch | Drill, chisel | Tight spaces, sleek design | $10-$20 |
| Edge Pull | ½ inch slot | Drill, jigsaw | Minimalist, hidden look | $5-$15 |
| Locking Handle | ⅜-1 inch | Drill, screwdriver | Privacy areas, offices | $20-$40 |
This helped me choose and install the right handle.
Adjusting Placement for Accessibility
I wanted my doors to work for everyone. My mom struggles with gripping, so I considered her needs. I lowered the handle to 34 inches for easier reach. I also chose a larger knob, about 2 inches wide, for a better grip. It cost $12 but made a big difference.
For kids, I’d go even lower, around 30 inches. If someone uses a wheelchair, 32 inches is ideal. I tested the height by pretending to be my mom, and it felt comfortable. Accessibility tweaks take a few extra minutes but make the door user-friendly for all.
Troubleshooting Handle Installation Issues
My first try had some hiccups. Here’s how I fixed them:
- Splintered Wood: I drilled too fast. Sandpaper smoothed it, and tape prevented it next time.
- Loose Handle: I didn’t tighten screws enough. A firm twist fixed it.
- Misaligned Hole: I marked wrong once. I filled it with wood putty for $5 and redrilled.
- Handle Wobbles: My hole was too big. I used a washer to stabilize it.
- Hard to Pull: I placed the handle too close to the hinge. Moving it 3 inches out helped.
I learned to go slow and check twice. If it’s too tough, a carpenter can assist.
Maintaining Your Bifold Door Handle
I want my handles to last. Here’s my maintenance routine:
- Tighten Screws: I check them every six months to prevent loosening.
- Clean Handle: I wipe with a damp cloth to remove dirt.
- Lubricate Hinges: I spray WD-40 on door hinges yearly for smooth folding. It’s $4.
- Polish Finish: I use metal cleaner for my brass knob. It costs $3.
- Test Operation: I open and close the door monthly to catch issues.
This takes 10 minutes a year and keeps my doors working like new.
Costs of Installing a Bifold Door Handle
I tracked my expenses. Here’s the breakdown:
- Handle: $5-$40. I paid $10 for a knob.
- Tools: Drill bit ($5), tape measure ($3), screwdriver ($5), level ($4), goggles ($5), gloves ($3). Total: $25.
- Supplies: Painter’s tape ($3), sandpaper ($2), WD-40 ($4). Total: $9.
- Professional Help: A carpenter charges $50-$150. I did it myself.
- Maintenance: Cleaner ($3), WD-40 ($4). Total: $7 yearly.
I spent $44 total. DIY saved me $100 compared to hiring a pro.
Safety Tips for Installation
I stayed safe while working. Here’s how:
- Wear Goggles: Protected my eyes from sawdust.
- Use Gloves: Kept my hands safe from sharp tools.
- Secure Door: I propped it to avoid movement.
- Work Slowly: I drilled steadily to prevent slips.
- Keep Kids Away: I worked when my kids were out.
These kept me safe and my door intact. I vacuumed sawdust after.
Environmental Impact of Bifold Door Handles
I care about the planet, so I considered the impact. Installing a handle is low-waste compared to replacing a door. My wood door and metal knob are recyclable. I used eco-friendly cleaners like vinegar for maintenance. I also reused my old knob on a shed door instead of tossing it. It’s a small way to keep my home green.
Customizing Handle Placement for Style
I wanted my doors to look great. I chose a brass knob to match my closet’s decor. I placed it 2 inches from the edge for a balanced look. For a modern vibe, I could’ve used a long pull higher up, around 40 inches. I aligned the handle with my door’s panels for symmetry. It’s a small touch, but it makes my closet pop.
When to Call a Professional
I handled the job myself, but sometimes a pro is needed. I’d call a carpenter if:
- Complex Door: Glass or heavy bifolds are tricky. My friend paid $100 for one.
- No Tools: Drilling needs a steady hand. A pro has everything.
- Multiple Doors: Installing handles on six doors takes time. A pro does it for $200.
- Damaged Door: If I mess up drilling, a pro can fix it.
- No Confidence: I’d hire out if I felt unsure.
I found a local carpenter for $50 per door. DIY was fun and saved cash for me.
Why Handle Placement Enhances Your Home
Getting the handle placement right makes your bifold door a joy to use. It’s easy to open, looks great, and works for everyone. I love how my closet doors blend function and style. It’s a small project that boosts your home’s comfort and value. I smile every time I open them.
Wrapping It Up
So, where should you put the handle on a bifold door? A knob or pull at 36 inches high and 2-3 inches from the edge is standard, but you can tweak it for accessibility or style. I went from fumbling with my closet doors to installing sleek, easy-to-use handles in under an hour. By measuring carefully, choosing the right handle, and drilling with confidence, you can transform your bifold doors. Grab your drill, mark that spot, and give it a try—you’ve got this! Your home will feel more functional, and you’ll love the polished look. Thanks for diving into this with me—here’s to stylish doors and happy homes!
FAQs
Where is the best place to put a handle on a bifold door?
I put mine 36 inches high and 2 inches from the edge. It’s easy to reach and looks balanced.
Do all bifold doors need the same handle placement?
Not always. I adjusted mine to 34 inches for my mom’s arthritis. Kids might need it lower, around 30 inches.
What type of handle is best for a bifold door?
I used a $10 knob for my closet. Pulls are modern, and flush pulls save space. It depends on your style.
How much does it cost to install a bifold door handle?
I spent $44 on a handle and tools. A pro charges $50-$150, but DIY is cheaper.
Can I install a bifold door handle without a drill?
It’s hard. I tried a screwdriver for a flush pull, but a $5 drill bit made it easier and cleaner.