How To Build Rocket Mass Heaters With Ernie And Erica
Building a rocket mass heater is a rewarding DIY project that offers highly efficient, clean-burning heat. These heaters combine a super-efficient combustion system (the “rocket” part) with a large thermal mass (the “mass” part) to store and slowly release heat. They are known for using very little wood and producing minimal smoke, making them a sustainable choice for heating homes.
Understanding the Magic of Rocket Mass Heaters
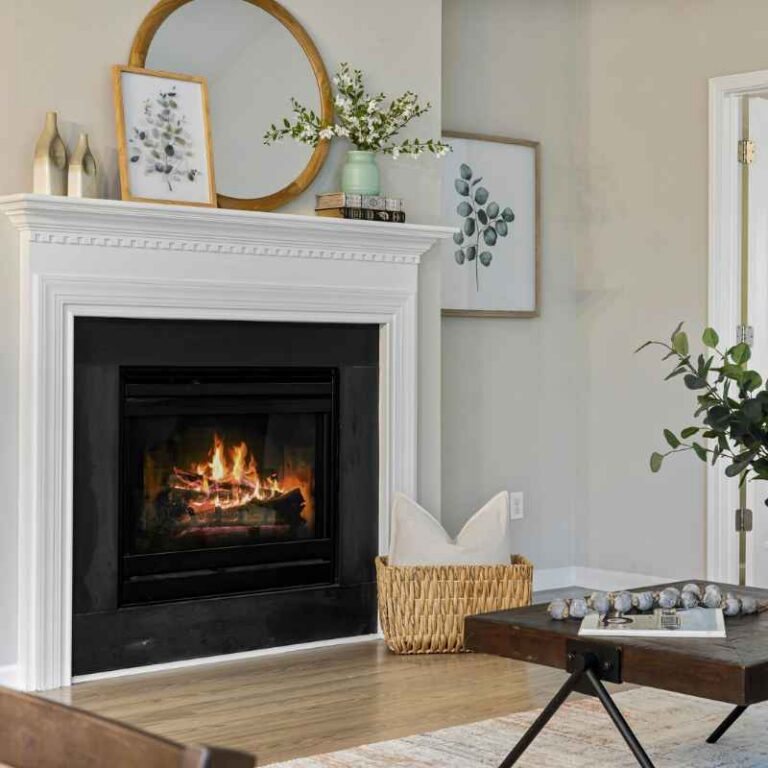
So, what exactly is a rocket mass heater? Think of it as a super-smart wood-burning stove. It’s designed to burn wood much hotter and cleaner than a regular fireplace or wood stove.
The “rocket” part refers to how the fire burns. It uses a special insulated combustion chamber and a narrow “feed tube” for the wood. This design pulls air in just right, making the fire incredibly hot.
This hot air then travels through a “heat riser” before it hits the “mass” part.
The “mass” part is usually made of cob, stone, or brick. This heavy material soaks up all the heat from the hot gases. Once it’s nice and warm, it slowly gives off that heat into your room over many hours.
This means you don’t have to constantly feed it wood. It’s like a cozy, long-lasting hug of warmth. This way of heating uses fuel very wisely.
It also means less smoke goes up your chimney and into the air. That’s great for you and good for the planet. It’s a clever system that’s been around in various forms for ages, but modern designs make them super effective.
My First Encounter with a DIY Heater
I remember visiting a friend’s cabin one winter. It was absolutely freezing outside, like the kind of cold that bites at your nose. Inside, though, it was surprisingly warm.
My friend, Ernie, had built this amazing-looking bench that curved around the room. It looked like a piece of art, but he told me it was his heater. He called it a rocket mass heater.
I was skeptical. How could a bench keep the whole place so toasty? He showed me how he put a few small pieces of wood into a little opening.
Within minutes, a clean, hot flame was roaring inside a small metal chimney. There was barely any smoke.
Then, he let me touch the bench. It was warm, not just a little bit, but deeply warm, like it had been sitting in the sun all day. He explained that the fire burned so hot in a small, insulated space that it burned up almost everything.
The heat then went through channels built into the bench before going up the actual chimney. That heat warmed up the cob the bench was made from. He told me it would stay warm for 12 to 24 hours after the fire went out.
I was hooked. I’d always hated how much wood my old stove used and the constant smoke smell. This was totally different.
It felt like magic, but Ernie explained it was just good physics and clever design. That day, I knew I wanted to learn how to build one myself.
The Core Components of a Rocket Mass Heater
Combustion Chamber: This is where the wood burns. It’s usually a metal “J” shape. It needs to be insulated to get super hot.
Feed Tube: This is where you put the small pieces of wood. It’s also insulated. It feeds the wood into the combustion chamber.
Heat Riser: This is a vertical, insulated pipe above the combustion chamber. The super-hot gases go up here.
Heat Exchanger / Mass: This is the big, heavy part made of cob, brick, or stone. The hot gases flow through channels in this mass, giving up their heat.
Chimney: A small pipe at the end of the heat exchanger that lets the cooled gases escape outside.
The Science Behind the Warmth: How It Works
Let’s break down the science a bit. It’s not as complicated as it sounds. The main idea is to burn wood very efficiently.
This happens in the “rocket” part. Wood needs three things to burn: fuel (wood), oxygen (air), and heat. The rocket design controls these perfectly.
You feed small sticks into the feed tube.
The feed tube pulls air in naturally. This air mixes with the wood. The heat generated by the initial burning helps this process.
Because the combustion chamber and the heat riser are insulated, the fire gets extremely hot, often over 1000 degrees Fahrenheit. This high heat causes something called “secondary combustion.” It means that even the smoke particles and gases that would normally escape are burned up. This makes the fire burn very cleanly.
You see almost no smoke coming out. This clean burn means more energy from the wood is released as heat.
After the heat riser, the hot gases flow through tunnels or channels built into the thermal mass. As the gases move slowly through these channels, they transfer their heat to the surrounding cob or stone. This is the “mass” part.
It’s like a sponge soaking up heat. The gases cool down a lot as they give up their energy. By the time they reach the chimney, they are much cooler and contain fewer pollutants.
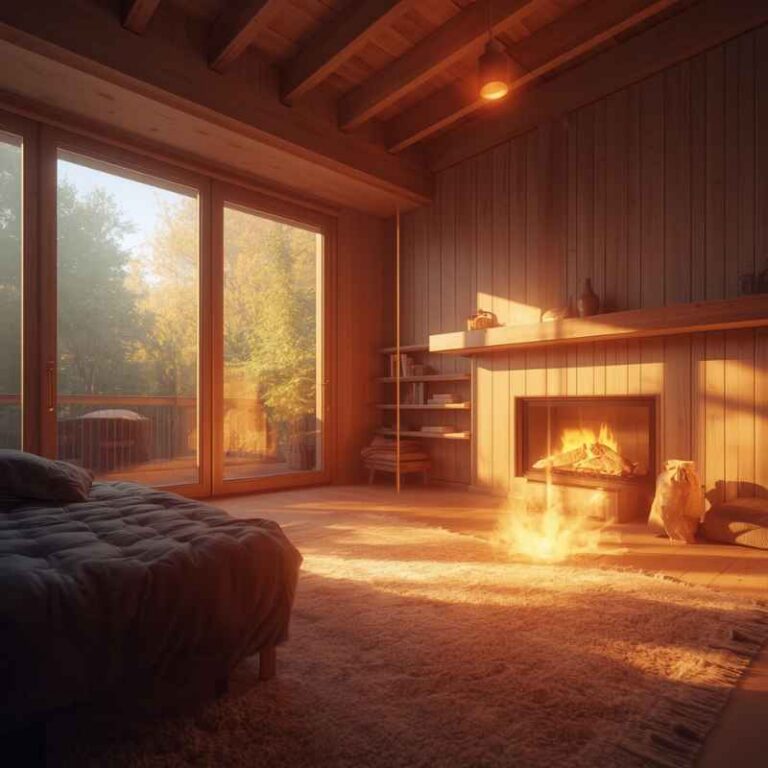
The thermal mass then acts like a radiator. It slowly releases the stored heat into your living space for many hours. This provides a steady, gentle warmth.
Ernie and Erica’s Real-Life Build: A Story from the Ground Up
My friends Ernie and Erica decided to build their own rocket mass heater two years ago. They live in a small farmhouse in Vermont. Winters there are serious business.
Their old furnace was costing a fortune and always seemed to break down when they needed it most. They wanted something more sustainable and hands-on. They’d done a lot of reading, just like you are now.
They decided to build a bench-style heater that would also serve as seating in their living room.
They started by building a sturdy base out of concrete blocks. This was important because the cob would be very heavy. Then came the metal components.
They bought a pre-made insulated combustion chamber and heat riser. Ernie, who’s a welder, even modified a few bits to fit their exact design. Erica, who has a background in art, was in charge of the cob mix.
They mixed clay, sand, and straw by hand. It was messy work, but they said it was also strangely satisfying. They’d stomp on the mix for hours, making big batches.
They built a wooden form for the bench shape. Then, they started packing the cob onto the metal components and around the channels they planned for the hot gases. They carefully laid out the path for the heat to flow through the bench.
They used cardboard tubes covered in plastic to create the internal tunnels before the cob dried. It took them about three weeks of weekend work. The hardest part, they told me, was waiting for the cob to dry completely before they could do the first burn.
They were so nervous. What if it cracked? What if it didn’t heat well?
But when they finally lit their first small fire, the bench slowly began to warm up. Within a few hours, their whole living room was toasty. They were absolutely thrilled.
They said it felt like they had built a living thing that was giving them comfort.
Rocket Mass Heater Design Styles
Bench Style: The most common. The heat mass is shaped like a bench, providing seating and heat.
Pedestal Style: The heat mass is a simpler, often round, structure. Good for smaller spaces.
Wall Style: The heat mass is built into a wall, distributing heat more widely.
Combination: Some designs blend these styles, like a bench that also forms part of a wall.
Gathering Your Materials: What You’ll Need
Building a rocket mass heater is a DIY project. This means you’ll be doing a lot of the work yourself. This is great because it can save money.
It also means you need to be prepared with the right stuff. For the “rocket” part, you’ll need metal components. This usually includes an insulated combustion chamber, a feed tube, and a heat riser.
You can buy these as kits or fabricate them yourself if you have welding skills.
For the “mass” part, cob is a popular choice. Cob is a natural building material. It’s a mix of clay, sand, and straw.
You can often find these materials locally. Bricks or stones can also be used, but cob is easier to shape into complex forms. You’ll also need materials for the internal channels.
These are often made from things like clay pipes or custom-made forms. Don’t forget about insulation. Ceramic fiber blanket is excellent for insulating the combustion chamber and heat riser to keep the fire super hot.
Other items you might need include: some type of fireproof mortar or cement, basic construction tools like shovels, buckets, and trowels, possibly some plywood for forms, and safety gear like gloves and eye protection. If you’re building a bench, you’ll need a solid base like concrete blocks or a poured slab. It’s always a good idea to plan your design first.
Measure your space carefully. Think about where the heater will go and how you want it to look. This preparation saves time and frustration later on.
Key Materials List
Metal Components: Insulated combustion chamber, feed tube, heat riser.
Insulation: Ceramic fiber blanket.
Thermal Mass Material: Cob (clay, sand, straw) or bricks/stone.
Channel Material: Clay pipes, cardboard tubes, or custom forms.
Binding Agent: Fireproof mortar or cement.
Tools: Shovels, buckets, trowels, level, measuring tape.
Safety Gear: Gloves, eye protection, dust masks.
Planning Your Build: Design and Safety First
Before you even buy a single screw, spend a good amount of time planning. This is where you and Erica come in. Think about the size of the room you want to heat.
A larger room needs a bigger heater. Where will the heater sit? It needs to be a safe distance from walls and anything flammable.
Most rocket mass heaters need about 18 inches of clearance around them, but check your specific plans and local codes. You also need a way to vent the exhaust gases outside. This means connecting to a proper chimney or a dedicated vent pipe.
The design of the internal channels is super important. This is how the heat gets distributed through the mass. A good design ensures the gases spend enough time in contact with the mass to transfer their heat effectively.
Poorly designed channels mean less efficient heating and potentially more heat going up the chimney. Look at different plans and see what appeals to you. Consider a bench style if you want built-in seating.
Or maybe a simpler post-style heater fits your space better.
Safety is non-negotiable. Always work with materials that can withstand high temperatures. Ensure all metal parts are properly sealed.
The cob or masonry must be thick enough to contain the heat. Always follow building codes and fire safety guidelines for your area. If you’re unsure about any part of the electrical or venting system, consult a professional.
It’s better to be safe than sorry. Remember, this is a system that deals with fire. Respect that.
Think about ventilation in your home too. While rocket mass heaters burn very cleanly, it’s always good to have fresh air circulating.
Safety Checklist Before You Start
Clearance: Ensure ample space around the heater from combustible materials.
Ventilation: Plan for proper exhaust venting to the outside.
Materials: Use only high-temperature-rated materials for the firebox and heat paths.
Structural Integrity: Make sure the base and mass are strong enough to support the weight.
Local Codes: Check and follow all local building and fire safety regulations.
Building the Firebox and Heat Riser: The “Rocket” Part
This is where the action starts. You need to build the core of the combustion system. This typically involves a metal “J” shape or a similar design.
The bottom part is the feed tube where you add wood. It angles up into the combustion chamber. This chamber is where the magic happens.
It needs to be made of thick metal or have a robust insulating jacket. Ceramic fiber blanket is a great insulator for this. You wrap the metal parts tightly with this blanket.
Then, you might encase it in a metal shell or build a cob or brick structure around it. This insulation is key to getting the fire hot enough for clean burning.
Above the combustion chamber is the heat riser. This is a vertical pipe. It also needs to be well-insulated.
The hot gases from the fire shoot up this riser. The height of the heat riser is important for how well the draft works. A good draft pulls air into the fire and helps the exhaust gases rise.
The feed tube should be positioned so that wood can be pushed in easily but air can also enter around it. The joint between the feed tube, combustion chamber, and heat riser needs to be airtight and able to withstand high heat. This is often achieved with high-temperature sealant or a well-fitted metal design.
When you’re putting these parts together, think about how the air flows. The design should encourage a strong draw of air. This means no leaks that would let cold air in and dilute the hot gases.
The feed tube shouldn’t be too wide or too narrow. It needs to allow airflow but also support the wood. Ernie and Erica spent a lot of time looking at different diagrams of the J-tube and heat riser.
They made sure their welded joints were solid. They also paid close attention to sealing the insulation. This part is crucial for efficiency and safety.
Quick Guide to the Rocket Core
Feed Tube: Angle it up to the chamber. Allows wood and air in.
Combustion Chamber: Insulated box or tube. Where primary burning happens.
Heat Riser: Vertical insulated pipe. Carries hot gases up.
Insulation is Key: Use ceramic fiber blanket or similar for maximum heat.
Airtight Seals: Prevent leaks that kill efficiency.
Building the Thermal Mass: The Heart of the Heater
This is the part that gives you that long-lasting, gentle heat. Once the hot gases leave the heat riser, they enter channels within the thermal mass. These channels are like little tunnels you build.
You can use clay pipes, specially made forms, or even carefully stacked bricks. The idea is to force the hot gases to travel a long path through the mass before they exit to the chimney. The longer the gases stay in contact with the mass, the more heat they give up.
If you’re using cob, you’ll be mixing your clay, sand, and straw. This is usually done by foot, stomping the materials together in a big pile. It’s a very physical process, but it’s also very rewarding.
You’ll then pack this cob around the metal heat riser and build it up to create the desired shape, like a bench or a wall. You need to make sure the cob is packed densely to avoid air pockets. You’ll also carefully create the channels for the gases to flow through.
Sometimes, people use cardboard tubes covered in plastic to form these channels, removing them after the cob has dried.
The thickness of the thermal mass is important. A thicker mass can store more heat. A general guideline is that the mass should be at least 4-6 inches thick, but it can be much thicker for larger heaters.
You need to let the cob dry completely before you fire up the heater. This can take several weeks, depending on the weather. Rushing this process can cause cracks.
Once it’s dry, you can paint or plaster it if you like. Ernie and Erica decided to leave their cob bench natural. They said they loved the earthy look and feel of it.
This mass is what makes the heater so different from a regular stove. It’s the gentle, radiant heat that stays with you.
Making the Most of Your Thermal Mass
Channel Design: Create a long, winding path for hot gases.
Material Choice: Cob, brick, or stone all work well.
Thickness Matters: Thicker mass stores more heat.
Drying Time: Allow ample time for cob or mortar to cure fully.
Surface Area: A larger surface area radiating heat is more effective.
Connecting to the Chimney: The Final Exit
The last piece of the puzzle is the chimney. This is where the cooled exhaust gases escape your home. It’s usually a simple metal pipe.
It connects to the end of the thermal mass. The gases have given up most of their heat by this point. So, the temperature in the chimney is much lower than in the heat riser.
This means you can often use a standard insulated chimney pipe, but always check local codes and manufacturer recommendations.
The chimney needs to be tall enough to create a good draft. This helps pull the exhaust gases out of the heater and up and away. The connection between the heater’s exhaust port and the chimney pipe needs to be secure and sealed.
You don’t want any of the residual gases leaking into your living space. The placement of the chimney exit should also be considered. It needs to be safely above your roofline according to building codes, to ensure proper drafting and prevent smoke from blowing back into the house.
When Ernie and Erica connected their chimney, they followed the instructions very carefully. They used proper flashing where the pipe went through the roof to prevent leaks. They also made sure there was enough clearance around the chimney pipe where it passed through the ceiling and roof.
They tested the draft by holding a lit match near the chimney opening before the first major burn. The flame should be pulled inwards. If it doesn’t, there might be an issue with the draft or a blockage.
Chimney Connection Essentials
Secure Connection: Ensure a tight, sealed fit between the heater and chimney.
Proper Height: Tall enough for good draft and code compliance.
Safe Exit: Above roofline and clear of obstructions.
Weatherproof: Use flashing to prevent roof leaks.
Your First Burn: Excitement and Caution
After all that work, it’s time for the first burn. This is an exciting moment! But it’s also a time to be extra careful.
You want to start with small fires. This allows the thermal mass to heat up gradually. This is especially important if you used cob or mortar.
Rapid heating can cause them to crack. Start by lighting just a few small twigs in the combustion chamber. Push them in through the feed tube.
You should see a clean flame quickly establish itself in the heat riser. There should be very little smoke. You’ll feel the heat riser getting warm first.
Then, as the hot gases travel through the channels, the thermal mass will start to warm up. It might take an hour or two for the bench or heater to feel noticeably warm to the touch. Don’t try to get it super hot on the first try.
Gradually increase the size of the wood pieces you use over a few more burns.
Watch for any strange smells or sounds. If you see smoke coming out of places it shouldn’t be, put the fire out immediately. Check for leaks or gaps in your construction.
It’s normal for new materials to smell a bit as they cure, but anything acrid or concerning means you need to investigate. Ernie and Erica said their first burn felt like watching a shy animal slowly wake up. The warmth built up gently.
They were so proud of what they had created. They sat on their new bench, feeling the soft heat, and couldn’t stop smiling.
First Burn Tips
Start Small: Use only small twigs for the initial fires.
Gradual Heating: Allow the mass to warm up slowly.
Observe Closely: Watch for smoke, smells, or unusual noises.
Check Seals: Ensure no leaks in the combustion system or mass.
Be Patient: Full heating capacity is reached over several burns.
When Is It Normal, And When to Worry?
Most of the time, your rocket mass heater will perform beautifully. It will provide consistent, clean heat. You’ll notice that you use much less wood than before.
The heat you get will feel different – more like gentle, radiant warmth than the dry heat from a forced-air furnace. It’s normal for the heater to be hot to the touch after a good burn, especially the parts closest to the combustion chamber and heat riser. It’s also normal for it to stay warm for many hours after the fire goes out.
However, there are a few things that might indicate a problem. If you see thick, black smoke coming from your chimney consistently, it means the combustion isn’t happening efficiently. This could be due to poor airflow, too much wood being fed at once, or not enough insulation in the combustion chamber.
If you notice cracks in the masonry or cob that seem to be growing, it might mean the heating and cooling cycles are too rapid or the materials are not strong enough. Any persistent, strong chemical smells are also a cause for concern.
Another sign to watch for is a lack of heat. If the heater seems to be burning okay but not warming the room much, it could be that the channels in the thermal mass are not designed well, or the mass itself isn’t thick enough. If you ever see glowing embers or flames coming out of the chimney, that’s a serious sign of overheating and inefficiency.
In such cases, extinguish the fire safely and let the heater cool completely. Then, carefully inspect the entire system. If you’re ever unsure about something, it’s best to consult someone with experience or a professional builder.
Troubleshooting Quick Checks
Black Smoke: Check airflow, insulation, and feeding technique.
Cracks: Ensure gradual heating and proper material curing.
No Heat: Review channel design and mass thickness.
Strange Smells: Investigate for combustion leaks or material issues.
Glow/Flames in Chimney: Immediately extinguish fire and inspect for overheating.
Tips for Optimal Performance and Longevity
To get the most out of your rocket mass heater and ensure it lasts for years, a few simple practices help. Always use dry, seasoned hardwood. Wet or green wood burns poorly and produces creosote, which can clog your channels and be a fire hazard.
Cut your wood into small, manageable pieces. The feed tube is not designed for large logs. Smaller pieces create a hotter, more efficient burn.
Learn to control the airflow. Most rocket heaters have some way to adjust how much air comes into the feed tube. Finding the sweet spot for your heater will maximize efficiency.
Don’t overload the combustion chamber. A small, hot fire is much better than a smoldering, smoky one. Regularly inspect your heater.
Look for any signs of damage or wear, especially around the combustion chamber and heat riser. Check the chimney for creosote buildup, though this should be minimal with a well-functioning rocket mass heater.
If you built with cob, be aware that it can absorb moisture from the air. In very humid climates, it might feel cooler to the touch. A good burn will dry it out.
In dry climates, it might dry out more than you’d like, potentially leading to minor cracks. These can often be repaired with a bit more cob. Keeping the area around the heater clear of debris is also important for safety and appearance.
Enjoy the warmth and the satisfaction of having built such an efficient and beautiful heating system yourself!
Maximizing Your Heater’s Life
Fuel Quality: Always use dry, seasoned hardwood.
Wood Size: Cut wood into small, appropriate pieces for the feed tube.
Air Control: Learn to adjust airflow for best combustion.
Feeding: Small, hot fires are more efficient than smoldering ones.
Regular Checks: Inspect for damage and creosote buildup.

Frequently Asked Questions About Rocket Mass Heaters
What is the main advantage of a rocket mass heater?
The main advantage is its extreme efficiency. It burns wood very cleanly and uses far less fuel than traditional wood stoves or fi
Can I build a rocket mass heater indoors?
Yes, but it’s crucial to have a proper, safe, and code-compliant chimney system to vent all exhaust gases outdoors. Never operate without proper ventilation.
How long does it take to build one?
It varies greatly depending on your skill level, the complexity of the design, and whether you’re using kits or fabricating parts. A simple build might take a few weekends, while a more complex one could take weeks.
What kind of wood should I use?
Dry, seasoned hardwood is best. It burns hotter and cleaner. Avoid treated lumber or softwoods that can produce more creosote.
How much heat can a rocket mass heater produce?
The amount of heat depends on the size and design of the heater, the amount of thermal mass, and how well it’s insulated. They are designed to heat a specific space efficiently rather than provide intense, rapid heat.
Is it difficult to maintain a rocket mass heater?
Maintenance is generally low. You’ll need to ash out the combustion chamber occasionally and check the chimney for any buildup (which should be minimal). Regular inspections for any physical damage are also wise.
Putting It All Together
Building a rocket mass heater is a big project, but it’s one that offers incredible rewards. You get a highly efficient, eco-friendly way to heat your home. You also gain the satisfaction of creating something with your own hands.
From understanding the basic principles to the detailed steps of construction, it’s a journey. Remember the experiences of people like Ernie and Erica. They started with questions, just like you have now.
They tackled the project step by step, focusing on safety and good design.
The key is to plan carefully, use the right materials, and be patient. Don’t rush the drying times or the initial burns. Respect the power of fire and heat.
With a well-built rocket mass heater, you’ll enjoy a cozy, comfortable home heated by a system that’s as beautiful as it is functional. It’s a connection to a more sustainable way of living. So, take that knowledge you’ve gained and start dreaming up your own design.
You’ve got this!