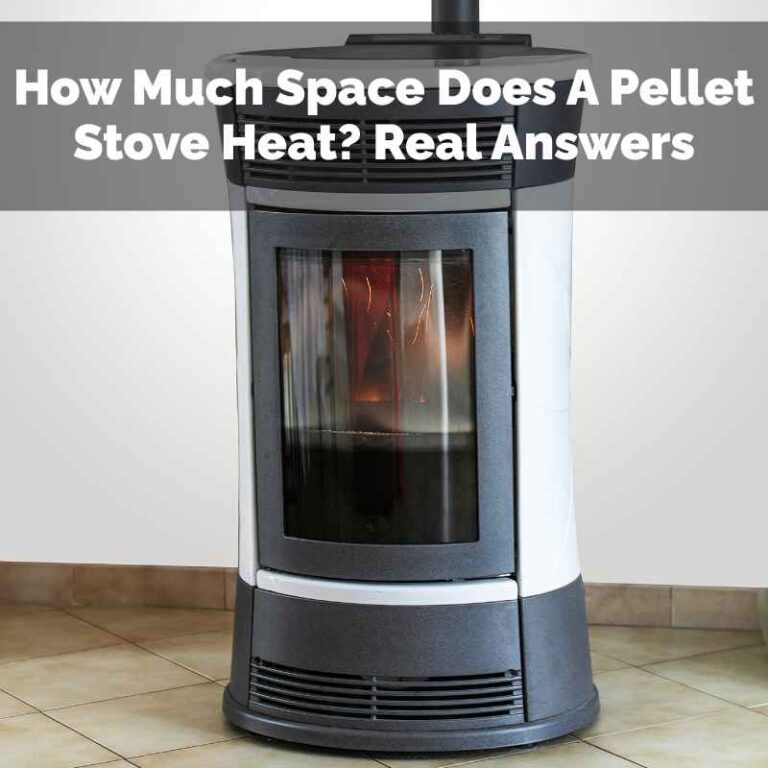
How To Install A Free Standing Pellet Stove With Fireplace
Installing a free standing pellet stove involves careful planning for ventilation and power. If you have a fireplace, you can often use it as part of the venting system by installing a specific pellet stove fireplace insert. Standalone units require a dedicated vent.
Always check local codes and manufacturer instructions for safe installation.
Understanding Your Pellet Stove Installation
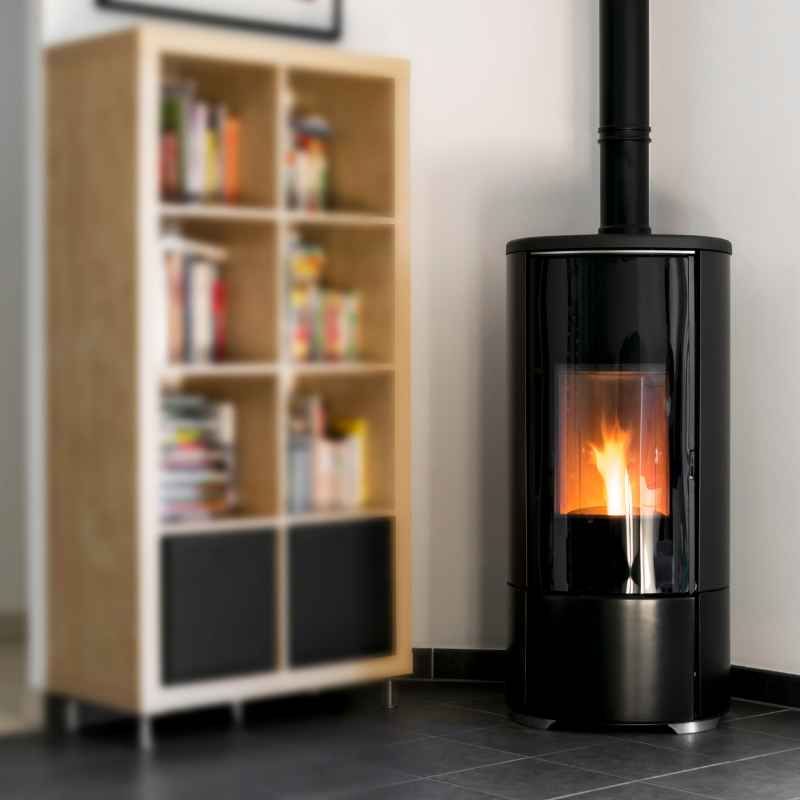
A free standing pellet stove is a modern heating appliance. It burns compressed wood pellets. These pellets are made from sawdust and other waste wood.
The stove is designed to sit out in a room. It heats the air around it. This warm air then circulates through your home.
Most units need electricity to run. This powers the auger that feeds the pellets. It also runs the fan that blows hot air out.
A chimney or vent system is crucial. This gets rid of smoke and fumes. It must vent safely outside.
Many people consider a pellet stove. They look for ways to save money on heating bills. They also want a more environmentally friendly option.
Pellet stoves produce less pollution than wood stoves. They are also easier to use. You don’t need to chop wood.
You just fill a hopper with pellets. The stove does the rest.
The idea of using a fireplace can make this seem easier. Your fireplace already has a chimney. This seems like a perfect place to vent a new stove.
However, not all pellet stoves are the same. Some are made specifically to fit inside a fireplace. These are called fireplace inserts.
A free standing unit is different. It’s built to stand on its own. It has its own housing and needs its own vent.
This guide focuses on free standing units. We will also look at how a fireplace might play a role. This might be for venting.
It might be for space. Understanding these differences is key. It helps you choose the right stove.
It also ensures you install it safely. Safety is always the first thing to think about. Heating your home should be worry-free.
We will cover the basic steps. We will also touch on important details. This includes ventilation, power, and location.
We will also discuss when your fireplace might help. Or when it might be a problem. Let’s start by looking at the main types and what you need to know before you buy anything.
Types of Pellet Stoves and Your Fireplace
When you think about pellet stoves, there are a few main types. This is important to know. Especially if you have a fireplace already.
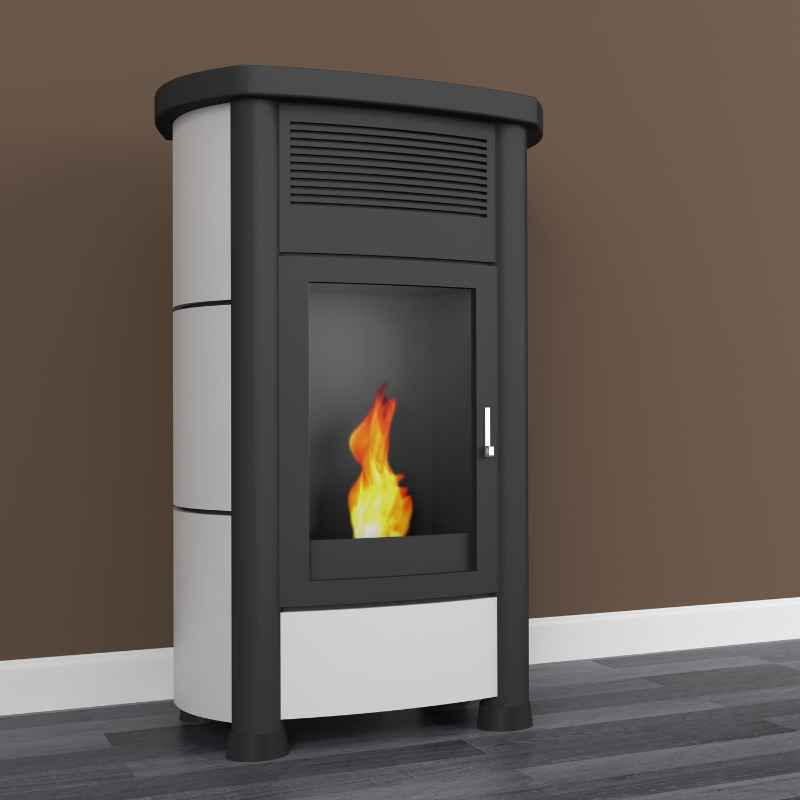
The first type is the free standing pellet stove. This is what we are talking about today. It’s a complete unit.
It has its own casing and sits in a room. It’s not built into anything. It looks like a small, modern wood stove.
Then you have pellet stove fireplace inserts. These are made to slide into an existing fireplace. They use the fireplace’s chimney for venting.
They are designed to seal up the fireplace opening. This makes them very efficient. They are a great option if you like the look of your fireplace.
You want better heating performance.
There are also pellet stoves that are built into walls. These are less common. They are more of a custom installation.
For most people, it’s between free standing or an insert. Since we are talking about free standing, we will stick to that. But it’s good to know the insert option exists.
It’s a related but different kind of project.
Your fi
Another way your fi
The key takeaway here is that a free standing stove is its own system. It needs its own power and its own vent. Your fi
Let’s think about what you need before you even pick out a stove. This is where the planning really starts. It makes the installation much smoother.
It prevents costly mistakes later on.
Before You Buy: Essential Checks
Check Local Codes: This is super important. Building codes vary by town and state. They tell you what’s allowed.
They cover venting, clearances, and electrical work. Your local building department is the place to ask. You might need a permit.
A permit ensures the work is safe and legal.
Manufacturer’s Manual: Every stove has one. Read it carefully. It tells you exactly how to install that specific model.
It covers clearances, venting requirements, and power needs. Don’t guess. The manual is your best friend.
Ventilation Needs: Where will the exhaust go? A free standing stove needs a dedicated vent. This is usually a pipe that goes through a wall or ceiling.
It must terminate outside. The vent pipe type matters. You need the right size and material.
This is usually specified by the stove maker.
Power Source: Most pellet stoves need electricity. They need it for the auger and the fan. Make sure you have an outlet nearby.
Or you’ll need an electrician to install one. Consider a battery backup. This keeps the stove running if the power goes out.
Stove Location: Where will the stove sit? Think about heat distribution. Think about furniture placement.
And most importantly, think about clearances. The stove needs space around it. This is for safety.
It prevents fires. Check the manual for exact measurements.
Planning Your Installation Location
Choosing the right spot for your free standing pellet stove is critical. It affects how well it heats your home. It also impacts safety.
Think about where the stove will sit. This is more than just finding an empty corner. It’s about airflow and heat.
It’s also about access. You need to be able to load pellets. You also need to clean it regularly.
Most people put a free standing stove in a central living area. This is often the living room or family room. The idea is to spread heat to other parts of the house.
You want to avoid placing it in a small, enclosed space. This can lead to overheating. It can also make it hard for the heat to get out.
A larger, open area works best.
Consider the floor. The stove needs a stable, non-combustible surface. This might be a hearth pad.
Or it could be a concrete floor. Never place a pellet stove directly on carpet or wood. The heat can ignite these materials.
A hearth pad adds an extra layer of safety. It also looks nice. Check the stove manual for the required size of the hearth pad.
It usually needs to extend a certain distance in front, to the sides, and behind the stove.
Clearances are non-negotiable. These are the distances the stove must be from walls, furniture, and curtains. These distances are determined by the stove manufacturer.
They are based on how hot the stove gets on its sides and back. Exceeding these clearances is a major fire risk. Always measure carefully.
Double-check the manual. Some stoves have lower clearance requirements than others. This can help if you have a smaller room.
Think about airflow. Where will the warm air come out? You don’t want it blowing directly into a wall.
Or into a busy walkway. You want it to circulate. If possible, place the stove where the air can flow freely.
Into hallways or other rooms. Sometimes, ceiling fans can help move the air. But the initial placement is key.
And then there’s the vent. The vent pipe needs to go outside. This might be through an exterior wall.
Or it might go up through the ceiling and roof. You need to plan this route early. It needs to be as direct as possible.
Long, winding vent runs can reduce efficiency. They can also be harder to clean. You’ll need to consider where the vent exits the house.
It must be a safe distance from windows, doors, and vents for other appliances. Again, the manufacturer’s manual will specify these distances. And local codes will also have rules about vent termination.
If you’re thinking about using your fireplace chimney, this changes location options. You can’t put a free standing stove far from the chimney. You’d likely place it in front of the fireplace.
This means the hearth pad and clearances become even more important. You’re essentially working around the existing structure. It’s possible, but requires careful thought about how the vent pipe will connect.
And how the stove will fit.
I remember setting up a stove in a client’s home once. They had a beautiful old brick fi
Location Checklist
- Central Heat Distribution: Place in a main living area.
- Non-Combustible Floor: Use a hearth pad.
- Safe Clearances: Measure wall and furniture distances.
- Airflow: Ensure heat can circulate freely.
- Vent Access: Plan the shortest, most direct vent route outside.
- Power Access: Locate near an electrical outlet.
- Maintenance Access: Easy to load pellets and clean.
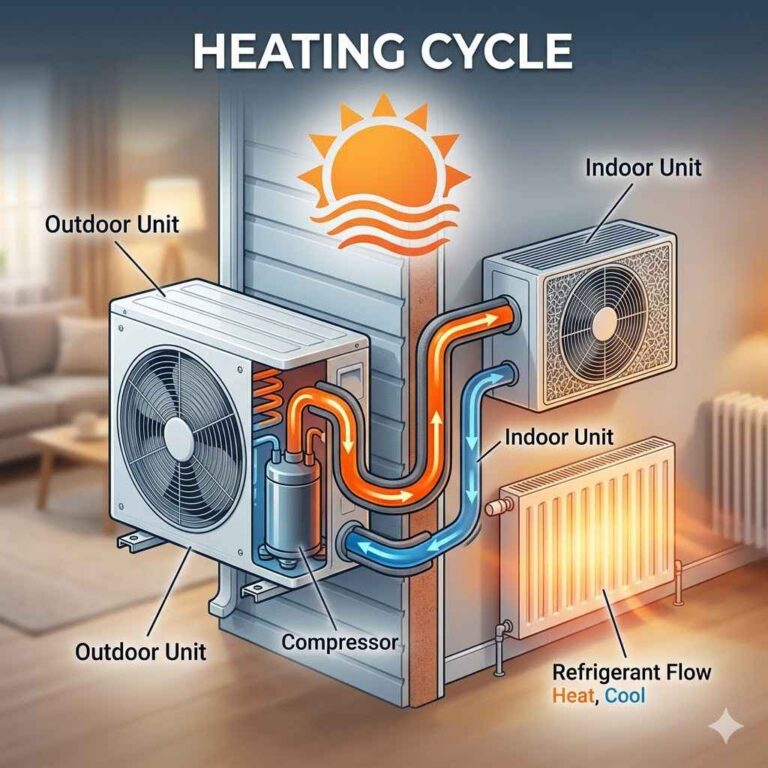
The Venting System: Your Stove’s Lifeline
The venting system is arguably the most important part of your pellet stove installation. This is what carries the exhaust gases from the stove outside. If it’s not done right, it’s a serious safety hazard.
Carbon monoxide is odorless and colorless. It can be deadly. A properly installed vent system is crucial for your family’s safety.
And for the stove’s performance.
For a free standing pellet stove, you have a few main venting options. The most common is a direct vent. This uses a special pipe that goes through an exterior wall.
It often uses a co-axial pipe. This means one pipe is inside another. The inner pipe carries exhaust out.
The outer pipe brings in fresh air for combustion. This is very efficient and safe.
Another option is a vertical vent. This pipe goes up through the ceiling and roof. It’s like a traditional chimney.
You might use this if you can’t vent through a wall. Or if you prefer the look. For this, you’ll need a specific type of double-wall insulated pipe.
This keeps the pipe cooler on the outside. It also prevents creosote buildup.
If you have a fireplace, you might be tempted to use its chimney. This is possible, but you must use a pellet stove vent liner. You cannot just vent into a masonry chimney.
A liner is a flexible or rigid pipe. It’s made of stainless steel. It fits inside the existing chimney flue.
This liner should be the correct diameter for your stove. The stove manufacturer will specify this. The liner connects to the stove’s exhaust port.
It goes all the way up the chimney. The top of the liner needs a special cap. This prevents rain and animals from getting in.
It also ensures proper draft. It’s vital that the liner seals well. It prevents exhaust from leaking into your attic or living space.
It also protects the chimney structure.
Why is this liner so important? Masonry chimneys are often too big for pellet stoves. They are also not designed for the type of exhaust pellet stoves produce.
Pellet stoves burn cleaner. They produce less heat in the exhaust. This can cause condensation.
This condensation can damage the mortar in a brick chimney. A stainless steel liner is smooth. It’s the right size.
It resists condensation. It’s much safer.
You’ll need to understand the pitch and length of the vent pipe. The vent pipe usually needs to slope slightly upwards. This helps with draft.
It also lets condensation drain back to the stove. There are limits to how far the vent can run horizontally. And how many bends it can have.
Too many bends or too long a run will hurt the stove’s performance. It might not vent properly. Check the manual for these specifications.
They are very precise.
I dealt with a situation where someone thought they could just run a dryer vent hose up their old chimney. It looked like it was working at first. But soon, they noticed strange smells.
Then, there were soot marks appearing. It turned out the hose was melting. And exhaust was seeping into the house.
It was a dangerous situation. We had to shut it down immediately. Then we installed the correct stainless steel liner.
It took a bit more work. But it was the only safe way. It shows you can’t cut corners on venting.
Venting Essentials
- Dedicated Vent: Free standing stoves need their own exhaust system.
- Direct Vent: Through an exterior wall, often with fresh air intake.
- Vertical Vent: Through ceiling and roof using insulated pipe.
- Chimney Liner: REQUIRED if using a masonry chimney. Use stainless steel.
- Proper Diameter & Pitch: Follow manufacturer’s specs for pipe size and angle.
- Safe Termination: Exit outside away from windows, doors, and air intakes.
- Vents Caps: Prevent debris and pests.
Connecting Power and Controls
Pellet stoves need electricity to operate. This is different from a wood stove. A wood stove is usually passive.
It relies on natural draft. A pellet stove has moving parts. These parts need power.
Understanding the power needs is key to installation. It ensures your stove runs correctly and safely.
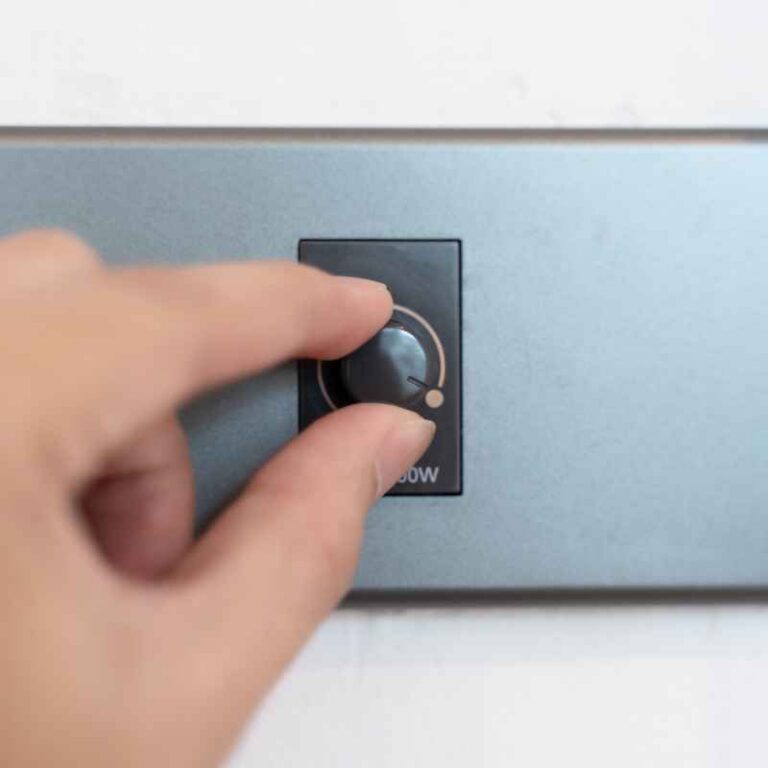
Most pellet stoves plug into a standard household outlet. This is usually a 120-volt outlet. You’ll need to check the stove’s wattage.
Most are fairly low. But it’s good to know. Make sure the outlet is on a dedicated circuit.
This means it’s not shared with other heavy appliances. This prevents tripping breakers. It also ensures consistent power to the stove.
You don’t want the stove shutting off mid-burn.
If you don’t have an outlet near where you plan to put the stove, you’ll need an electrician. They can run a new circuit from your electrical panel. This is a job for a professional.
Electrical work can be dangerous. And it needs to meet code. Your stove manual will likely specify the type of outlet required.
And the circuit breaker size.
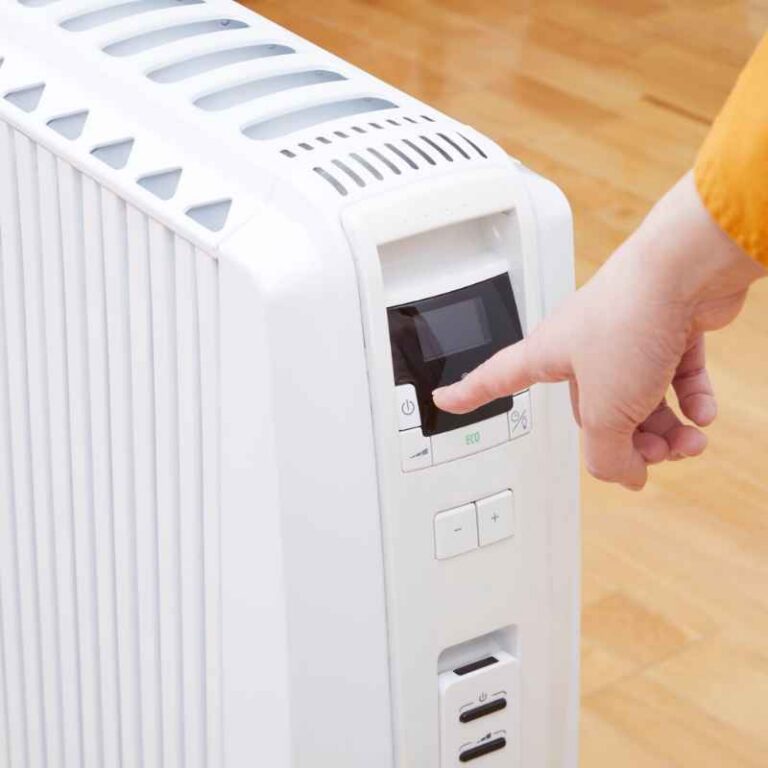
What about the controls? Most pellet stoves have a control panel on the unit itself. This is where you set the heat level.
You can adjust the fan speed. You can set a thermostat. Some modern stoves have remote controls.
Or even Wi-Fi connectivity. You can control them from your phone. For installation, you just need to ensure the stove is plugged in.
The controls are part of the stove’s internal workings.
One thing to consider is a power outage. Pellet stoves need electricity to vent properly. If the power goes out, the stove will shut down.
This can leave embers in the burn pot. It can also cause smoke to back up into the room. Many people choose to have a battery backup system.
This is a small uninterruptible power supply (UPS). It can power the stove for a few hours. This is enough time to safely shut down the stove.
Or to wait for the power to come back on. It’s a smart safety measure. Especially if you live in an area with frequent power outages.
I remember a bad storm hit one winter. The power went out for two days. My neighbor had a new pellet stove.
They hadn’t gotten a battery backup yet. The stove shut down. Smoke started to come into their living room.
They had to quickly open windows. And run outside. It was scary for them.
It made me realize how important that backup is. I made sure my own stove had one installed right away. It gives you peace of mind.
Power and Control Basics
- Standard Outlet: Most stoves use a 120V plug.
- Dedicated Circuit: Recommended to prevent breaker trips.
- Professional Electrician: Needed for new wiring or circuits.
- Control Panel: Adjust heat, fan, and thermostat settings.
- Battery Backup: Essential for power outage safety.
Assembling and Connecting the Stove
Once you’ve chosen the location and have your venting and power sorted, it’s time to get the stove ready. Most free standing pellet stoves come partially assembled. You’ll need to unpack it carefully.
Remove all packaging materials. Check for any shipping damage. Make sure all parts are present.
The first step is often to attach the legs. Or any decorative side panels. These are usually straightforward.
They might screw into place. Your manual will guide you through this. Next, you’ll connect the vent pipe.
This is a crucial step. Make sure the pipe is clean. Ensure it’s the correct size and type.
The vent pipe connects to the back or side of the stove. It might use a special adapter. Or it might have a flange.
You need to create a tight seal. Use high-temperature sealant if recommended by the manufacturer. This prevents exhaust leaks.
Ensure the pipe is securely fastened. It should not wobble or sag.
If you’re venting through a wall, you’ll use a wall thimble. This is a piece of hardware that goes through the exterior wall. It keeps the combustible wall materials away from the hot vent pipe.
It also seals the opening. You’ll follow specific instructions for installing this. The vent pipe will pass through the thimble and extend outside.
There will be a specific length of pipe required outside the house. This is for safety.
If you’re venting vertically through the roof, you’ll need a roof flashing. This seals the hole in the roof. It prevents leaks.
It also provides a secure mounting point for the vent pipe. The pipe will go through the flashing and then attach to a chimney cap. The cap is essential for preventing rain and debris.
Connecting the power is simple. Just plug the stove into the outlet you’ve prepared. Make sure the cord isn’t pinched or strained.
Before you turn the stove on, double-check everything. Are all connections tight? Is the vent pipe secure?
Are clearances respected? Is the hearth pad in place? Is the electrical connection safe?
Once you’re confident, you can proceed to the initial startup.
I had a friend who was so excited to get their new stove going. They rushed through the connection. They didn’t quite get the vent pipe sealed.
The first time they turned it on, there was a faint smell of exhaust. They ignored it. Then the smell got stronger.
They had to shut it down. And re-seal the vent. It was a simple mistake.
But it could have been dangerous. It taught them to slow down and be thorough.
Assembly and Connection Steps
- Unpack Carefully: Check for damage and all parts.
- Attach Legs/Panels: Follow the manual for structural parts.
- Connect Vent Pipe: Securely attach to stove and extend to exit point.
- Seal Connections: Use high-temp sealant where needed.
- Install Wall Thimble/Roof Flashing: Ensure proper wall/roof penetration sealing.
- Plug In: Connect to the prepared electrical outlet.
- Final Inspection: Double-check all connections and clearances.
First-Time Startup and Testing
Turning on your new pellet stove for the first time is exciting! But it’s also a critical step. The first startup is called commissioning.
It’s when you test everything. You make sure it works as it should. And you do it safely.
Read the manual’s instructions for the initial startup. They will be specific to your model. Usually, you’ll start by filling the hopper with pellets.
Make sure they are good quality pellets. Cheap or dusty pellets can cause problems. Then, turn on the stove.
There’s usually a power switch. You’ll then select a startup or ignition cycle.
The stove will begin to light the pellets. This might take a few minutes. You’ll see flames appear in the burn pot.
The fan will start to blow warm air. This is normal. Watch for any strange noises.
Or any smells other than the normal faint smell of burning wood.
During the first hour of operation, keep a close eye on the stove. Check the flame. Is it a steady, active flame?
Or is it weak and sputtering? Look at the exhaust vent outside. Is smoke coming out cleanly?
Or is it billowing out? If you see smoke backing up into the room, shut the stove off immediately. This indicates a venting problem.
You might notice a bit of smoke or smell the first time you run it. This is often due to dust or oils on the new stove parts. This should go away after the first hour or so.
If it persists, or if the smell is strong or acrid, there’s a problem.
Test the controls. See if you can adjust the heat level. Does the fan speed change?
Does the flame intensity change? If you have a thermostat, test that too. Set it to a higher temperature.
The stove should increase heat. Then set it lower. It should decrease heat or go into standby mode.
It’s a good idea to run the stove on a medium setting for at least an hour or two. This helps cure any factory coatings. It also lets you get used to how it operates.
You’ll learn its rhythms. You’ll see how it responds to adjustments.
If you’re not comfortable doing this yourself, this is where a professional installer is worth every penny. They will have done this many times. They know what to look for.
They can troubleshoot issues quickly. And they can give you peace of mind that it’s done right.
First Startup Checklist
- Read Manual: Follow the specific startup steps.
- Fill Hopper: Use good quality pellets.
- Select Ignition Cycle: Let the stove light itself.
- Observe Flames: Ensure a steady, active burn.
- Check Venting: Watch for clean exhaust outside. No smoke inside.
- Test Controls: Adjust heat and fan speeds.
- Monitor for Smells: Expect slight initial smells, but no strong exhaust.
- Run for 1-2 Hours: Allow stove to break in.
When Your Fireplace Can Help (and When It Can’t)
We’ve touched on this, but let’s dive deeper into how your fi
Using the Fi
Pros of using the chimney:
- Cost Savings: You avoid building a new vent system.
- Aesthetics: The stove can be placed in front of the fireplace. This looks natural. You keep the architectural feature.
- Efficient Venting: A well-maintained chimney provides good draft.
Cons of using the chimney:
- Liner Cost: The stainless steel liner and cap are an investment.
- Chimney Condition: If the chimney is damaged or too wide, it might not be suitable. Repairs can be expensive.
- Location Constraint: The stove has to be placed near the chimney.
When the fireplace cannot help (or can be a problem):
1. Stove Too Close: If you want to put the free standing stove right next to the fireplace, but not necessarily using its chimney, be careful. The heat radiating from the stove can affect the fireplace.
Conversely, the fireplace opening might draw air away from the stove. This can affect its combustion. Always check clearances from the stove to the fireplace opening.
2. Blocked or Damaged Chimney: If your fireplace chimney is blocked. Or if it’s crumbling.
Or if it’s too small for a liner. You cannot use it for venting. You will need to install a new vent system.
This might be through a wall or roof.
3. Separate Venting Required: Some free standing stoves are designed for direct venting. This means they must vent through an exterior wall.
They cannot be vented up a chimney at all. This is for safety reasons. The stove’s combustion air intake and exhaust are integrated into this system.
Always check your stove’s manual to see its specific venting requirements.
4. Insufficient Draft: Even with a liner, if the chimney is too short. Or if there are obstructions.
It might not provide enough draft for the pellet stove. Pellet stoves need a consistent draft to operate safely and efficiently. Draft is the natural upward movement of air and exhaust gases.
A weak draft can cause smoke to back up.
So, while your fi
Maintaining Your Pellet Stove for Longevity
Installing your free standing pellet stove is a big step. But the job isn’t done yet. To keep it running well and safely, you need to maintain it.
Regular cleaning and checks are essential. This prevents breakdowns. It also ensures efficient heating.
And it keeps your home safe.
Daily Checks:
- Hopper Level: Make sure there are enough pellets for the stove to run.
- Burn Pot: Check the burn pot for excessive ash or clinkers. You might need to do a quick clean.
Weekly or Bi-Weekly Cleaning:
- Burn Pot Cleaning: This is important. Ash can build up. This can block airflow. Use a brush or shop vacuum to remove ash. You might need to do this more often if you burn a lot. Or if your pellets produce more ash.
- Ash Pan: Empty the ash pan when it gets full. Dispose of the ash safely. Let it cool completely before putting it in a metal container.
- Glass Door: Clean the glass with a special glass cleaner. Or a damp cloth with a bit of ash. This lets you see the flame better. It also makes your stove look nicer.
Monthly or Annual Maintenance:
- Hopper Cleaning: Remove any old pellets. This prevents them from going stale. Or absorbing moisture.
- Combustion Fan: Check the fan for dust and debris. Clean it carefully. A dirty fan can reduce airflow.
- Exhaust Vent Inspection: Check the vent pipe for any blockages. Or signs of corrosion. If you used a chimney liner, ensure it’s in good condition.
- Gaskets: Check the door gasket. And any other seals. If they are cracked or worn, they need to be replaced. This ensures a tight seal. And prevents air leaks.
- Professional Service: It’s a good idea to have a qualified technician service your stove once a year. They can do a deep clean. They can check all the internal components. They can ensure everything is working perfectly. This is especially important before the heating season starts.
I learned this the hard way. I got a bit lazy with cleaning one winter. The stove started to run poorly.
The flame was weak. It wasn’t heating as well. Then, one day, it shut down completely.
It turned out the burn pot was completely clogged with ash. And the exhaust vent was partially blocked. It took a whole afternoon to clean it out.
It was a mess. But it was a good lesson. Regular maintenance saves you trouble in the long run.
Maintenance Schedule
- Daily: Check hopper and burn pot.
- Weekly/Bi-Weekly: Clean burn pot, ash pan, and glass.
- Monthly: Clean hopper and inspect fan/vent.
- Annually: Full professional service, check gaskets.
Troubleshooting Common Issues
Even with careful installation and maintenance, pellet stoves can sometimes act up. Knowing how to troubleshoot common problems can save you time and frustration. Most issues are related to fuel, airflow, or venting.
Stove Won’t Light:
- Check Pellets: Are there enough? Are they dry and good quality?
- Check Power: Is the stove plugged in? Is the breaker on?
- Check Igniter: The igniter might be faulty. This is often a job for a technician.
- Burn Pot: Is it clean? Heavy ash can prevent ignition.
Stove Shutting Down:
- Venting Issues: Blocked vent pipe or chimney liner. Insufficient draft. Smoke detectors might trigger a shutdown.
- Overheating: Something might be causing the stove to get too hot. Check fan operation.
- Power Problems: Intermittent power supply. Or a failing UPS.
- Hopper Empty: The stove will shut down when pellets run out.
Smoke Coming Back into the Room:
- Venting Blockage: This is the most common cause. Check the entire vent path.
- Improper Draft: The vent might be too short, too long, or have too many bends.
- Door Seal Leak: The door might not be closing tightly.
- Negative House Pressure: Other appliances (like kitchen vents or bathroom fans) might be pulling air out of the house. This can create negative pressure. It draws smoke back in. Try running the stove with a window slightly open. If this helps, you have a negative pressure issue.
Low Heat Output:
- Dirty Stove: Burn pot, heat exchanger, or ash buildup can reduce efficiency.
- Poor Pellet Quality: Low-quality pellets burn less effectively.
- Incorrect Settings: The stove might be set to a low heat level.
- Fan Issues: The combustion fan might not be running at the correct speed.
- Venting Problems: Poor draft can affect heat output.
Error Codes: Many modern stoves have digital displays. They will show error codes. Consult your owner’s manual.
It will explain what each code means. And what steps to take.
If you are ever unsure about a problem. Or if it involves electrical or venting issues. It’s always best to call a qualified pellet stove technician.
Trying to fix complex problems without knowledge can be dangerous.
Frequently Asked Questions About Pellet Stove Installation
Can I install a free standing pellet stove myself?
Yes, many people do. But it requires careful planning and attention to detail, especially for venting and electrical connections. Always follow the manufacturer’s instructions and local building codes.
If you’re unsure, hiring a professional is recommended for safety and peace of mind.
Do I need a permit to install a pellet stove?
In most areas, yes, a permit is required for pellet stove installation. This ensures the work meets safety standards. Contact your local building department to find out the specific requirements in your area.
What is the best location for a free standing pellet stove?
The best location is usually in a central living area. This allows for optimal heat distribution. Ensure you have adequate clearances from walls and furniture, a non-combustible floor surface, and easy access to power and the vent exit.
Can I vent a pellet stove through my existing fireplace chimney?
Yes, but you MUST use a properly sized stainless steel liner. You cannot vent directly into a masonry chimney without one. The liner protects the chimney and ensures safe exhaust.
Check your stove manual for specific liner requirements.
How much clearance do I need around a pellet stove?
Clearances vary by stove model. Always consult your owner’s manual for exact measurements. These are critical for fire safety and are typically listed for the sides, back, front, and top of the stove.
Do pellet stoves require a lot of electricity?
No, most pellet stoves use very little electricity, typically running on a standard 120V outlet. They need power for the auger (pellet feed) and the fan. A dedicated circuit is recommended, and a battery backup is a good safety addition.
How often do I need to clean my pellet stove?
Daily checks of the hopper and burn pot are recommended. Weekly or bi-weekly cleaning of the burn pot and ash pan is usually necessary. Annual professional servicing is highly advised to ensure the stove is in top working order.
Conclusion
Adding a free standing pellet stove can be a fantastic way to boost your home’s warmth. It offers efficiency and a cozy ambiance. Whether you’re using your fireplace chimney for venting or installing a completely new system, careful planning is the most important step.
Understanding the clearances, venting needs, and power requirements will set you up for success. Always prioritize safety. And when in doubt, consult the manufacturer’s manual and local codes.
Enjoy your new heating comfort!