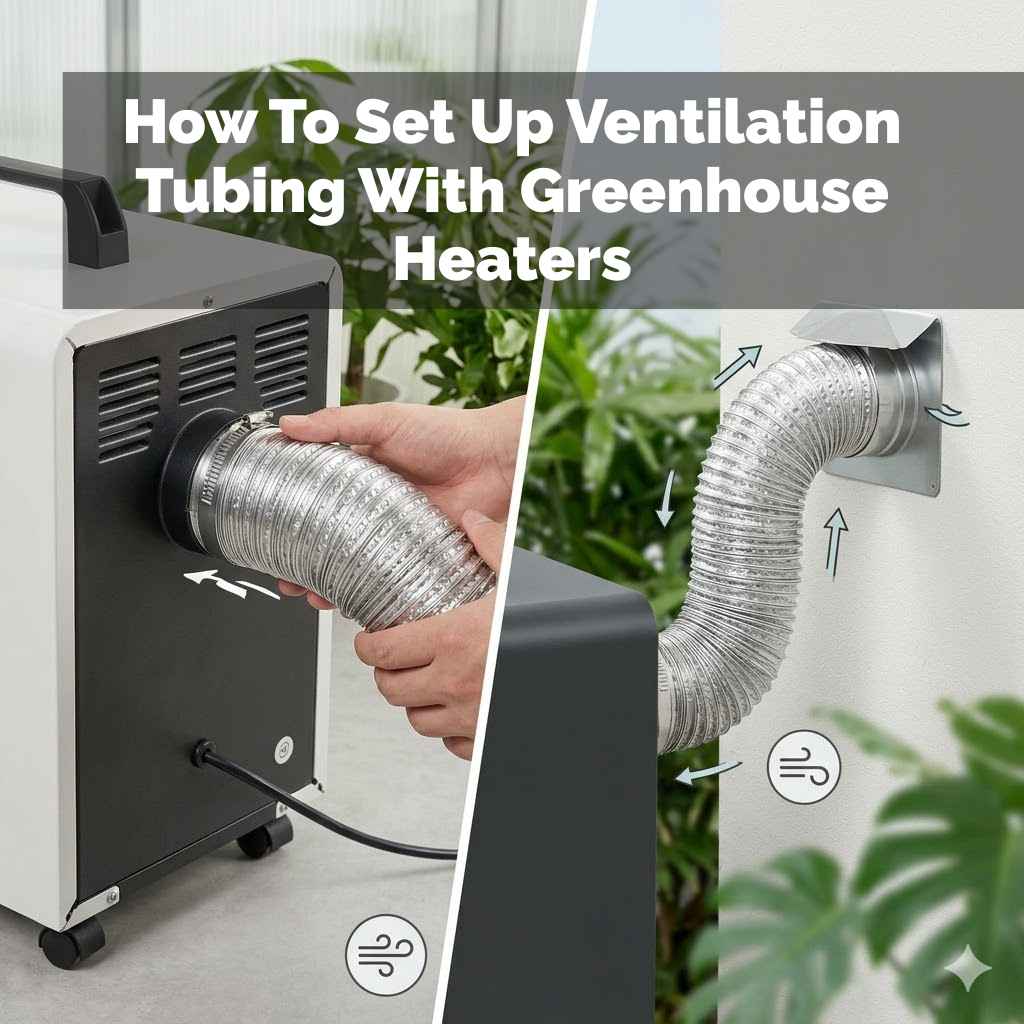
How To Set Up Ventilation Tubing With Greenhouse Heaters
The best way to set up ventilation tubing with greenhouse heaters is to ensure proper airflow for safe operation and optimal heat distribution. This involves connecting intake and exhaust tubing correctly, considering heater type, and maintaining good air exchange within the greenhouse.
Understanding Greenhouse Heater Ventilation
Greenhouse heaters work by burning fuel or using electricity. This process creates heat. But it also creates gases.
Some of these gases aren’t good for plants. They can also be unsafe for you. This is where ventilation tubing comes in.
It helps move air around safely. Good ventilation makes sure your heater works well. It also keeps the air inside fresh for your plants.
Proper airflow is key to happy plants.
There are two main reasons for ventilation tubing with heaters. The first is to bring in fresh air for the heater to burn fuel. This is called combustion air.
The second reason is to take the used air, or exhaust, out of the greenhouse. This keeps harmful gases from building up. Without this, your heater might not run well.
It could also make the air inside unhealthy.
Think about how a car engine works. It needs air to run. It also has an exhaust pipe to let out smoke.
Greenhouse heaters are similar. They need a clean air supply. They need a way to get rid of the waste gases.
Ventilation tubing provides these paths. It’s like giving your heater its own lungs and lungs to breathe out.
The type of heater matters a lot. Some heaters are sealed. They don’t let their exhaust into the greenhouse at all.
Others are not sealed. They might let a little exhaust into the air. For non-sealed heaters, ventilation is even more important.
Always check your heater’s manual. It will tell you what kind of setup it needs. Safety is always the top priority.
We want to create a system where the heater can breathe in fresh air. We also want it to push out its exhaust safely. This keeps the oxygen levels good for your plants.
It also prevents a buildup of carbon monoxide or other bad stuff. It’s a delicate balance. But once you get it, it makes a big difference.
My Own Greenhouse Heater Scare
I remember one winter, maybe five years ago. It was a particularly cold snap. My small greenhouse was struggling to stay warm.
I had a propane heater running inside. It was one of those older models. I had just put it in.
I thought I was being smart by not using any special tubing. I figured it was just a small heater. What could go wrong?
One morning, I went out to check on my seedlings. The air inside felt. strange.
It was warm, yes, but also heavy. My favorite tomato plants looked a bit droopy. I felt a little dizzy myself.
I opened the greenhouse door. A puff of stale, almost metallic-smelling air came out. That’s when the worry hit me.
I realized I had made a big mistake by not venting it properly.
I quickly turned off the heater. I opened up all the vents and doors. Fresh, cold air rushed in.
It was a relief. But the plants were definitely stressed. I felt a knot of panic.
What if I had left it running? What if it had been a more serious issue? That day taught me a huge lesson about greenhouse heater safety.
It’s not something to guess about. You need to get the ventilation right.
After that scare, I did my research. I learned about intake and exhaust. I bought proper tubing.
I set it up according to the manufacturer’s instructions. The difference was amazing. The heater ran smoother.
The air in the greenhouse felt clean. My plants perked up. It wasn’t just about keeping it warm.
It was about keeping it healthy and safe for everyone.
That experience really drove home how important this detail is. It’s easy to overlook. But it’s one of the most critical parts of running a greenhouse safely and effectively.
It’s about protecting your plants and yourself. It’s about being a good plant parent and a responsible heater owner.
Connecting the Intake Tubing
The intake tubing is for fresh air. Your heater needs this air to burn its fuel. Think of it as the heater’s fresh drink of water.
This air needs to come from outside the greenhouse. You don’t want it to pull in stale air from inside. Stale air has less oxygen.
It might also have gases that can hurt the heater. Or even harm your plants.
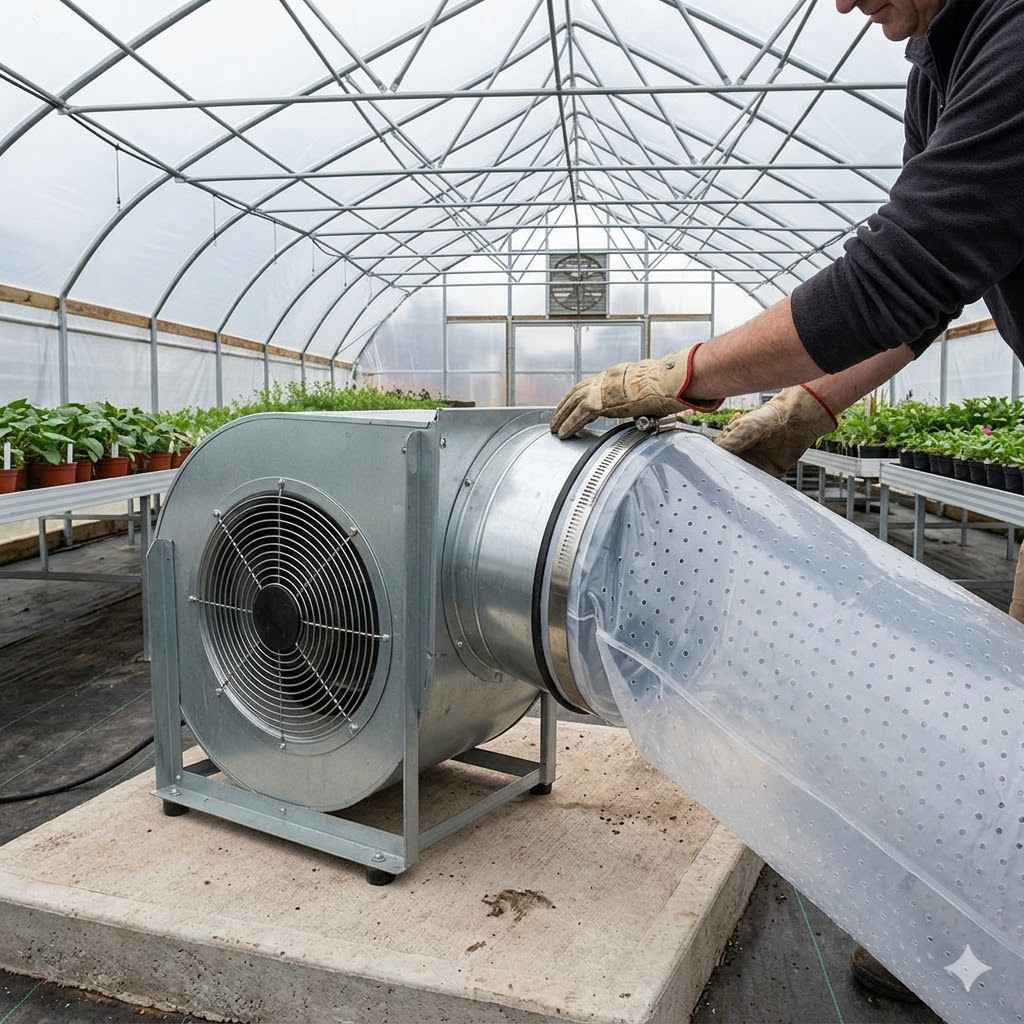
To set up intake tubing, you usually attach one end to the heater. The other end goes outside. You might need a special fitting or adapter for this.
Check your heater’s manual. It will show you exactly where the intake port is. Make sure the connection is snug.
You don’t want leaks.
The tube itself needs to be the right size. It should match the size of the intake port on your heater. If the tube is too small, the heater might not get enough air.
This can make it run poorly. It might even cause it to shut down. If the tube is too big, you might need a way to connect it securely.
Some heaters come with a specific intake pipe. You just attach the flexible tubing to that.
You need to run the intake tube to a place where it can get clean, fresh air. Often, this means running it out of the greenhouse wall or roof. Make sure the end of the tube is not blocked.
It shouldn’t be sitting in a puddle or covered by leaves. You might want to put a screen on the end. This stops bugs or small animals from getting in.
Consider the length of the tubing. Longer tubes can sometimes make it harder for air to flow. Your heater might have to work harder to pull air through.
If you have a very long run, you might need a larger diameter tube. Again, the manual is your best friend here. It often gives guidelines for how far you can run the intake tubing.
Also, think about where the intake tube ends up. You don’t want it to suck in exhaust from something else. If your greenhouse is near a generator or a wood stove, make sure the intake is far away from those fumes.
Key Points for Intake Tubing
Intake Setup Checklist
- Connect Firmly: Ensure the tube attaches securely to the heater’s intake port.
- Outside Air: Run the tube to an area with fresh, clean outside air.
- Unblocked End: Keep the outside end clear of debris and obstructions.
- Right Size: Use tubing that matches the heater’s intake size.
- Avoid Fumes: Position the intake away from other exhaust sources.
Getting the intake right means your heater has the fuel it needs. It means it can burn cleanly. This is the first step to a good ventilation system.
It’s about giving your heater the best conditions to work. And that means better conditions for your greenhouse too.
Setting Up the Exhaust Tubing
The exhaust tubing is for the waste gases. After the heater burns its fuel, it produces exhaust. This exhaust contains things like carbon dioxide and, if not burning perfectly, carbon monoxide.
These can be harmful. They can build up inside your sealed greenhouse. You need a way to safely get this exhaust out.
Like the intake tubing, the exhaust tubing connects to a port on the heater. This port is specifically for the exhaust. You’ll attach one end of the tubing there.
The other end needs to lead safely outside the greenhouse. You do not want this exhaust going back into your growing space.
The size of the exhaust tubing should also match the heater’s exhaust port. If it’s too small, exhaust can build up pressure. This can damage the heater or cause it to overheat.
If it’s too big, you’ll need a way to make a secure connection. Again, your heater’s manual will guide you. Some heaters come with a dedicated exhaust pipe.
You just connect the flexible tubing to that.
You will run the exhaust tube out of the greenhouse. It needs to vent away from any windows or doors. You don’t want the exhaust to blow back in.
It should also be far from where people or pets gather. The goal is to release these gases harmlessly into the atmosphere.
When running exhaust tubing, it’s good practice to avoid sharp bends or kinks. These can restrict airflow. This is bad for both the heater and safety.
Keep the tubing as straight as possible. If you need to make turns, make them gentle curves.
Some exhaust systems may require a specific type of tubing. This is especially true for high-temperature exhaust. Check your heater’s specifications.
Make sure the tubing you use can handle the heat safely. Most standard flexible heater vents are made for this. But it’s always good to double-check.
If your heater is designed to exhaust outside (meaning it’s a “direct-vent” or “sealed combustion” unit), it will have a dedicated system for this. You will often use a specialized pipe kit for this. These kits are designed to be safe and efficient.
They might even include a way to run both intake and exhaust through the same wall penetration.
A common mistake is not extending the exhaust far enough. You need it to be well clear of the building. You also want it to be where the wind won’t easily blow it back inside.
A small amount of exhaust can be dangerous if it collects near an air intake.
Tips for Exhaust Tubing Setup
Exhaust Venting Safety
- Vent Outside: Always run exhaust tubing to the exterior of the greenhouse.
- Clear Path: Ensure the tubing has a clear, unobstructed path.
- No Kinks: Avoid sharp bends or kinks that restrict airflow.
- Safe Distance: Vent away from windows, doors, and living areas.
- Proper Material: Use tubing rated for exhaust temperatures.
Proper exhaust venting protects everyone. It protects your plants from bad air. It ensures the heater runs efficiently.
It’s the responsible thing to do. Never skip this step, especially with fuel-burning heaters.
Heater Types and Ventilation Needs
Not all greenhouse heaters are created equal. Their design directly impacts how you need to set up ventilation. Understanding your heater type is crucial for a safe and effective system.
Let’s break down the main kinds.
Propane and Natural Gas Heaters
These are very common in greenhouses. They burn propane or natural gas to produce heat. There are two main categories:
Unvented (Blue Flame) Heaters: These are often used for temporary or supplemental heat. They release their combustion byproducts directly into the greenhouse air. This means they consume oxygen and produce carbon dioxide and potentially carbon monoxide. For these heaters, ventilation is not just recommended, it’s absolutely essential. You need to provide a constant source of fresh air and vent out the exhaust. Often, you’ll need to slightly crack a vent or door to allow for air exchange. They are not designed for fully sealed, long-term use without air exchange.
Vented (Direct-Vent) Heaters: These are much safer for enclosed spaces. They have a sealed combustion chamber. This means they draw combustion air from outside the greenhouse and vent exhaust gases directly outside. They often use a double-pipe system. One pipe brings in fresh air, and the other takes out exhaust. If you have a direct-vent heater, the setup for intake and exhaust is usually built into the unit itself. You just need to ensure the pipes are correctly installed and run to the outside.
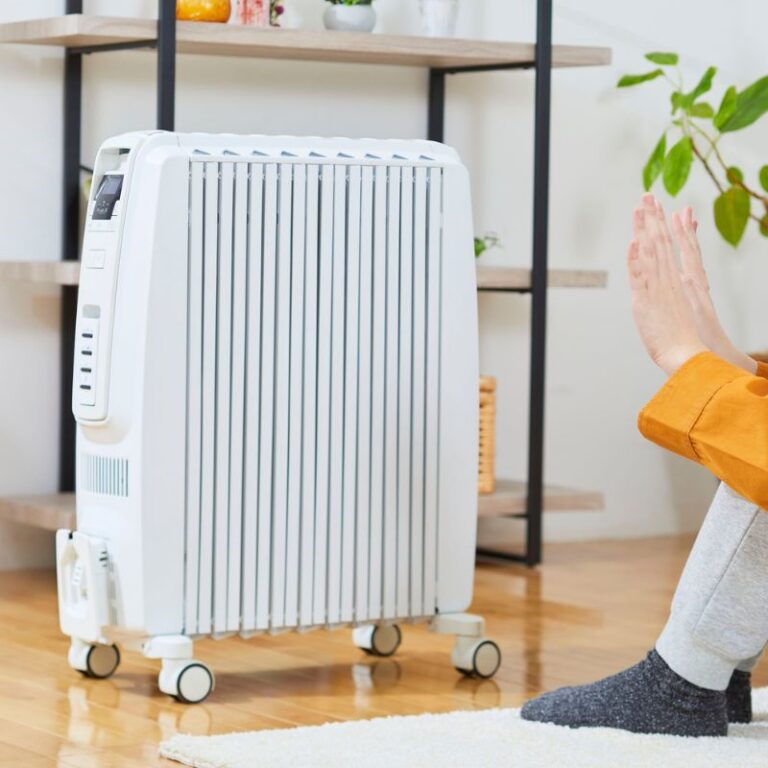
Electric Heaters
Electric heaters do not burn fuel. They convert electricity into heat. Because they don’t involve combustion, they do not produce exhaust gases like carbon monoxide.
This means they do not require ventilation tubing for exhaust. They do, however, consume electricity. Good airflow within the greenhouse is still important for even heat distribution and to prevent overly hot spots.
Kerosene and Paraffin Heaters
These heaters also burn fuel and produce combustion byproducts. They often release water vapor along with carbon dioxide and other gases. Similar to unvented propane heaters, they require significant ventilation to remove these gases and maintain air quality.
They are generally not recommended for sealed greenhouses unless very robust ventilation is in place.
Infrared Heaters
Infrared heaters work differently. They emit radiant heat that warms objects directly, rather than heating the air. Most infrared heaters do not require specific ventilation tubing for exhaust.
However, like electric heaters, good general air circulation within the greenhouse is still beneficial for overall plant health and temperature uniformity.
Heater Ventilation Comparison
Heater Type
Unvented Propane/Gas
Direct-Vent Propane/Gas
Electric
Kerosene/Paraffin
Infrared
Ventilation Needs (Tubing)
High: Essential for fresh air intake and exhaust removal.
Specific: Built-in system; follow manufacturer’s pipe setup.
None (for exhaust): General air circulation is still good.
High: Essential for exhaust removal.
None (for exhaust): General air circulation is still good.
Always consult your heater’s instruction manual. It will tell you precisely how it is designed to be used. It will specify if it needs an intake and exhaust setup.
And what type of setup is required for safe operation in your greenhouse environment.
Real-World Greenhouse Scenarios
Let’s look at how these principles play out in different greenhouse setups. Each situation has unique needs.
Scenario 1: The Small Hobby Greenhouse
Imagine a 6×8 foot hobby greenhouse. The owner uses a small, unvented propane heater for frost protection. Because it’s small and the heater is unvented, air quality is a big concern.
The owner has learned they need to crack a vent slightly on the opposite side of the heater. They also have to monitor humidity. This setup relies heavily on passive air exchange.
The owner often finds they have to open the door briefly each day. This helps clear out moisture and stale air. They are very aware of the heater consuming oxygen.
They know they can’t run it continuously without good air flow. It’s a constant balancing act for them.
Scenario 2: The Larger Commercial Greenhouse
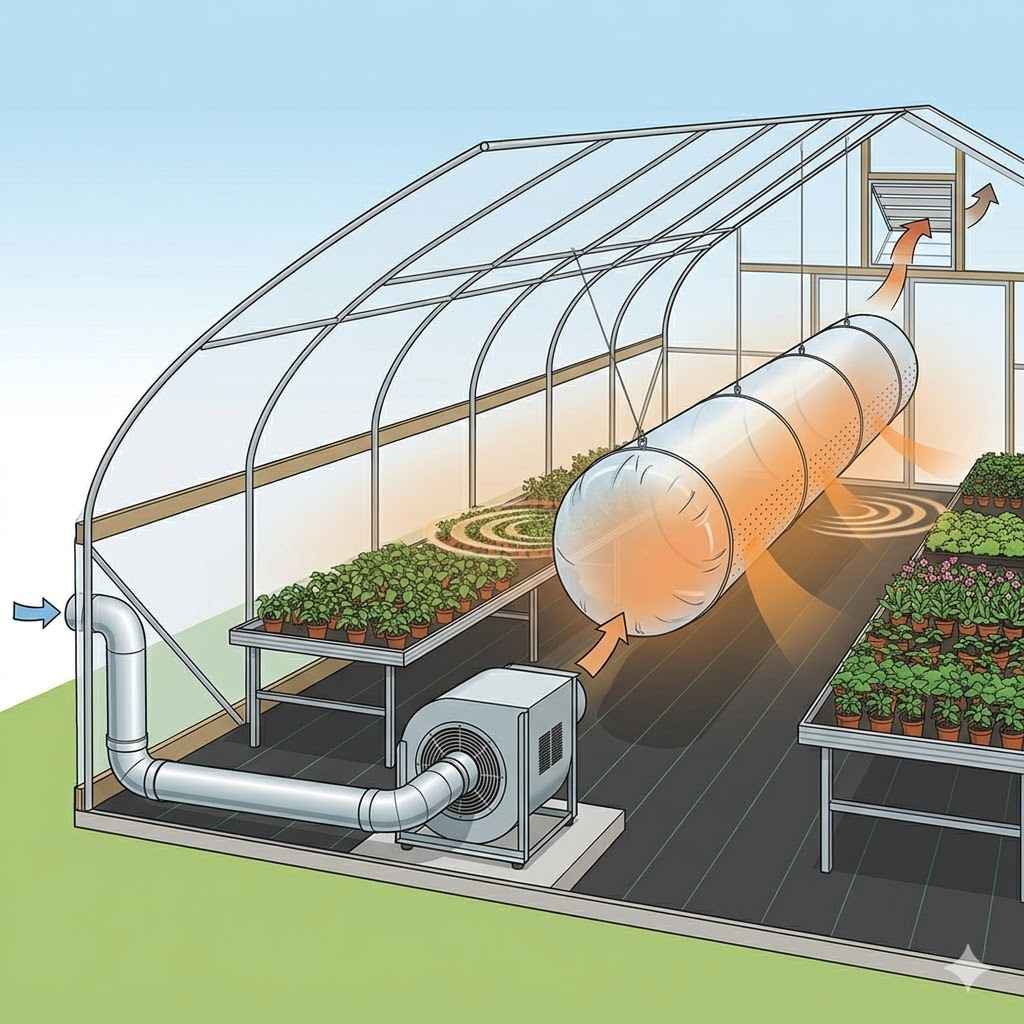
A commercial greenhouse, perhaps 20×50 feet, might use a larger, direct-vent natural gas heater. This heater is installed with its own intake and exhaust pipes that go through the wall. The manufacturer provided a specific kit for this.
The intake pipe draws air from just outside the wall. The exhaust pipe releases fumes safely away from the building and any air intakes. This system is much more automated and requires less manual intervention for air exchange.
The manager still monitors CO2 levels, but the primary concern is heater performance and fuel use. They ensure the vents on the pipes are not blocked by snow or debris. The system is designed to be self-sufficient for combustion air and exhaust.
This allows for a much more stable environment inside the greenhouse. It ensures the plants have what they need to thrive.
Scenario 3: The DIY Greenhouse with Electric Heat
Someone builds their own greenhouse and uses a large electric space heater. They love that it’s quiet and has no fumes. They don’t need any special ventilation tubing for the heater.
However, they still need to think about air movement. They might use a small fan. This fan circulates the air.
This helps prevent cold spots near the heater. It also ensures the warm air reaches all the plants evenly.
They still need to vent their greenhouse for humidity control and to refresh CO2 levels for plant growth. This ventilation is separate from the heater. They might use automated vent openers.
Or they might open vents manually. The electric heater is simple, but managing the greenhouse climate is still key.
Scenario Quick View
Hobby Greenhouse (Unvented Heater): Manual air exchange, cracked vents, door opening. High user involvement.
Commercial Greenhouse (Direct-Vent Heater): Automated intake/exhaust, minimal manual intervention for heater. Focus on system checks.
DIY Greenhouse (Electric Heater): No exhaust tubing needed for heater. Air circulation fan may be used. Separate ventilation for humidity/CO2.
These scenarios show that the heater type is the biggest factor. What works for one might not work for another. Always tailor your setup to your specific heater and greenhouse size.
What This Means for Your Greenhouse
So, what’s the takeaway from all this? Understanding how your heater works with its ventilation is super important. It’s not just a small detail.
It affects the health of your plants and your safety. Let’s break down what it means for you and your greenhouse.
When Is It Normal?
It’s normal to need ventilation tubing if you use a propane, natural gas, kerosene, or paraffin heater that is not direct-vent. This means the heater takes in air and releases exhaust into the greenhouse space. In these cases, setting up the intake and exhaust tubing correctly is standard practice.
It’s how these heaters are designed to operate safely.
It is also normal to need some general air circulation within the greenhouse, even with electric or direct-vent heaters. This isn’t about venting fumes. It’s about moving air around.
This helps keep temperatures even. It also prevents diseases from taking hold. A small fan is often used for this purpose.
When Should You Worry?
You should worry if you have a fuel-burning heater (like propane or gas) and you are not using any ventilation tubing for intake and exhaust. Especially if it’s not a direct-vent model. This is a risky situation.
It can lead to oxygen depletion. It can also cause dangerous levels of carbon monoxide to build up.
You should also worry if you notice these signs:
- A strange smell: Especially a metallic or gassy smell.
- Plants wilting or looking unhealthy: When they shouldn’t be.
- Headaches or dizziness: When you’re in the greenhouse.
- The heater running poorly: If it sputters, seems weak, or shuts off often.
- Condensation: Excessive condensation that doesn’t clear up. This can be a sign of poor air exchange.
If you see any of these, stop using the heater immediately. Get fresh air into the greenhouse. Then, investigate your ventilation setup.
It’s better to be safe than sorry.
Simple Checks to Perform
Here are a few easy checks you can do regularly:
- Visual Inspection: Look at your intake and exhaust tubing. Are they connected securely? Are they kinked or damaged? Is the outside end blocked?
- Manufacturer’s Manual: Re-read the section on installation and operation. Does your setup match what the manual says?
- Airflow Check: For vented systems, can you feel air being drawn in by the intake? Can you feel exhaust being pushed out by the exhaust? (Be careful not to touch hot parts).
- Listen to the Heater: Does it sound smooth and steady? Or is it struggling?
- Monitor Air Quality: If you’re concerned, consider a simple carbon monoxide detector for your greenhouse.
Taking these small steps can prevent big problems. It’s about being proactive. It’s about ensuring your greenhouse is a safe and productive place for your plants to grow.
Quick Tips for Better Ventilation
Making sure your greenhouse has good ventilation, especially with a heater, is key. Here are some simple tips to help you out:
Ventilation Boosters
Use a Fan: Even with tubing, a small circulating fan helps move air. This ensures heat spreads evenly and prevents stale pockets.
Check Vents: Make sure your greenhouse vents open and close properly. They are your first line of defense for air exchange.
Positioning Matters: Place your heater so its intake and exhaust tubes have a clear path. Avoid putting them right against a wall or obstruction.
Seasonal Checks: Before each heating season, inspect all your tubing and connections. Replace anything that looks worn or damaged.
Monitor Humidity: Good ventilation also helps control humidity. High humidity can lead to plant diseases. If you see too much condensation, you may need more air exchange.
These tips are easy to follow. They help make sure your heater works its best. They also help keep your plants healthy and happy.
Frequently Asked Questions
Do I need ventilation tubing for an electric greenhouse heater?
No, electric heaters do not burn fuel. They do not produce exhaust gases like carbon monoxide. So, you do not need ventilation tubing for exhaust or combustion air for an electric heater.
However, a fan to circulate air is still a good idea for even heating.
What happens if my direct-vent heater’s exhaust pipe is blocked?
If a direct-vent heater’s exhaust pipe is blocked, it can cause the heater to malfunction. It might overheat or shut off. In some cases, if the safety mechanisms fail, it could potentially release some exhaust into the greenhouse.
Always keep the intake and exhaust pipes clear.
Can I use dryer vent tubing for my greenhouse heater?
It depends on the type of heater. For some unvented heaters, a flexible dryer vent might work for exhaust, but you must ensure it’s rated for the temperature and can handle the gases. For direct-vent systems, specialized gas vent pipe or a specific kit is usually required.
Always check your heater’s manual for recommended materials.
How do I know if my heater is getting enough combustion air?
If your heater is struggling, running unevenly, or shutting off frequently, it might not be getting enough air. For unvented heaters, this means you need better overall ventilation. For direct-vent heaters, check that the intake pipe is not blocked and is the correct size.
A faint smell of gas might also indicate a problem.
What is carbon monoxide and why is it dangerous in a greenhouse?
Carbon monoxide (CO) is a poisonous gas produced by incomplete burning of fuels. It’s odorless and colorless. In a greenhouse, especially a sealed one, CO can build up to dangerous levels.
It can harm or kill plants, animals, and people because it prevents the body from using oxygen.
Can I vent my heater exhaust near a building air intake?
No, you absolutely should not. Venting heater exhaust near any air intake (for the heater itself, or for a building) can cause the exhaust to be drawn back into the system. This can lead to dangerous levels of carbon monoxide or other harmful gases.
Keep exhaust vents far away from any air intakes.
Conclusion
Setting up ventilation tubing for your greenhouse heater might seem complicated. But it’s really about making sure your heater can breathe safely. It’s about sending its waste gases away.
Following the right steps for your specific heater type keeps your plants healthy. It also ensures your greenhouse is a safe place to be. Always read your manual.
When in doubt, ask for help. Your plants will thank you.