How To Install A Pellet Stove Insert Without A Fireplace
Installing a pellet stove insert is a fantastic way to add cozy heat to your home. Many people think you absolutely need a traditional fireplace. But what if you don’t have one?
It might seem tricky. You want that warmth and charm. You might be wondering if it’s even possible.
Or maybe you’re a bit worried about doing it right. We get it. It’s a big project.
Getting it wrong can be unsafe. But the good news is, yes, it is absolutely possible. You just need the right knowledge.
This guide will walk you through it. We’ll cover everything you need to know. Let’s make your home warmer and more inviting.
You can install a pellet stove insert without a pre-existing fireplace. This involves creating a proper vent system through an exterior wall or the ceiling. Careful attention to clearances, local codes, and professional consultation is crucial for safety and efficiency.
Understanding Pellet Stove Inserts
A pellet stove insert is a heater. It’s designed to fit inside an existing structure. This structure is usually a fireplace opening.
It burns compressed wood pellets for fuel. These pellets are made from sawdust and wood waste. They are eco-friendly and easy to store.
Pellet stoves offer consistent heat. They are also more efficient than wood stoves. Many have thermostats.
This lets you set a desired temperature. The stove then manages its own heat output. It’s a clean-burning option for many homes.
The main goal of an things get interesting.
The core idea is still the same: controlled burning and safe venting. The “insert” part might be less about fitting into an existing hole. It’s more about placing the unit and building its system.
Why No Fireplace?
There are many reasons why a home might lack a fi
Think about it. A traditional fi
Ventilation is Key
This is the most critical part. Pellet stoves must have a proper vent. This vent removes smoke and gases.
It also brings in air for the fire to burn. Without it, dangerous fumes like carbon monoxide can fill your home. This is a serious safety hazard.
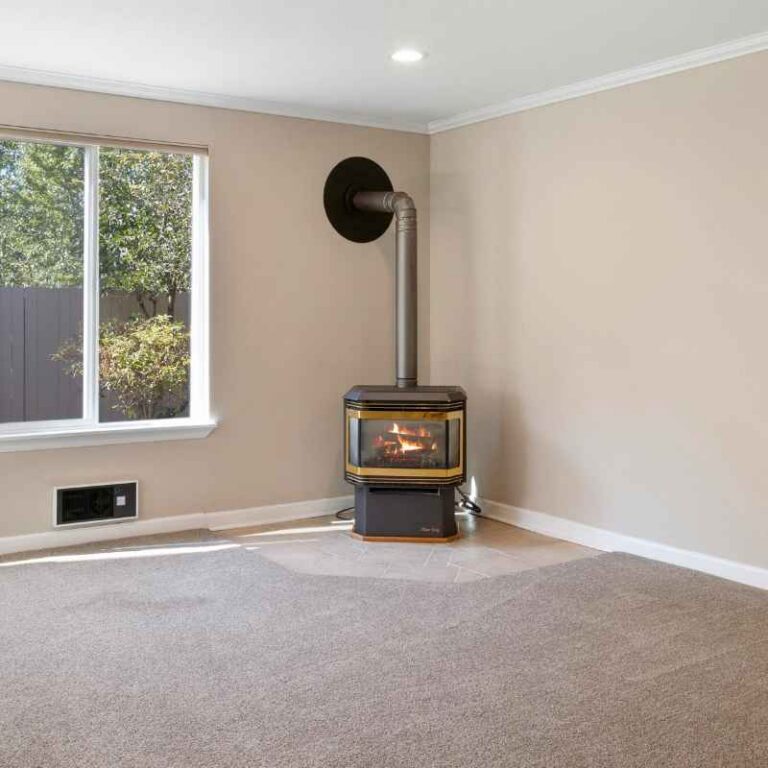
For a standard insert in a fireplace, the vent often goes up the existing chimney. But if you don’t have a chimney, you need another way. This usually means venting through an exterior wall or the roof.
Through-the-wall venting is very common for homes without fireplaces. You’ll need a special vent kit. This kit includes pipes and a wall thimble.
The thimble is a protective piece. It goes through the wall. It keeps the hot vent pipe away from flammable materials.
The pipe then exits your home. It needs a proper termination cap. This cap stops rain, snow, and animals from getting in.
It also directs exhaust safely away from windows and doors.
Roof venting is another option. This involves running the vent pipe up through the ceiling and out the roof. It requires a roof flashing kit.
This kit seals the hole where the pipe exits. It protects your roof from leaks. Like wall venting, it needs a termination cap.
Roof venting can be more complex. It often requires working at heights. It also involves cutting through structural elements of your house.
You need to be sure you aren’t cutting a beam.
Clearances Matter a Lot
Pellet stoves get hot. Very hot. The stove body itself, the vent pipes, and the exhaust gases are all hot.
Because of this, you need to keep flammable materials away. This is called maintaining proper clearances. Every stove model has a manual.
This manual lists the exact required distances. You need to follow these. They are not suggestions.
They are safety requirements.
What counts as flammable? This includes wood framing, drywall, insulation, furniture, curtains, and carpets. You’ll need to measure.
You’ll measure from the sides of the stove. You’ll measure from the back of the stove. You’ll measure from the top.
You’ll also measure from the vent pipes. These distances are usually listed in inches. For example, you might need 12 inches on the sides.
You might need 18 inches behind the stove. The vent pipe might need 1 inch clear all around.
Expert Tip: Always check your stove’s manual. Also, check your local building codes. Codes can sometimes require larger clearances than the manufacturer.
It’s better to be safe. Measure twice. Cut once, or rather, install once!
Planning Your Installation
Before you buy anything, plan. Where will the stove go? How will it be vented?
What materials do you need? This planning step saves you time and money. It also prevents mistakes.
Think about the room’s layout. You want the stove to fit well. You also want it to heat the space effectively.
Consider where the vent pipe will run. Is there an easy path through a wall or ceiling? Are there any obstructions like pipes or wires?
Ask yourself these questions:
- Where is the nearest exterior wall for venting?
- Can I run vent pipe through the ceiling and roof easily?
- Are there any windows or doors that would be too close to the vent exit?
- What is the floor made of where the stove will sit?
- What materials are around the stove’s location?
Most pellet stoves need a non-combustible hearth pad. This protects the floor. It must extend in front of the stove.
It also needs to go out to the sides. The manual will tell you the required size. You might need to build a custom one.
Or buy a pre-made one. Check if your floor needs reinforcement. Some stoves are quite heavy.
Especially when filled with pellets.
Vent Pipe Routing Checklist
Exhaust Pipe:
- Use only approved pellet stove vent pipe.
- Keep runs as short and straight as possible.
- Each bend reduces efficiency.
- Ensure all connections are sealed securely.
- Maintain required clearances from combustible surfaces.
Air Intake Pipe (if applicable):
- Some stoves need a dedicated outside air intake.
- This pipe brings fresh air directly to the stove.
- It improves combustion and reduces drafts in the house.
- Follow manufacturer’s specs for routing and termination.
Choosing Your Venting Method
We touched on this, but let’s dive a bit deeper. For a home without a fireplace, venting is your biggest challenge. The most common methods are single-wall, double-wall (Type 2), or flexible vent pipes.
Always use vent pipe designed for pellet stoves. Standard chimney pipes might not work. Or they could be unsafe.
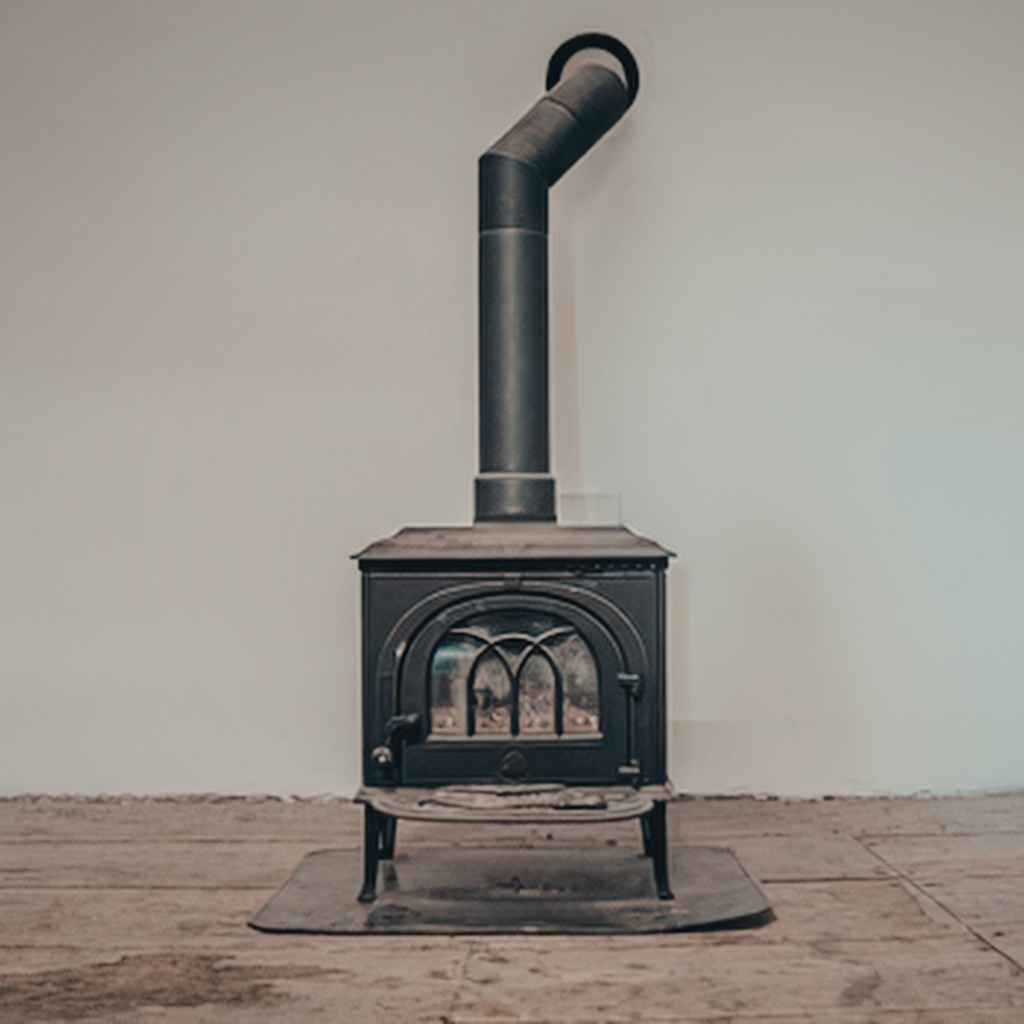
Single-wall pipe is usually used for the initial connection. It goes from the stove to the wall or ceiling penetration. It’s not insulated.
So, it requires larger clearances. Double-wall pipe (often called Type 2 or Type B vent) is insulated. It offers better safety.
It allows for smaller clearances. This makes it easier to route through walls and floors. Most manufacturers recommend using it for the majority of the vent run.
Flexible vent pipe is also available. It can be useful for tight spots. But it often has limitations.
It can be harder to keep clean. It can also sag if not supported properly. Always check your stove manual.
It will specify the approved vent types. It will also tell you the maximum length and number of bends allowed. Exceeding these can cause poor performance.
Or create a fire hazard.
Vent Termination Points
Wall Termination:
- Must be a minimum distance from windows, doors, and air intakes.
- Needs a proper wall thimble to prevent fire.
- The exit cap should be bird-proof and rain-resistant.
Roof Termination:
- Must be a minimum height above the roof line.
- Requires proper flashing to prevent roof leaks.
- Must be clear of any obstructions like vents or chimneys.
- Check local codes for specific height requirements based on roof pitch.
The Installation Process (DIY vs. Professional)
Installing a pellet stove insert can be a DIY project. But it’s a complex one. If you’re not comfortable with construction and safety aspects, hire a professional.
A certified pellet stove installer is a wise choice. They know the codes. They have the right tools.
They can ensure the job is done safely and correctly. This is especially true for venting. Getting the vent system wrong is dangerous.
If you decide to DIY, here’s a general overview:
- Prepare the Area: Clear the space. Lay down a protective drop cloth. Ensure you have good lighting and ventilation.
- Install Hearth Pad: Place the non-combustible hearth pad. Ensure it’s level and meets clearance requirements.
- Position the Stove: Carefully move the pellet stove into position. Leave enough space to work behind it.
- Install Vent Pipe: Connect the vent pipe to the stove. Route it through your wall or ceiling. Use appropriate supports and hangers.
- Install Wall/Roof Thimble and Termination: Securely install the thimble or roof flashing. Attach the exterior vent cap. Seal all joints properly.
- Make Electrical Connections: Pellet stoves need electricity. Follow the manufacturer’s instructions. Ensure proper grounding.
- Initial Startup: Follow the manual for the first startup. Watch for any leaks or unusual noises.
My own experience: I helped a friend install one in their garage. We were venting through the wall. The hardest part was cutting the hole.
We double-checked measurements a dozen times. The wall thimble installation felt secure. We used good quality sealant.
Running the double-wall pipe through the studs was tricky. We used a stud finder and a small pilot hole. It took a whole weekend.
We felt great when it fired up. But that sense of relief came after a lot of careful work.
DIY vs. Pro: When to Call an Expert
Consider a Pro if:
- You are unsure about local building codes.
- Your venting requires complex routing (e.g., multiple bends, long runs).
- You need to cut through structural beams or joists.
- You are uncomfortable working with electrical wiring.
- You have a limited budget for specialized tools.
DIY might be okay if:
- You have a straightforward vent run (e.g., short, direct to exterior wall).
- You are skilled with tools and basic home repairs.
- You have thoroughly read and understand the stove and vent manuals.
- You have confirmed all local code requirements.
Understanding Codes and Permits
This cannot be stressed enough: Check local codes. Your town or county will have specific rules. These rules cover installation. They cover clearances.
They cover venting. They may require a permit. They might also require an inspection.
Failing to follow codes can be dangerous. It can also void your home insurance. It could cause problems if you ever sell your house.
Start by calling your local building department. Ask them about pellet stove installation requirements. Ask about permits.
Ask if inspections are needed. Many areas require a certified installer. This ensures the job meets safety standards.
For venting, they will have specific rules. These rules ensure exhaust goes where it should. They ensure it doesn’t create hazards for neighbors or your family.
Don’t guess about codes. Get the facts directly from the authority.
Here are some common code aspects:
- Clearances to combustibles: As mentioned, these are vital.
- Vent height and termination: How far the vent must be from the ground, windows, and roof.
- Type of vent pipe: Only approved types are allowed.
- Support and anchoring: Vent pipes need to be secured.
- Air supply: Some codes require a dedicated outside air intake.
- Electrical safety: Proper wiring and grounding.
Real-World Scenarios
Let’s imagine a few situations. This helps make it clearer.
Scenario 1: The Basement Corner
Sarah has a finished basement. She wants extra heat there. There’s no fireplace.
But there’s an exterior concrete wall. She plans to install a small pellet stove. She chose a direct-vent model.
This means it pulls air from outside. It also vents exhaust outside. She’ll use a special wall-penetration kit.
The kit includes a thimble for the concrete wall. The vent pipe will run a short distance horizontally. Then it will exit the house.
She checked the stove manual. It needs 10 inches clearance from combustible materials. The basement has concrete floors and walls.
So clearance is less of a concern. But she still needs to ensure the vent pipe doesn’t touch anything flammable. She also got a permit.
An inspector will check the final installation.
Scenario 2: The Open Concept Living Area
Mark lives in a modern home. It’s open concept. There’s no fi
Common Installation Pitfalls to Avoid
Pitfall 1: Inadequate Clearances
Myth: A little closer won’t hurt. Reality: This is a major fire risk. Always follow manufacturer and code requirements.
Pitfall 2: Improper Venting
Myth: Any pipe will do. Reality: Only approved vent pipe is safe. Incorrect venting can lead to carbon monoxide poisoning.
Pitfall 3: Ignoring Local Codes
Myth: Codes don’t apply to my situation. Reality: Codes exist for safety. Violating them can have serious consequences.
Pitfall 4: Overlooking Air Supply
Myth: The stove can use air from the room. Reality: Many stoves need direct outside air. This improves performance and safety.
Safety First: Carbon Monoxide and Fire Prevention
We’ve mentioned safety a lot. That’s because it’s paramount. Carbon monoxide (CO) is a silent killer.
It’s an odorless gas. It’s produced by burning fuel. Pellet stoves, like any combustion appliance, produce CO.
A proper vent system removes this gas. But if the vent leaks or is blocked, CO can enter your home.
Install CO detectors. This is non-negotiable. Have them on every level of your home. Especially outside sleeping areas.
Test them regularly. Replace batteries at least once a year. If a detector sounds, evacuate immediately.
Call the fire department. Do not re-enter until cleared by professionals.
Fire prevention is also crucial. This comes back to clearances. And proper installation.
Keep the area around the stove clean. Do not store flammable items nearby. Regularly inspect your vent pipes.
Look for any signs of damage or leaks. Keep the stove itself clean. Ash buildup can be a fire hazard.
Follow the manufacturer’s cleaning schedule.
Regular Maintenance:
- Daily: Check the burn pot for ash. Empty if needed.
- Weekly: Clean the glass. Check the stove for any issues.
- Monthly (during heating season): Clean the ash pan. Inspect the venting for blockages.
- Annually: Have the stove and vent system professionally inspected and cleaned. This is vital for safety and efficiency.
Quick Safety Checklist
Before Starting:
- Have I read and understood the stove and vent manuals?
- Do I know my local building codes and permit requirements?
- Are CO detectors installed and tested?
- Are all clearances to combustibles maintained?
During Installation:
- Is the vent pipe sealed correctly at all joints?
- Is the vent termination cap installed properly?
- Is the hearth pad adequate and non-combustible?
Ongoing:
- Is the area around the stove kept clear?
- Are the stove and vent system cleaned regularly?
- Are CO detectors functioning?
What This Means for Your Home
Installing a pellet stove without a fireplace adds a new heating source. It can significantly reduce your reliance on expensive central heating. It can make rooms that were previously chilly much more comfortable.
The aesthetic appeal is also a big plus. Many people enjoy the glow and warmth of a stove.
However, it’s a significant project. It requires careful planning. It demands attention to safety and codes.
It’s not a simple plug-and-play appliance. The venting system is the heart of the operation. Getting it wrong is dangerous and costly to fix.
Think about the long-term. Will the stove be easy to access for cleaning and maintenance? Is the fuel supply convenient?
Do you have a place to store pellets?
Consider the pros:
- Efficient supplemental heat.
- Lower heating bills.
- Ambiance and comfort.
- Environmentally friendly fuel.
- Can increase home value.
Consider the cons:
- Upfront cost of the stove and installation.
- Requires electricity to run.
- Needs regular cleaning and maintenance.
- Pellet storage space is needed.
- Potential for noise (fan and auger).
Maintaining Your Pellet Stove
A pellet stove is an appliance. Like any appliance, it needs care. Regular maintenance keeps it running efficiently.
It also keeps it safe. It prevents costly breakdowns. Most manufacturers provide a maintenance schedule.
It’s crucial to follow it.
The most frequent task is cleaning the burn pot. Pellets burn down to ash. This ash needs to be removed.
If it builds up, the fire can’t get enough air. This leads to incomplete burning and smoke. The ash pan also needs emptying.
Some stoves have an automatic cleaning cycle. But you still need to empty the pan.
Beyond the daily and weekly tasks, there’s annual maintenance. This is when a professional comes in. They will do a thorough cleaning.
They will inspect the firebox. They will check the exhaust blower. They will inspect the combustion blower.
They will check the igniter. They will clean the vent pipe thoroughly. This is the best time to catch small problems before they become big ones.
Pellet Stove Maintenance Schedule
Daily (or as needed):
- Check burn pot and empty ash.
- Ensure pellets are feeding properly.
Weekly:
- Clean the stove glass.
- Wipe down the exterior.
- Check ash pan and empty.
Monthly (during heating season):
- Inspect vent pipe for any visible damage or debris.
- Vacuum ash from around the stove.
Annually (professional service recommended):
- Thorough cleaning of stove and venting.
- Inspection of all parts (blowers, igniter, seals).
- Check for any corrosion or wear.
Frequent Questions
Can I vent a pellet stove through an existing chimney without a fireplace?
Yes, but it’s not a simple connection. You’ll likely need a special liner kit designed for pellet stoves. This liner is insulated and runs inside your existing chimney.
It ensures safe venting. You still need to check local codes and manufacturer specs. The chimney cap also needs to be suitable for pellet stove venting.
What is the difference between a direct vent and a power vent pellet stove?
A direct vent pellet stove pulls outside air for combustion and vents exhaust outside. It uses a coaxial vent pipe (one pipe inside another) or two separate pipes. A power vent uses a fan to push exhaust gases out through a vent pipe.
This fan is usually located in the stove or at the vent termination. Both require proper installation. Always follow the manufacturer’s guide.
How much space do I need for pellet storage?
Pellets are sold in 40-pound bags. A general rule of thumb is one bag per day for a medium-sized stove on a cold day. For a full heating season, this can add up quickly.
You’ll need a dry, accessible space. A corner of a garage or basement is often used. Estimate about 4 cubic feet per ton of pellets.
So, calculate your expected usage.
Is it safe to install a pellet stove insert in a mobile home?
Mobile homes have very strict safety regulations. They often require specific types of venting systems. These are usually direct vent systems that go through the wall.
They also need a specific heat shield. Always consult the manufacturer’s manual. And check with your local mobile home authority.
Safety is paramount in these structures.
What happens if my pellet stove loses power?
Most pellet stoves have safety features. If power is lost, the stove will typically shut down. It will go through a cool-down cycle if possible.
You should never try to force it to restart while it’s hot. Wait until it has cooled completely. Then you can reset it.
Some advanced models may have battery backup systems.
Can I run my pellet stove insert all winter without interruption?
While pellet stoves are designed for continuous use, it’s wise to plan for shutdowns. Regular cleaning and maintenance are essential. You might need to shut it down for these tasks.
Also, if there’s a power outage, it will stop. It’s good to have a backup heat source. Or be prepared for the stove to go out.
Conclusion
Adding a pellet stove insert without a fireplace is totally doable. It offers great warmth and efficiency. The key is careful planning.
It’s about understanding the venting needs. It’s about respecting clearances. And it’s about following all safety codes.
Whether you DIY or hire a pro, do your homework. A well-installed pellet stove can bring comfort for years.