How to Remove a Heater Hose Connector Without a Tool Fast
Removing a heater hose connector without a tool is easier than most drivers think, even when the fitting feels fused to the hose. This guide walks you through household methods, safe pull techniques, and the mistakes that crack plastic connectors. By the end, you’ll free that stubborn fitting in minutes without special equipment.
Simply put, you can remove a heater hose connector with items like a flathead screwdriver, long-nose pliers, and a hair dryer. Let the engine cool, break the corrosion seal with a twist, soften the rubber with moderate heat, and pull straight out. Most connectors release within 10 minutes.
Key Takeaways
- Heater hose connectors usually seize because of heat and corrosion, not because they need a specialty tool.
- A household flathead screwdriver or long-nose pliers can replace a dedicated quick-disconnect tool in most cases.
- Twisting and rocking the connector breaks the seal faster than pulling straight with force.
- Controlled heat from a hair dryer softens the rubber and expands the plastic fitting for easier removal.
- Know when to replace a brittle connector instead of forcing it, or you risk cracking the intake fitting.
What You Need to Remove a Heater Hose Connector Without a Tool
Heater hose connectors are the plastic quick-connect fittings common on Honda, Toyota, and Ford vehicles. They lock onto a metal tube or nylon nipple, and over time the rubber hose bonds to the plastic neck. The good news?
You don’t need a branded quick-disconnect removal tool.
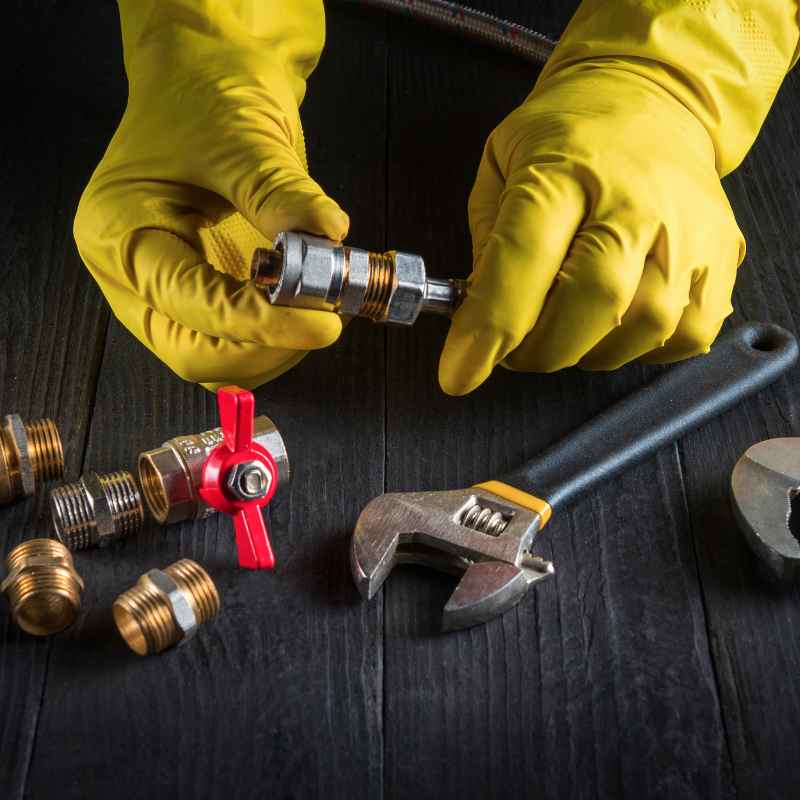
Most stubborn fittings release with items you already own. Gather these before you start and the whole job takes minutes:
- Flathead screwdriver, medium and long reach
- Long-nose pliers or slip-joint pliers
- Hair dryer or heat gun on the low setting
- Penetrating oil such as WD-40 or PB B’laster
- Two wide zip ties for spring clamp work
- Shop rags to catch coolant drips
- A spray bottle with plain water for cooling plastic
| Dedicated Tool | Household Substitute |
|---|---|
| Quick-disconnect tool | Flathead screwdriver plus a twisting motion |
| Hose clamp pliers | Long-nose pliers or a zip tie loop |
| Pick tool set | Thin zip tie or bent wire hanger |
| Heat gun | Hair dryer on high heat |
Before you start, look closely at the fitting. If it has a locking tab or a release button, press it inward and hold it while you twist the hose. Many quick-connect failures happen because people pull before releasing the tab.
Tip: Spray penetrating oil around the metal tube where the plastic connector seats. Let it soak for 15 minutes before you attempt any movement. That short wait turns a 30-minute struggle into a one-minute removal.
Step 1: Let the Engine Cool Down and Drain the Coolant
Coolant temperature can reach 220°F or higher after a drive, and the cooling system stays pressurized even when the engine is off. Opening a hot heater hose means risking a spray of boiling antifreeze. Always start with a cold engine.
Follow this order to prep the system safely:
- Park on level ground, set the parking brake, and chock the rear wheels.
- Wait at least two to three hours after the last drive so the engine cools completely.
- Place a drain pan under the radiator petcock, usually located at the bottom corner of the radiator.
- Open the petcock slowly and drain about one gallon of coolant. This removes system pressure and prevents a mess.
- Cap the radiator, then release the pressure cap slightly to confirm zero hiss before fully removing it.
You only need to drain enough coolant to drop the level below the heater hose connection. If the connector sits high on the engine block, a partial drain is often enough to stop the flow.
Warning: Never remove a heater hose connector on a warm engine. Coolant burns quickly and causes serious skin injuries. Antifreeze also contains ethylene glycol, which is highly toxic to pets and children. Mop up any spills and dispose of old coolant at an auto parts store.
Step 2: Loosen the Clamp With Household Items
Every heater hose connector sits behind a clamp that holds the rubber hose onto the fitting. You will find one of two designs: a spring-type clamp with two small ears, or a screw-type worm gear clamp. Each releases differently, but neither needs a specialty tool.
| Clamp Type | How to Release It | Household Tool |
|---|---|---|
| Spring clamp (two ears) | Squeeze both ears together to expand the ring | Long-nose pliers or slip-joint pliers |
| Screw clamp (worm gear) | Turn the screw counterclockwise to open | Flathead screwdriver |
| Wire or band clamp | Pry up the tang with a flat blade | Flathead screwdriver or pick |
If the spring clamp sits in a tight spot where pliers will not reach, use the zip tie trick. Loop a wide zip tie around both ears of the clamp, then pull the tail to squeeze them together. This gives you a firm grip without needing angled pliers.
Slide the loosened clamp up the hose, away from the connector. This prevents the clamp from re-gripping the rubber while you work on breaking the seal.
Tip: Spray the clamp ears with penetrating oil before squeezing. Rusted spring clamps sometimes snap or slip off the pliers, and a clean grip prevents skinned knuckles in tight engine bays.
Step 3: Break the Seal With Twisting and Rocking
Here is the reason most heater hose connectors resist removal: the rubber hose shrinks around the plastic neck after years of heat cycling, and mineral corrosion builds up between the hose inner wall and the fitting. Pulling straight out fights that entire bond at once.
Twisting breaks the bond with less force. Use this sequence:
- Grip the hose behind the connector with one hand, or use long-nose pliers on the metal sleeve.
- Rotate the hose a quarter turn clockwise, then a quarter turn counterclockwise. Do not force it past 90 degrees.
- Repeat this rocking motion while pushing the hose inward by about 1/8 inch. The push separates the rubber edge from the tube.
- Apply penetrating oil to the seam between the hose and the connector after the first few twists.
- Continue the rocking motion for 30 seconds, then test a gentle outward pull.
Rocking works better than pulling because it shears the adhesive bond in small steps instead of trying to overcome it all at once. As soon as the hose rotates freely around the connector, the removal is nearly complete.
Important: Never pull the hose at an angle. Angled force bends the thin metal tube that connects to the heater core, and a bent tube means an expensive heater core replacement. Always pull parallel to the tube’s direction.
- Warm the surrounding area with a hair dryer before twisting if the hose feels stiff.
- Use rubber-coated gloves for extra grip on the slippery hose surface.
- Tapping the plastic connector lightly with a screwdriver handle helps break corrosion flakes loose.
Step 4: Apply Heat to Soften the Hose
Heat is your best friend on a stubborn heater hose connector. Moderate heat makes the rubber hose more pliable and causes it to expand slightly, creating a millimeter of clearance around the plastic fitting. That tiny gap is often all you need to break the bond.
Use a hair dryer or a heat gun set to low. Hold the nozzle 2 to 3 inches from the hose and move it in a sweeping motion for 60 to 90 seconds. Work your way around the entire circumference of the connection, focusing on the rubber where it meets the plastic neck.
- Heat in short cycles of 30 seconds, then test the twist resistance.
- Stop heating the moment the hose feels soft and pliable to the touch.
- If the fitting gets too hot to hold, let it cool for two minutes before continuing.
- Keep a spray bottle of water nearby to cool the plastic connector if needed.
- Reapply penetrating oil while the rubber is warm, because heat thins the oil and helps it wick deeper into the seam.
Warning: Never use an open flame such as a lighter or propane torch near a heater hose. Coolant residue is flammable, and the hose inner lining can ignite without visible flame. Plastic connectors melt at around 250°F to 300°F, so high heat can warp the fitting permanently.
Heating also works on the plastic connector itself, but only briefly. Plastic expands about five times more than metal per degree of temperature change, so a short burst of heat on the connector can open the interference fit with the metal tube. Keep the heat low, sweep constantly, and test often.
According to the National Institute for Automotive Service Excellence (ASE), most heater hose removal failures involve a cracked plastic quick-connect, and nearly all of those cracks come from excessive force or heat.
Step 5: How to Pull the Connector Free Without Breaking It
Once the hose twists freely and the clamp is out of the way, the connector should slide off with a steady, straight pull. The right technique matters as much as the right tool. Pull in this order for the cleanest release:
- Rotate the connector so the locking tab faces you, then press the tab inward fully.
- Push the connector inward 1/8 inch to disengage the internal O-ring from the tube.
- Pull straight backward with steady, slow pressure while wiggling the hose up and down.
- If it resists, reposition your hands and twist 15 degrees before pulling again.
- Once the connector moves, slide it off the tube completely and inspect the O-ring.
For barbed fittings, pull straight back while rocking gently. Barbed connectors require slightly more force because the hose must stretch over the raised ridges. If the hose tears around the barb, cut the hose lengthwise with a utility knife and peel it off in sections.
| Connector Type | Best Release Method |
|---|---|
| Plastic quick-connect with tab | Press tab inward, push in slightly, then pull straight |
| Barbed plastic or metal fitting | Rock while pulling, or cut the hose lengthwise |
| Quick-connect with two buttons | Press both buttons simultaneously, then slide off |
Empty the old coolant into a sealed container and inspect the removed connector. Check the O-ring for flat spots or cracks, and look at the rubber hose for internal crumbling. Gates Corporation recommends replacing heater hoses every three years or 60,000 miles, so if the hose feels soft or shows bulges, install a new one while the system is open.
Common Mistakes to Avoid When Removing Heater Hose Connectors Without a Tool
Every year, DIY mechanics crack plastic quick-connects, bend heater core tubes, and spill coolant across their driveways. These mistakes are avoidable. The most damaging error is treating the connector like a nail that needs a hammer.
Patience, heat, and twisting solve almost every removal.
- Pulling straight out before breaking the seal: This strains the metal tube and often snaps the plastic locking tab. Always twist first.
- Using an open flame: Fire melts the connector, ignites coolant residue, and can damage nearby wiring. A hair dryer is hot enough.
- Skipping the penetrating oil soak: Oil needs time to work. A 15-minute soak before you start eliminates most sticking.
- Twisting barbed fittings aggressively: On barbed connectors, excessive rotation shreds the hose inner liner. Rock gently instead.
- Reusing a cracked connector: A hairline crack on a plastic fitting will fail under coolant pressure and leave you stranded. Replace any damaged part.
- Forgetting the locking tab: Forcing a quick-connect with the tab still engaged breaks the internal retainer. Study the fitting shape before you pull.
- Draining old coolant into the gutter: Antifreeze is hazardous waste. Collect it all and take it to a local parts store for recycling.
Overheating damage is the real cost of a botched job. According to the American Automobile Association (AAA), cooling system failures are among the top causes of roadside breakdowns, and CarMD data suggests cooling repairs consistently rank in the five most common vehicle repairs in the United States. A cracked connector that fails on the highway turns a simple 10-minute fix into a tow bill.
Tip: Take a photo of the connector from every angle before you remove it. Matching the exact replacement part is easier when you can compare shapes, tab positions, and O-ring grooves at the parts counter.
If the connector will not budge after 15 minutes of heat, oil, and twisting, stop and reassess. Inspect the area for a hidden second clamp or a retaining clip that you missed. At this point, a specialty quick-disconnect tool from a brand like Dorman Products or Lisle costs less than $15 and turns the job into a 30-second release.
When to Replace vs Reuse Your Heater Hose Connector
Not every connector needs replacement, but inspecting it after removal prevents a second job next week. Hold the connector up to the light and check the plastic for stress marks. A whitish haze or a fine crack means the plastic has fatigued and the fitting can burst under the 15 to 20 psi of a normal cooling system.
Signs that point to replacement:
- Cracks, chips, or white stress lines on the plastic body
- Flat, torn, or deformed O-rings
- Broken locking tabs that no longer click into place
- Soft, bulging, or oil-soaked hose ends
- Corrosion pitting on the metal tube or the connector sleeve
| Condition | Reuse or Replace | Reason |
|---|---|---|
| Clean shape, no cracks, O-ring intact | Reuse | Original parts hold up well if undamaged |
| Hairline crack or white stress marks | Replace | Cracks grow under heat and pressure |
| O-ring flattened or torn | Replace | A bad O-ring causes coolant drips |
| Hose ends soft or bulging | Replace | Soft rubber blows out under pressure |
Replacement parts are inexpensive. A plastic quick-connect fitting from Dorman or Dayco typically costs between $8 and $25, and a universal heater hose connector kit includes new O-rings and retaining clips. Compared to the average dealer labor rate, spending a few dollars on a fresh connector is the cheapest insurance you can buy.
If you decide to reuse the connector, clean the metal tube with fine sandpaper, apply a thin coat of silicone lubricant to the new O-ring, and slide the fitting home until you hear the tab click. Confirm the connection by pulling gently on the hose. A loose fit means the retainer did not engage.
Frequently Asked Questions
Can I remove a heater hose connector without any tools at all?
Yes, if the fitting is in good condition and the hose twists freely. Press any locking tab inward, then pull straight out while wiggling the hose. In practice, most connectors need a flathead screwdriver or pliers because of corrosion and heat bonding.
What is the easiest way to loosen a stuck heater hose?
Spray penetrating oil on the seam, let it soak for 15 minutes, then twist the hose a quarter turn in each direction while pushing inward. Apply low heat from a hair dryer for 60 seconds if the hose still resists. This combination breaks the bond without damaging the plastic.
Can I use a heat gun to remove a heater hose connector?
Yes, but set it to low heat and keep it moving. Hold the nozzle 2 to 3 inches away and heat the rubber hose, not the plastic connector. Never use an open flame, because the plastic melts quickly and coolant residue can catch fire.
What household items work as a heater hose removal tool?
A flathead screwdriver, long-nose pliers, zip ties, and a hair dryer handle almost every removal. For spring clamps, a large zip tie pulled around both clamp ears mimics a dedicated clamp tool. Penetrating oil and patience do the actual work of freeing the fitting.
How much does it cost to replace a heater hose connector?
A replacement plastic quick-connect fitting costs $8 to $25 at auto parts stores, and a universal kit includes new O-rings and clips. If a shop does the whole job, expect $80 to $200 depending on labor rates and how hard the old fitting is to access.
Final Thoughts
Removing a heater hose connector without a tool comes down to three moves: cool the system, break the seal with a twist, and let heat do the heavy lifting. Household items replace specialty tools in almost every situation. Work slowly, inspect the O-ring before reuse, and replace any cracked plastic to protect your engine from a future overheating failure.
Sponsored / affiliate links. As an Amazon Associate I earn from qualifying purchases. I may earn additional commission from eligible campaigns.