How to Scan Your Home for RF Radiation With Cornet 88
Simply put, you can scan your home for RF radiation with a Cornet 88 by setting the meter to RF mode, walking slowly through every room, and noting peak readings near appliances, Wi-Fi routers, and smart devices. The Cornet 88 gives you real-time radio frequency measurements up to 8 GHz, making it a reliable tool for a baseline home assessment.
Key Takeaways
- Scan your home for RF radiation using the Cornet 88 in RF mode, which covers frequencies from 50 MHz to 8 GHz.
- Always record a baseline reading outdoors before scanning inside to compare ambient levels with your indoor environment.
- Move slowly and hold the meter at chest height to catch localized hot spots near routers, smart meters, and cell phones.
- The Cornet 88 measures in mW/m² and µW/m², and knowing how to convert these units helps you interpret safety guidelines.
- Re-scan after making changes like relocating a router or turning off devices to see whether your RF exposure actually dropped.

Why Scanning Your Home for RF Radiation Matters
RF radiation is all around us, and most homes now have multiple sources broadcasting continuously. Wi-Fi routers, cordless phones, baby monitors, smart meters, Bluetooth speakers, and even microwave ovens emit radio frequency energy. While regulatory bodies set exposure limits, many people want to understand their personal environment better and reduce unnecessary exposure.
The World Health Organization’s International Agency for Research on Cancer (IARC) classifies RF electromagnetic fields as Group 2B, meaning “possibly carcinogenic to humans.” That classification isn’t a confirmed risk, but it does encourage a precautionary approach. According to the FCC, most consumer devices must comply with specific SAR (Specific Absorption Rate) limits, yet that compliance doesn’t tell you the combined levels from all sources in your home.
- Peace of mind: Knowing your baseline RF levels helps you make informed decisions about device placement.
- Identify high-exposure areas: Scanning reveals spots near routers and smart devices where exposure is highest.
- Validate mitigation efforts: After moving a router or adding shielding, you can measure whether the change made a difference.
- Help for EMF-sensitive individuals: People who report symptoms like headaches or fatigue often use meters to correlate symptoms with exposure.
- Home buying and renting: A quick scan helps you evaluate a property before you commit, especially if cell towers or power lines are nearby.
Scanning your home for RF radiation doesn’t require professional training. The Cornet 88 is designed for consumer use, with a clear digital display and multiple measurement modes. It’s a popular choice among EMF consultants, building biologists, and concerned homeowners.
| RF Source | Typical Frequency | Where Found |
|---|---|---|
| Wi-Fi Router | 2.4 GHz / 5 GHz | Living room, office, hallway |
| Cordless Phone Base | 1.9 GHz MHz (DECT) | Kitchen or hallway |
| Baby Monitor | 900 MHz – 2.4 GHz | Nursery |
| Smart Meter | 900 MHz – 2.4 GHz | Exterior wall or garage |
| Microwave Oven | 2.45 GHz | Kitchen (while operating) |
These everyday sources can create surprising RF hotspots. A study from the Swiss Federal Institute of Technology found that indoor RF exposure is often dominated by the user’s own devices rather than outdoor base stations. That means your router and cordless phone likely matter more than the cell tower down the street.
What You Need to Scan for RF Radiation With Cornet 88
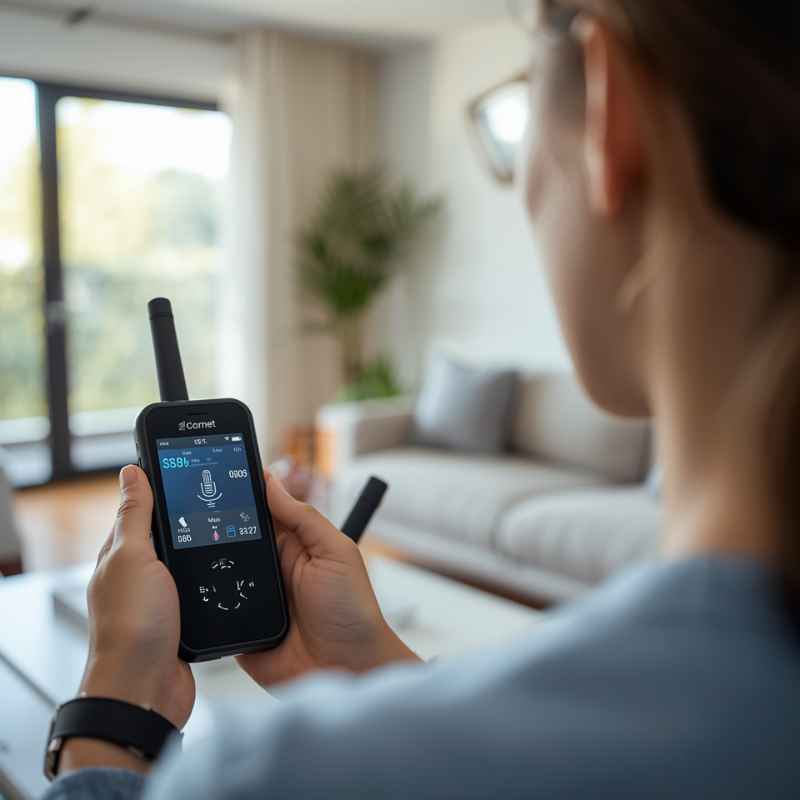
Before you start, make sure you have the right equipment. The Cornet 88 is a triple-mode meter that measures electric fields (EF), magnetic fields (MF), and radio frequency (RF) power density. You’ll use the RF mode for this scan.
- Cornet 88 (or Cornet ED88T) – the meter itself with a built-in antenna and backlit LCD screen.
- Fresh batteries – the unit uses a 9V battery; check the charge before you begin.
- Notebook or phone app – to record readings by room and location.
- Measuring tape – helpful for taking readings at consistent distances (e.g., 1 meter from sources).
- Your home’s floor plan – even a rough sketch helps you mark hot spots.
| Cornet 88 Spec | Details |
|---|---|
| RF frequency range | 50 MHz to 8 GHz |
| Measurement units | mW/m², µW/m², V/m (switching units) |
| Display | Digital LCD with bar graph |
| Modes | Electric field, magnetic field, RF power |
| Alarm | Adjustable audio and visual alarm |
| Data logging | Micro-USB output for PC connection (ED88T model) |
If you own the older Cornet 88 without data logging, don’t worry. Manual recording works just fine. You’ll also want to read the user manual first to understand which button switches between measurement units.
Tip: Charge or replace the 9V battery before your scan. Low battery can cause erratic readings that are hard to interpret.
Step 1: Set Up Your Cornet 88 for RF Measurement
Your first step is to configure the meter for RF-only measurement. Press the “MODE” button until the display shows “RF” and the unit reads power density, usually in mW/m² or µW/m². Keep the unit in this mode for the whole scan.
- Turn on the Cornet 88 by pressing the power button.
- Press MODE repeatedly until you see “RF” on the left side of the screen.
- Press the “UNIT” button to select mW/m² for easier comparison with common guidelines (1 mW/m² = 1000 µW/m²).
- Set the alarm threshold if desired. The Cornet 88 lets you set a custom level; start with 1 mW/m² (the BioInitiative residential guideline).
- Test the meter by holding it near a Wi-Fi router. You should see the reading jump.
Be careful not to confuse the electric field (EF) and magnetic field (MF) modes. RF mode is the one that measures high-frequency wireless signals, which is what you want for this scan.
Important: The Cornet 88’s RF mode is average power detection, not peak hold. That means it responds to changing signals, so it’s ideal for finding relative differences rather than exact peak levels.
Step 2: Measure Background RF Levels Outside Your Home
Before walking through your house, step outside to get a baseline reading. This outdoor measurement shows the ambient RF level from cell towers, broadcast antennas, and neighbors’ devices. Your indoor readings will be more meaningful when compared to this baseline.
- Stand at least 10 feet away from the exterior wall to avoid interference from your own home’s signals.
- Hold the meter at chest height with the antenna pointing upward.
- Wait 10-15 seconds for the digital average to stabilize.
- Record the reading and the location (front yard, back yard, side yard).
- Repeat at two or three locations around the house if your property is large.
Warning: Avoid standing directly under power lines or near a smart meter when taking your baseline. Those sources are extremely localized and will give you a falsely high reading.
Typical outdoor RF levels in a suburban area range from 0.01 mW/m² to 0.5 mW/m², depending on your proximity to cell towers. If your baseline is above 1 mW/m², that’s a red flag that you have a strong external source nearby.
Step 3: Scan Each Room for RF Radiation
Now you’re ready to work inside. Start with the room farthest from your router and move closer. This approach helps you spot the contribution of each source as you go.
- Enter the room and wait 30 seconds for the meter to average out.
- Walk slowly around the perimeter of the room, holding the meter at waist to chest height.
- Pause near each electronic device, keeping the meter about 1 foot away.
- Move the meter vertically (low, middle, high) around each source to catch directional signals.
- Note the highest reading you observe in that room, along with the exact location.
- Turn off the room’s Wi-Fi-connected devices one by one to see which one is the main contributor.
- Living room: Check the router, smart TV, streaming devices, and game consoles.
- Bedroom: Focus on the headboard wall, alarm clock, phone chargers, and any smart home speakers.
- Kitchen: Test the microwave while it operates (from 3+ feet away), plus smart appliances.
- Home office: Scan the laptop, external monitor, Bluetooth keyboard, and Wi-Fi printer.
- Nursery: Pay special attention to baby monitors, night lights, and Wi-Fi cameras.
Tip: For a more accurate reading, hold the meter away from your body. Your body can absorb or reflect RF signals, affecting the measurement slightly.
Remember that the meter measures power density in a specific spot, so a reading at 1 foot from a router may be high, but at 10 feet it can drop dramatically. Note the distance for every reading so you can compare apple to apples later.
Step 4: Identify Hot Spots and Pinpoint Sources
After scanning each room, you’ll have a list of elevated readings. Now it’s time to connect those numbers to specific sources. A hot spot is usually within 2-3 feet of an active transmitter, but it could also come from a neighbor’s device if you share a wall.
| Reading Range | Interpretation | Recommended Action |
|---|---|---|
| Below 0.1 mW/m² | Low exposure | No immediate action |
| 0.1 – 1 mW/m² | Moderate exposure | Consider moving the source farther from sleeping areas |
| 1 – 10 mW/m² | High exposure | Turn off sources when not in use; relocate router |
| Above 10 mW/m² | Very high exposure | Keep distance; consider shielding or professional consult |
Keep in mind that these are relative rules, not official safety limits. The FCC’s general population limit for power density is around 10 mW/m² at 2.4 GHz, averaged over 30 minutes. The BioInitiative Report recommends a much stricter residential level of 0.001 mW/m² (1 µW/m²), which is far below what most homes measure near a router.
When you find a hot spot, trace it to the source:
- If the reading is highest near the router, you’ve found the main indoor contributor.
- If it’s near a wall shared with a neighbor, the source might be their Wi-Fi or a smart meter on the other side.
- If it’s near a window, the source could be an outdoor cell tower or a neighbor’s outdoor access point.
- If it’s throughout the whole room, check the ceiling for hidden wiring or a smart meter on an adjacent wall.
Step 5: Record and Interpret Your Cornet 88 Readings
Accurate record-keeping turns your scan into a useful report. Use a table to list each room, the maximum reading, the location of that reading, and the suspected source. This data helps you prioritize changes and re-test later.
- Create a simple table in your notebook or phone with columns: Room, Max Reading (mW/m²), Location, Source.
- Record the outdoor baseline at the top of the page for reference.
- For each room, write the highest reading plus a second reading 3 feet away from the hot spot.
- Circle any reading above 1 mW/m².
- After you make changes (like moving the router), repeat the scan and compare the numbers.
Important: The Cornet 88 displays the average power density over a short time window. Spot readings can fluctuate due to network traffic, so take 2-3 measurements per location and use the highest consistent value.
Now let’s put the numbers in context. If you measured 2 mW/m² next to your router, that’s not an emergency, but it’s above the precautionary level of 1 mW/m². You might decide to move the router out of the bedroom or set it on a timer.
If you measured 0.02 mW/m² in the center of a room, that’s close to typical outdoor levels and likely fine by most standards.
Common Mistakes to Avoid When Scanning for RF Radiation
Many first-time users make errors that produce misleading results. Here are the most common pitfalls and how to avoid them.
- Holding the meter too close to your body: Your body is a conductor and can block RF signals. Keep the meter at arm’s length.
- Scanning too quickly: The meter needs a few seconds to average the signal. Slow down and use a systematic grid pattern.
- Ignoring the outdoor baseline: Without a baseline, you can’t tell whether indoor levels are elevated by your own devices or by outside sources.
- Touching the antenna: This attenuates the signal and lowers the reading. Keep your fingers off the antenna.
- Measuring only the center of the room: RF sources are near walls and devices, so scan along every wall and around furniture.
- Forgetting to check both low and high positions: A router on a shelf may create a hot spot at that exact height, not at waist level.
- Not re-testing after changes: A scan is only a snapshot. Make changes and then verify that your exposure actually decreased.
Warning: Don’t use the Cornet 88 to test for microwave oven leakage while the oven is operating at close range. This meter isn’t designed as a microwave leakage detector, and the strong RF field could confuse the readings.
One more common mistake is using the electric field (EF) mode and thinking it measures RF. The EF mode responds to low-frequency electric fields from power cords and outlets. It’s a useful mode, but for this scan, stick to RF mode exclusively.
Frequently Asked Questions
What RF radiation levels are considered safe in a home?
There’s no universal consensus. The FCC allows up to 10 mW/m² at typical Wi-Fi frequencies, while the BioInitiative Report suggests a precautionary target of 1 µW/m² (0.001 mW/m²) for sleeping areas. Most practical guidance recommends keeping long-term exposure as low as reasonably achievable, especially in bedrooms.
Does the Cornet 88 measure 5G signals?
Yes, but with limits. The Cornet 88 covers 50 MHz to 8 GHz, which includes the lower 5G bands (600 MHz to 6 GHz). It cannot measure millimeter-wave 5G signals above 24 GHz.
For most home environments, the lower 5G bands are the ones you’ll encounter.
How do I convert the Cornet 88 reading from mW/m² to V/m?
The meter can display in V/m if you press the UNIT button. If you want to convert manually, use this formula: V/m = square root (mW/m² × 376.7). For example, 1 mW/m² equals approximately 19.4 V/m.
Not reliably. The meter detects active RF transmitters, but many devices only transmit intermittently. It might alert you to a hidden camera that uses Wi-Fi, but it won’t locate a phone that’s in airplane mode.
This isn’t a surveillance tool.
How often should I scan my home for RF radiation?
Scan once to get a baseline, then re-scan whenever you change your Wi-Fi setup, add smart devices, or notice new symptoms. Some people scan seasonally because nearby cell tower usage patterns and neighbor devices can change over time.
Final Thoughts
Scanning your home for RF radiation with a Cornet 88 gives you a concrete picture of your wireless environment. The process is straightforward: set the meter to RF mode, take an outdoor baseline, walk through each room, and record the numbers. Once you know where your hotspots are, you can make small changes like moving a router, turning off devices at night, or switching to wired internet.
The goal isn’t to live in fear, but to make informed choices. Regular scans let you verify that your mitigation efforts are actually working. Whether you’re concerned about long-term exposure or just curious, the Cornet 88 is a handy tool that puts control back in your hands.
Sponsored / affiliate links. As an Amazon Associate I earn from qualifying purchases. I may earn additional commission from eligible campaigns.