How To Clean Wood Furniture Before Painting It Right
Getting ready to paint a piece of wood furniture can feel exciting. You have a vision for a fresh new look. But before you even think about picking up a brush, there’s a crucial step.
It’s cleaning. Skipping this step is like building a house on shaky ground. Your beautiful paint job won’t last.
Let’s dive into making sure your painted furniture looks amazing and stays that way.
Cleaning wood furniture before painting is essential for a smooth, durable finish. It removes grease, dirt, and old wax that prevent new paint from adhering properly, leading to peeling or uneven application. A clean surface ensures the paint bonds well.
What is Surface Preparation for Painting?
Surface preparation is basically getting your furniture ready. It’s making the surface smooth and clean. This helps the new paint stick well.
It’s like prepping your skin before putting on makeup. You wash it and maybe put on lotion.
For furniture, this means more than just a quick wipe. It involves a few steps. These steps make sure the paint will look great for years.
They also help prevent problems down the road. Think of it as laying a strong foundation.
Why Cleaning Wood Furniture is So Important
Wood furniture can get pretty dirty. Over time, it collects dust. It can also pick up grease and grime.
This happens from hands touching it. It also happens from spills. Old wax finishes can build up too.
Sometimes, there are even stubborn spots.
If you paint over this dirt, the paint can’t stick. It’s like trying to glue something to a greasy surface. The glue won’t hold.
The paint will peel or chip. It might also look bumpy. This is why cleaning is key.
It gives the paint a clean surface to grip.
Most people think painting is all about the paint and the brush. They forget about what happens before. That’s the real secret to a pro-looking finish.
A clean surface is the first big secret. It’s also the easiest to get right.
My Own Painting Mishaps
I remember one time, maybe five years ago. I found a lovely old dresser at a yard sale. It was solid wood, but the finish was a bit dull.
I was so eager to give it a pop of color. I saw it painted bright teal in my mind. I rushed through the cleaning.
I gave it a quick dust, maybe a damp cloth. Then I slapped on a coat of primer and paint.
It looked okay at first glance. But within a few weeks, I started noticing little bumps. Then, near the handles, the paint began to lift.
It was embarrassing! I had worked so hard. But I learned a tough lesson that day.
Skipping proper cleaning was a huge mistake. It made my work look sloppy.
That experience taught me to respect the prep work. Now, I never skip it. I take my time.
I know it’s worth it. The final result is always much, much better. It’s a lesson I share with everyone I can.
Different Types of Grime to Tackle
Grease and Oil: From fingerprints and cooking fumes. They make surfaces slick.
Dust and Dirt: Settles from the air. Can be gritty.
Wax Buildup: From old polishes. Creates a barrier.
Food Spills: Can leave sticky residue.
Soap Scum: In bathrooms or kitchens. Often chalky.
Mildew: In damp areas. Looks like black or green spots.
Understanding Wood Furniture Finishes
Wood furniture comes with many types of finishes. Each one can affect how you clean. Some are smooth and sealed.
Others might be more open and porous.
Common finishes include lacquer, varnish, and polyurethane. These are usually pretty tough. They create a protective layer.
You often don’t need to remove these fully. But you do need to clean them well.
Sometimes, furniture has a natural oil finish. Or it might be waxed. These are softer.
They can soak into the wood more. You’ll need to be careful not to damage them too much. But you still need to remove the surface dirt.
The Best Cleaning Agents to Use
You don’t need fancy cleaners. Simple things work best. For most dirt, warm water and a little dish soap are great.
Dawn dish soap is a good choice. It cuts through grease really well. Just a drop or two in a bucket of warm water.
For tougher spots, you might need something stronger. A degreaser can help with oily residue. TSP (trisodium phosphate) is a very strong cleaner.
But it’s harsh. Use it with caution. Always wear gloves and eye protection.
Make sure the area is well-ventilated.
Mineral spirits can also clean off old wax. But test it first. It can sometimes dull finishes.
Always work in a well-ventilated spot. The goal is to clean, not to strip the wood unless you plan to.
Quick-Scan Cleaning Guide
| Problem | Cleaner | Method |
|---|---|---|
| General Dirt/Grime | Dish Soap & Warm Water | Wipe, rinse, dry |
| Grease/Oil | Degreaser or Dish Soap | Scrub gently, rinse, dry |
| Wax Buildup | Mineral Spirits (Test first) | Wipe with a cloth, let dry |
| Stubborn Stains | TSP (Use with care) | Follow product instructions, rinse well |
How to Deep Clean Wood Furniture: Step-by-Step
Let’s get into the actual cleaning process. It’s not hard, but it takes patience. This is where you make sure your paint will stick.
First, clear out any drawers or doors. You want access to all the surfaces. Then, give the whole piece a good dusting.
Use a soft cloth or a vacuum with a brush attachment. This gets rid of loose particles.
Next, mix your cleaning solution. A bucket with warm water and a few drops of dish soap is perfect. Get a soft cloth.
Dampen it in the soapy water. Wring it out well. You don’t want it soaking wet.
Wipe down the entire piece of furniture. Work in sections. Pay attention to areas that get touched a lot.
These are usually around handles or edges.
After washing, you need to rinse. Get a clean cloth. Dampen it with plain water.
Wipe away any soap residue. This is important. Soap left behind can also make paint not stick.
Finally, let it dry completely. This can take several hours. Or even overnight.
You can speed it up with a fan. But make sure it’s bone dry before you move on.
For tougher spots, use your chosen stronger cleaner. Follow the product directions. Always test in an hidden area first.
This is especially true for mineral spirits or TSP.
I often find that cleaning is also a good time to spot repairs. Look for small dents or scratches. You can fix these before painting.
It makes the final look much smoother.
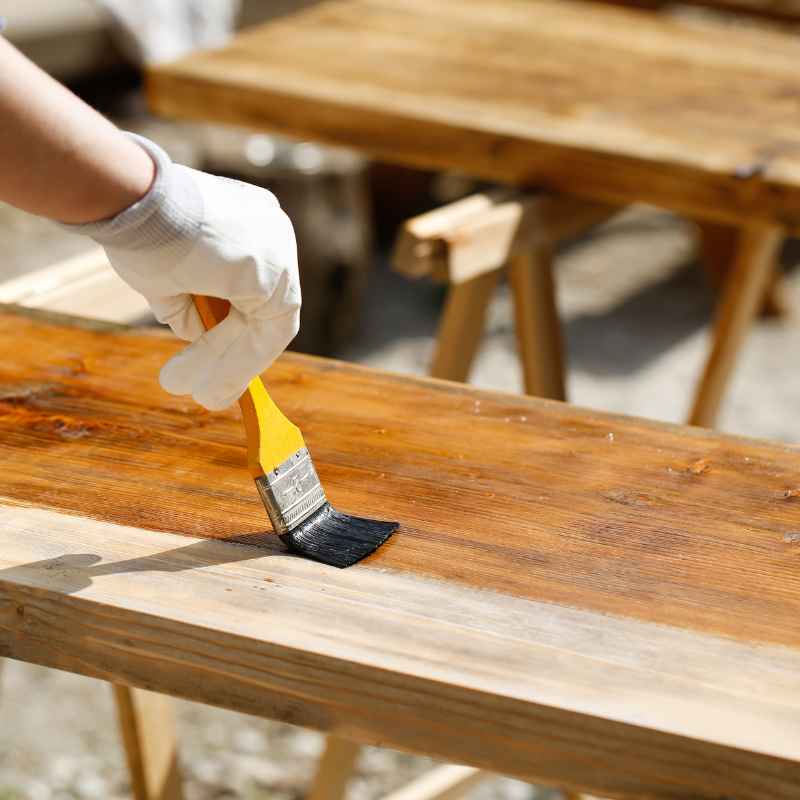
Dealing with Old Finishes: To Remove or Not to Remove?
This is a big question people have. Do you need to strip off the old finish? The answer depends.
If the old finish is in good shape, you probably don’t need to strip it. A good cleaning and light sanding should be enough. The goal is to create a surface the new paint can grab onto.
You don’t need to expose raw wood unless you want to.
However, if the finish is peeling, cracking, or sticky, you should remove it. A stripper can help with this. Or you might need to sand it down more aggressively.
This is more work, but it’s necessary for a good paint job.
Sometimes, a finish is so thick or uneven, it’s easier to just remove it. This gives you a fresh start. It’s a bit messy.
But it guarantees a smooth base. If you’re unsure, it’s often safer to remove a failing finish.
When to Consider Stripping Old Finishes
Peeling or Flaking Finish: Indicates poor adhesion.
Sticky Surface: The finish may have degraded.
Deep Scratches or Dents: Easier to fix on bare wood.
Uneven or Bulky Layers: Prevents a smooth final coat.
Stains That Won’t Lift: Might need to be removed with the finish.
The Crucial Role of Sanding After Cleaning
Once your furniture is clean and dry, sanding is the next big step. This step is vital. It’s like giving your wood a slight ‘roughening up.’ This helps the primer and paint adhere much better.
You don’t need to sand down to raw wood. The goal is to create a ‘tooth’ for the paint. Think of it like very fine sandpaper on a smooth wall.
It gives the paint something to grab onto.
Use fine-grit sandpaper. Start with something like 120-grit. You can move to 150-grit or even 220-grit.
The grit number tells you how rough it is. Higher numbers mean finer grit.
Sand in the direction of the wood grain. Always. This prevents scratches.
Be gentle. You’re not trying to remove material. You’re just lightly scuffing the surface.
After sanding, you must clean again. Use a tack cloth. This is a sticky cloth designed to pick up all the fine dust.
Dust left behind will ruin your paint finish. It will look like tiny bumps under the paint. Wipe the entire piece carefully with the tack cloth.
I’ve seen so many projects go wrong because of dust. It’s the enemy of a smooth paint job. Always use a tack cloth after sanding.
Dealing with Specific Stains and Spots
Sometimes, after cleaning, you’ll find stubborn stains. These might be from water rings, ink, or grease that soaked in.
For water rings, sometimes a light sanding is enough. If not, a bleach solution can help. Mix one part bleach with two parts water.
Apply it to the stain with a cloth. Let it sit for a bit. Then rinse well.
Be careful not to get it on surrounding good wood. Always wear gloves.
Ink stains can be tricky. You might need a special stain remover. Or sometimes rubbing alcohol can lift lighter ink marks.
Test it first, as alcohol can affect some finishes.
Grease that has really soaked in might need a degreaser. Or it might be too deep to remove fully without sanding it out. If it’s a deep stain, you might need to sand it down a bit.
Or, you can use a good quality primer. Some primers are designed to block stains.
Remember that the primer you choose is important. A good stain-blocking primer can save you a lot of trouble. It covers up old marks and provides a uniform base.
Stacking Micro-Sections: Spot Treatment Tips
Water Stains: Try light sanding or a diluted bleach solution (1 part bleach: 2 parts water). Rinse well.
Ink Marks: Rubbing alcohol can work for light stains. Test first.
Grease Stains: Use a degreaser. May require sanding if deep.
Paint or Crayon Marks: A putty knife can scrape these off gently.
Unknown Spots: Start with mild soap and water. Escalate carefully.
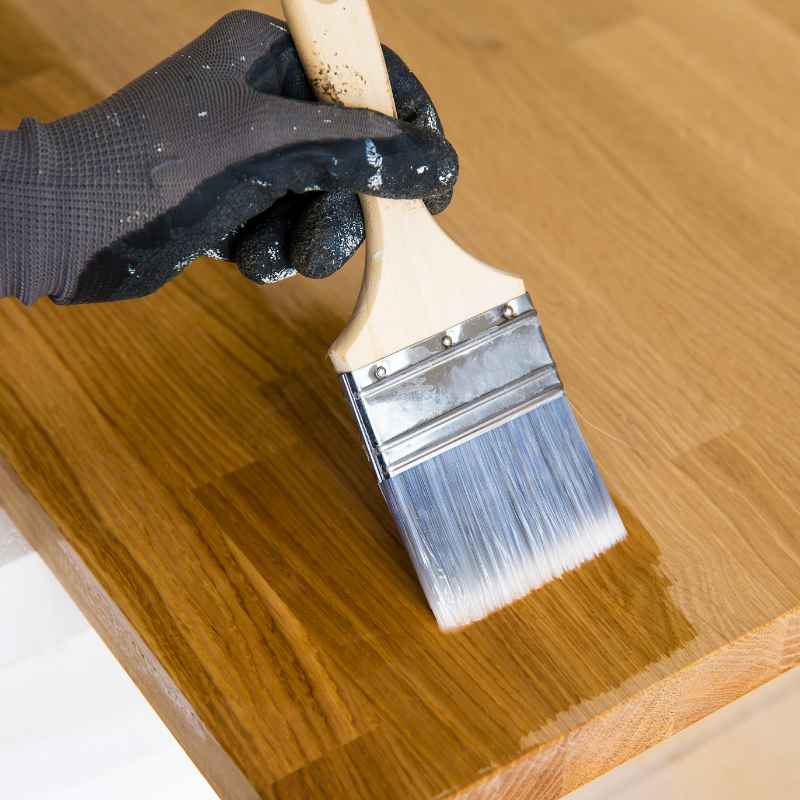
When to Use a Primer
After cleaning and sanding, primer is your next friend. Primer is like the secret sauce for a great paint job. It’s not paint, but it’s super important.
Primer helps the paint stick. It covers up any remaining minor imperfections. It also blocks stains from coming through.
And it gives you a uniform color base. This means you might need fewer coats of your top paint color.
Some people skip primer. But I strongly suggest you don’t. It’s especially important if you’re painting over a dark color with a light one.
Or if you have stains. Or if the wood has a very slick finish.
There are different types of primers. For wood, an oil-based primer is often best. It’s great at blocking stains and adhesion.
Water-based primers are also good and easier to clean up. Choose one that suits your project and paint type.
Apply primer evenly. Let it dry completely according to the can’s instructions. Sometimes, you’ll need to lightly sand the primer too.
This makes the surface even smoother for the paint.
Common Mistakes to Avoid When Cleaning for Paint
Let’s talk about the things people often get wrong. These are the pitfalls that lead to paint problems.
Mistake 1: Not Cleaning Enough. This is the biggest one. Just a quick wipe isn’t enough. You need to remove all the grease and grime.
Mistake 2: Using Too Much Water. For wood furniture, you don’t want it soaking wet. Too much water can warp the wood or damage the finish. Always use a damp, not wet, cloth.
Mistake 3: Not Rinsing Soap. Soap residue is a paint killer. Make sure you rinse all the soap off completely.
Mistake 4: Skipping Sanding. A smooth, clean surface is good. But a lightly sanded surface is even better for paint adhesion.
Mistake 5: Not Cleaning Dust After Sanding. This is so common. Tiny dust particles under the paint look terrible. Use a tack cloth.
Mistake 6: Using Harsh Cleaners Unnecessarily. Start with mild soap. Only use stronger cleaners if needed. Always test first.
Avoiding these mistakes will save you time and frustration. It ensures a much better outcome for your painted furniture.
Myth vs. Reality: Cleaning for Paint
Myth: A quick wipe is enough to clean.
Reality: Grease and dirt prevent paint adhesion. Deep cleaning is needed.
Myth: You must strip all old finishes.
Reality: If the finish is sound, cleaning and light sanding suffice.
Myth: Soap doesn’t matter if you paint over it.
Reality: Soap residue is a barrier to paint adhesion.
Myth: Sanding is only for removing paint.
Reality: Sanding creates a grip surface for primer and paint.
Real-World Scenarios for Cleaning Wood Furniture
Let’s imagine some real situations. This might help you see why cleaning is so vital.
Scenario 1: Kitchen Table Makeover. Your kitchen table has seen years of meals. There are probably grease splatters from cooking. Food crumbs might be stuck in the grain.
Your hands have touched it thousands of times, leaving oils. If you just paint over this, the paint will likely feel tacky. Or worse, it will peel where the grease is strongest.
Scenario 2: Old Wooden Toy Box. This might have been handled by children. Their hands might be sticky from snacks. It could have crayon marks or scuffs.
If you paint without cleaning, the crayon marks might bleed through the paint. The sticky spots will prevent paint from sticking well.
Scenario 3: Antique Dresser in a Living Room. This piece might have been polished for years. Old wax polishes can build up a thick layer. This layer is like a barrier.
If you try to paint over it, the paint might not adhere. It could chip off easily, especially on edges.
In all these cases, proper cleaning is the first step to a successful transformation. It addresses the specific challenges each piece faces.
What Cleaning Means for Your Painted Furniture’s Longevity
The way you clean directly impacts how long your paint job lasts. A well-cleaned surface means the primer and paint can bond properly.
This strong bond creates a durable finish. It’s less likely to chip, scratch, or peel. Your furniture will look good for much longer.
It will also stand up better to daily use. Imagine a table that gets wiped down regularly. If it wasn’t cleaned properly first, that wiping would remove paint.
A clean surface also helps your paint look its best. You’ll get a smoother finish. Colors will be truer.
There won’t be weird bumps or textures showing through.
So, cleaning isn’t just a step. It’s an investment. It’s an investment in the beauty and durability of your painted furniture.
Quick Tips for a Smooth Painting Prep
Here are some final quick tips to keep in mind.
- Work in a well-ventilated area. This is for your health and helps drying.
- Use good quality cleaning cloths. Microfiber cloths are great.
- Have separate buckets for washing and rinsing. This keeps your rinse water clean.
- Test cleaners and solvents in an inconspicuous spot. Always check first.
- Let everything dry completely. Patience here pays off.
- Wear old clothes. Cleaning can be messy.
- Clean your tools too. Brushes and rags should be cleaned right away.
Frequently Asked Questions About Cleaning Furniture Before Painting
Do I really need to clean my furniture before painting?
Yes, absolutely. Cleaning removes grease, dirt, and wax that prevent paint from sticking. Skipping this step leads to peeling and a poor finish.
What is the best cleaner for wood furniture before painting?
For most jobs, warm water with a little dish soap is effective. For tougher grease, a degreaser works. Always test any cleaner first.
How do I clean greasy furniture without damaging the wood?
Use a damp cloth with dish soap or a mild degreaser. Wring the cloth out well. Rinse with a clean damp cloth.
Dry thoroughly.
Should I remove the old paint or finish completely?
Not always. If the old finish is in good shape, cleaning and light sanding are enough. You only need to strip it if it’s peeling, sticky, or damaged.
How fine should my sandpaper be for cleaning prep?
After cleaning, use fine-grit sandpaper like 120 to 220 grit. This scuffs the surface for better paint adhesion, not to remove material.
What is a tack cloth and why is it important?
A tack cloth is a sticky cloth that picks up fine dust. It’s crucial after sanding to remove all dust particles, ensuring a smooth paint finish.
Can I paint over wax furniture without removing the wax?
No, you must remove wax. Wax creates a slick surface that paint cannot adhere to. Mineral spirits can help remove wax, but test first.
Wrapping Up: The Foundation of a Great Paint Job
Taking the time to clean your wood furniture properly is non-negotiable. It’s the bedrock of a beautiful, lasting paint finish. Think of it as an act of care for your furniture.
It ensures your hard work truly shines through for years to come.