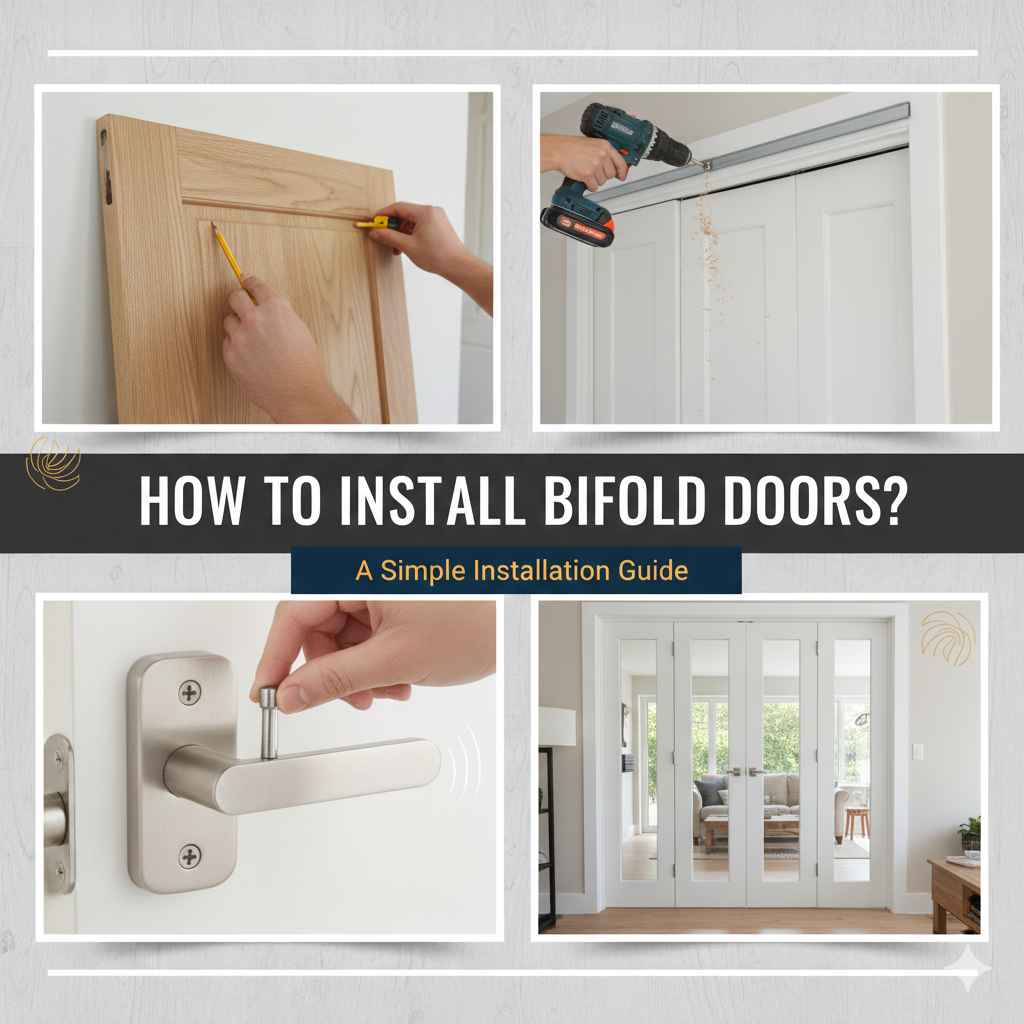
How to Install Bifold Doors: A Simple Installation Guide
Figuring out How to Install Bifold Doors: Step-by-Step Guide can seem tricky. Many people find the process a little challenging, mainly because of the precision needed. However, don’t worry! This guide is created to make things easy. We’ll break down each step in simple terms. Get ready to learn exactly what you need to know to install your doors like a pro! Let’s get started and make this project a success.
Gathering Your Tools and Preparing for the Project
Before you get started on your installation, it’s vital to get all the tools ready. This first step ensures a smooth process, preventing any unexpected delays or problems. Having all the correct items close at hand helps you to stay focused and avoid extra trips. Take your time during this preparation stage; it sets the tone for a successful outcome. We will go through each tool, clarifying its purpose and how it helps.
Essential Tools and Supplies
When you start, you’ll need a range of tools. These help ensure a job well done. From measuring to securing the doors, having the correct equipment is key. Missing a tool could really slow you down. Here’s a list of what you will need:
Measuring Tape: Accurate measurements are critical to success. A good measuring tape ensures you cut the right sizes and that the doors fit perfectly. Be sure to measure several times, just to be sure. It prevents costly mistakes and ensures a professional-looking result.
For instance, incorrect measuring can cause your doors not to fit properly or hang correctly.
Level: You’ll use this to ensure the tracks and door frames are aligned correctly. A level ensures the doors swing smoothly, avoiding any annoying gaps or unevenness. Getting this right prevents the doors from slamming or sticking.
Consider a situation where you skip using a level. The doors might constantly swing open or shut unevenly.
Screwdriver and Drill: These are indispensable for tightening screws and assembling the hardware. You’ll need different bits for driving screws, like Phillips head and flathead. The drill will help you to pre-drill holes.
For example, a drill makes pre-drilling holes quick and efficient, helping prevent wood from splitting when you insert screws.
Saw (Hand Saw or Circular Saw): You might need this to trim door frames or adjust door sizes, if necessary. Make sure your saw has a good blade. This keeps cuts clean and smooth.
If the door frame is too wide, you’ll use a saw to cut it down.
Safety Glasses: Your eyes are very precious, so always wear safety glasses. They’ll protect them from debris and dust during cutting and drilling. They keep you safe, so you can do your work without worries.
Imagine a small piece of wood flying into your eye! Not fun, so wear your glasses.
Preparing the Doorway
Before putting up the bifold doors, make sure the door frame is ready. Take time to check that everything is in good condition and clear of problems. This crucial step is about setting the stage for a simple installation process. You can prevent potential issues and ensure your doors will function properly by doing this. Any problems at this early stage could result in major issues later.
Inspect the Frame: Start by looking closely at the existing door frame. Check for any damage such as rot, warping, or loose sections. If any damage is present, repairs are needed before moving forward. Solid frames are vital for secure bifold door installation.
Imagine the frame has a bit of rot. Your new doors might not sit well and could become unstable.
Leveling the Frame: Use your level to ensure the door frame is perfectly vertical and horizontal. If the frame isn’t level, your bifold doors won’t hang correctly. The doors could stick, not close completely, or be hard to operate.
A door frame that’s not level could lead to problems with the doors closing properly.
Removing the Old Door (if any): If you’re replacing an old door, remove it carefully. Detach the hinges from the door frame and the door itself. Store any hardware you plan to reuse. Be careful and remember how the old door was installed.
If the old door is there, remove it by unscrewing the hinges carefully.
Cleaning the Area: Clean the doorway area thoroughly. Remove any dust, debris, or old hardware. A clean space ensures a tight fit for the new door. This ensures all parts fit properly.
Clean any old debris from the frame before installing your new doors.
Assembling and Installing the Hardware
This part focuses on putting the different components together. It’s where the hardware that makes the doors move smoothly and correctly is assembled and mounted. Precise assembly ensures that the doors swing easily and operate as intended. Following these steps carefully will prevent problems.
Installing the Top Track
The top track is crucial, as it’s the primary support for your bifold doors. Correct installation ensures the doors glide open and shut without difficulty. This component must be level and firmly secured to the door frame. Proper mounting prevents the doors from sagging or coming off the track. A solid track provides consistent and smooth door movement.
Measure and Mark: Measure the width of your doorway and the location where the top track will be installed. Mark the exact position of the track on the door frame. Proper measuring is vital.
For example, inaccurate measuring could make the doors too tight or too loose.
Pre-Drill Holes: Drill pilot holes into the frame. This makes it simpler to fasten the track using screws, making the process much easier. Pre-drilling prevents wood from splitting, especially important with older or fragile frames.
Drilling pilot holes makes screwing the track into the frame much easier.
Attach the Track: Using screws, secure the top track to the frame. Make sure the track is level using your level. Ensure it’s firmly and evenly mounted.
Make sure the track is level. This ensures smooth movement for your doors.
Check for Smooth Operation: After attaching the track, examine it to ensure that it has a smooth, frictionless operation. If any problems are seen, adjust the installation accordingly.
Test the track by sliding your hand along it. It should be smooth.
Installing the Pivot Hardware
The pivot hardware, including hinges and pivot pins, is essential for the smooth operation of bifold doors. These parts enable the doors to fold and unfold smoothly. Ensuring proper alignment and secure installation of the pivot hardware is key to preventing problems such as binding or improper door closure. Any errors in this stage can lead to frustrating door function.
Attaching the Top Pivot: Attach the top pivot to the top of the door panel using the provided screws. Ensure it’s correctly aligned and securely fastened. The top pivot is responsible for supporting the door’s weight and allowing it to swing.
The top pivot connects to the top track, enabling the door to swing and slide.
Installing the Bottom Pivot: Mount the bottom pivot to the bottom of the door panel, making sure it’s in line with the top pivot. This pivot connects with the bottom track or floor. Proper alignment of top and bottom pivots is critical for smooth door movement.
The bottom pivot fits into a socket, enabling the doors to move correctly.
Positioning the Hinges: Place the hinges on the door panels, making sure they’re aligned correctly. Then secure them with screws. Properly placed hinges are essential for doors to fold neatly.
Correct hinge placement ensures the panels fold evenly.
Verifying Alignment: Once all hardware is installed, double-check that all components are aligned properly. Proper alignment is key to ensure correct door function and avoids any operational hitches.
Make sure everything is straight before moving forward.
Installing the Bifold Door Panels
Mounting the door panels is a key step, where the whole process comes together. The successful installation of the panels is central to the final function of the doors. Accurate alignment and placement of the doors guarantee smooth operation. This section provides a clear path for putting the door panels correctly in place.
Mounting the Door Panels in the Frame
The door panels are then put into the frame. The success of this stage will determine whether the doors will function correctly and without any problems. The panels have to be inserted, aligned, and properly secured. Making sure the panels fit properly is vital for ease of use. Incorrect installation can make the doors hard to open or close.
Insert the Top Pivot: Lift the door panel into place. Insert the top pivot into the top track. Carefully align the top pivot with the track’s opening and gently seat it. This ensures the door is secured to the upper part of the doorway.
The top pivot slides into the top track, holding the door in place.
Position the Bottom Pivot: After placing the top pivot, align the bottom pivot with its corresponding bracket or floor socket. This will ensure that the door remains vertical.
The bottom pivot must be seated correctly in the lower guide to allow the door to swing smoothly.
Align and Secure: Make sure the door panels are aligned with each other and the frame. Check that the door panels hang straight. Fasten any securing screws to keep the doors firmly in place.
Check the alignment and ensure the panels are level and square.
Test the Movement: Once the doors are installed, try opening and closing them. Make sure they move smoothly and without catching. Proper operation is the aim.
Open and close the door several times to check for smooth operation and any obstacles.
Adjusting and Fine-Tuning
After putting the doors in place, fine adjustments may be needed. Fine-tuning the doors is important for ensuring smooth and easy operation. This step will often include modifying hinges, pivots, or tracks to ensure the doors will close and open correctly. It can involve adjusting all kinds of elements so that the doors work perfectly.
Adjusting the Pivots: Use the set screws or the adjustment mechanisms on the pivots to modify the height or alignment of the door. Adjustments can help ensure the doors swing smoothly and make sure that the door does not stick.
If the door is rubbing on the top or bottom, fine-tune the pivots.
Hinge Adjustments: For door alignment issues or if the doors are binding, modify the hinges. Loosen the screws and shift the door panels slightly until they line up. Re-tighten the screws once the right position is attained.
If the doors are not folding correctly, adjust the hinges.
Checking the Track: Make sure the top track is still level after mounting the doors. If the track is not level, you can change the screws to adjust the height. Modify the track until the doors glide with no issues.
A level track helps make the door move easily.
Final Checks and Lubrication: Finish with final checks for smooth operations. If needed, apply lubricant to the track and the pivot points. Lubrication keeps the doors working properly for a long time.
A little lubrication can ensure that the doors move freely.
Adding Finishing Touches and Troubleshooting
This phase is all about refining the look and ensuring the doors function well. Completing these last steps adds to the overall look and the ease of use of your doors. Final adjustments remove any remaining problems and make the final product the best it can be. Paying attention to these finishing steps will ensure complete satisfaction.
Installing the Door Hardware and Finishes
Adding the door hardware will not only ensure a pleasing look but also ensure smooth operation. Proper finishing improves the general look and function of the door. Correctly installed hardware makes the doors look good and enhances the overall user experience. This step requires the installation of elements like door handles and other decorative hardware.
Install Handles or Knobs: Affix the door handles or knobs to the door panels. Make sure the handle and/or knob are aligned correctly and secured with the screws provided.
For instance, make sure the handle is properly aligned before you secure it.
Test the Latch: Check that the latch operates smoothly. If there is an issue, try adjusting the strike plate on the frame until the latch engages easily and holds the door securely when closed.
If the latch does not close easily, adjust the strike plate.
Add Decorative Elements: Consider adding decorative elements like trim or molding to enhance the appearance. Add these elements with care to match your home’s design.
Decorative trim can help to enhance the overall appearance of the bifold door.
Clean Up: Remove any leftover debris, such as wood shavings or packaging materials. This creates a neat look. A clean area highlights your finished product and adds a sense of completion.
Cleaning up after you finish means the job is complete.
Addressing Common Problems
Even with careful planning, some issues may arise. This last phase addresses the most common troubles in bifold door installation. Knowing how to resolve these issues will let you make adjustments and ensure smooth operation of your doors. These suggestions can help ensure you can solve most common installation problems.
Door Sticking: If the door sticks, verify that the top and bottom tracks are free of dirt. Ensure the pivots are in the correct position and lubricate the track to reduce friction. Check for any binding along the door’s path.
If the door sticks, check for debris or misalignment.
Door Not Closing Properly: If the door doesn’t close right, inspect the hinges and pivot points for alignment. Check the latch mechanism for any obstructions. Make adjustments, if needed, to the strike plate.
If the door won’t close, check the latch and make adjustments.
Uneven Alignment: Use a level to verify the frame is level. Check that the door panels are aligned correctly. Modify the hinges or pivots if the door is not vertical.
If the door is uneven, use a level to make sure the frame is straight.
Hardware Issues: Make sure all the screws are tight and the hardware is secure. Replace any damaged hardware. Check that the track is not damaged.
Check the screws and hardware and replace any damaged parts.
Frequently Asked Questions
Question: How do I measure for bifold doors?
Answer: Measure the width and height of the opening inside the door frame. Measure at several spots to get the most accurate dimensions.
Question: What do I do if my bifold door sticks?
Answer: First, check if there is any dirt. Make sure the top and bottom tracks are clean. Lubricate the tracks and pivots. Adjust hinges or pivots if necessary.
Question: Can I install bifold doors by myself?
Answer: Yes, you can install bifold doors yourself if you carefully follow the steps. If you’re not sure, get help from a friend or consider hiring a professional.
Question: What tools do I need to install bifold doors?
Answer: You’ll need a measuring tape, level, screwdriver, drill, saw, and safety glasses. Have all your tools on hand before you start.
Question: How do I adjust a bifold door that isn’t closing properly?
Answer: Inspect the hinges and pivot points for alignment. Then, check the strike plate for adjustments. Make small changes until the door closes correctly.
Final Thoughts
Installing bifold doors, while it can seem like a lot, is very doable if you break it down into simple steps. From gathering your tools to making the final adjustments, each phase is important. Paying attention to details like proper measurements and precise alignment will make a big difference. Remember, the key is preparation and taking your time. Now you have a clear plan for your project. With the right approach, you can successfully How to Install Bifold Doors: Step-by-Step Guide for your home. You’ve got this! Now you can start improving your space and enjoy the results of your work.