How To Make Acrylic Templates For Woodworking Projects
Creating accurate acrylic templates for your woodworking projects allows for precise replication of shapes and designs, leading to higher quality and more consistent results. This guide will walk you through the simple steps to make your own, improving the efficiency and outcome of your craft.
What Are Acrylic Templates and Why Use Them?
Acrylic templates are essentially stencils or patterns made from clear acrylic sheets. You can cut them into any shape you need for your woodworking projects. Think of them as reusable blueprints for your cuts and designs.
Woodworkers use them for many reasons. They help make sure every piece is the same. This is super important for projects with multiple identical parts.
It also means you can easily repeat a design you love on future projects.
The clear nature of acrylic is a big plus. You can see right through it to your wood. This lets you line up your pattern exactly where you want it.
It’s much better than opaque paper or cardboard templates.
Acrylic is also quite durable. It lasts a long time with proper care. You don’t have to worry about it ripping or warping like paper.
This makes it a smart choice for frequent use.
Using templates makes woodworking faster. You spend less time measuring and marking by hand. Instead, you trace the template.
This saves time, especially on bigger jobs. Plus, it helps reduce mistakes. Fewer mistakes mean less wasted wood and less frustration.
My Own Template Struggle Story
I remember one time I was building a set of chairs for my dining room. I wanted a specific curved backrest design. I sketched it out on paper and cut it carefully.
I used that paper template to trace onto the wood for each of the six chairs. Well, by the time I got to chair number five, the paper template was soft and bent. My tracing lines were wobbly.
It was a nightmare! The chairs didn’t look alike at all.
I spent so much extra time trying to fix the inconsistencies. It was frustrating. I felt like I was letting myself down and the project down.
That’s when I decided there had to be a better way. I needed something that wouldn’t bend or stretch. I needed something I could see through.
That’s when I first looked into making my own acrylic templates. It was a game-changer.
Why Acrylic is a Woodworker’s Friend
Durability: Acrylic holds up much better than paper or cardboard. It resists warping and tearing, lasting for many projects.
Clarity: Being see-through lets you precisely align the template on your wood. You can see grain and defects easily.
Accuracy: Once cut, an acrylic template stays true to its shape. This ensures consistent results every time.
Ease of Use: Tracing around a smooth acrylic edge is simple and clean.
Gathering Your Materials and Tools
To make your acrylic templates, you’ll need a few things. Don’t worry, most of these are pretty common or easy to find.
First, you need the acrylic sheet itself. You can buy this at most home improvement stores or art supply shops. It comes in different thicknesses.
For most woodworking templates, 1/8 inch (3mm) or 1/4 inch (6mm) is a good choice. Thicker acrylic is more durable but harder to cut. Thinner acrylic is easier to cut but can be more flexible.
Consider what you’ll be using it for.
You’ll also need a way to draw your design onto the acrylic. A permanent marker works well. Choose a color that stands out on the acrylic, like black or red.
For cutting, there are a few options. A scroll saw or a bandsaw with a fine blade is ideal for curves. If you have a router, you can use a straight or spiral bit.
For very precise, straight cuts, a table saw can also work. If you don’t have power tools, a coping saw or a good hand saw can work for thinner acrylic, but it takes more effort and precision.
You’ll need something to smooth the edges once cut. Sandpaper is essential. Start with a medium grit and move to finer grits to get a smooth finish.
A block of wood to wrap the sandpaper around can help.
Safety gear is a must. Always wear safety glasses. Acrylic can chip and send small pieces flying.
Gloves are also a good idea, especially when handling cut edges. If using power tools, wear a dust mask or respirator.
Finally, you’ll need your design. This can be something you draw by hand, print from a computer, or get from a pattern. Make sure it’s exactly the size and shape you want.
Essential Toolkit for Template Making
- Clear Acrylic Sheet (1/8″ or 1/4″ thick)
- Permanent Marker (e.g., Sharpie)
- Cutting Tool: Scroll Saw, Bandsaw, Router, Coping Saw
- Sandpaper (medium and fine grits)
- Safety Glasses
- Work Gloves
- Dust Mask (optional, but recommended with power tools)
- Your Design or Pattern
Step-by-Step Guide to Making Your Template
Let’s get started. This process is designed to be clear and easy to follow.
Step 1: Prepare Your Design
First, make sure your design is perfect. If you’re drawing it, take your time. If you’re printing it, ensure it’s printed at the correct scale.
Some people like to draw their design onto paper first. Then, they can refine it before transferring it to the acrylic.
You can trace a shape you already have or create something completely new. For complex shapes, it might be helpful to break them down into simpler lines and curves. A steady hand is key here.
Step 2: Transfer Your Design to Acrylic
Once your design is ready, you need to get it onto the acrylic sheet. You can do this in a few ways.
The simplest method is to place your paper design directly on top of the acrylic. Then, use your permanent marker to trace the outline onto the acrylic. Make sure the paper doesn’t move while you trace.
You might want to tape the paper down first.
If your design is very complex, you could print it on special temporary tattoo paper or transfer paper. Follow the instructions for that product to get a clean image onto the acrylic. Another way is to use a thin layer of spray adhesive to stick your paper pattern directly to the acrylic.
Then, cut through the paper and acrylic together.
Whatever method you use, make sure your traced line is clear and easy to see. This line will be your cutting guide.
Tip for Tracing
Align Carefully: Double-check that your design is perfectly positioned on the acrylic before marking. Small shifts here can lead to big problems later.
Mark Clearly: Use a bold, permanent marker. You want to see your line even when looking at an angle.
Consider a Jig: For very precise shapes, you might create a simple jig to hold your template accurately on the wood later.
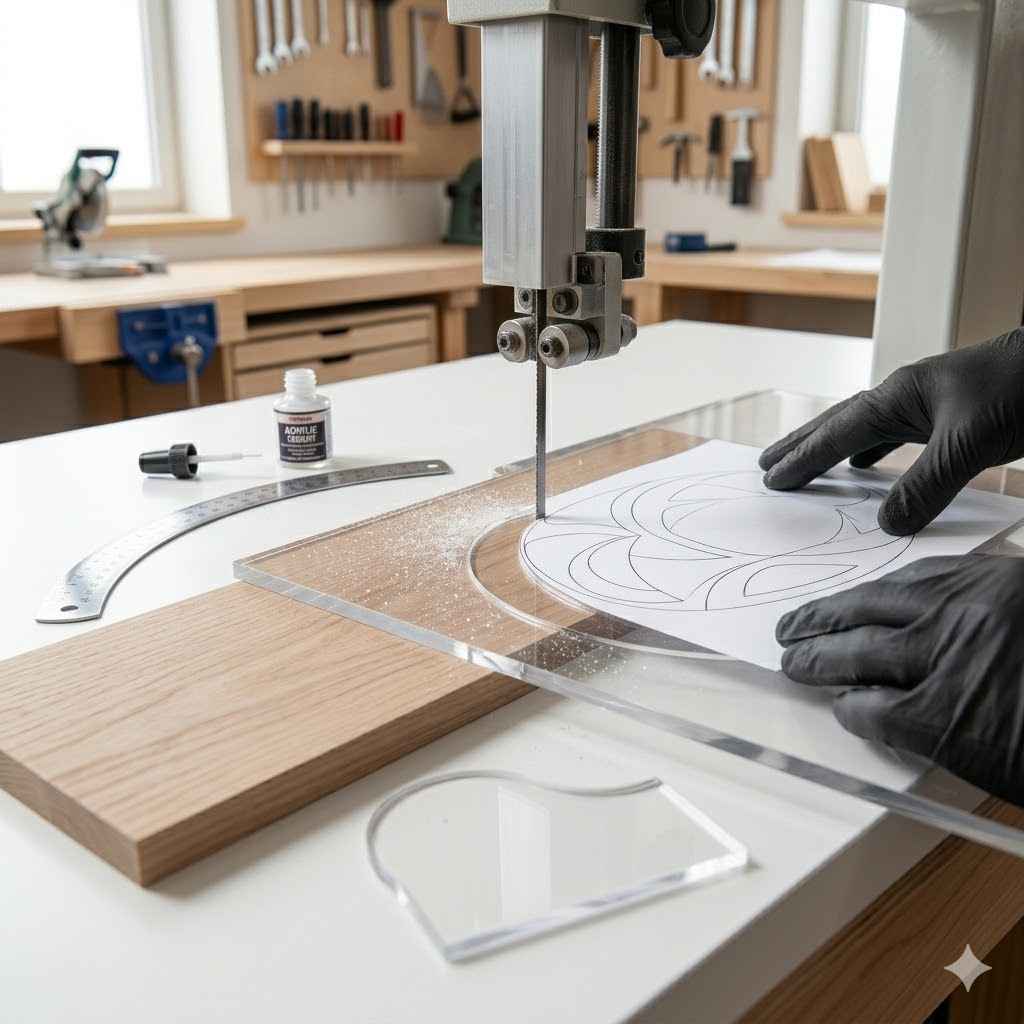
Step 3: Cutting the Acrylic
This is where the actual template takes shape. Take your time and work carefully.
If using a scroll saw or bandsaw, set it up with a blade suitable for plastic. A finer toothed blade will give a cleaner cut. Slowly feed the acrylic into the blade, following your traced line.
Don’t rush. Let the saw do the work.
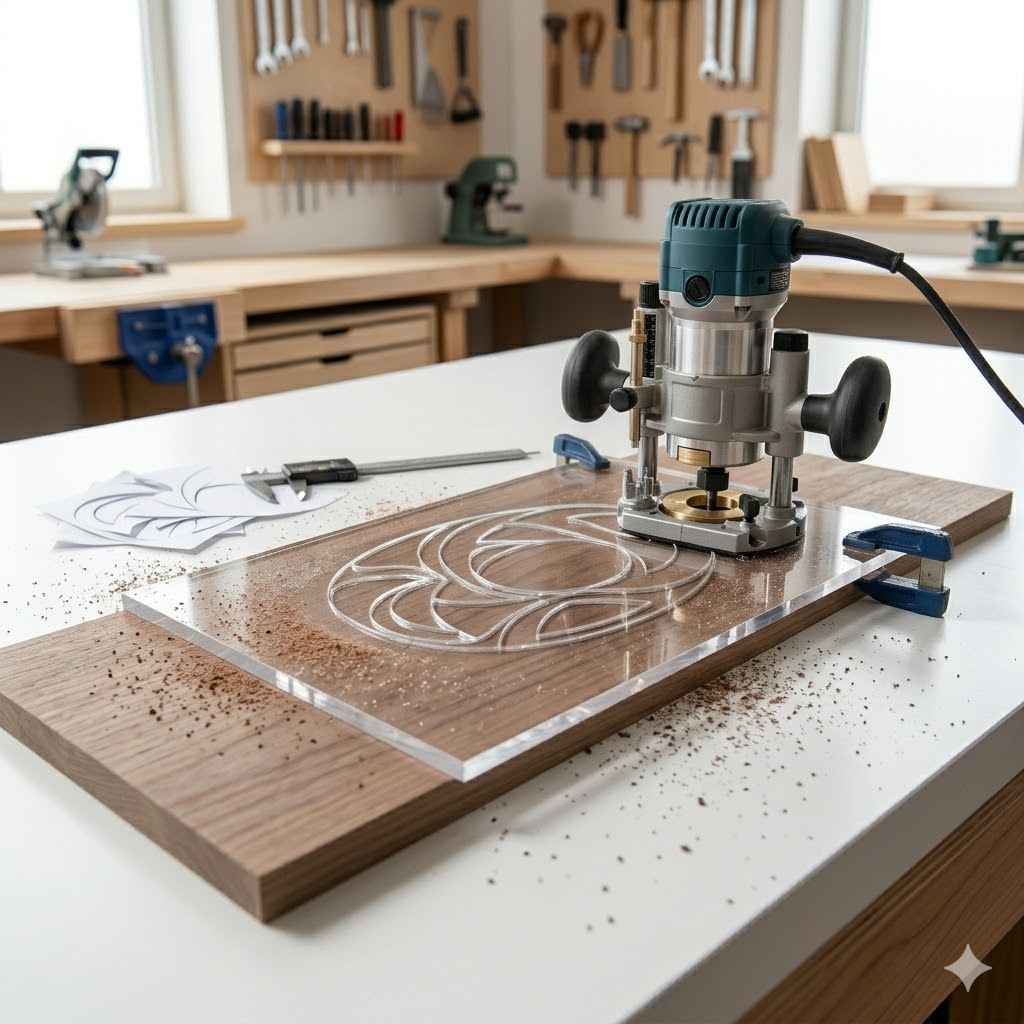
If using a router, you can create a template jig. Mount the acrylic to a piece of scrap wood. Then, use a router bit to cut around your design.
You can also clamp the acrylic firmly and use a router with a guide bearing. Be careful with router bits and acrylic, as it can melt if you go too fast.
For straight lines, a table saw can work, but be very careful. Make sure the acrylic is well-supported. Always use a sharp blade designed for plastics.
If using a hand saw, like a coping saw, secure the acrylic firmly. Make slow, steady strokes. This method is best for thinner acrylic and simpler shapes.
Remember to wear your safety glasses! Small chips can fly off unexpectedly. If you attached a paper pattern with spray adhesive, you might need to remove the paper after cutting.
Cutting Methods at a Glance
Power Saws (Scroll, Band): Best for curves and complex shapes. Requires control and the right blade.
Router: Great for precise shapes, especially with a template bit and guide. Can be fast but requires care to avoid melting.
Hand Saws (Coping): Good for simpler shapes and thinner acrylic. Takes more time and effort.
Table Saw: Suitable for straight cuts only. Needs careful setup and support.
Step 4: Smoothing the Edges
After cutting, the edges of your template will likely be a bit rough. This is where sandpaper comes in.
Start with a medium-grit sandpaper, maybe 100 or 120 grit. Wrap it around a sanding block or a flat piece of wood. Sand along the cut edge.
Work your way around the entire template. Your goal is to remove any sharp bits and smooth out the transition.
Once the rough edges are gone, switch to a finer grit sandpaper, like 220 or 320 grit. Sand again. This will make the edge very smooth.
A smooth edge is comfortable to handle and won’t snag on your wood. It also makes tracing easier.
You can also use a file for initial shaping if needed. Some people even use a router with a roundover bit to give the edges a soft, rounded profile. This makes the template even nicer to use.
Wipe down the template with a damp cloth to remove any dust. Inspect it closely. Make sure there are no sharp points or rough spots left.
Edge Finishing for a Professional Touch
Smooth is Key: Rough edges can mar your wood or make tracing difficult. Spend time here.
Progressive Grits: Always move from coarser sandpaper to finer grits for a truly smooth finish.
Rounded Edges: Consider a slight roundover on the edges with a router or file. This feels great in your hand and protects your work.
Step 5: Final Touches and Testing
Your template is almost ready! Before you use it on your project, it’s wise to do a quick test.
Find a scrap piece of wood that’s similar to what you’ll be using. Place your new acrylic template on it. Trace the outline.
Then, cut along the traced line on the scrap wood. See how well your template worked.
Check the accuracy. Does the cut piece match the template shape? Are the edges smooth?
This test run helps you catch any last-minute issues before you commit to your actual project wood.
You might also want to add some markings to your template. For example, you could add a small arrow to show the direction of cut or a center point mark. You can etch these into the acrylic with a sharp tool or simply draw them with your permanent marker.
To help your template stay put when tracing, you can add a few small rubber feet to the back. Or, consider drilling small pilot holes and adding tiny screws to act as registration points. This is especially useful for complex shapes or when routing.
Using Your Acrylic Templates Effectively
Now that you’ve made your custom template, let’s talk about using it to get the best results.
Precise Placement
The clear nature of acrylic is a huge advantage. Lay your template on the wood. Look through it.
Align it exactly where you want it. You can see the wood grain, any knots, or defects. This allows you to make the best placement decision.
Some templates might need to be positioned with a specific margin from an edge or to a certain point. Use your ruler and marker to help with this alignment. For repeatable accuracy, marking registration points on your wood and template is very helpful.
Tracing the Shape
Once placed, use your permanent marker to trace around the edge of the template. Hold the marker upright. Keep it firmly against the acrylic edge.
Move slowly and steadily.
If you’re using a router with a guide bearing, the template is usually mounted a small distance away from the desired cut line. The router bit rides along the edge of the template. This is a very accurate method for repeatability.
For hand cutting or jigsaw use, you’ll trace directly onto the wood. Make sure your traced line is clear and easy to follow. Try to trace as close to the acrylic edge as possible for accuracy.
Securing the Template
Depending on how you’re cutting, you might need to secure the template. If you’re tracing with a marker, you can often just hold it in place. For more precise work, or when using a router, you’ll need to attach it.
Clamps: Use small clamps to hold the template firmly to the wood. Make sure the clamps don’t interfere with your tracing or cutting path. Some templates have small notches or holes specifically for clamps.
Double-Sided Tape: For some applications, strong double-sided tape can work. It holds the template without making holes.
Screws: For router templates, you might drill small pilot holes through the template into the scrap wood (not the main project piece). Then use screws to hold it down. These holes should be outside the final cut line.
Template Use Scenarios
Jigsaw/Scroll Saw: Trace and cut. Template can be clamped for stability during tracing.
Router (with guide bearing): Template is positioned away from the cut line. The bit follows the template edge.
Hand Plane/Chisel: Template can be used to mark a line and then removed for cutting.
Drilling: Template can have holes drilled in it to guide your drill bit accurately.
When is a Template Absolutely Necessary?
While templates are great for many things, they really shine in specific situations. Knowing when you truly need one can save you a lot of effort and guarantee better results.
Repeatable Parts: If your project requires multiple identical pieces, like chair legs, cabinet doors, or drawer fronts, a template is almost essential. Trying to measure and cut each one by hand will almost certainly lead to slight variations.
Complex Curves and Shapes: Freehand cutting perfect curves can be difficult. A template ensures that your beautiful, sweeping curves are consistent from piece to piece. Think about decorative elements, unique table legs, or custom inlay patterns.
Accurate Joinery: For techniques that require precise placement of cuts or holes, like mortises or tenons, a template can guide your tools accurately. This is especially true for specialized joinery or when working with machines like a router or drill press.
Reproducing Designs: If you’ve created a unique design and want to use it again on another project, a template is the best way to capture and reproduce it perfectly.
Improving Efficiency: On large projects, using templates can significantly speed up the process. Once the template is made, tracing and cutting become much faster than intricate measuring and marking.
Situations Where Templates Shine
Consistency: Need many identical parts? Template is your best friend.
Curves: Perfect, repeatable curves every time.
Precision: For joinery or accurate hole placement.
Replication: Easily reproduce your favorite designs.
Speed: Streamline the cutting process for large projects.
Dealing with Different Types of Cuts
Acrylic templates can handle a variety of cuts. Each might require a slightly different approach.
Straight Cuts
For straight lines, you can use a table saw or a router with a straight edge guide. Your acrylic template will simply act as a guide for your pencil mark or as a reference for your saw fence. If using a router, you might even use the template to mark the line and then set your router fence to that line.
Curved Cuts
This is where acrylic templates really prove their worth. For curves, you will typically trace the template onto your wood. Then, you’ll use a jigsaw or scroll saw to cut along the line.
The smoother your template edge, the easier and more accurate your cut will be.
If you’re using a router with a template or guide bearing bit, you’ll position the template so the bearing rides along its edge. This ensures a perfect copy of the template’s curve.
Dovetails and Intricate Shapes
For complex joinery like dovetails, you can create a template that guides your router. Special dovetail jigs use templates to create both the pins and tails. For hand-cut dovetails, an acrylic template can help you mark out the angles and lines very precisely.
Other intricate shapes, like inlay patterns or decorative inlays, can be cut using templates. You might trace the shape and then use a router with a small bit, or even a chisel for careful work.
Holes and Drilling Patterns
You can drill holes directly into your acrylic template. These holes can then be used to guide your drill bit. This is incredibly useful for creating consistent hole patterns, like for hardware placement or dowel joinery.
Make sure the hole in the template is the exact size you need your pilot hole to be.
Cut Type Considerations
Straight: Mark and cut, or use template with router fence.
Curved: Trace and cut with jigsaw/scroll saw, or use router with guide bearing.
Intricate: Router jigs or careful marking for hand tools.
Holes: Drill template guides the drill bit for accuracy.
Advanced Techniques and Tips
Once you’re comfortable making basic templates, you can explore some more advanced ideas.
Adding Registration Marks
For perfect alignment every time, add registration marks. These can be simple crosses or dots etched into the template. You can also make small notches or holes that align with marks you make on your workpiece.
This is crucial for projects where multiple parts must fit together perfectly.
Creating Overlays
Sometimes, you need a template to be a specific distance away from your cut line. You can achieve this by adding a small spacer or by routing the template itself with a slight offset. Another way is to use a router bit with a bearing that will ride along the template edge, creating the offset automatically.
This is common for mortising or inlay work.
Template Materials Beyond Acrylic
While acrylic is excellent, other materials can also be used. MDF (medium-density fiberboard) is popular for router templates because it’s cheap and easy to cut. However, it can wear down over time.
Hardboard is another option. For very hard-wearing templates, like for repeated routing jobs, you might consider phenolic resin or even metal, but these are much harder to work with.
Protecting Your Templates
To make your acrylic templates last, store them flat. Avoid bending them or stacking heavy objects on top. Keeping them clean will also help.
A simple wipe with a soft cloth and mild soap is usually enough. Avoid harsh solvents that could cloud or damage the acrylic.
Pro Template Tips
Registration: Use marks or holes for perfect alignment.
Offsets: Account for tool paths with spacer or offset routing.
Material Choice: MDF for general use, acrylic for clarity, phenolic for heavy routing.
Storage: Store flat, clean, and protected to maximize lifespan.
Common Pitfalls and How to Avoid Them
Even with clear instructions, you might run into a few snags. Here’s how to steer clear of common mistakes.
Rushing the Cut: This is probably the biggest mistake. If you try to cut acrylic too fast, it can chip, crack, or melt. Slow down.
Let your tool do the work. Especially with routers, taking too much material at once can cause problems.
Ignoring Safety: Acrylic can splinter. Always wear eye protection. If you’re using power tools, wear gloves and a dust mask.
Poor Design Transfer: If your design isn’t transferred accurately, your template will be flawed from the start. Double-check your measurements and markings. Ensure the marker line is clear and on the correct side of your intended cut.
Rough Edges: Don’t skip the sanding step. Rough edges make tracing harder and can lead to a less precise cut on your workpiece. A smooth edge on the template leads to a clean line on your wood.
Template Movement: If your template shifts during tracing or routing, your project will be off. Secure it well using clamps, tape, or screws.
Not Testing: Always test your template on scrap wood first. This helps you catch any errors or issues with your template or your cutting method before you ruin your project piece.
Avoid These Template Traps
Too Fast: Slow down your cutting speed.
Unsafe: Always wear safety glasses and gloves.
Inaccurate Trace: Double-check your design transfer.
Rough Finish: Sand template edges until perfectly smooth.
Slipping: Secure your template firmly.
No Test Run: Always test on scrap wood first.
When It’s Okay Not to Use a Template
Templates are fantastic, but they aren’t always necessary. For simple projects with straight lines, or when you’re practicing a new technique and don’t need perfect repeatability, hand measuring and marking might be fine.
If you’re creating a one-off artistic piece where slight variations add character, a template might not be needed. Sometimes, the charm of handmade items comes from their unique imperfections. For very simple shapes that are easy to measure and cut accurately, like a basic square or rectangle, the effort of making a template might outweigh the benefit.
Listen to your gut. If a project feels simple and straightforward, and you’re confident in your measuring and marking skills, go for it without a template. But for anything requiring precision, repetition, or complex shapes, a custom acrylic template is a wise investment of your time.
Frequently Asked Questions
What is the best thickness for an acrylic template?
For most woodworking projects, 1/8 inch (3mm) or 1/4 inch (6mm) thick acrylic is ideal. 1/8 inch is easier to cut and handle, while 1/4 inch offers more durability and stability, especially for routing.
Can I use a regular saw to cut acrylic?
It’s best to use a saw with a fine-toothed blade specifically designed for plastics or toothed for smooth cuts. A scroll saw, bandsaw, or even a jigsaw with the right blade can work. Avoid using a coarse-toothed saw, as it can cause chipping and splintering.
How do I prevent acrylic from melting when routing?
To prevent melting, use a sharp router bit designed for plastics, and take shallow passes. Keep the router moving at a consistent speed and avoid letting the bit dwell in one spot for too long. A spiral bit can also help clear chips effectively.
What kind of marker is best for tracing on acrylic?
A permanent marker, like a Sharpie, is best. Choose a dark color that contrasts well with the clear acrylic, such as black, red, or blue. Ensure the tip is fine enough for accurate tracing.
Can I reuse my acrylic templates for different projects?
Yes, absolutely! That’s one of the biggest advantages of acrylic templates. Once made, they are durable and can be used repeatedly for the same design on future projects.
How do I clean my acrylic templates?
Clean your acrylic templates with a soft cloth and mild soap and water. Avoid abrasive cleaners or solvents, as they can scratch or damage the acrylic surface.
What if my template has sharp corners?
You can smooth sharp corners using sandpaper or a small file. For a more professional finish, you can use a router with a small roundover bit to create a slightly curved edge, making the template safer and more comfortable to handle.
Conclusion
Creating your own acrylic templates for woodworking is a skill that truly elevates your projects. It brings precision, consistency, and efficiency to your craft. From simple shapes to complex curves, these clear guides help you achieve professional-level results.
Invest a little time now to make templates, and you’ll save a lot of frustration and wasted material down the line. Happy templating!