How To Put Cabinet Doors Back On Hinges: Essential Guide
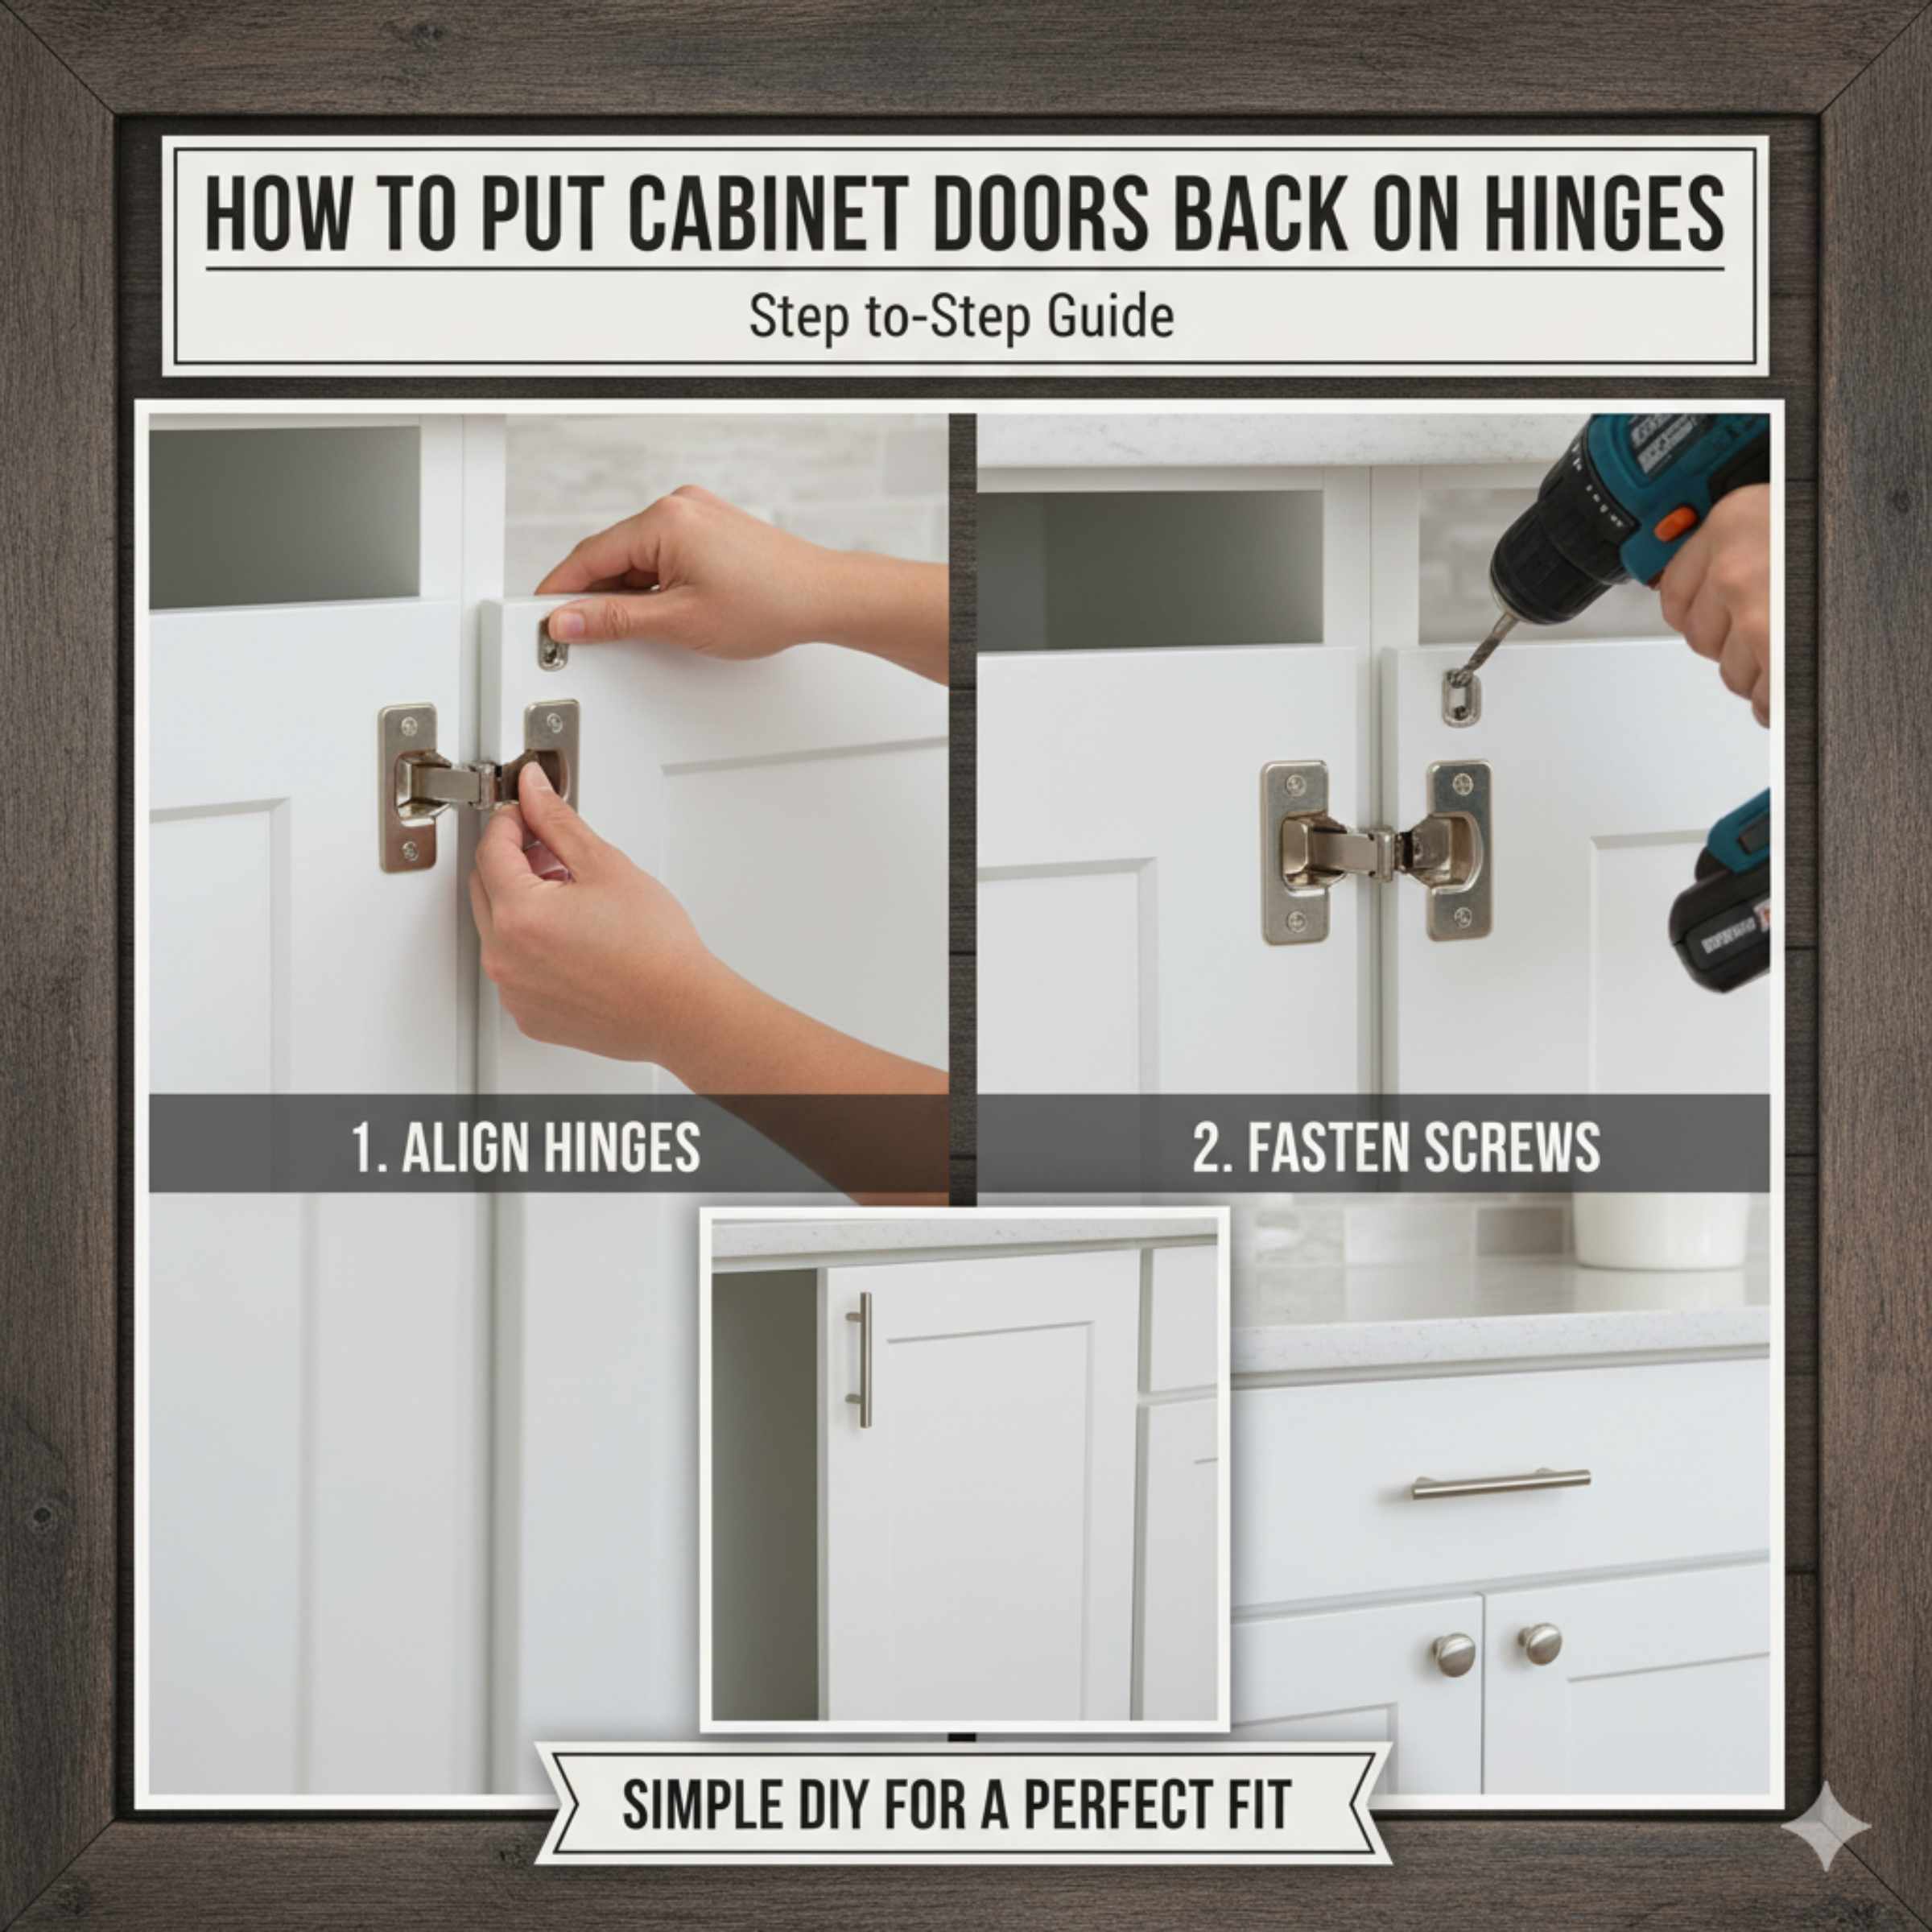
Quick Summary: To put cabinet doors back on hinges, line up the hinge plate on the door with the mounting plate on the cabinet frame. Secure the screws loosely at first, then adjust the door alignment using the hinge adjustment screws (up/down, in/out, side-to-side) until the gaps are even and the door closes smoothly. Finally, tighten all screws firmly.
Welcome to your easy guide for tackling one of the most common, yet sometimes frustrating, DIY tasks: reattaching a cabinet door. Maybe you were cleaning, replacing a hinge, or perhaps the door just popped off. It happens to everyone! You don’t need to call a professional carpenter for this simple job. With a few basic tools and clear steps, you can have those doors hanging perfectly straight again. We will walk through every part of the process, making sure you feel confident and capable. Let’s dive into making your kitchen or bathroom look flawless!
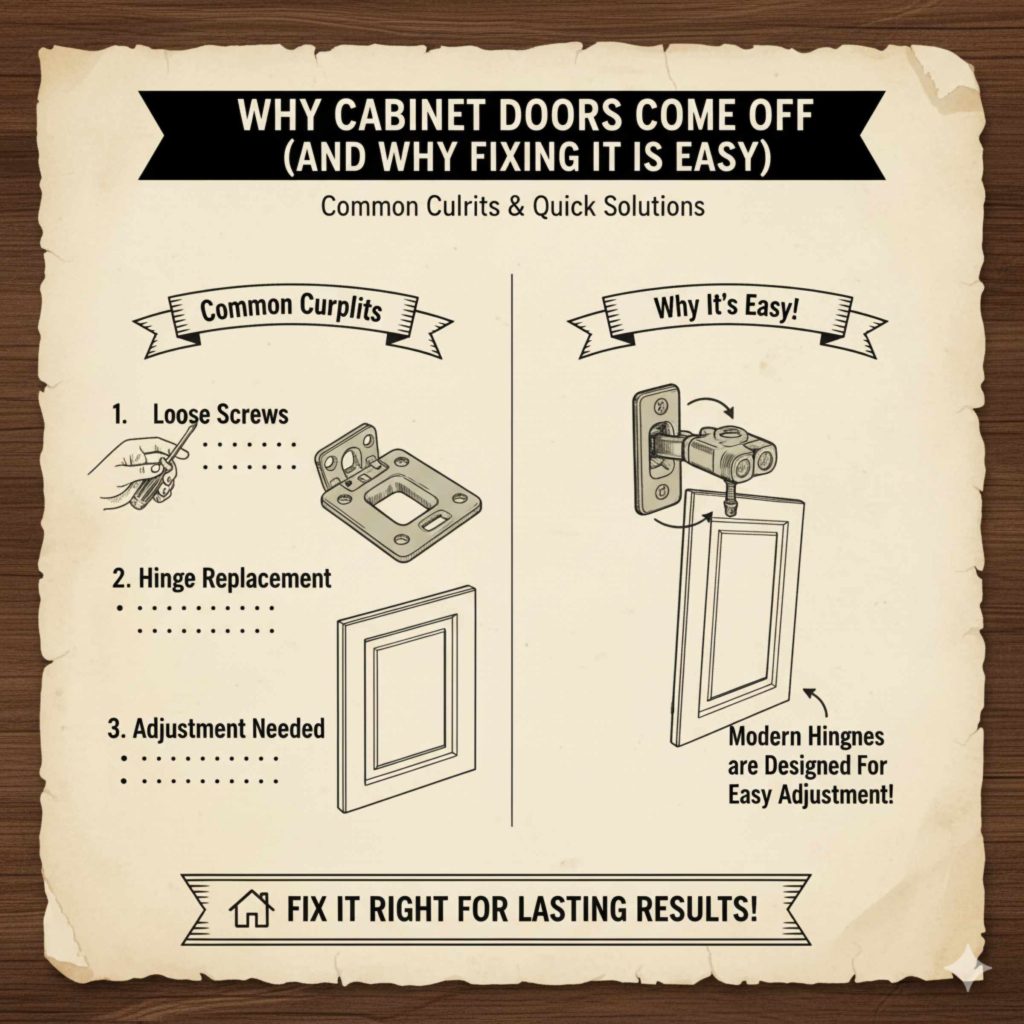
Why Cabinet Doors Come Off (And Why Fixing It Is Easy)
Cabinet doors are subject to a lot of movement. They open, close, get bumped, and sometimes the screws just loosen over time due to vibration or humidity changes. Understanding why this happens helps us fix it right the first time.
The main culprits are usually:
- Loose Screws: The screws holding the hinge to the cabinet frame or the door itself have worked themselves loose.
- Hinge Replacement: You might have installed a brand-new hinge and need to attach the door to it.
- Adjustment Needed: Sometimes, the door is still attached, but it’s sagging or crooked, requiring a full re-seat.
The good news is that modern cabinet hinges, especially European-style cup hinges, are designed for easy adjustment. This means getting the door back on is only half the battle; making it look perfect is the fun part!
Tools You Need Before You Start
You do not need a full workshop for this job. Keep your tool list short and accessible. Having the right gear makes the job faster and prevents stripping screws.
Essential Tool Checklist
- Screwdriver Set: You will need a Phillips head screwdriver (the most common type) and possibly a flathead for leverage or prying gently. A cordless drill/driver is great, but use it on a low torque setting to avoid damaging the wood.
- Measuring Tape or Ruler: Crucial for checking even gaps between doors once they are hung.
- Pencil: To mark alignment points if you are dealing with an old hinge location.
- Helper (Optional but Recommended): Cabinet doors can be awkward to hold steady while aligning two mounting points. A second pair of hands is a huge confidence booster.
- Small Container: To keep track of any removed screws so they don’t roll away.
Safety Note: Always ensure your cabinet doors are safely supported or held by your helper while you work on the hinges. Never try to balance a heavy door while reaching overhead.
Step 1: Preparation – Understanding Your Hinge Type
Before you start screwing things in, take a moment to look at your hinges. The method for reattaching the door depends heavily on the hinge style. Most modern cabinets use European-style (or concealed) hinges, which are adjustable.
Common Cabinet Hinge Types
| Hinge Type | Appearance | Reattachment Method |
|---|---|---|
| European (Concealed) | Hinge cup is hidden inside the cabinet door edge. | Door mounts onto a mounting plate screwed to the cabinet frame. |
| Surface Mount (Older Style) | Hinge is visible on the outside of the cabinet frame. | Door attaches directly to the frame using screws. |
| Pinch Hinge (Overlay) | Often used on utility cabinets; simple pivot points. | Requires careful alignment of the door onto the installed pivot posts. |
For this guide, we will focus primarily on the popular European-style hinge, as it covers the majority of modern kitchen and bath renovations. If your door came off, it likely detached from the mounting plate attached to the cabinet box.
Step 2: Aligning the Hinge Components
This is where precision matters. You need to connect the hinge arm (which is attached to the door) with the mounting plate (which is screwed onto the inside of the cabinet frame).
If You Are Reattaching to Existing Plates:
- Hold the Door Steady: Have your helper hold the door in its approximate final position, slightly elevated if necessary.
- Locate the Arm and Plate: Look at the back of the door. You will see the hinge arm extending from the door. On the inside wall of the cabinet, you will see the mounting plate, usually secured by two screws.
- Hook the Hinge Arm: Most European hinges have a specific notch or slot on the hinge arm that slides directly onto the mounting plate. Gently guide the arm until it hooks or slides onto the plate. You might hear a small click, or you might need to gently push the door inward to engage it.
- Secure Loosely: If your hinge system uses a quick-release clip or lever, engage it now. If it uses screws to hold the arm onto the plate (common on older or heavy-duty models), insert the screws but only turn them a few times—just enough to hold the door in place without being tight.
If You Are Installing New Hinges:
If you replaced the hinges, you must first ensure the mounting plates are correctly installed on the cabinet frame. Refer to the hinge manufacturer’s instructions for the precise distance from the cabinet face frame. Generally, for standard overlay doors, the mounting plate should be positioned according to the hinge specifications (often 37mm or 32mm from the edge of the cabinet opening). Always check the installation guide for the specific brand you are using, as precise measurements are crucial for proper door swing.
You can find reliable installation guidelines from hardware manufacturers like Blum or Salice, which often detail the center-to-center measurements required for mounting plates, ensuring alignment across multiple cabinets. Understanding standard cabinet hardware spacing is key for a professional finish.
Step 3: Initial Adjustment and Leveling
Once the door is loosely attached, it will probably look crooked, sag, or stick out too far. This is perfectly normal! This is where the magic of adjustable hinges comes in.
Cabinet hinges usually have three main adjustment screws (though sometimes they are combined into two). You need to know what each screw does:
The Three Adjustment Screws Explained
| Adjustment Screw | Function | Result on Door |
|---|---|---|
| Screw 1 (Depth/In-Out) | Adjusts how far the door sits into the cabinet opening. | Moves the door closer to or further away from the cabinet face. |
| Screw 2 (Side-to-Side) | Adjusts the horizontal position of the door. | Adjusts the gap (reveal) between the door and the adjacent door or frame. |
| Screw 3 (Up/Down) | Adjusts the vertical position (usually done on the mounting plate). | Moves the door up or down relative to the cabinet box. |
Start with the door resting slightly open (about 45 degrees) so you can access the screws easily.
Adjusting for Height (Up and Down)
If the door is too high or too low, you need to adjust the mounting plate on the cabinet frame. Look at the screws holding the plate to the cabinet. If your system uses an adjustment screw on the plate itself (instead of just the screws holding it on), turn that one. If it’s a quick-release system, you might need to loosen the main mounting screws slightly, nudge the door to the correct height, and then re-tighten those screws.
Goal: Make sure the bottom edge of the door is parallel with the bottom edge of the cabinet, or perfectly aligned with the door below it.
Adjusting for Side Gaps (Left and Right)
This adjustment controls the gap (or “reveal”) between your door and the next door or the cabinet frame edge. This is usually done using the screw closest to the cabinet face frame (Screw 2 in the table above).
If the gap is too wide on the right side: Turn the screw to move the door slightly to the left.
If the gap is too wide on the left side: Turn the screw to move the door slightly to the right.
Turn the screw in small increments—half a turn at a time—and then close the door to check the gap. Consistency is key here. Aim for a gap of about 1/8 inch (3mm) between doors, though this varies by cabinet style.
Adjusting for Depth (In and Out)
This controls how flush the door sits with the cabinet face. If the door is sticking out too far, or seems recessed too deeply, use the screw furthest from the cabinet frame (Screw 1).
Goal: The door should sit perfectly flush with the surrounding cabinet face when closed. If you have overlay doors, they should overlap the frame by the intended amount.
Step 4: Fine-Tuning and Final Tightening
Once the door is generally level and centered, you need to test the swing and make final tweaks.
Test the Swing
Open and close the door several times. Pay close attention to:
- Does it rub against the adjacent door or the cabinet frame at any point during the swing?
- Does it close completely without stopping short?
- Does the door latch or click securely into place?
If you notice rubbing, it usually means the door is slightly too far out (depth adjustment) or needs a slight shift left/right. Make tiny adjustments as needed, closing the door after every small turn of the screwdriver.
Final Tightening
When you are completely satisfied with the alignment—the gaps are even, and the door swings freely—it’s time to lock everything down. Go back to the screws that hold the hinge arm to the mounting plate (or the screws holding the plate to the frame, if applicable).
Tighten these screws firmly, but be careful not to overtighten, especially if you are driving them into particleboard or MDF, which can strip easily. A snug, firm feel is all you need.
Troubleshooting Common Reattachment Issues
Even with the best instructions, DIY projects sometimes throw curveballs. Here are solutions for the most frequent problems homeowners face when putting cabinet doors back on hinges.
Problem 1: The Door Sags or Won’t Stay Level
Likely Cause: The mounting plate screws are loose, or the hinge itself is failing.
Solution: First, ensure the screws securing the mounting plate to the cabinet box are tight. If that doesn’t work, try tightening the Up/Down adjustment screw (Screw 3). If the door still sags, the hinge might be worn out, especially if it’s an older cabinet. In this case, replacing the entire hinge assembly is the most reliable long-term fix.
Problem 2: The Door Rubs Against the Frame When Closing
Likely Cause: The door is too far out (depth issue) or it’s shifted too far toward the side of the rub.
Solution: Use the depth adjustment screw (Screw 1) to pull the door slightly back into the cabinet opening. If it’s only rubbing on one corner, use the side-to-side adjustment (Screw 2) to shift the door away from the rubbing point.
Problem 3: The Hinge Won’t Clip Onto the Mounting Plate
Likely Cause: The hinge arm and the mounting plate are not perfectly aligned vertically, or the clip mechanism is dirty/stuck.
Solution: Clean both the receiving slot on the plate and the back of the hinge arm. If they still won’t connect, you must loosen the screws holding the mounting plate to the cabinet frame and manually adjust the plate slightly up or down until the hinge arm slides smoothly onto the plate. Then, re-tighten the mounting screws.
Problem 4: I Stripped a Screw Hole
Likely Cause: Using too much power with a drill, or the wood is old and soft.
Solution: This is common, especially in older cabinets. Remove the screw. Dip a wooden toothpick or a small wooden matchstick (without the head) into wood glue and insert it snugly into the stripped hole. Let the glue dry for about 30 minutes. Once dry, the wood filler acts like new wood, and you can drive the screw back in carefully.
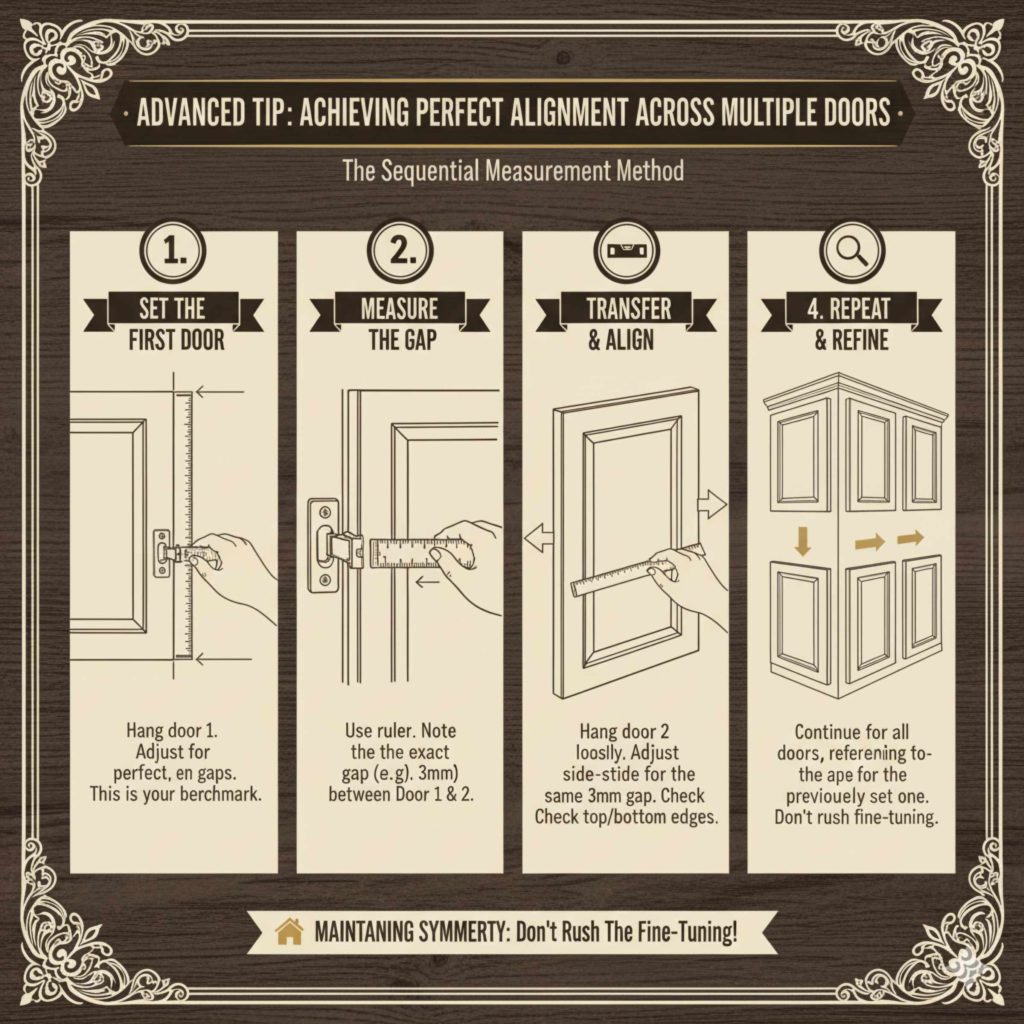
Advanced Tip: Achieving Perfect Alignment Across Multiple Doors
If you are putting back several doors on a bank of cabinets (like a double pantry or a run of kitchen uppers), achieving a consistent look is vital. This requires measuring!
Follow these steps for professional-looking results:
- Set the First Door: Hang the first door (usually the one furthest to the left or right) and adjust it until the gaps around it are perfect. This door becomes your benchmark.
- Measure the Benchmark Gap: Use your ruler or tape measure to determine the exact gap (reveal) between the benchmark door and the cabinet frame edge, and the gap between the benchmark door and the adjacent door. Let’s say the gap is 3mm.
- Transfer Measurements: Move to the next door. Hang it loosely. Use the side-to-side adjustment screw to move this second door until the gap between Door 1 and Door 2 is exactly 3mm.
- Check Verticality: Use a level or check that the top and bottom edges line up perfectly with the door next to it.
- Repeat: Continue this process for every door, always referencing the previously set door. This sequential method prevents you from having to constantly backtrack.
Remember, even the best cabinet makers take time to adjust hinges. Don’t rush the fine-tuning stage. A quick 15-minute adjustment can save you hours of looking at crooked cabinet doors!
Frequently Asked Questions (FAQ)
Q1: Do I need to remove the entire hinge to put the door back on?
A: Usually, no. For European hinges, the door simply clips or slides onto the mounting plate already screwed to the cabinet. You only need to remove the entire hinge if the hinge itself is broken or needs replacing.
Q2: How tight should the screws be when attaching the door?
A: Screws should be snug enough that the door doesn’t wiggle or shift during normal use. However, avoid overtightening, especially into MDF or particleboard, as this will strip the hole and require filling before re-screwing.
Q3: What if my cabinet doors don’t have European hinges?
A: If you have older surface-mount hinges, the process is simpler but less forgiving. You must align the hinge leaves (the flat parts) perfectly on the cabinet frame and door edge before driving in the screws. There is usually little to no adjustment once the screws are tight.
Q4: How can I easily hold the door while I attach it?
A: The easiest way is to use a helper to hold the door steady. If working alone, place a stack of books or a small, sturdy box underneath the door to support its weight at the correct height while you focus on aligning and securing the hinge screws.
Q5: What is the “reveal” on a cabinet door?
A: The reveal is the small, consistent gap left between adjacent cabinet doors or between a door and the fixed cabinet frame. Achieving a consistent reveal (usually about 1/8 inch) is what makes a run of cabinets look professionally installed.
Q6: Can I adjust my cabinet doors if they are painted wood?
A: Yes, you can adjust hinges on painted doors just as easily as unpainted ones. However, be very careful when adjusting the depth or side-to-side screws, as turning too far can cause the door to rub the paint off the adjacent door or frame.
Conclusion: You’ve Got This!
Reattaching a cabinet door might seem intimidating at first, but as you’ve seen, it’s really just a matter of hooking the hinge arm onto the mounting plate and then making small, methodical adjustments. Remember the three adjustments—up/down, side-to-side, and in/out—and tackle them one at a time. Don’t try to fix the height, the gap, and the depth all at once!
Take your time during the fine-tuning stage. Close the door, check the alignment, make a tiny turn, and check again. Before you know it, that door will swing smoothly, align perfectly with its neighbors, and you will have successfully completed another home improvement task with confidence. Enjoy your perfectly hung cabinet doors—you earned that satisfaction!