Tile Installation Over Concrete: Moisture Checks Before You Start
Do not tile a concrete slab until it meets the tile system’s moisture limit; many uncoupling, membrane, and mortar product sheets cap in-slab relative humidity anywhere from about 75% to 85%, and the exact limit is product-specific rather than universal. ASTM F2170 and ASTM F1869 are the main moisture tests used to evaluate concrete, while ANSI/TCNA guidance governs installation details such as flatness, movement joints, and coverage. Skip the moisture check and you can trap vapor under the tile, which can lead to debonding, efflorescence, and expensive repairs.
Concrete slab checks before you start
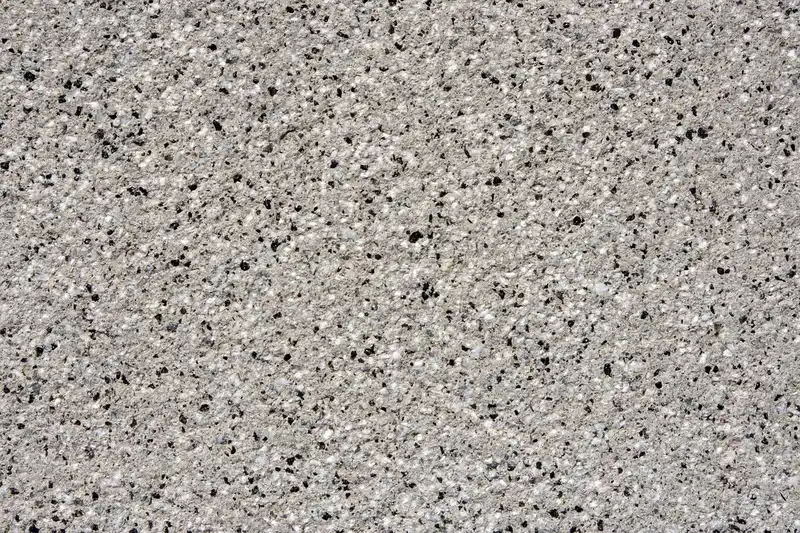


A slab must be clean, sound, cured, and free of oil, paint, curing compounds, adhesive residue, sealers, and loose laitance before moisture results mean much. ANSI A108/TCNA installation guidance also expects the substrate to be free of anything that interferes with bond. If the surface is dirty, coated, or uneven, the tile system can fail even when the moisture reading looks fine.
Concrete should also be old enough to have cured. New concrete should cure at least 28 days before tile installation, but cure time alone does not prove the slab is dry enough. Recent rain, irrigation, basement grade, plumbing leaks, and hydrostatic pressure can keep feeding moisture into the slab after curing is complete.
What to inspect on the slab surface
- Scrape off loose dust, laitance, adhesive residue, and curing compound.
- Check for oil, paint, sealers, and any slick film that could block bond.
- Look for cracks, spalls, humps, dips, and patched areas.
- Trace likely moisture sources: plumbing leaks, grade issues, irrigation, or rain intrusion.
- Check whether the slab is dry on the surface or only dry at the top skin.
Pre-tile slab prep checklist: clean and mechanically verify the surface, identify moisture sources, test with the right ASTM method, compare the result to the exact product limit, and do not install until flatness, crack treatment, and movement-joint details also fit the system.
A common first-timer mistake is to see a dry-looking surface and assume the slab is ready. Surface dryness matters for bond, but internal moisture matters for the whole tile assembly. A slab can feel dry and still drive vapor upward from below.
Say your basement slab looks clean but has a dark band near one wall after a storm. That is not a reason to tile over it. It is a reason to find the source first, because a local wet zone can point to drainage or hydrostatic pressure that a simple surface check will miss.
What if the slab has old adhesive, curing compound, paint, or sealer?
Bond-breakers have to come off or be mechanically roughened before any moisture test or tile install. Water-drop checks help you judge absorption: if water beads or sits on the surface instead of darkening the concrete, you likely have a sealer, curing compound, adhesive residue, or dense contaminated skin that can block bond. That surface needs scraping, grinding, or shot blasting until the slab is visibly and mechanically sound.
Do not trust appearance alone. A patchy old adhesive film can look thin and still interfere with mortar bond, and a curing compound can remain effective long after the slab appears “dry.” If the residue cannot be removed by scraping and the water-drop test still shows poor absorption, mechanical preparation is usually required before tile work.
Some adhesives and coatings are not just bond-breakers; they can also affect moisture testing results if they trap surface vapor or create uneven contact for test materials. Remove contamination first, then test the concrete itself. If removal exposes weak concrete or pitting, repair that before proceeding.
How do you check a concrete floor for moisture?
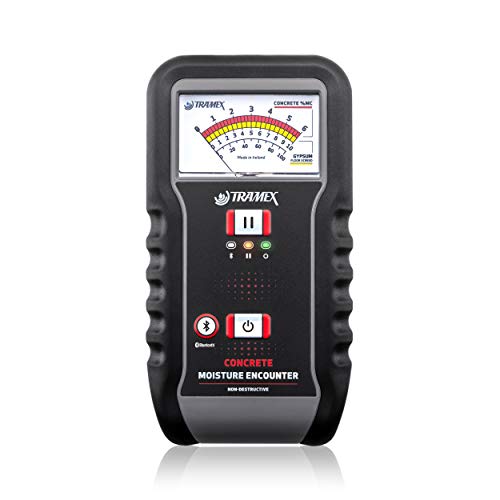
Use a real moisture test, not guesswork. ASTM F1869 measures moisture vapor emission rate from concrete, and ASTM F2170 uses in-situ probes to measure internal relative humidity. A plastic sheet test can help you screen for surface condensation, but it is only a quick check, not a final pass/fail test.
ASTM F1869 calcium chloride testing
ASTM F1869 measures moisture vapor emission rate from concrete. It is useful when you want a surface emission reading, but it does not show the full internal condition of the slab. That matters when moisture is moving up from below or when the slab has patchy wet zones. Because some tile systems set limits by RH and others by MVER, the product sheet—not the test method alone—controls the decision.
ASTM F2170 relative humidity probe testing
ASTM F2170 uses in-situ probes to measure internal relative humidity. For tile planning, that is often the better read on what the slab is doing below the surface. Many manufacturers publish RH limits around 75%, 80%, or 85%, but those limits vary by primer, membrane, mortar, and finished flooring system. Follow the exact product sheet for the assembly you plan to install.
When RH is over the product limit, the next step is not to “hope it dries later.” The next step is to stop, identify the source, and decide whether the slab needs more drying time or a compatible moisture mitigation system. A coating or membrane is only acceptable if the manufacturer documents that use case for the full assembly.
Plastic sheet screening test
The plastic sheet test uses a 2-foot by 2-foot clear plastic sheet left in place for 24 to 48 hours. Use it to spot condensation or darkening under the plastic. If you see moisture under the sheet, the slab needs more investigation. If you do not, that still does not prove the slab meets the tile system’s moisture limit.
Picture a garage slab that looks fine in the morning, then shows a damp patch under the plastic sheet after a humid afternoon. That points to surface moisture movement or a wet area at the slab surface. It does not replace ASTM testing, but it does tell you not to rush the install.
How do you decide whether the slab is dry, borderline, intermittently wet, or failed?
Use a step-by-step workflow: first screen for a moisture source, then choose the right ASTM test, then compare the result to the exact product limit, and only then decide whether to proceed. “Dry” means the slab is within the product’s limit and the surface is prepared. “Borderline” means it is close enough that retesting or mitigation is prudent. “Intermittently wet” means the result changes with rain, plumbing, irrigation, or season. “Failed” means it is outside the product limit or keeps trending wet.
Concrete moisture decision table
| Scenario | Which test to trust | Result range that matters | Next action | Failure risk if ignored |
|---|---|---|---|---|
| Dry slab | ASTM F2170, then confirm the product sheet | Internal RH at or below the exact limit in the membrane, mortar, or tile system sheet; many systems are in the 75% to 85% range, but the product controls | GO if the slab is clean, flat enough, and all crack/joint details are addressed | Low, if the full assembly is compatible |
| Borderline slab | ASTM F2170, with ASTM F1869 as a cross-check if allowed by the system | Near the system limit, especially where the published threshold is tight or varies by product | HOLD; retest, verify the source, or use a compatible mitigation system if the product sheet allows it | Moderate to high; bond loss or grout problems can appear later |
| Intermittently wet slab | ASTM F2170 plus source tracing | Results that swing after rain, irrigation, plumbing use, or seasonal change | STOP; find and correct the source before tiling | High; recurring wet spots can push vapor through the system |
| Failed slab | ASTM F2170 and product-specific limits | Above the accepted limit for the tile assembly, or repeated wet readings that do not stabilize | STOP; do not install until the slab is fixed or a documented mitigation system is designed for the condition | Very high; debonding, efflorescence, mold, and delamination are all possible |
Do not confuse a borderline slab with a failed one. Borderline means you are close to the limit and may have a workable path with mitigation or more drying time. Failed means the slab is outside the system limit or is still getting wetter, which changes the decision from “prep” to “solve the source.”
Borderline slabs need a decision, not a guess
If the reading sits near the limit, retest before you buy time with thinset. A repeat reading can tell you whether the slab is drying or drifting upward. If results stay high, choose a mitigation system that is documented as compatible with the thinset and tile you plan to use. Some systems allow a primer or epoxy mitigation layer; others do not. The product sheet decides.
Do not assume every membrane is a vapor barrier. Some layers help with uncoupling or waterproofing, but they are not rated to stop moisture vapor from a concrete slab. The product sheet has to say what the layer can do.
What if the slab has cracks or joints?
Hairline cracks and control joints are not the same problem. Hairline cracks may be handled with an isolation membrane if the system allows it, while structural cracks and active movement need a separate fix. Control joints should be honored in the tile assembly, not bridged as if they were ordinary surface cracks. TCNA EJ171 movement-joint guidance is the reference most installers use for those details.
Hairline crack versus structural crack
Cracks are not managed by a single universal width rule. Some products will bridge certain non-structural cracks, while others require treatment at much smaller widths or disallow bridging entirely. As a general installation rule, wider or active cracks need evaluation and a system-approved repair before tile goes down. If the crack is moving, the membrane alone is not a cure.
Control joints and movement joints
Control joints should be carried through the tile assembly or treated with a movement joint detail approved for the system. TCNA EJ171 calls for movement joints in tilework at changes in plane and at prescribed intervals, and control joints in the slab are typically honored rather than covered over. Do not fill a moving joint and tile over it as if it were static. That usually leads to cracked grout or broken tile along the joint line.
Suppose a slab has a saw-cut control joint running across a hallway. If you tile across it without honoring the joint, the tile can shear when the slab moves. A movement joint detail costs far less than redoing the hallway later.
How flat does a concrete slab need to be for tile?
Flatness depends on tile size and the standard you are following. ANSI A108 and TCNA guidelines commonly use 1/4 inch in 10 feet for tiles with any side under 15 inches, and 1/8 inch in 10 feet for tiles with at least one side 15 inches or longer. Check the slab with a 10-foot straightedge, because dips and humps affect coverage, lippage, and bond even when moisture is acceptable.
Flatness and large-format tile
Large-format tile needs more from the slab. It also tends to need a large-and-heavy-tile mortar or another mortar approved by the tile and membrane manufacturers. Back-buttering often helps you reach coverage, but it does not fix a wavy slab. Large-format tile can be less forgiving of substrate variation, so flatness becomes more important, not less.
Coverage targets and back-buttering
Aim for the coverage target required by the application and tile type, which is commonly 95% in wet areas and for exterior or other demanding service, and not less than what the installation standard or manufacturer requires for the location. Coverage expectations can also rise with tile size and service conditions. Back-buttering and beat-in improve coverage, especially under large-format tile. Coverage matters because voids hold water, weaken support, and raise the chance of a hollow bond or cracked grout line.
Do not use a trowel size by habit alone. Use the mortar and trowel shape that gives the required coverage for your tile size, back profile, and slab flatness. Open time and pot life also matter; if mortar skins over, coverage drops fast.
When should you use a moisture mitigation membrane?
Use a moisture mitigation membrane when the slab test is too high for the chosen tile system, and only if the membrane is documented as compatible with the thinset and tile assembly. A membrane is not automatically a vapor barrier, and not every system can combine mitigation, uncoupling, and waterproofing in one layer.
Compatibility with thinset and tile system
Check the membrane, thinset, and tile manufacturer guidance together. Some systems require specific mortar chemistry over the membrane. Others allow only certain tile sizes or formats. If the product sheets do not agree, do not improvise.
When mitigation cannot solve the problem
A membrane cannot fix an active leak, a wet subgrade, or hydrostatic pressure that keeps feeding the slab. It also cannot make a failing slab structurally sound. If moisture keeps coming back after repair, stop and correct the source before installing tile.
Excess moisture is a major cause of flooring failures, and the failure bill is often larger than the testing bill. A moisture check is cheap compared with demo, disposal, replacement tile, fresh mortar, and labor to rebuild the floor. Spending a little on testing is usually the less painful choice.
Frequently asked questions
How do I check a concrete slab for moisture before tile installation?
Use ASTM F2170 for internal relative humidity, ASTM F1869 for vapor emission, and a plastic sheet test only as a quick screen. Clean the slab first, then check for rain intrusion, leaks, or damp areas. If results are near the system limit, retest or plan mitigation before tile goes down.
What moisture test should I use on a concrete floor before tiling?
ASTM F2170 is the clearest read on internal slab moisture, while ASTM F1869 measures moisture vapor emission from the concrete surface. If you need a quick check for surface condensation, use the plastic sheet screen. The final pass or fail still depends on the tile system’s listed limits.
How dry does concrete need to be before you can install tile?
The slab needs to be within the moisture limit allowed by the tile assembly you are using. The acceptable RH limit is not a universal 80%; it varies by product sheet, and some systems allow less while others allow more. If the reading is above the product limit, do not proceed until the condition is corrected or mitigated.
Do I need a vapor barrier under tile on concrete?
Sometimes, but only if the system calls for one and documents it as compatible with the thinset and tile. Not every membrane is a vapor barrier. If the slab is too wet, a compatible moisture mitigation membrane may be required, and the product sheet should spell out that use case.
Can I tile over a concrete slab with hairline cracks?
Sometimes, if the crack is stable and the tile system allows crack isolation treatment. Crack-width rules are product- and system-dependent, so do not apply a single universal number to every membrane or mortar. Active movement needs a stronger fix. Do not bridge a structural crack and hope thinset will hold it together.
Sponsored / affiliate links. As an Amazon Associate I earn from qualifying purchases. I may earn additional commission from eligible campaigns.