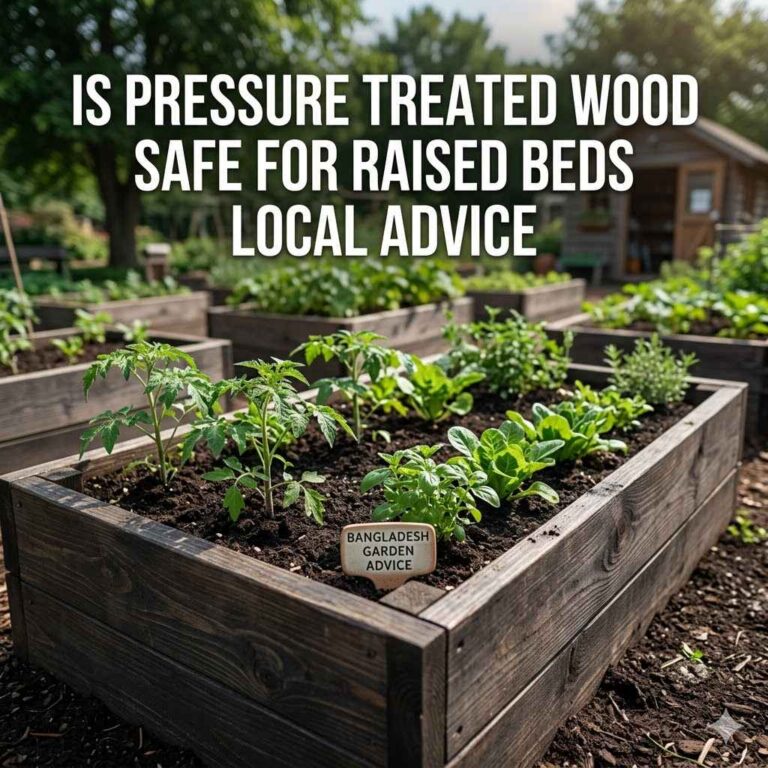
How Long Before Treated Wood Can Be Painted? Real Answer
Understanding how long treated wood needs before painting is key. Waiting too soon can cause paint to peel or bubble. It also means the wood might not be ready to accept the paint properly. This guide explains the drying process, factors that influence it, and how to know when your wood is truly ready.
Understanding Treated Wood and Paint
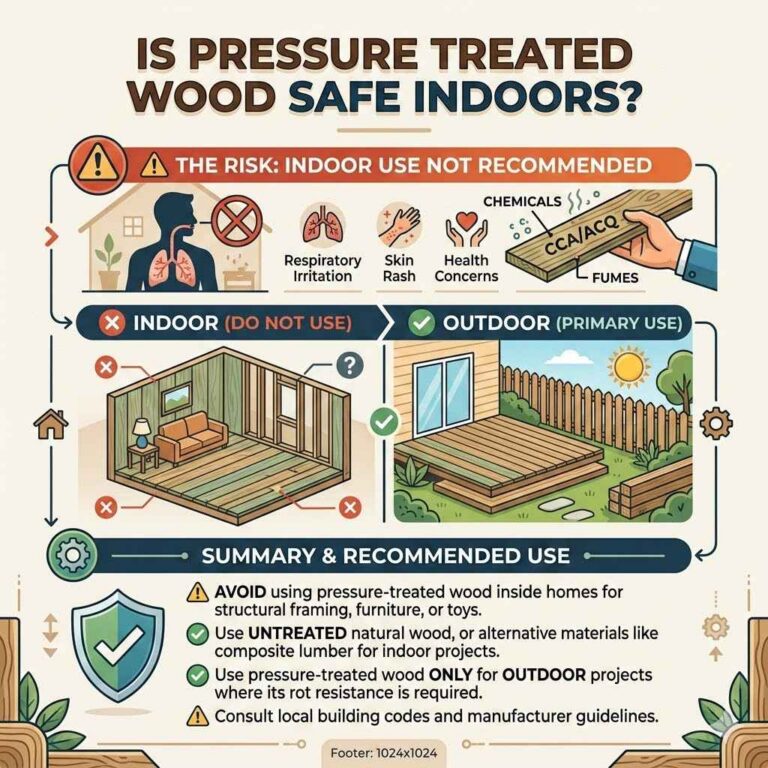
Treated wood is wood that has been specially treated. This treatment helps protect it from rot and insects. It’s often used outdoors.
Think decks, fences, and garden furniture. The treatment process forces chemicals deep into the wood. These chemicals are good for protecting the wood.
But they can be bad for paint. They can make the wood surface slick. They can also keep moisture trapped inside.
Paint needs a dry and stable surface. It needs something to stick to. When wood is freshly treated, it’s wet.
It’s also holding onto those treatment chemicals. Painting too soon is like trying to glue wet paper. The paint won’t stick well.
It might crack or chip off later. The chemicals can also react with the paint. This can cause discoloration or peeling.
So, patience is really important here.
The type of treatment matters too. The most common treatment is called Alkaline Copper Quaternary (ACQ). Others include Copper Azole (CA) and Micronized Copper Azole (MCA).
Each has slightly different properties. But all of them add moisture and chemicals. This means waiting is needed for all types of treated wood.
You can’t rush this step if you want a good paint job. It’s about making sure the paint lasts.
Why the Wait is Crucial
The main reason for waiting is moisture. Treated wood is soaked with a water-based preservative solution. This solution needs time to evaporate.
If you paint over wet wood, the moisture has nowhere to go. As it tries to escape, it pushes against the paint. This can create blisters.
It can also cause the paint to lift away from the wood. This is a common problem. It ruins the look of your project.
Besides moisture, there are residual chemicals. These can interfere with paint adhesion. They might create a barrier.
The paint can’t bond properly with the wood. This leads to peeling and flaking. It’s not just about how the wood feels dry.
It’s about the entire structure of the wood drying out. The chemicals need to settle in, too. They shouldn’t be so active that they fight the paint.
Think of it like baking a cake. You can’t take it out of the oven too early. It needs to set.
If you try to frost it while it’s still gooey, it’s a mess. Treated wood and paint are similar. The wood needs time to cure.
It needs to be dry all the way through, not just on the surface. This ensures the paint job is smooth and lasts a long time.
Common Treated Wood Paint Problems
- Paint Blistering: Moisture trapped under the paint escapes.
- Paint Peeling: Poor adhesion due to moisture or chemicals.
- Paint Flaking: Similar to peeling, but in smaller pieces.
- Discoloration: Chemicals reacting with paint over time.
- Uneven Finish: Paint not absorbing evenly on the wood surface.
These issues can turn a great project into a frustrating one. Proper drying prevents them.
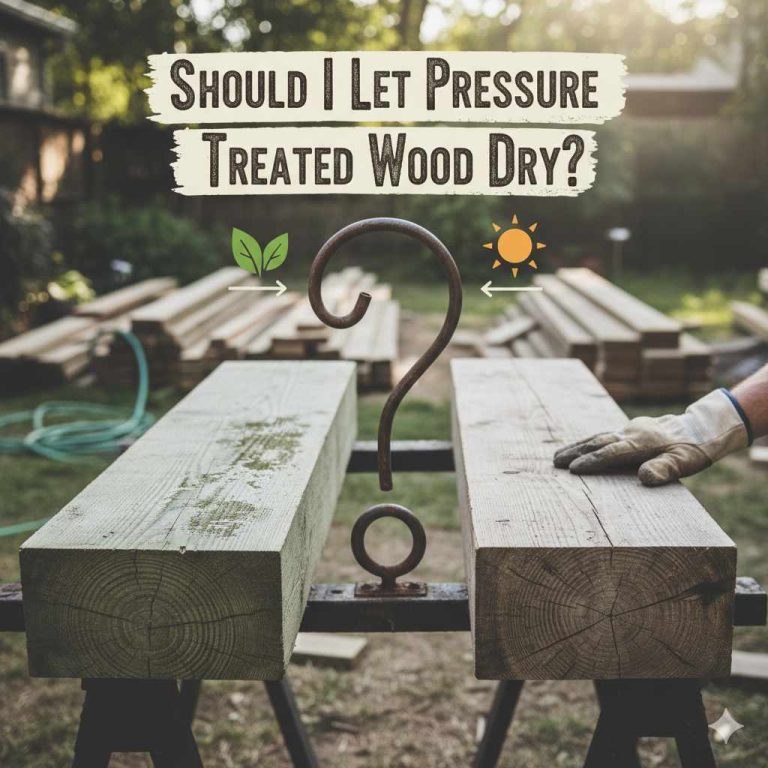
How Long Does Treated Wood Need to Dry?
This is the million-dollar question! The honest answer is: it varies. There isn’t a single magic number.
But most experts agree on a general timeframe. For typical treated lumber, you’re looking at anywhere from a few weeks to several months. Yes, months.
It sounds like a long time, but it’s often necessary.
A common recommendation is to wait at least 6 to 12 months. Some sources might say 4 to 6 months. This longer wait is especially true for structures like decks.
Decks are exposed to lots of weather. They need to be thoroughly dry. For smaller items like garden furniture or fence pickets, sometimes a shorter wait is okay.
But it’s still best to be patient.
Factors that influence drying time are important. The wood itself plays a role. The thickness of the lumber matters.
Thicker boards take longer to dry. They hold more moisture. The type of wood species can also be a factor.
Pine, for instance, tends to dry faster than some hardwoods. But treated wood is often pine or fir.
Factors Affecting Drying Time
Wood Thickness: Thicker wood = longer drying. A 2×4 dries faster than a 4×4.
Wood Species: Some woods absorb and release moisture differently.
Treatment Level: How much preservative was used?
Environmental Conditions: This is a big one!
Environmental Factors That Speed Up or Slow Down Drying
This is where things get really variable. The weather plays a huge role. If you live in a humid climate, drying will take much longer.
Warm, dry, sunny weather is your best friend for drying wood. Lots of airflow also helps immensely.
Think about it: if the air is already full of moisture, the wood struggles to release its own moisture. Dry air pulls moisture out. Sun helps heat the wood, which makes moisture evaporate faster.
Wind moves the moist air away. This creates space for more moisture to leave the wood. So, if you’re in Florida during summer, expect a long wait.
If you’re in Arizona in May, it might be quicker.
Proper stacking of the lumber is also key. If you just pile it up, air can’t get to all sides. This creates wet spots and uneven drying.
For decks or fences, this means good spacing between boards. For lumber you’re storing, it means using stickers (thin strips of wood) between layers. This allows air circulation all around.
Quick-Scan Table: Drying Time Estimates
| Conditions | Estimated Drying Time (Months) |
|---|---|
| Hot, Dry, Windy Climate | 4-6 months |
| Moderate Climate, Good Airflow | 6-9 months |
| Humid, Cool, Poor Airflow Climate | 9-12+ months |
These are general estimates. Always test the wood.
How to Tell If Your Treated Wood is Ready to Paint
This is the most important part. You can’t just rely on the calendar. You need to test the wood.
There are a few easy ways to do this. The simplest method involves common household items.
First, let’s talk about appearance. The wood should look lighter in color. Fresh treated wood often has a greenish tint.
As it dries, it should turn a more natural wood color, like a light brown or grayish-brown. However, color alone isn’t a guarantee. It’s just one sign.
The wood should also feel dry to the touch. It shouldn’t feel damp or cool. But even this can be deceiving.
The surface might feel dry, but moisture could still be trapped inside. That’s why testing is so vital.
The Water Drop Test
This is the most recommended and reliable test. It’s simple and uses only water. Get a small cup or container.
Pour a few ounces of water into it. Take the wood you want to test. Find a spot on the wood that will be painted.
Pour about a tablespoon of water onto that spot. Let it sit there for a few minutes, maybe 5 to 10.
Now, observe what happens to the water. If the wood is dry enough, the water will bead up. It will sit on the surface, like water on a waxed car.
If the wood is still too wet, the water will soak into it. It will disappear into the wood fibers. This tells you that moisture is still escaping from the wood.
The paint will not adhere well to wood that absorbs water like this.
If the water beads up, that’s a good sign! It means the wood surface is ready for paint. You can do this test in a few different spots on the wood.
This gives you a more accurate reading. If even one spot absorbs the water, you need to wait longer. It’s better to be safe than sorry.
A failed paint job is a lot more work to fix.
The Water Drop Test: Step-by-Step
- Get a small amount of water.
- Pour about one tablespoon onto the wood surface.
- Wait 5-10 minutes.
- If water beads up: Wood is likely ready.
- If water soaks in: Wood is too wet. Wait longer.
Repeat this test on different parts of your project.
Using a Moisture Meter
For a more precise reading, you can use a wood moisture meter. These tools measure the moisture content within the wood. You can find them at hardware stores.
They are relatively inexpensive. There are two main types: pin type and pinless type.
Pin-type meters have two small pins. You push these pins into the wood. The meter then reads the moisture content.
Pinless meters hover over the surface. They measure moisture without damaging the wood. For treated wood, it’s best to use a pinless meter if possible.
Or be very careful where you insert the pins. You don’t want visible holes on your finished project.
What reading are you looking for? For most exterior painting projects, you want the moisture content to be 12% or lower. Some sources might say 15% or lower.
But for the best adhesion and longest-lasting paint job, aim for 12% or less. Treated wood often comes with a moisture content of 19% or higher.
Using a moisture meter is a great way to be sure. It takes the guesswork out of it. You can check different boards and different areas.
This ensures uniformity. It’s a worthwhile investment if you do a lot of outdoor woodworking projects.
Moisture Meter Reading Goals
- Ideal for Painting: 12% or less
- Acceptable (with caution): 15% or less
- Too Wet for Paint: Above 15%
Tip: Always calibrate your meter according to the manufacturer’s instructions.
Preparing Treated Wood for Painting
Once you’ve confirmed your wood is dry enough, preparation is key. You can’t just slap paint on. Proper prep work makes a huge difference.
It ensures the paint sticks well and looks great.
First, clean the wood. Even if it looks clean, there might be dust or dirt. Use a stiff brush or broom to sweep it off.
If the wood has gotten dirty during the drying period, you might need to wash it. Use a mild detergent and water. Or use a cleaner specifically designed for wood.
Rinse it thoroughly. Let it dry completely again before moving on.
Inspect the wood for any rough spots or splinters. You might need to sand them down. Use medium-grit sandpaper, like 80 or 100 grit.
Sand with the grain of the wood. This smooths out any imperfections. After sanding, clean off all the dust.
A vacuum with a brush attachment works well. You can also use a tack cloth.
It’s important to remove any “fuzzies.” Treated wood can sometimes develop a fuzzy surface as it dries. Sanding helps with this. But make sure all dust is gone.
Any dust left behind will get trapped under the paint.
Choosing the Right Primer and Paint
This is a critical step for treated wood. Not all primers and paints are created equal. You need products designed for exterior use.
And they need to be suitable for treated wood.
Always use a high-quality exterior primer. Look for a primer that specifically states it’s for exterior wood. Some primers are designed to block stains.
They also help create a good base for paint. This is very important for treated wood. The primer helps seal in any remaining chemicals.
It also provides a surface that the topcoat can really grip.
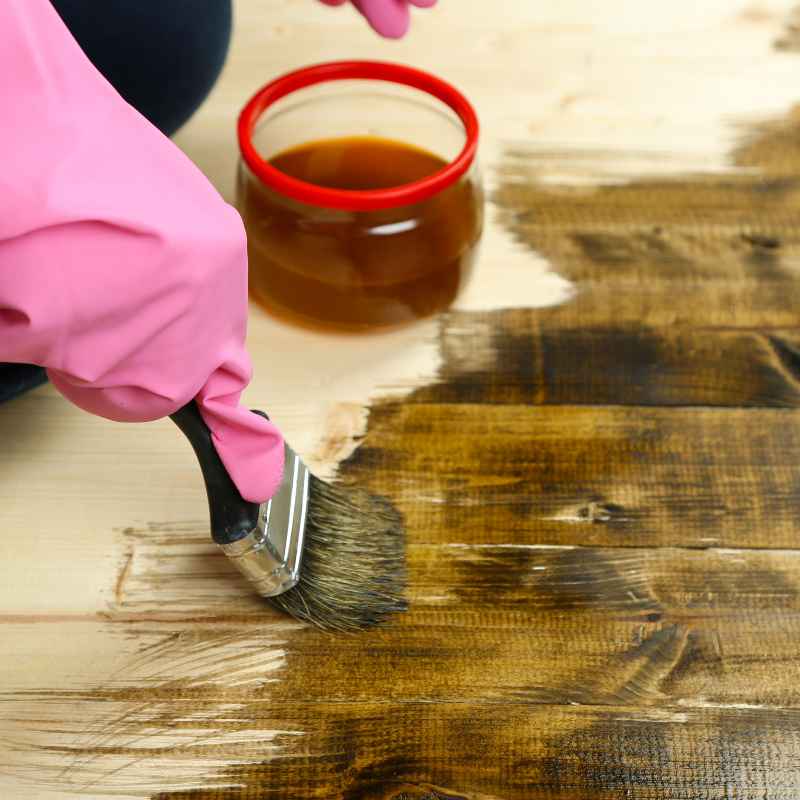
An oil-based primer is often recommended for treated wood. Oil-based primers tend to adhere better to challenging surfaces. They can help seal in those wood preservatives.
However, many water-based (latex) primers are now formulated for treated wood. Always check the product label. It should say if it’s suitable for treated lumber.
For the topcoat, choose a good quality exterior paint. Again, check the label. It should be suitable for wood.
Latex-based paints are common and work well. They are flexible and can expand and contract with the wood. This helps prevent cracking.
Primer & Paint Selection Tips
- Primer: Use an exterior primer made for wood. Oil-based is often best, but check labels for good water-based options.
- Paint: Choose a high-quality exterior paint. Latex paints are usually a good choice.
- Surface Prep: Ensure wood is dry, clean, and lightly sanded.
- Read Labels: Always check if the product is suitable for treated wood.
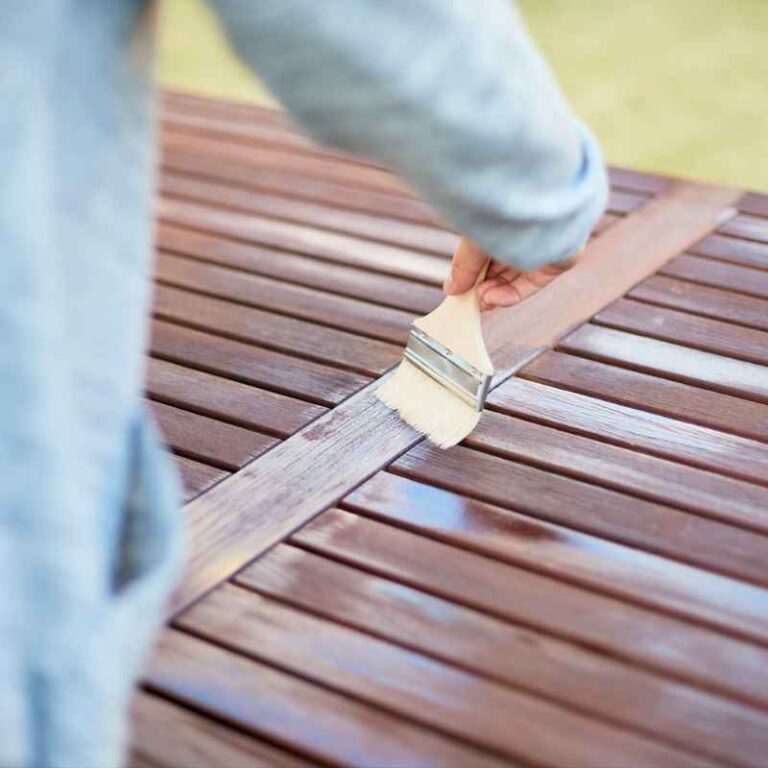
Painting Tips for Treated Wood Projects
Once you have your dry wood, your primer, and your paint, you’re ready to go. Painting treated wood is much like painting any other exterior wood, but with a few extra considerations.
Apply the primer first. Follow the manufacturer’s instructions for drying times. Most primers need a few hours to dry.
Don’t rush this. Once the primer is dry, apply your first coat of paint. Use even strokes.
Work with the grain of the wood.
Most projects will need two coats of paint. Allow the first coat to dry completely before applying the second. This usually means waiting at least 4 to 24 hours, depending on the paint and weather.
Check the paint can for specific instructions.
Avoid painting in direct, hot sun. The paint can dry too quickly. This can lead to brush marks.
It can also cause the paint to not adhere properly. Cooler, overcast days are often ideal for painting. Make sure there’s no rain expected for at least 24 hours after you finish.
If you are painting a deck, remember to paint between the boards too. Make sure to get into all the nooks and crannies. For vertical surfaces like fences, start at the top and work your way down.
This prevents drips from ruining already painted areas.
Painting Best Practices
Timing: Paint during cooler parts of the day. Avoid direct sun.
Application: Use even strokes. Follow wood grain.
Coats: Apply two coats of paint for best coverage and protection.
Drying: Allow adequate drying time between coats and before exposure to weather.
Tools: Use quality brushes and rollers suitable for exterior paint.
When is Treated Wood NOT Ready to Paint?
Let’s revisit the signs that your wood is NOT ready. It’s just as important to know what to look for as it is to know what’s good.
The most obvious sign is that the wood still feels damp. If you touch it and it feels cool or wet, it’s not ready. This is especially true if you can press your finger into it and feel moisture.
Another sign is if it looks very dark. While some treated wood darkens naturally with age, a very deep, wet-looking color can mean it’s still saturated.
The water drop test is your best friend here. If the water soaks in quickly, it’s a definite no. Don’t skip this test.
It’s easy and effective. Even if it’s been months, the wood might still be too wet. Every piece of wood is different.
Every environment is different.
If you’ve used a moisture meter and the reading is above your target (12-15%), then it’s too wet. Don’t risk it. The cost of fixing a paint job that fails is much higher than the cost of waiting a few more weeks or months.
Patience here pays off big time.
Alternative Finishes for Treated Wood
What if you really don’t want to wait the long drying period? Or what if you prefer a different look? There are other options besides paint.
Stains: Exterior wood stains are a popular choice. They penetrate the wood rather than forming a film on top like paint. Many stains come in different opacities.
You can get transparent stains that let the wood grain show through. Semi-transparent stains offer more color but still show the grain. Solid stains look much like paint.
They offer good protection. Stains are often more forgiving with slightly damp wood than paint is. However, the wood should still be reasonably dry for the best stain adhesion.
Sealers: Clear wood sealers provide a protective coating. They help repel water. They don’t add color.
They are good for maintaining a natural wood look. Like stains, they usually require less drying time than paint. But again, drier wood is always better.
Weathering Naturally: For some projects, like a rustic fence or a simple bench, you might decide to let the wood weather naturally. Treated wood will turn gray over time. This is a natural process.
It doesn’t harm the wood’s integrity. Many people like the look of weathered wood. If this is your goal, you don’t need to paint or stain at all.
Finish Options Compared
| Finish Type | Drying Time Impact | Appearance | Protection Level |
|---|---|---|---|
| Paint | Longest wait needed | Opaque color, hides grain | Highest |
| Solid Stain | Shorter wait than paint | Opaque color, may show slight grain | High |
| Semi-Transparent Stain | Moderate wait | Tinted color, shows grain | Medium |
| Transparent Stain | Shortest wait | Clear tint, shows all grain | Low to Medium |
| Sealer | Shortest wait | Clear, natural look | Low to Medium |
Always test finish on scrap wood.
My Own Experience: The Deck Fiasco
I remember building my first deck about ten years ago. I was so proud of it. It was made of beautiful, freshly treated pine.
I wanted it to look amazing. I planned to stain it a rich cedar color. I finished building the deck in late spring.
The weather was warm and sunny. I thought, “Great! This will dry super fast.”
I waited about two months. It seemed like enough time. The wood looked and felt dry to me.
I did the water drop test on a few spots. The water beaded up! I was so excited.
I went ahead and applied a beautiful semi-transparent stain. It looked absolutely stunning. I was so happy with myself.
Fast forward to the next spring. I went out to my deck. And oh boy.
The stain was peeling. In large patches. Especially where the sun hit it the most.
It looked terrible. I was so disappointed. And honestly, a little embarrassed.
I called a professional painter friend. He took one look and just shook his head. He explained that even though my water drop test passed, and it felt dry, the wood was still releasing moisture.
The chemicals were still active. The sun’s heat on the deck surface was the real culprit. It was baking the moisture out from underneath the stain.
This pushed the stain off.
He told me I should have waited at least six months, maybe even a full year. He said for decks, it’s always better to err on the side of caution. He had to strip the old stain.
Then the deck had to dry for a whole extra summer. Then it was re-stained. It was a huge amount of extra work and cost.
That experience taught me a valuable lesson. Patience is not just a virtue; it’s a necessity when working with treated wood.
Can You Paint Other Treated Items?
Yes, you can paint other treated wood items too! It’s not just for decks and fences. Think about outdoor furniture, pergolas, trellises, and even some types of garden sheds.
The same rules apply. The wood needs to be dry. You need to do the water drop test.
You need to use the right primer and paint. For outdoor furniture, you want a durable finish. It will see a lot of use.
For smaller items, like planters or birdhouses, the drying time might feel shorter. This is because they are often made from thinner lumber. They have more surface area exposed to air.
However, you still need to be sure. The water drop test is your best friend. Don’t skip it just because the item is small.
If you’re painting something that will be in constant contact with the ground, like the base of a planter, be extra vigilant. These areas will hold moisture longer. They are also more prone to rot.
A good quality exterior paint and primer are essential for longevity.
What If My Treated Wood Already Has a Green Tint?
The green tint is a sign of the copper-based preservatives. This is normal for most modern treated wood. It doesn’t automatically mean it’s not ready to paint, but it does mean you need to be patient and test.
As the wood dries, the green color should fade. It will turn into a more natural wood tone, often gray or light brown. If the green is still very strong and the wood feels damp, it’s definitely not ready.
Some stains and paints are designed to cover the green tint. But it’s still better if the wood is dry. If you are using a primer designed for exterior wood, it should help block out any remaining color.
The goal is for the primer and paint layers to be the barrier, not for the wood itself to be perfectly colored.
Can I Use Pressure Treated Plywood?
Yes, you can paint pressure-treated plywood. The principles are the same. Plywood is made of thin layers of wood glued together.
This means it can absorb and release moisture somewhat differently than solid lumber. It might dry faster in some ways, but can also hold moisture in the glue layers.
Always test the plywood with the water drop test. Ensure it’s dry. Use a good quality exterior primer and paint.
Plywood can be more prone to warping if it gets too wet. So, ensuring it’s dry before finishing is especially important. If you are using it for outdoor projects like a deck surface, proper sealing is critical.
Myths vs. Reality About Painting Treated Wood
There are a lot of conflicting ideas out there. Let’s clear some things up.
Myth vs. Reality: Painting Treated Wood
| Myth | Reality |
|---|---|
| You can paint treated wood right after it’s built. | No, treated wood needs significant drying time (months). |
| If it looks dry, it’s ready. | Not necessarily. The water drop test or moisture meter is needed. |
| Any outdoor paint will work. | No, use a high-quality exterior primer and paint made for wood. |
| The green color means it’s too wet. | The green is from the treatment. Color fades as it dries, but testing is key. |
| Waiting is a waste of time. | Waiting prevents costly paint failures and ensures a long-lasting finish. |
Final Thoughts: The Power of Patience
Dealing with treated wood and painting can feel like a waiting game. But the rewards are significant. A well-prepared and properly finished treated wood project will look great.
It will also last for many years. The key is to be patient. Test the wood thoroughly.
Use the right products. And take your time with the application.
Don’t let the frustration of waiting get the best of you. Think of it as an investment in the beauty and durability of your project. That deck, fence, or piece of furniture will serve you well for a long time.
All because you gave it the time it needed to dry. Happy building and painting!