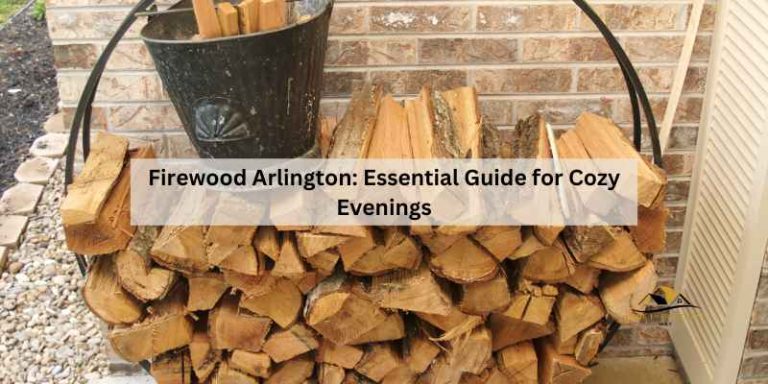
How To Build A Firewood Rack With Cinder Blocks
Building your own firewood rack can save you money and give you a great sense of accomplishment. Sometimes, the idea of building something can seem tough, especially if you’re new to DIY projects. But the truth is, How to Build a Firewood Rack With Cinder Blocks is simpler than you might think!
We’ll guide you through each easy step. Get ready to learn how to make a sturdy place to store your wood.
Simple Firewood Rack Ideas With Cinder Blocks
Many people find that using cinder blocks is a fantastic way to create a firewood rack. This method is popular because it’s affordable, requires very few tools, and is quite forgiving for beginners. You don’t need to be a master builder to get this done.
The basic concept involves stacking these concrete blocks in a way that creates supports for your wood. This keeps the wood off the damp ground and helps it dry out better. We’ll show you how to pick the right spot, gather your materials, and put it all together.
Choosing the Right Location
Finding the best place for your firewood rack is key to keeping your wood dry and ready for use. You want a spot that is relatively flat and offers good air circulation. Avoid areas that are too shaded or tend to hold a lot of moisture, as this can lead to mold and rot.
A location near your home but not directly against it is often ideal. This makes it easy to grab wood when you need it, but also prevents any potential dampness from affecting your house. Also, consider how the rack will look in your yard.
Sometimes, tucking it away behind a shed or at the edge of your property works well.
- Accessibility: Make sure you can easily get to the rack with your wheelbarrow or cart to load and unload wood. You don’t want to be struggling through thick brush.
- Drainage: The ground where you place the rack should drain well. If water pools there, your firewood will stay wet.
- Sunlight and Airflow: A spot that gets some sun and has good airflow helps your firewood dry faster. Avoid placing it in a dark, damp corner.
- Proximity to Fireplace or Stove: While not essential, having it somewhat close to where you’ll use the wood makes hauling it much easier on cold days.
- Aesthetics: Think about how the rack will look. While function is important, you might want it to blend in with your yard’s appearance.
Consider a spot that is away from any wooden structures. This minimizes the risk of pests or fire spreading. A gravel base can also help with drainage and keep the bottom blocks cleaner.
Think about the prevailing wind direction, too. If you can orient the rack so that wind can blow through it, your wood will dry even better.
Gathering Your Materials and Tools
For this project, you won’t need a lot of fancy equipment. The star of the show is, of course, the cinder blocks. You’ll also need your firewood.
That’s pretty much it for the main items! For tools, a tape measure can be helpful to ensure your spacing is even, and a level can make sure your rack is stable. If you plan to stack your blocks high, safety gloves are a good idea.
You might also want a shovel if you need to level the ground slightly. The beauty of this project is its simplicity; you can often get started with items you already have around the house.
- Cinder Blocks: The number you need depends on the size and height of the rack you want. Standard cinder blocks are readily available at most hardware and building supply stores.
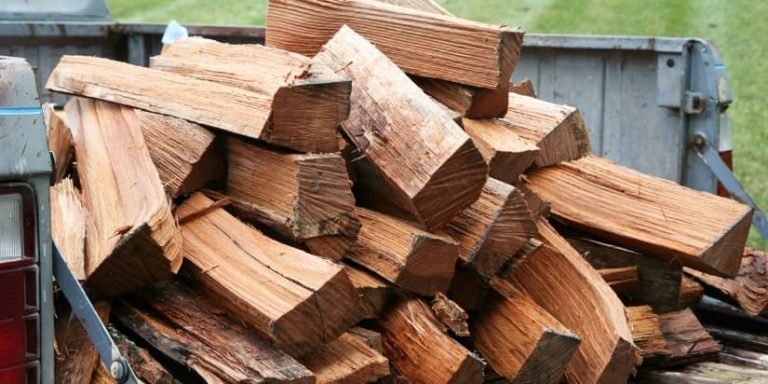
- Firewood: Make sure your wood is cut to a manageable size for stacking.
- Tape Measure (Optional): Helps with spacing and ensuring symmetry if you want a perfectly aligned rack.
- Level (Optional): Useful for ensuring your base layer of blocks is even, leading to a more stable structure.
- Safety Gloves (Recommended): Protect your hands when handling concrete blocks.
- Shovel (Optional): For leveling uneven ground to create a stable base for your blocks.
The exact number of cinder blocks will depend on the desired length and height of your rack. A common approach uses two rows of blocks to create a base. For a rack that’s about 4 feet high, you might need around 40-50 blocks for a 8-foot long section.
It’s always better to have a few extra than to run out mid-project. You can buy them individually or sometimes in bulk for a better price.

Building the Base Layer
The first step in building your firewood rack is to lay down the base layer of cinder blocks. This is the foundation, so it’s important to make sure it’s solid and level. You’ll want to lay your blocks parallel to each other, spaced apart to create channels for your firewood.
Think about how wide you want your rack to be; this will determine the distance between the blocks. Most people find that leaving enough space for a good amount of wood to fit comfortably is best. Ensuring this first layer is flat and even will make all the subsequent steps much easier and result in a more stable rack.
Leveling the Ground
Before you place any blocks, take a moment to make sure the ground where your rack will sit is as level as possible. Even a slight slope can cause your blocks to shift over time, making the rack unstable. If the ground is uneven, use a shovel to remove any high spots or fill in low spots.
A level can be very helpful here to check your work. This simple step prevents future problems and ensures your firewood rack is safe and sturdy.
- Check for Unevenness: Walk the area and look for dips and bumps.
- Remove High Spots: Use a shovel to scrape down any raised areas of soil or grass.
- Fill Low Spots: Add soil or gravel to low areas and pack it down firmly.
- Use a Level: Place a level on the ground to confirm it is flat across the intended width of your rack.
- Gravel Option: For superior drainage and stability, consider spreading a layer of gravel over the leveled ground and packing it down.
A well-leveled base is crucial. It prevents the weight of the firewood from causing the blocks to sink unevenly. This is especially important in areas with soft soil or during wet seasons.
Taking this extra time upfront pays off in the long run with a more durable and safer structure.
Placing the First Row of Blocks
Now, begin placing your cinder blocks on the prepared ground. Lay them out in two parallel lines, leaving enough space between them to hold your firewood. The standard hole-openings in cinder blocks usually face upwards, but some people turn them on their sides for different looks or support.
For a basic rack, keeping the holes facing up is common. Make sure the blocks are touching each other at the ends to form a solid line. Use your level to ensure each block is sitting flat and that the entire row is even.
- Spacing is Key: Decide on the width of your rack. A common spacing between the inner edges of the blocks is about 1.5 to 2 feet (about 18-24 inches). This allows for a good depth of firewood.
- Keep Them Close: For the base layer, place the blocks end-to-end in each line. This provides a continuous support.
- Check Each Block: Use a level on each block as you place it. Adjust by adding a little soil or gravel underneath if needed.
- Parallel Lines: Ensure your two lines of blocks are perfectly parallel to each other. Measure the distance at both ends to confirm.
- Consistent Height: Make sure the top surface of your entire base layer is at the same height.
This first layer acts as the foundation. If it’s not level and stable, the whole rack will be compromised. You want a solid, even base for the rest of your construction.
Think of it like building the foundation for a small house; it needs to be perfect.
Adding Height and Support
Once your base layer is perfectly in place, it’s time to add more height. This is where the rack really starts to take shape. You’ll be stacking more cinder blocks on top of the first layer.
The way you stack them can create different styles of racks. A simple method is to offset the blocks like you would with bricks, or to simply stack them directly on top of each other. For storing a good amount of firewood, two or three layers are usually sufficient.
Remember to keep everything level and stable as you build upwards.
Stacking the Second Layer
With the first row of blocks set, you can now add the second layer. For a basic and very strong rack, you can simply place the second set of blocks directly on top of the first. The holes in the blocks will align vertically.
This creates sturdy upright supports. Ensure each block in the second layer is positioned squarely on the block below it. Again, using your level on the top of each new block will help ensure a straight and stable structure.
This method is quick and requires no special techniques.
- Direct Stacking: Place each block directly on top of the corresponding block in the layer below.
- Align Holes: The vertical channels in the blocks should align, creating strong columns.
- Use the Level: Check the levelness of each block as you place it.
- Offset Stacking (Optional): For a slightly different look or added stability, you can offset the second layer blocks so they bridge the gap between two blocks below, similar to how bricks are laid.
- Secure Placement: Ensure each block sits firmly and doesn’t wobble.
This direct stacking method is the most straightforward and produces a very robust rack. The weight of the wood helps to hold the blocks in place. It’s an effective way to create vertical supports that can handle a substantial amount of firewood.
This approach is also quick to build.
Creating the Firewood Channels
The space between the cinder blocks is where your firewood will rest. As you stack your blocks, these gaps become your storage slots. For a typical cinder block rack, you’ll have these channels running horizontally between the parallel lines of blocks.
Make sure the spacing you established in the base layer is consistent all the way up. If you used offset stacking for the second layer, you might create slightly different looking channels. The goal is to have sturdy, open areas ready to be filled with wood.
- Consistent Gaps: The space between the blocks should remain the same on each level.
- Adequate Depth: Ensure the distance between the two parallel rows of blocks is wide enough to hold a good amount of firewood.
- Clear Access: The front and back of the channels should be open for easy loading and unloading.
- Smooth Surfaces: Check that there are no sharp edges or protruding pieces of concrete that could snag or damage your firewood.
- Optional Enhancements: Some people add small pieces of wood horizontally across the top layer of blocks to create a more finished look or to help keep wood from falling out the top.
These channels are the functional heart of your firewood rack. They need to be deep enough to hold a decent supply of wood and provide enough airflow around the logs. The simplicity of this design is its strength, offering an open and accessible storage solution.
Securing the Blocks (Optional)
For most basic cinder block firewood racks, especially those that are only two or three layers high, you might not need to secure the blocks further. The weight of the stacked blocks and the firewood itself provides significant stability. However, if you live in an area with high winds or plan to build a particularly tall rack, you might consider adding some adhesive.
Construction adhesive, designed for concrete, can be applied between the layers of blocks. This adds an extra layer of security and prevents shifting. Always follow the manufacturer’s instructions for any adhesive you use.
- Construction Adhesive: A heavy-duty adhesive made for bonding concrete and masonry is best.
- Apply Sparingly: You don’t need a lot; just a bead along the top of the lower block before placing the upper one is usually enough.
- Allow to Cure: Let the adhesive cure according to the product’s instructions before loading the rack with firewood.
- For Tall Racks: This is especially recommended if your rack will be four or more blocks high.
- Safety First: Work in a well-ventilated area when using adhesives and follow all safety precautions.
While not always necessary, using construction adhesive can provide peace of mind, especially in areas prone to strong weather. It’s a simple way to increase the longevity and stability of your DIY firewood rack.
Loading Your Firewood Rack
With your cinder block rack built, the most satisfying part is loading it up! This is where you see the result of your work. Stack your firewood neatly within the channels you’ve created.
It’s best to stack the wood so that air can circulate around each piece. Avoid packing it too tightly. Leaving some space ensures that the wood continues to dry properly and prevents moisture from getting trapped.
A well-organized rack not only looks good but also helps your firewood season effectively, making it ready for your fireplace or wood stove.
Proper Stacking Techniques
How you stack your firewood can make a big difference in how well it dries and how much you can fit into your rack. Start by placing the larger, rounder logs at the bottom for a stable base. Then, fill in the spaces with smaller pieces.
Try to stack the wood so that there are air gaps between the logs. This allows air to flow through the entire stack, helping to dry out the wood. Don’t pack the wood too tightly, as this can trap moisture.
Aim for neat, organized rows that allow for good ventilation.
- Base Layer: Start with your largest logs at the bottom for a solid foundation.
- Fill Gaps: Use smaller pieces to fill in spaces between larger logs.
- Airflow is Crucial: Leave small gaps between logs to allow air to circulate.
- Vertical Stacking: Some people stack logs vertically to maximize space and airflow.
- Avoid Overpacking: Do not jam wood in too tightly; this prevents drying.
A common mistake is simply tossing wood into the rack. Taking a few extra moments to stack it thoughtfully can significantly improve its drying time and overall quality for burning. Think about arranging pieces so that their ends are facing outwards where possible, allowing for maximum air exposure.
Tips for Maximizing Storage Space
To get the most out of your cinder block firewood rack, consider how you arrange the wood. Stacking logs in parallel rows, ensuring they are relatively uniform in length, will allow you to fit more wood into the available space. You can also use smaller pieces of kindling or split wood to fill in any large gaps between the main logs.
Some people even stack wood in a criss-cross pattern for added stability, though this might reduce the total volume slightly. The key is to be organized and to utilize the depth of your rack effectively.
- Uniform Lengths: Cut your firewood into consistent lengths for easier stacking.
- Fill Gaps Creatively: Use smaller, split pieces to fill any wasted space between larger logs.
- Alternating Directions: Sometimes, alternating the direction of logs in a row can create a more stable and space-efficient stack.
- Use the Full Depth: Ensure you are stacking wood all the way to the back of the rack.
- Consider a Roof (Optional): While this guide focuses on the blocks, adding a simple tarp or piece of plywood on top can protect the upper layers of wood from direct rain, extending its life.
The goal is to create a dense yet breathable stack. This maximizes the amount of wood you can store while still allowing for proper drying. It’s about being efficient with the space you have.
Frequently Asked Questions
Question: How many cinder blocks do I need for a firewood rack?
Answer: The number of cinder blocks depends on the size and height of the rack you want to build. For a typical rack that is about 4 feet long and 2-3 blocks high, you might need around 20-30 blocks. Always measure your desired space and calculate based on the dimensions of a standard cinder block.
Question: Can I build a firewood rack with just one layer of cinder blocks?
Answer: Yes, you can. A single layer of cinder blocks can keep your firewood off the ground, which is the most important function. However, a single layer won’t hold much wood and may not be as stable.
Two or three layers are more common for storing a good amount of wood.
Question: Do I need to secure the cinder blocks together?
Answer: For basic racks that are only two or three layers high, securing the blocks is often not necessary. The weight of the blocks and the firewood will keep them stable. If you are building a taller rack or live in a very windy area, you can use construction adhesive to bond the blocks together for added security.
Question: What is the best spacing for the cinder blocks?
Answer: A good spacing between the parallel rows of cinder blocks is usually between 1.5 to 2 feet (about 18-24 inches). This allows enough room to hold a substantial amount of firewood while still being manageable. The exact spacing can be adjusted based on the typical size of your logs.
Question: Will cinder blocks get too hot in the sun?
Answer: Cinder blocks can get warm in direct sunlight, but this generally doesn’t harm the firewood. In fact, some warmth can even help with drying. The primary concern is keeping the wood dry and off the damp ground, which cinder blocks achieve very well.
Final Thoughts
You have now learned how to build a firewood rack with cinder blocks. This simple, effective method keeps your wood dry and off the ground. By following these steps, you can create a sturdy rack with minimal tools and cost.
Enjoy your well-organized firewood supply!