How to Install Tile Around a Toilet Flange and Closet Bolts
Tile around a toilet flange after you verify the flange is supported at the finished floor, with the top resting on or very close to the finished surface so the seal can compress correctly. If tile raises the floor higher, add a flange extender before setting the toilet. Skip that check and you can end up with a wax ring that leaks, a toilet that rocks, or closet bolts that barely catch. This guide shows how to cut, dry-fit, and tile around the flange and leave the bolts long enough for a solid reset.
What height should a toilet flange be above finished floor?


Target the flange so its top ends up on top of, or roughly flush with, the finished floor. That position gives the wax ring a normal compression point while still leaving enough bolt engagement for the toilet base. If the flange lands below the tile, plan a repair before the final set.
What flange position to aim
A common target is a flange top that ends up on or very near the finished floor. That position usually gives the wax ring enough compression without forcing the toilet down onto a flange that is too low. Seal manufacturers typically want a close, compressible fit rather than a deep gap.
How tile and thinset change the math
Finished-floor height is not just the tile thickness. Add the thinset mortar bed under the tile, plus any underlayment or decoupling layer you use. A simple floor-build formula is: tile thickness + mortar thickness + underlayment thickness = finished height increase. That increase can move the flange from acceptable to too low.
For example, a 3/8-inch porcelain tile with about 1/8 inch of cured thinset can raise the floor by about 1/2 inch. If the flange started flush with the subfloor, it can end up below the tile surface after installation. That is the point where a flange extender or other repair becomes part of the plan, consistent with extender manufacturer instructions.
Do you tile under the toilet flange?
Tile under an existing flange only when the flange can remain supported, accessible, and at the right height after the floor build-up. In many remodels, the tile is cut around the flange instead. The choice depends on the flange material, its current height, and whether the toilet can still seal correctly after the tile goes in.
Tiling around an existing flange
When the flange already sits on top of the subfloor and the tile is being added around it, cut the tile to fit around the opening and leave the flange visible. That keeps the mounting ring and bolt slots accessible. PVC, ABS, and cast-iron flanges all need that access so the toilet can be reset later without disturbing the drain connection.
When a flange sits below the finished floor
If the flange ends up below the finished tile surface, the wax ring has to bridge a larger gap, which raises leak risk. Standard wax rings are intended for a flange near finished-floor height, not a recessed one. If the gap is larger, repair the flange height with an extender or other approved fix rather than relying on extra wax alone.
When repairs change the flange position
Cast-iron flanges often use a mounting ring or repair ring that can be fastened to the floor or into the existing body, while PVC and ABS versions are more often solvent-welded to the drain pipe. In any case, the flange needs to stay open, level, and available after tile is installed. Do not bury the bolt slots under tile.
How do you mark the flange and bolt centers?
Marking starts with room centerlines or a flange-centered layout so the tile cut around the opening stays balanced. That matters because a sloppy layout can leave a thin sliver at the front edge or a large, awkward notch at the toilet opening. Good layout also makes the bolt holes easier to line up later.
Set room centerlines
Snap reference lines from the room or from the toilet flange center, depending on how the bathroom is shaped. Use those lines to position the field tile so the cut around the opening is even on both sides. If the room is slightly out of square, keep the cut size consistent where possible and avoid a narrow strip at the door or the toilet side.
Trace the flange opening
Use the actual flange outline, not a guessed circle. Trace the opening and mark the front arc and side clearances on the tile before cutting. That keeps the tile edge where the toilet base will sit from landing too close to the flange and creating a weak, chip-prone section.
Check closet bolt spacing and rotation
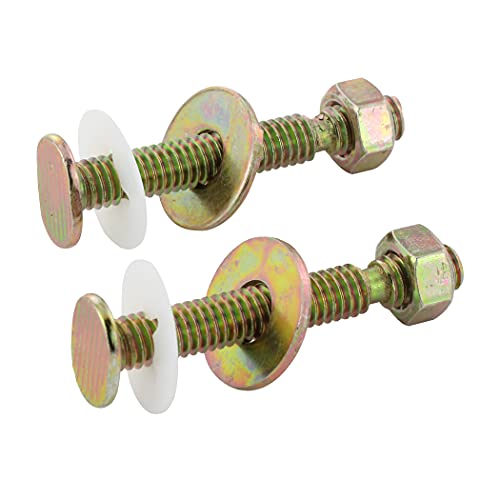
Closet bolts usually sit in the flange slots with the threaded ends facing up. Before setting the tile, check that the slots accept the bolts cleanly and that the bolts can rotate and lock in place. The bolt spacing needs to match the toilet base slots, and the thread length must extend far enough for washers, nuts, and final tightening.
Picture a flange where one bolt slot is turned sideways after repair. The toilet can still go down, but one bolt may bind as soon as the porcelain lands. Catching that before tile is set is much easier than forcing a fix after grout cures.
What tools and materials do you need to cut tile around a toilet flange?
Gather the cutting and setting tools before you mark the opening so the tile can be dry-fit, trimmed, and reset without delays. A wet saw handles straight cuts, a grinder manages tight curves, and nippers clean up small adjustments. Keep the seal option ready too, because flange height decides whether you use standard wax, extra-thick wax, or an extender.
- Wet saw
- Angle grinder with diamond blade
- Tile nippers
- Thinset mortar
- Tile spacers
- Flange extender
- Standard wax ring
- Extra-thick wax ring
- Flexible toilet base caulk
How do you cut tile around the toilet flange?
Dry-fit the tile against the flange before you cut. Then mark the arc, the bolt clearances, and the small movement gap. The opening needs room for the flange, room for the hardware, and an edge that will not chip when the toilet is tightened down. Match the tool to the cut shape, because one tool will not handle every part cleanly.
Step-by-step checklist before cutting
- Measure the finished-floor build-up and confirm flange height.
- Dry-fit the tile around the flange opening.
- Mark the flange arc and bolt centers on the tile.
- Confirm the movement gap around the flange and bolt slots.
- Plan the main cut with the wet saw and detail cuts with the grinder or nippers.
- Test the tile fit again before thinset is applied.
Use a wet saw for main cuts
A wet saw is best for straight cuts and larger curved sections that can be broken into smaller passes. It gives cleaner edges on porcelain and reduces heat and dust. Start with the main shape of the tile, then refine the opening with other tools as needed.
Use an angle grinder for tight curves
An angle grinder with a diamond blade works well for tight curves and touch-up work near the flange. It is more likely than a wet saw to chip porcelain, so keep the blade steady and make shallow passes. Use it where the cut needs fine control, especially at the front arc of the opening.
Use tile nippers for small adjustments
Tile nippers are best for small relief cuts, like nibbling a corner near a bolt slot or trimming a tiny high spot after sawing. They are not meant for long curved cuts or the whole flange opening. Take small bites and keep the pressure light so the edge stays intact.
A common first-timer mistake is trying to finish the whole flange cut with nippers alone. That often leaves a jagged edge and a gap that is too wide in one spot, then too tight in another. Start with a saw or grinder, then use nippers only for fine tuning.
How much gap should you leave around the flange and closet bolts?
Leave a small, even gap around the flange so the tile can move slightly without binding against the toilet hardware. Around the bolt area, leave enough room for the bolt shank and washers to pass through without pushing the tile edge. The goal is a practical gap, not a zero-clearance fit.
Gap at the flange edge
Keep the tile edge off the flange by a narrow movement gap rather than butting the tile tight to the metal or plastic. A common practical range is about 1/8 inch around the flange body, enough to prevent binding and chipping without leaving an exposed cavity. Consistency matters more than forcing a perfect circle.
Gap around closet bolts
Do not crowd the bolt slots. The bolts need room to sit upright, stay aligned, and pass through the toilet base without rubbing the tile. Leave enough space for the hardware to move freely, usually a small clearance of about 1/8 inch or a little more where the cut edge is irregular.
Movement, chipping, and cleanup
The front arc of the toilet opening takes the most traffic and load, so a weak edge there is a bad place to save a few millimeters. A small gap also gives you room to clean out thinset squeeze-out before it hardens. Use grout only where the field tile calls for it, and do not pack rigid material tight to the flange opening where movement and future service access matter.
Toilet flange troubleshooting table
Use this table when the flange height or bolt layout does not match the tile job you planned. The fixes below focus on finished-floor height, seal compression, and bolt engagement, since those are the parts that decide whether the toilet sits solidly and seals well.
| Scenario | Likely symptom | Measurement to check | Fix | Wrong move to avoid |
|---|---|---|---|---|
| Flange flush | Wax ring compresses unevenly, or the toilet rocks slightly after tightening | Measure flange top relative to the finished floor | Use a standard seal only if the flange still sits in the target range after tile; add a spacer or extender if needed | Setting the toilet and hoping the wax ring will fill a larger gap |
| Flange low | Seal is not fully compressed and leaks may appear after flushing | Measure how far the flange sits below the finished tile surface | Install a flange extender or choose an extra-thick seal if the gap is within its limits | Adding more wax without correcting the flange height |
| Flange high | Toilet base rocks on the flange or refuses to sit flat | Measure how far the flange rises above the finished floor | Lower the finished surface if possible, or correct the flange before setting the toilet | Forcing the toilet down and cracking the base or tile edge |
| Bolts misaligned | Bolts bind, lean, or do not reach the toilet base slots | Check bolt spacing, slot orientation, and thread length above the flange | Rotate the bolts into the correct slot position or replace with longer bolts if the toilet base thickness needs it | Bending the bolts hard against the tile or trimming them too short |
How do you set the toilet without rocking?
Choose the seal based on the finished-floor height, then set the toilet squarely over the bolts and press it down once. Tighten the closet bolts evenly so the bowl draws down without twisting, following common installation practice and the wax-ring or seal maker’s compression guidance. After that, check for rocking, inspect for leaks, and confirm that the bolt threads remain long enough for the nuts and caps.
Choose the right wax ring or seal
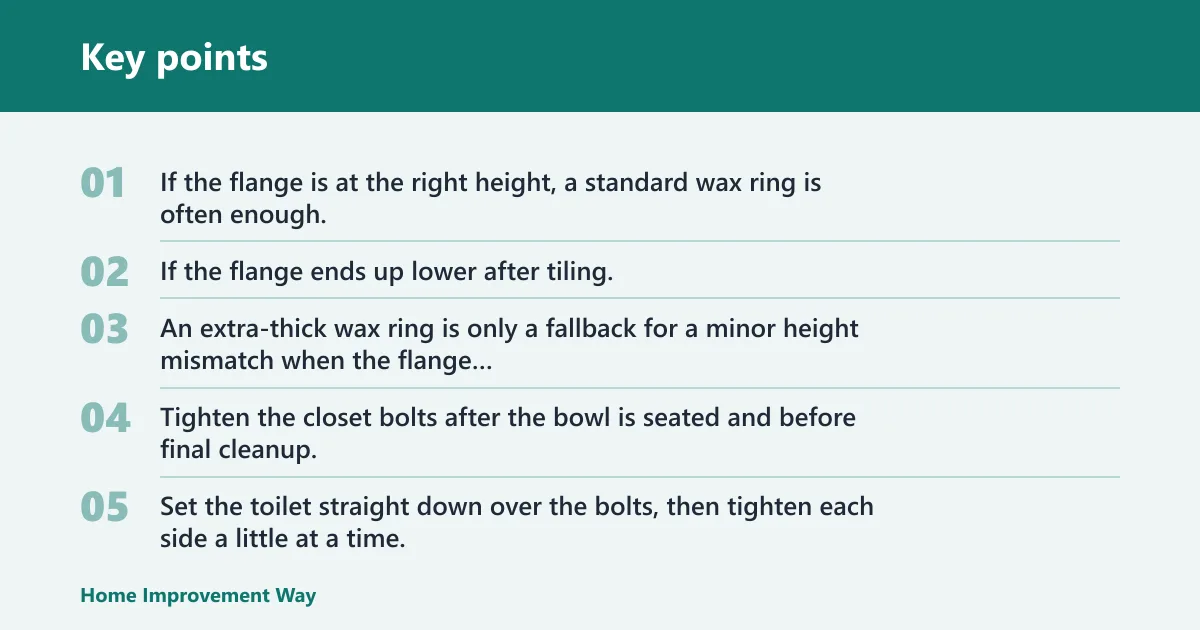
If the flange is at the right height, a standard wax ring is often enough. If the flange ends up lower after tiling, first correct the flange height with an extender or repair. An extra-thick wax ring is only a fallback for a minor height mismatch when the flange is still close enough to the finished floor for proper compression; it should not be used to make up for a flange that is clearly too low.
When the bolt-tightening page helps next
Tighten the closet bolts after the bowl is seated and before final cleanup; that guide helps when the toilet rocks, the nuts feel uneven, or you need a quick check on safe tightening order and stopping points.
Tighten closet bolts evenly
Set the toilet straight down over the bolts, then tighten each side a little at a time. Even tightening keeps the bowl from twisting and reduces stress on the tile edge. Stop when the toilet is firm and no longer rocks; do not keep tightening just to force the base tighter to the floor.
Check for leaks and base movement
After the water is back on, flush several times and watch the base and the supply connection. A dry tissue around the base can help reveal seepage quickly. Leave the rear gap unsealed if you want leak detection to remain visible; that small opening can tell you early if water is escaping.
Say your tile build raises the floor by 9/16 inch, but the flange was already flush with the subfloor. The toilet may bolt down, yet the wax ring can be under-compressed. That is the kind of setup where a flange extender or different seal is needed before the final reset.
Should you caulk or grout the toilet base?
Caulk belongs where the toilet meets the finished floor at the front and sides, because that joint needs flexibility. Grout is too rigid for that seam, and plumbing installation guidance generally keeps movement joints at fixture edges flexible rather than hard-grouted. Leave the rear portion unsealed if you want to spot leaks early.
Where caulk belongs
Use a color-matched flexible caulk along the visible front and side edges if the toilet is stable and leak checks are complete. That page helps when you want a neat finish and need to confirm the right sealant type for a fixture-to-floor joint. The caulk line should be neat, but it should not lock the toilet so tightly that future leak detection becomes difficult. Keep it low and clean.
Where to leave a checkable gap
Do not seal the entire perimeter if you need to confirm whether water is escaping from the wax ring or supply line. Leaving the back open is common for that reason. If local practice calls for full caulk, make sure the sealant choice still allows inspection and does not trap moisture under the base.
Frequently asked questions
How do you tile around a toilet flange without leaving a weak edge?
Keep the cut edge even, leave a small movement gap, and avoid a narrow sliver at the front of the opening. Dry-fit the tile, mark the arc, then use a wet saw for the main cut and a grinder or nippers for the final shape. The goal is a stable edge that will not chip when the toilet is tightened.
Do you install tile under the toilet flange or cut around it?
Most remodels cut around an existing flange so the mounting ring and bolt slots stay accessible. Tile goes under the flange only when the flange is being reset or repaired as part of the floor work. The final decision depends on flange height, material, and whether the seal will still land in the correct range.
How much gap should you leave around closet bolts and the flange?
Leave enough room for the bolts to stand upright and for the tile not to touch the flange body. The gap should be small and even, not tight enough to bind the hardware or so wide that the toilet base hides a rough cut. A consistent gap of about 1/8 inch is a useful target.
What is the best way to mark and cut tile around a toilet flange?
Mark room centerlines, then trace the flange opening and bolt centers before cutting. Make the main shape with a wet saw, use an angle grinder for tighter curves, and finish small corrections with nippers. Dry-fit the tile before setting it so the opening and bolt holes land where they should.
Can you use a wax ring if the toilet flange ends up too low after tiling?
Only if the flange is still close enough to the finished floor for proper compression. If the flange is too low, first correct the height with a flange extender or repair. An extra-thick ring is only a limited backup when the height difference is small enough for the seal to work as intended.
What do you do if the closet bolts do not line up after tile is installed?
First check whether the bolts are rotated into the correct flange slots and whether the toilet base slots line up with them. If the bolts are too short, replace them with longer ones that still allow full nut engagement. Do not force the toilet sideways or bend the bolts hard against the tile.
Sponsored / affiliate links. As an Amazon Associate I earn from qualifying purchases. I may earn additional commission from eligible campaigns.