How To Make A Nutcracker Soldier Out Of Wood (Diy Guide)
Making a wooden nutcracker soldier involves shaping wood pieces for the body, head, arms, and legs, then assembling them with fasteners and adding decorative details like paint and fabric for a festive, classic holiday figure.
Understanding Your Nutcracker Project
A wooden nutcracker soldier is more than just a toy. It’s a piece of holiday tradition. People love them for their bright colors and stern looks.
They often stand guard near Christmas trees. Making one yourself is a rewarding hobby. It lets you add a personal touch to your home.
You get to decide the colors and size. This whole process is about bringing a classic idea to life with your own hands. It’s a chance to learn new skills too.
The basic nutcracker soldier has a few key parts. There’s a body, a head, and limbs. Often, there’s a hat and a uniform.
The classic design shows a soldier standing tall. They might hold a sword or a scepter. Some have a big mouth that actually works like a nutcracker.
Others are just for show. We’ll focus on making one for display. This means we can simplify some parts.
Our goal is a sturdy, good-looking soldier.
Why build one from wood? Wood is a great material for crafts. It’s natural and can be carved or shaped easily.
It feels good to work with. Plus, a wooden nutcracker has a certain charm. It feels more handmade and special.
You can paint it any color you like. This is where your creativity shines. You can even make it a family project.
Kids can help with painting or gluing smaller parts.
Gathering Your Wood and Tools
Before you start cutting, you need the right stuff. For a wooden nutcracker, softwoods are best. Pine is a great choice.
It’s easy to find and easy to cut. You can get it at any lumber store. You’ll need a few pieces.
Maybe a 1×4 board and a 1×6 board would work. The length depends on how big you want your soldier. A 6-foot board of each should be plenty.
What tools do you need? You don’t need a whole workshop. A handsaw is fine for cutting.
If you have a jigsaw, that’s even better. It makes curved cuts easier. You’ll need sandpaper to smooth everything out.
Get a few different grits. Start with a rough one and move to a fine one. Glue is important for holding parts together.
Wood glue is the strongest. You’ll also need screws or dowels for extra strength.
For painting, get some acrylic paints. Red, blue, white, and black are good starting colors. You’ll also need brushes.
A few different sizes will be helpful. Don’t forget a pencil for drawing your shapes. Safety gear is also a must.
Always wear safety glasses when cutting or sanding. Gloves can protect your hands too.
Essential Materials List
- Wood: Pine boards (e.g., 1×4, 1×6)
- Cutting Tools: Handsaw or Jigsaw
- Smoothing: Sandpaper (various grits)
- Fasteners: Wood glue, screws or dowels
- Decorating: Acrylic paints, paintbrushes
- Marking: Pencil
- Safety: Safety glasses, gloves
Having these items ready makes the building process smooth. It prevents you from stopping mid-project to get something. Think of it like gathering ingredients before you cook.
It makes the whole experience much more fun.
Designing Your Nutcracker Soldier
Now, let’s think about the design. You can find many nutcracker patterns online. Or, you can draw your own.
A basic soldier shape is a good place to start. It’s basically a tall rectangle for the body. Then, you’ll need a head shape.
A cylinder or a square works. Arms can be simple shapes too. Legs are usually straight pieces.
The details are what make it special. A hat is a must. It could be a tall shako hat or a simple cap.
Think about the uniform. Will it have stripes? Buttons?
A sash? These elements add character. You can draw these details on paper first.
This is like a blueprint. It helps you see the finished product before you cut any wood.
Consider the size. A 12-inch nutcracker is a nice size for a shelf. A 2-foot one makes a statement.
Keep your wood sizes in mind. A 1×6 board is about 5.5 inches wide. So, a 12-inch soldier made from this will look proportionate.
You can scale your drawings to fit your wood. It’s all about making it fit your space and your vision.
For example, let’s sketch out a simple design. The body could be a piece of 1×6, maybe 8 inches long. The head could be a 3-inch long piece of 1×4.
Arms could be two 4-inch pieces of 1×4. Legs could be two 5-inch pieces of 1×4. The hat can be made from scrap wood.
These are just ideas. You can adjust them to your liking.
Simple Soldier Shape Breakdown
- Body: Tall, rectangular piece.
- Head: Cylindrical or square piece.
- Arms: Straight or slightly bent pieces.
- Legs: Straight, sturdy pieces.
- Hat: Separate piece for a crown.
- Details: Painted or added trim for uniform.
Drawing it out first saves a lot of guesswork. You can see how the parts will fit. It helps you plan your cuts too.
This step is really important for a good result. Don’t skip it.
Cutting Out the Pieces
Now comes the cutting. Take your drawn design and trace it onto the wood. Use your pencil.
Make sure the lines are clear. If you’re cutting a body that’s just a rectangle, measure it carefully. For curved shapes, like a hat brim or rounded shoulders, use your pencil to draw the curve.
Then, use your jigsaw to cut along the line.
If you’re using a handsaw, take your time. Make slow, steady strokes. Try to keep the saw straight.
This is especially important for straight cuts. For curves, a jigsaw is much easier. Always cut outside your pencil line.
This leaves room for sanding. You don’t want to cut too much away.
When cutting smaller pieces, like arms or legs, be extra careful. Hold the wood firmly. If using a power saw, make sure your hands are well away from the blade.
Safety is the priority here. You want to enjoy making your nutcracker, not have an accident.
After cutting, you’ll have all the shapes you need. They might look rough. That’s okay.
The next step is making them smooth. This is where sandpaper comes in. Start with a medium-grit sandpaper.
This will remove any rough edges or saw marks. Go over all the cut edges and surfaces. Feel the wood.
Is it smooth? If not, keep sanding.
Once the rough sanding is done, switch to a fine-grit sandpaper. This makes the wood feel really nice. It prepares it for painting.
Smooth wood takes paint better. It also looks much more finished. Take your time with this step.
It really makes a difference in the final look of your nutcracker soldier.
Cutting Tips for Success
- Trace Carefully: Use a sharp pencil.
- Cut Outside the Line: Saves wood for sanding.
- Steady Strokes: For handsaws, go slow and even.
- Jigsaw for Curves: Makes rounded shapes easier.
- Safety First: Always wear safety glasses.
- Sand Smooth: Use medium then fine grit sandpaper.
Don’t rush the sanding process. It’s worth the effort. A smooth piece of wood is a good base for your artwork.
It shows you care about the quality of your work.
Assembling the Nutcracker Soldier
With all your pieces cut and smooth, it’s time to put them together. This is where your soldier starts to take shape. First, attach the head to the body.
Use wood glue for this. Apply a good amount to the top of the body piece. Then, press the head piece firmly onto it.
Hold it in place for a minute or two. You can use clamps if you have them.
If you want extra strength, you can add screws or dowels. For screws, drill a pilot hole first. This prevents the wood from splitting.
Then, drive the screw in. Make sure the screw head sits flush or slightly below the wood surface. For dowels, drill holes in both pieces that line up.
Then, put glue in the holes and insert the dowel. This creates a strong bond.
Next, attach the arms. Glue them to the sides of the body. Make sure they are positioned where you want them.
You can have them straight down or slightly out. Again, screws or dowels can add strength. Do the same for the legs.
Attach them to the bottom of the body. You want the soldier to stand up straight. So, make sure the legs are even.
The hat goes on top of the head. Glue it securely. If your hat has multiple parts, like a brim and a crown, assemble those first.
Then, attach the whole hat to the head. This is a good time to check the balance. Does the soldier stand well?
If not, you might need to adjust the leg placement a little.
Once the main structure is glued, let it dry completely. Check the glue instructions for drying time. It’s usually at least a few hours, or overnight.
Don’t rush this. A strong glue bond is key to a durable nutcracker. Once it’s dry, you can gently test its sturdiness.
It should feel solid and well-put-together.
Assembly Steps Overview
- Head to Body: Use wood glue for a strong bond.
- Arms: Attach to the sides of the body.
- Legs: Secure to the bottom, ensure stability.
- Hat: Glue to the top of the head.
- Reinforce: Use screws or dowels for added strength.
- Dry Thoroughly: Allow ample time for glue to cure.
This assembled structure is the foundation. It’s exciting to see it finally look like a nutcracker. The next part is making it beautiful.
Painting and Decorating Your Soldier
This is where your nutcracker soldier really comes to life. Start with a base coat of paint. White or a light primer is good.
This helps your colors pop. Let the base coat dry completely. Then, start adding the main colors of the uniform.
Red and blue are classic soldier colors. Use steady brush strokes.
Think about the details. Soldiers often have gold or black trim. You can use a smaller brush for these.
Paint stripes on the sleeves or pants. Add buttons down the front. A belt is another common detail.
You can paint this black or brown. Don’t forget the hat. It might have a band or a symbol on it.
If you want a more rustic look, you can use washes. A wash is watered-down paint. It can add depth and texture.
You can also dry-brush. This is where you use very little paint on the brush. It highlights raised edges.
These techniques can make your nutcracker look more professional.
Some people like to add fabric. You can cut small pieces of ribbon or felt for sashes or trim. Use fabric glue to attach these.
Glitter glue can add a festive sparkle. You can even use small beads for buttons or decorations. Be creative!
This is your unique nutcracker.
My first attempt involved a lot of trial and error. I painted a bright red coat, but then realized I forgot to paint the trim first. I had to carefully go over the red with a fine brush to add the gold stripes.
It took patience! I learned that planning the paint order is important. Also, letting each layer dry is crucial.
Smudged paint is not a good look for a soldier!
Painting & Decorating Tips
- Base Coat: Use white or primer for best color results.
- Classic Colors: Red, blue, white, gold, and black work well.
- Detail Brushes: Use small brushes for trim and fine lines.
- Layering: Let each paint color dry before adding the next.
- Optional: Add fabric, glitter, or beads for extra flair.
- Sealing: Consider a clear coat to protect the paint.
When you’re happy with how it looks, you can add a clear sealant. A spray sealant will protect the paint. It also gives it a nice finish, whether matte or glossy.
This step isn’t required, but it helps your nutcracker last longer.
Adding Special Touches and Details
The basic nutcracker is now painted. But what makes it truly special? It’s the little things.
Think about the face. You can paint eyes, a nose, and a mouth. Some nutcrackers have a stern expression.
Others look a bit grumpy. You can paint a mustache or beard. This adds a lot of personality.
What about accessories? Many nutcrackers hold props. A sword is common.
You can make a simple sword shape from wood or even sturdy cardboard. Paint it silver or gold. Glue it into the nutcracker’s hand.
A scepter is another option. Or perhaps a small flag?
The base is also important. Some nutcrackers have a simple square base. Others have more elaborate stands.
You can create a stand from scrap wood. It should be wide enough to keep the nutcracker stable. You can paint the base to match the soldier, or in a contrasting color.
I once made a nutcracker for a friend who loved cats. So, I painted his uniform with little cat faces. I also added a tiny fabric cat tail to his back.
He looked quite funny! It’s these personal touches that make a craft project memorable. Think about who it’s for, or what theme you want.
Consider the material of the hat. While we cut ours from wood, some are made from felt or rolled paper. You could try that for a different look.
A fuzzy trim around the hat could be fun. Or a shiny ribbon band. There are many ways to make your nutcracker stand out.
Enhancing Your Nutcracker
- Facial Features: Paint expressive eyes and a mouth.
- Props: Add a sword, scepter, or flag.
- Base: Create a stable and decorative stand.
- Uniform Details: Personalize with unique emblems or patterns.
- Hat Variations: Experiment with different materials like felt.
These extra steps take time, but they add so much charm. They turn a simple wooden figure into a unique piece of art. It’s these touches that people notice and love.
Real-World Nutcracker Context
Wooden nutcrackers have a long history. They became popular in Germany in the 19th century. Initially, they were actual tools used to crack nuts.
But they were also seen as symbols of good luck. People believed they could ward off evil spirits. This belief helped them become popular holiday decorations.
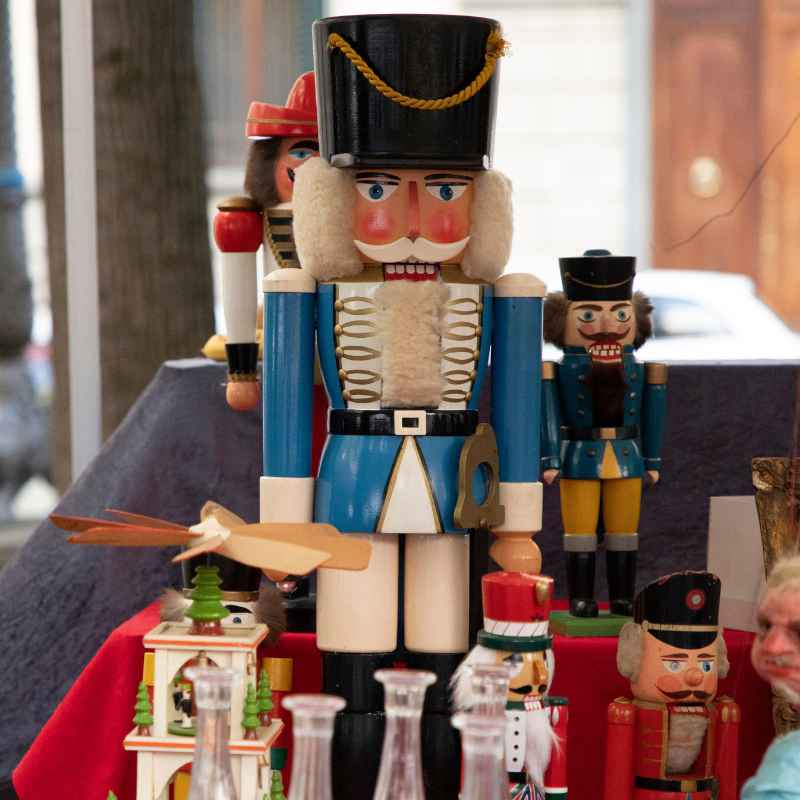
The classic nutcracker often depicts a king, a soldier, or a prince. These characters represent authority and protection. The traditional colors are often red, green, and gold.
This fits the festive holiday mood. Many families have a special nutcracker that comes out every year. It becomes a treasured heirloom.
In American homes, nutcrackers are most often seen during the Christmas season. They are placed on mantels, shelves, or as part of a larger holiday display. Children are often fascinated by them.
They might even act out stories inspired by them. The Nutcracker ballet also plays a big role in their popularity. It tells a magical story featuring these figures.
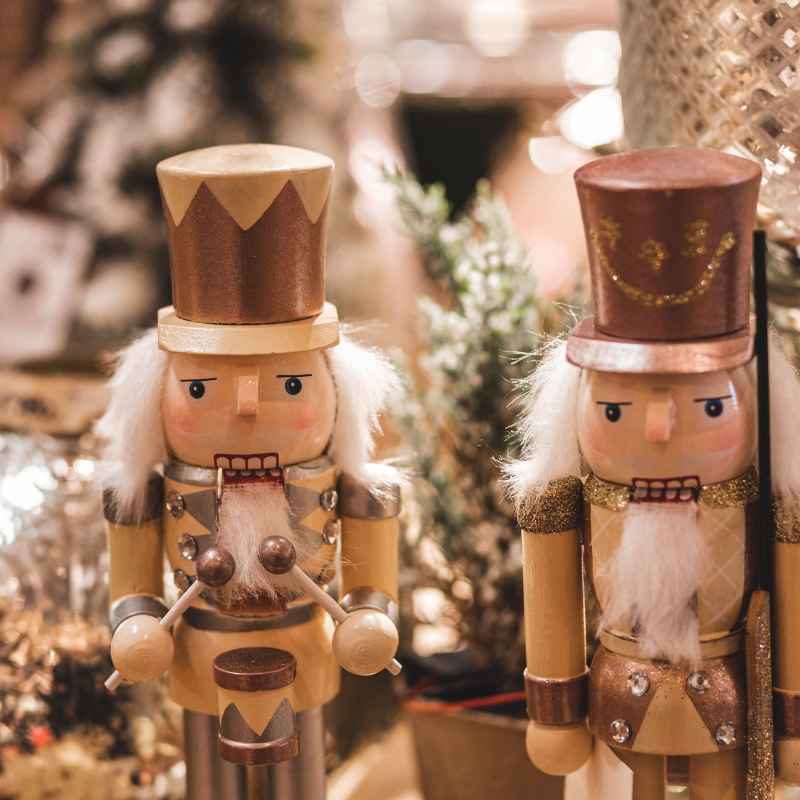
The design has evolved over time. While the classic soldier is popular, you can find nutcrackers in all sorts of shapes now. There are animal nutcrackers, Santa nutcrackers, and even pop culture nutcrackers.
However, the carved wooden soldier remains an iconic representation. It’s a timeless design that people connect with.
When making your own, think about where it will live. If it’s going outside on a porch (though wood isn’t ideal for the elements), you’d need different finishes. For indoor use, standard paints and sealants are fine.
The environment matters for durability and appearance. Most DIY nutcrackers are made for indoor display.
Nutcracker Traditions
- Origin: Germany, 19th century, as nutcrackers and good luck charms.
- Symbolism: Kings, soldiers, princes represent authority.
- Holiday Icon: Primarily associated with Christmas decorations.
- Cultural Impact: Popularized further by “The Nutcracker” ballet.
- Display: Commonly seen on mantels and shelves.
Understanding this context helps appreciate the craft. It’s not just a wooden figure; it’s part of a story and a tradition.
What This Means for You
Making your own wooden nutcracker soldier is very achievable. Even if you’re new to woodworking, the steps are manageable. You don’t need a lot of fancy tools.
A basic set of tools and some patience will get you far. The main thing is to enjoy the process.
You get a unique decoration. It’s something you made yourself. This adds a special meaning to your holiday decor.
It’s a conversation starter when guests visit. Plus, you can feel proud of what you created. It’s a tangible result of your effort and creativity.
This project is also a great way to learn. You’ll practice cutting, sanding, and painting. These are skills you can use for other DIY projects.
You might discover you really enjoy working with wood. It could be the start of a new hobby. For children, it’s a fantastic way to learn about crafting and traditions.
When is it “finished”? It’s finished when you’re happy with it. There’s no strict rule.
Some people love adding more and more detail. Others prefer a simpler look. The important part is that you enjoyed making it.
And that you have a soldier you’re proud to display.
What if it’s not perfect? That’s okay! Hand-made items often have little quirks.
A slightly uneven line or a small paint smudge can add character. It shows it wasn’t mass-produced. It’s perfectly normal for beginner projects to have imperfections.
That’s part of their charm. Don’t let a small mistake discourage you.
Your Nutcracker Project Benefits
- Achievable Craft: Simple tools and steps are enough.
- Unique Decor: Create a one-of-a-kind holiday item.
- Skill Building: Learn woodworking and painting techniques.
- Personal Pride: Enjoy the satisfaction of making something.
- Heirloom Potential: Create a piece that can be passed down.
So, embrace the project. Have fun with it. The outcome will be a wonderful wooden nutcracker soldier.
Quick Tips for Your Nutcracker Build
Here are some quick ideas to help your build go smoothly. Always measure twice and cut once. This old saying is true.
It saves you from wasting wood. If you’re unsure about a cut, practice on a scrap piece first.
When painting, use thin coats. It’s better to apply two thin coats than one thick one. Thick paint can drip and doesn’t dry as well.
Let each coat dry fully before adding the next. This applies to both the wood and any fabric details.
For attaching small parts, like buttons or facial features, super glue can be helpful. It sets quickly. Just be careful not to glue your fingers together!
Use it in a well-ventilated area.
Consider the type of wood finish. If you want a very durable nutcracker, use an oil-based polyurethane. For a quicker dry, acrylic spray sealants work well.
They come in matte, satin, or gloss finishes.
Don’t be afraid to experiment. If a color doesn’t look right, you can often paint over it. If a part doesn’t fit perfectly, you can often sand it down a bit more.
Your nutcracker is a personal project. Make it how you like it.
Building Best Practices
- Measure Carefully: Double-check all measurements.
- Thin Paint Coats: Apply multiple thin layers for a smooth finish.
- Allow Drying Time: Patience prevents smudges and runs.
- Ventilation: Work in a well-aired space for glues and paints.
- Super Glue: Useful for small details; use sparingly.
These little tips can make a big difference. They help you avoid common frustrations. They lead to a better-looking final product.
Frequently Asked Questions
What kind of wood is best for a nutcracker soldier?
Pine is a great choice. It’s soft, easy to cut, and widely available. Other softwoods like poplar or basswood also work well.
Avoid hardwoods, as they can be difficult to work with for DIY projects.
How do I make sure my nutcracker stands up straight?
Ensure the legs are cut to the same length. Attach them securely to the bottom of the body, making sure they are parallel. A slightly wider base can also help with stability.
Can I make a nutcracker with a working mouth?
Yes, but it’s more complex. It involves creating a hinge mechanism and often requires more precise cutting and joining. For a first project, focusing on a decorative nutcracker is recommended.
What if I don’t have a jigsaw? Can I still cut curves?
You can use a handsaw for curves, but it takes more practice and patience. A coping saw is also an option for curves. If curves are difficult, simplify your design to use mostly straight cuts.
How do I protect the paint on my nutcracker?
After the paint is completely dry, apply a clear sealant. A spray-on acrylic sealant (matte, satin, or gloss) is easy to use and provides good protection for indoor display.
Should I use screws or just glue to assemble the pieces?
Glue provides a good bond, but using screws or dowels in addition to glue makes the nutcracker much stronger and more durable. Drill pilot holes before using screws to prevent wood splitting.
Your Nutcracker Awaits
Building your own wooden nutcracker soldier is a fulfilling project. It combines craft, tradition, and holiday spirit. You’ve learned about choosing wood, cutting shapes, and putting it all together.
You know how to paint and add those special details. Now, you have a guide to help you create something wonderful.
Don’t aim for perfection on your first try. Aim for fun and learning. The most important part is the joy of creation.
Enjoy the process, and you’ll end up with a unique piece you’ll cherish. Happy crafting!