How to Remove a Ceiling Fan Light Cover (4 Cover Types Explained)
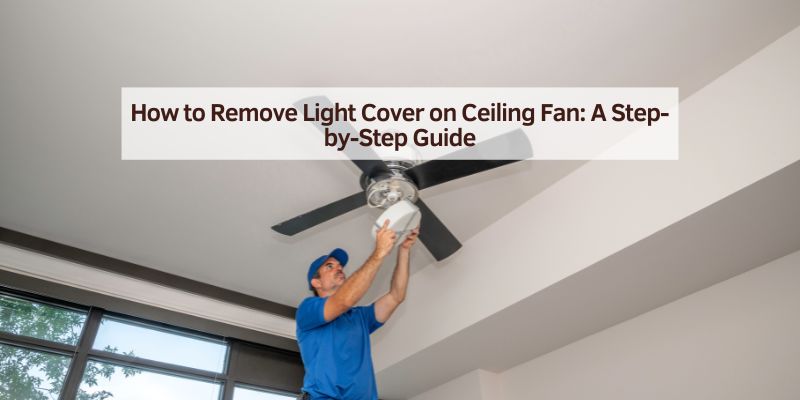
A ceiling fan light cover comes off one of four ways — twisting counterclockwise, unclipping spring tabs, unscrewing a finial nut, or removing edge screws — depending on the style. Forcing the wrong method cracks the glass or bends the mounting clips. This guide covers identifying your cover type, the tools you need, and safe removal steps for each style.
Quick Answer
Most ceiling fan light covers use one of four mechanisms: twist-off (screw-on glass), unclip (spring tabs), unscrew (finial nut), or unscrew edge screws (flush-mount). Turn off the power first, identify your cover type, then apply slow, steady pressure — a stuck cover almost always loosens with a little WD-40 and patience, not force.
Why You Might Need to Remove a Ceiling Fan Light Cover
Ceiling fan light covers protect the bulbs, diffuse the light, and keep dust out — but there comes a time when you need to take them off. Maybe a bulb burned out, the cover’s gotten grimy from years of dust and bugs, or you want a fresh style on your ceiling fan light. I once helped a neighbor remove a cover because a bulb was flickering, and we found a loose connection inside — removing the cover is the first step to diagnosing or upgrading the light.
Types of Ceiling Fan Light Covers
Before you start twisting or tugging, you need to know what kind of light cover you’re dealing with. Using the wrong method can crack the glass or damage the fan. Here’s how the five common types break down.
| Type | Description | How It’s Attached | Common Materials |
|---|---|---|---|
| Screw-On | Glass cover twists into place | Threads like a jar lid | Glass, plastic |
| Clip-On | Held by spring clips or metal tabs | Clips snap into the fan’s light kit | Glass, acrylic |
| Nut or Finial | Secured by a decorative nut or finial at the bottom | Unscrew the nut to release | Glass, frosted glass |
| Flush-Mount | Sits flat against the fan, held by screws or clips | Screws or clips around the edge | Glass, metal, plastic |
| Twist-Lock LED Panel | Entire integrated light panel twists to unlock — no separate glass cover | Whole panel twists counterclockwise like a lid, bayonet-style | Plastic, acrylic diffuser |
Screw-On Light Covers
These are the most common. They look like a glass bowl that screws into the fan’s light kit, kind of like a jar lid — you can usually see the threaded edge. You twist it counterclockwise to remove it, holding it firmly so it doesn’t slip, especially if it’s stuck from years of being in place.
Clip-On Light Covers
Clip-on covers are held by small metal clips or tabs that snap into the fan. These are common in older fans and can be tricky if you don’t know where the clips are — you usually squeeze or push the cover gently to release the tension before pulling it down.
Nut or Finial Light Covers
These covers are secured by a decorative nut or finial at the bottom of the glass. Unscrew the nut and the cover slides off — just hold the cover so it doesn’t fall when the nut comes loose.
Flush-Mount Light Covers
Flush-mount covers sit flat against the fan and are often held by screws or clips around the edge, common on modern flush-mount ceiling fans. You might need a screwdriver to loosen hidden screws, or gently pry the cover if it’s clipped. These can be stubborn, so patience is key.
Twist-Lock LED Light Panels (Modern Fans)
Many newer low-profile ceiling fans use a single integrated LED panel instead of a separate glass cover — there are no screws or clips to find at all. The whole panel typically twists counterclockwise like a large lid to release a bayonet-style mount, the same twist-lock mechanism Hunter Fan uses on its twist-lock light kits. If a firm twist doesn’t budge it, your fan may use hidden spring tabs instead — our dedicated guide for screwless covers walks through that case in more detail.
Tools You’ll Need
You don’t need a fancy toolbox for this job — just a few basic items:
- Step Ladder: To reach the fan safely. Use a sturdy one that doesn’t wobble.
- Screwdriver: A flathead or Phillips, depending on your fan’s screws. Check the screws first to grab the right one.
- Gloves: Optional, but they protect your hands and keep oils off the glass.
- Soft Cloth: For cleaning the cover once it’s off or wiping your hands.
- Replacement Bulb: If you’re changing a bulb, check the fan’s manual for the correct wattage and bulb type first.
Keep a small bowl or bag nearby to hold screws or nuts so they don’t roll away — a tiny screw lost on the carpet is a common, avoidable headache.
Best Replacement Cover Pick
6-Inch Universal Screw-On Glass Globe – $14.15
Fits the classic screw-on threaded fitter covered above — the cover type this guide flags as the most common and the easiest to remove.
- Best for: Replacing a cracked or yellowed screw-on globe
- Why we picked it: Standard 3-1/4″ fitter matches most screw-on light kits
- Main drawback: White glass only — no frosted or tinted option
Compare more replacement cover options
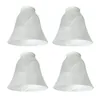 Option 1 4-Pack Bell-Shaped Alabaster Glass Covers – $29.99
|
 Option 2 Tool-Free Frosted Acrylic Cover – $11.69
|
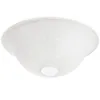 Option 3 13-Inch White Linen Glass Bowl Upgrade – $69.99
|
As an Amazon Associate we earn from qualifying purchases.
Safety Tips Before You Start
Before you climb that ladder, let’s talk safety. Here’s what to do every time to stay safe:
- Turn Off the Power: Flip the switch off, and for extra safety, turn off the circuit breaker for the fan. Skipping this step risks a shock.
- Let Bulbs Cool: If the light was on, wait 10-15 minutes for the bulbs to cool. Hot bulbs can burn your fingers or crack the cover.
- Use a Stable Ladder: Make sure it’s on flat ground and locked in place. Have someone hold the ladder if you’re reaching high.
- Work Slowly: Don’t rush or force anything. If the cover’s stuck, take a moment to figure out why before pulling harder.
How to Remove a Ceiling Fan Light Cover
Now for the main event — removing the cover. Follow the steps for your specific cover type.
For Screw-On Covers
- Climb your ladder so you’re at eye level with the cover.
- Hold the glass with both hands. If it’s dusty, wear gloves or use a cloth for grip.
- Twist the cover counterclockwise, like opening a jar, applying steady pressure.
- Once it’s loose, keep twisting until it comes off. Set it down on a soft surface.
If it’s stuck, wiggle it gently while twisting. A damp cloth or a little WD-40 on the threads usually loosens years of dust and grime.
For Clip-On Covers
- Look for the clips or tabs around the edge of the cover — usually metal and springy.
- Gently push the cover up toward the fan to release the tension.
- Tilt the cover to one side and pull it down past the clips, going slow to avoid breaking the glass.
- If it won’t budge, check for hidden screws holding the clips in place.
Some fans have three or four clips, so you might need to release them one at a time.
For Nut or Finial Covers
- Hold the glass cover with one hand to support it.
- With your other hand, unscrew the nut or finial at the bottom, turning it counterclockwise.
- Once the nut’s off, lower the cover gently — it might slide right off or need a slight wiggle.
- Place the nut in a safe spot — you’ll need it to reinstall the cover.
Check the nut for wear. If it’s stripped, replace it with a new one from the hardware store rather than reusing it.
For Flush-Mount Covers
- Look for screws or clips around the edge — screws are sometimes hidden under decorative caps.
- If there are screws, loosen them with a screwdriver — don’t remove them completely, just enough to free the cover.
- If it’s clipped, gently pry the cover with a flathead screwdriver or your fingers, starting at one edge.
- Lower the cover slowly — some flush-mounts have wires attached, so don’t yank it.
If you’re unsure, check your fan’s manual first — prying too hard on a flush-mount is the easiest way to scratch or crack the cover.
For Twist-Lock LED Panels
- Support the panel with one hand — it’s often heavier than a glass cover.
- Grip the panel firmly and twist counterclockwise, the same motion as a screw-on cover.
- If it doesn’t rotate, check the edge for small spring tabs instead of a twist mechanism.
- Lower the panel slowly — LED panels usually have a short wire connector attached underneath.
What to Do After Removing the Cover
Once the cover’s off, here’s what to do next, depending on why you removed it:
- Replace the Bulb: Check the old bulb’s wattage and type, then follow our step-by-step bulb replacement guide to install the new one without overtightening. Test the light before putting the cover back.
- Clean the Cover: Dust and bugs love light covers. Wash with warm soapy water, rinse well, and dry with a soft cloth — it’s amazing how much brighter the room gets after a good cleaning.
- Inspect the Light Kit: Look for loose wires or damaged parts. A frayed wire is a real hazard — have an electrician fix it, don’t tape over it.
- Upgrade the Cover: If you’re swapping for a new cover, make sure it’s compatible with your fan’s fitter size before buying — a fresh cover pairs well with a full ceiling fan repaint if the blades and housing are looking dated too.
Common Problems and How to Fix Them
Sometimes things don’t go as planned. Here’s how to handle the most common hiccups:
- Stuck Cover: If a screw-on cover won’t budge, spray a little WD-40 on the threads and let it sit for a minute. For clip-on covers, double-check for hidden screws.
- Cracked Cover: If you accidentally crack the glass, replace it right away — most hardware stores or online retailers sell replacements. Measure the old cover to get the right size.
- Loose Clips: If clips won’t hold the cover securely, they might be bent. Gently bend them back with pliers or replace them if broken.
- Wrong Bulb: If the new bulb doesn’t work, double-check the wattage and bulb type against your fan’s rating before returning it.
If you’re stuck, step back and reread your fan’s manual — it’s the fastest way to identify a mechanism you might be missing.
How to Maintain Your Ceiling Fan Light
Keeping your fan’s light kit in good shape is easy with a little regular care:
- Clean Regularly: Dust the cover every few months with a damp cloth — do this when you clean the fan blades to save time.
- Check Bulbs: Test your lights every season to catch burned-out bulbs early. Keep spare bulbs on hand for quick swaps.
- Tighten Fittings: Loose screws or nuts can make the cover rattle. Check them yearly with a screwdriver.
- Use the Right Bulbs: Stick to the recommended wattage to avoid overheating. LED bulbs run cooler and last far longer than incandescent.
A well-maintained light kit keeps your room bright and your fan looking great.
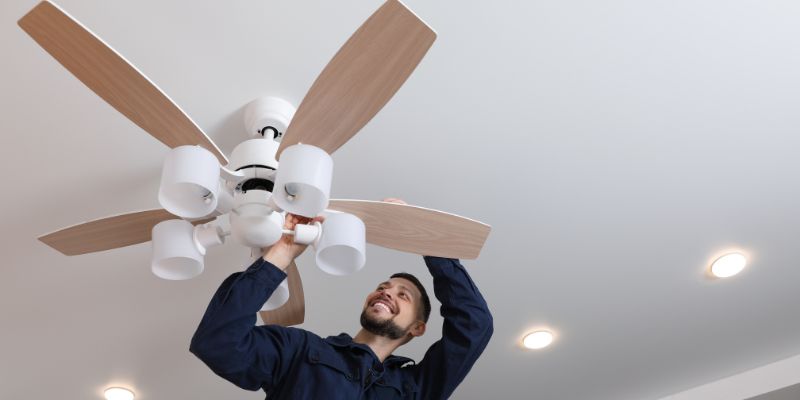
When to Call a Professional
Most light cover removals are DIY-friendly, but sometimes you need a pro. Here’s when to get help:
- Electrical Issues: If you see sparks, frayed wires, or the light won’t turn on, don’t mess with it — call an electrician.
- Complex Fans: Some high-end fans have unique light kits that need special tools — leave those to a pro to avoid damage.
- High Ceilings: If your fan’s on a vaulted ceiling, a pro with the right ladder is safer than improvising.
📊 Electricians typically charge $50–$100 per hour, plus a roughly $70 minimum service fee that’s usually credited toward the first hour. — Source: HomeAdvisor, 2026 Electrical Work Cost Guide
“I found a frayed wire in my own fan’s light kit once, behind what looked like a totally normal flush-mount cover. I had an electrician fix it before it became a hazard — if a cover comes off and you see bare or discolored wire, stop and call someone, no exceptions.”
Find a licensed electrician through friend recommendations or a site like Angi. It’s peace of mind you can’t put a price on.
Frequently Asked Questions
How do I know what type of light cover my ceiling fan has?
Look at how the cover’s attached. If it twists off, it’s screw-on. If it’s held by metal tabs, it’s clip-on. A nut at the bottom means it’s a finial type, and a panel with no visible hardware is usually a twist-lock LED type. Check your fan’s manual for confirmation.
Can I remove a ceiling fan light cover without a ladder?
If your ceiling is low and you can reach the fan safely, maybe. But a sturdy ladder is strongly recommended to avoid stretching, overreaching, or falling. Safety first.
What if my light cover is stuck?
For screw-on covers, try a little WD-40 on the threads and wait a minute before twisting again. For clip-on covers, check for hidden screws first. Go slow and don’t force it, or you risk cracking the glass.
How do I clean a ceiling fan light cover?
Wash it with warm, soapy water, rinse well, and dry with a soft cloth. Doing this every few months keeps the light bright and free of dust buildup.
Is it safe to remove a light cover with the power on?
No. Always turn off the fan’s switch and, if possible, the circuit breaker first. Also wait for bulbs to cool before touching them to avoid burns or shocks.
What if my ceiling fan light cover has no screws or visible clips?
It’s likely a twist-lock LED panel — grip it firmly and twist counterclockwise like a jar lid. If it still won’t move, it may use hidden spring tabs instead; our screwless cover removal walkthrough covers that case step by step.
Conclusion
Removing a ceiling fan light cover is a simple task once you know which of the five mechanisms you’re dealing with — screw-on, clip-on, finial nut, flush-mount, or twist-lock LED panel. Turn off the power, work slowly, and use WD-40 rather than force on a stuck cover. Whether you’re swapping a bulb, cleaning dust, or upgrading the look, you now have the steps to do it safely on the first try.
Sponsored / affiliate links. As an Amazon Associate I earn from qualifying purchases. I may earn additional commission from eligible campaigns.