What Happens If You Don’T Paint Over Primer? Find Out
Painting over primer is usually best for a smooth, even finish. Skipping this step can lead to issues like poor paint adhesion, uneven color, and a less durable result. Properly preparing surfaces with primer ensures your topcoat looks great and lasts longer.
Why We Use Primer in the First Place
Think of primer as a helpful friend for your walls. It’s not just colored paint. Primer helps new surfaces, or ones you’ve changed, get ready for their final look.
It’s especially good at hiding old colors. It also helps the new paint stick really well. This means your paint job will look better and last much longer.
Priming is like giving your walls a good meal before a big party. They’re then ready for anything!
There are different kinds of primers too. Some are for wood, some for drywall, and some seal in tough stains. They all have one main job: to create a smooth, even base.
This base is like a perfect canvas for your chosen paint color. It helps prevent the paint from soaking in unevenly. This is a common issue on porous surfaces.
Without it, you might end up with patchy spots or dull areas. Primer makes sure the color you see in the can is the color you get on your wall. It really is a game-changer for a professional finish.
It also helps paint stick. This is super important. New paint needs something to grab onto.
Primer provides that grip. This is true even on tricky surfaces like glossy paint or slick laminate. It makes sure your paint job won’t peel or chip easily later.
This means less work for you down the road. You get a lasting, beautiful finish. That’s the real goal, right?
Making sure your hard work pays off for years to come.
My Own Primer Panic: A True Story
I remember one time I was painting my kid’s bedroom. It was a Saturday afternoon. I had just finished sanding and spackling.
My son really wanted a bright blue room. We picked out a bold shade. I was so excited to get started.
I put on one coat of the blue paint. I thought I was done. Then, as it dried, I saw it.
Patches. Darker spots where the old, ugly beige was peeking through. It looked so uneven.
My heart sank. I had forgotten to prime. I had skipped that step because I was in a hurry.
I really thought I could get away with it. But nope. The blue paint was soaking into the patched areas differently.
It just looked bad. I felt so silly and frustrated. All that work, and it looked amateur.
I had to go back and buy primer. Then I had to put on another coat of blue. It was a total bummer.
That’s when I learned my lesson about primer.
The smell of fresh paint was supposed to be exciting. Instead, it was a reminder of my mistake. I could see the uneven color in the afternoon sun.
It was a mess. I felt that familiar sting of annoyance. Not at the walls, but at myself for being impatient.
Why did I think I knew better than the paint can instructions? My son, bless his heart, just wanted his blue room. He didn’t notice the patches yet.
But I did. And I knew I couldn’t leave it like that. That was a moment where I wished I could turn back time just a little bit.
I pictured myself back at the store, grabbing that can of primer. It would have saved me so much hassle. But it taught me a valuable lesson.
A lesson I’m happy to share with you now. Patience with the prep work truly pays off.
So, I went to the store. I picked out a good quality primer. It was a stain-blocking one.
Just in case. I came back home feeling a bit sheepish. I put on one coat of primer.
It covered the old beige beautifully. It looked like a blank slate again. Then, I put on my first coat of blue paint.
This time, it looked so much better. The color was even. The coverage was amazing.
It dried so smoothly. It made me realize how important that step really was. My son’s room turned out great in the end.
But that primer panic was something I never wanted to repeat. And I haven’t. Not since then.
It’s a small step that makes a huge difference.
Primer vs. Paint: What’s the Real Difference?
Primer:
- It’s a preparatory coating.
- Helps paint stick better.
- Blocks stains and odors.
- Creates an even surface.
- Seals porous surfaces.
Paint:
- It’s the final color layer.
- Provides decoration and protection.
- Comes in many finishes (matte, satin, gloss).
- Needs a good base to perform best.
You can’t really
What Happens When You Skip the Primer
So, what exactly goes wrong if you decide not to paint over primer? It’s not always a disaster. But it often leads to problems.
The most common issue is poor adhesion. This means the paint doesn’t stick well to the surface. You might see the paint peeling or chipping off much sooner than you expect.
This is especially true in areas with high traffic or moisture. Think kitchens or bathrooms. Your nice new paint job won’t last as long.
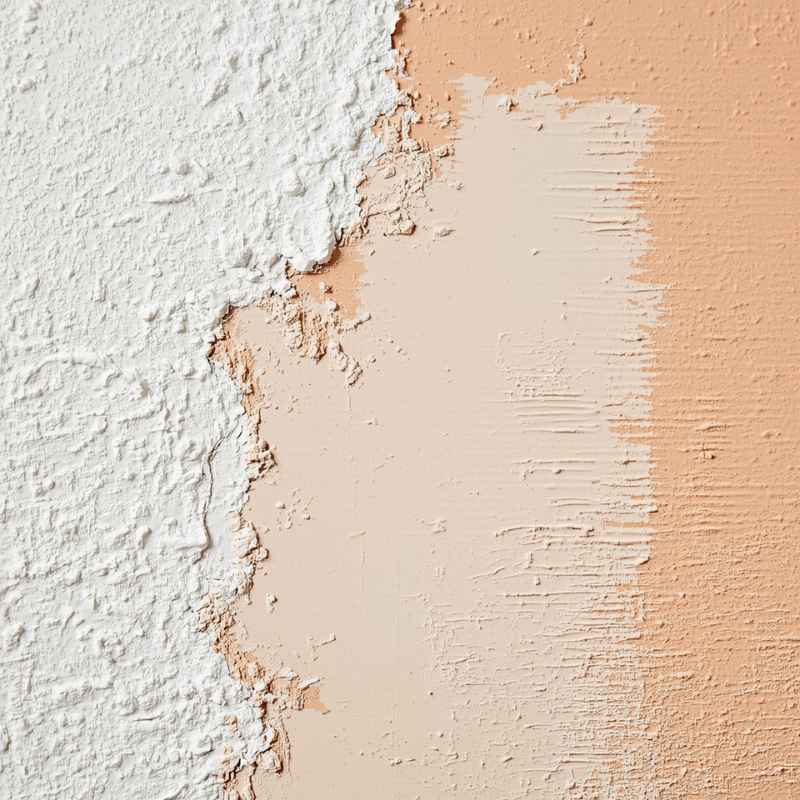
Another big problem is uneven color. Primer helps create a uniform base. Without it, the paint can soak into the wall unevenly.
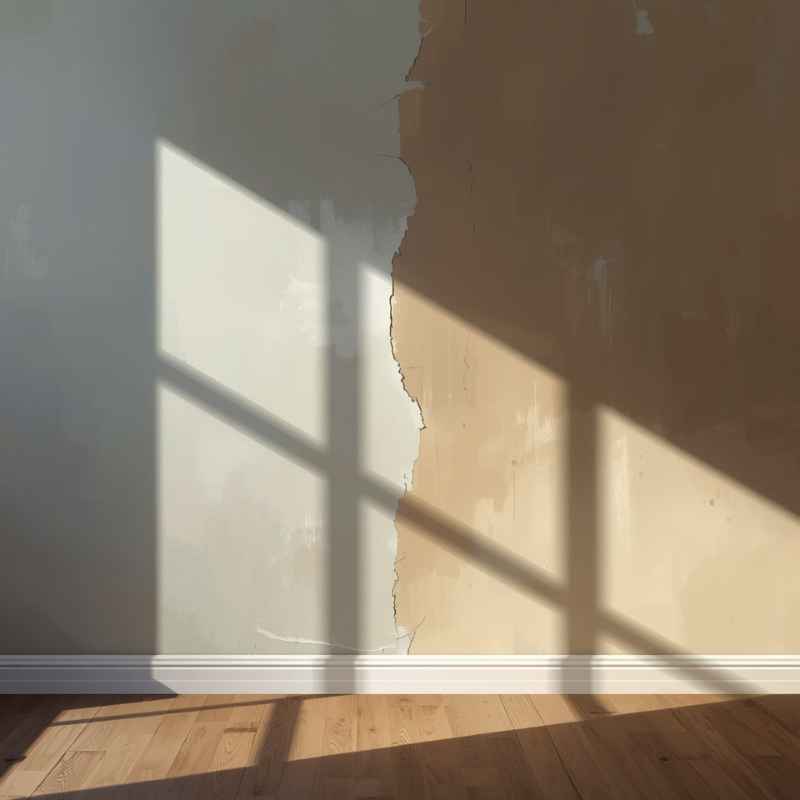
Some spots will look darker. Other spots might look lighter. This happens a lot when you’re painting over a dark color with a lighter one.
Or when you’re painting over patched areas. The new paint just can’t hide the old color or the different textures. You’ll end up with a patchy, streaky look.
It really takes away from the beauty of your chosen color. It makes the room feel unfinished.
The finish might also suffer. Paint applied directly to a surface without primer might not have a smooth sheen. You might notice areas that look duller than others.
Or you might see brush strokes or roller marks more clearly. Primer helps create a smooth surface. This makes it easier for the paint to lay down evenly.
This results in a more consistent and professional-looking finish. Without primer, your paint might also absorb more. This means you might need more coats of paint than you planned.
This ends up costing you more money and time in the long run. It’s a false economy, really.
Durability is another concern. Primer helps seal the surface. This makes it less likely to absorb moisture.
This is critical for preventing issues like mold or mildew. It also helps protect the wall itself. Without primer, the paint is the only barrier.
It might wear down faster. It can be more susceptible to scuffs and marks. So, while skipping primer might save you time upfront, it can lead to more problems and repairs down the line.
It’s like building a house without a strong foundation. It might stand for a while, but it’s not built to last.
Surface Types Matter: Where Skipping Primer is Riskiest
Some surfaces are much more forgiving than others. For example, if you’re painting over a lightly textured, previously painted latex surface with another light latex paint, you might get away with it. But even then, you’re risking some issues.
However, there are certain materials where skipping primer is a really bad idea. These surfaces have unique needs that primer is designed to meet.
Glossy Surfaces: Think of old, glossy oil-based paint. This stuff is slick. Paint just slides off it.
It’s like trying to glue something to a greased pan. A primer made for glossy surfaces (often called a bonding primer) has special ingredients. These ingredients help the new paint actually stick.
Without this primer, your new paint will likely peel off in sheets. I’ve seen this happen in old kitchens. The cabinets were painted over and over with glossy paint.
When someone tried to paint them a new color without priming, it was a disaster. The paint just flaked off.
Bare Wood: Wood is porous. It soaks up liquids. If you paint directly onto bare wood, the wood will drink up the paint.
This means the color will be uneven. It will look patchy. The wood grain might even show through weirdly.
A good wood primer seals the wood. It prevents the paint from soaking in. It also helps fill in the grain slightly.
This creates a smooth surface for painting. It also helps prevent tannins in some woods (like redwood or cedar) from bleeding through the paint. This is called tannin bleed.
It looks like brown or pinkish streaks. Primer stops this.
New Drywall: Drywall paper is very porous. It’s also made of paper. The gypsum core behind it can be dusty.
If you paint directly onto new, unprimed drywall, the paint will soak into the paper unevenly. It will look like blotchy shadows. It will also soak into the taped seams differently than the rest of the wall.
You’ll see those seams right through the paint. A drywall primer (often called a drywall primer-sealer) seals the paper. It evens out the absorption.
It covers up any pencil marks or dust. It makes the wall ready for paint.
Stained or Damaged Surfaces: If you have water stains, crayon marks, grease spots, or anything like that, primer is your best friend. Many paints can’t cover these stains. They just bleed through.
A good stain-blocking primer is designed specifically for this. It seals the stain in. It prevents it from reappearing on your fresh paint.
This is a huge one for me. I’ve had to deal with old smoke stains in rental properties. Without a good stain-blocking primer, that yellowy-brown would just keep coming back.
It’s like magic how primer can hide those tough marks.
Dark or Bold Colors: If you’re trying to paint over a very dark or vibrant color with a much lighter shade, primer is essential. Even multiple coats of light paint might not fully cover a dark base. A tinted primer (where the primer is mixed with a small amount of your paint color) can be a lifesaver here.
It provides a neutral base that’s closer to your final color. This means you’ll need fewer coats of your actual paint. It saves paint, time, and frustration.
Trying to cover dark red with pale yellow without primer is a nightmare.
Surface Type Quick Guide
Surface | Primer Needed? | Why?
| |
Previously painted latex (light to light) | Maybe | For best adhesion and finish. Previously painted latex (dark to light) | Yes | To cover old color. Previously painted oil/glossy | YES | Bonding primer needed for adhesion.
Bare Wood | YES | Seals, prevents soak-in, grain filling. New Drywall | YES | Seals porous paper, evens absorption. Stained Surfaces | YES | Blocks stains from bleeding through.
Dark/Bold Colors (to light) | YES | Aids coverage, fewer paint coats. Metal | YES | Prevents rust, helps paint adhere. Laminate/Melamine | YES | Bonding primer crucial for grip.
The Look and Feel: How Primer Affects Your Paint Finish
Primer does more than just help paint stick. It also greatly impacts the final look and feel of your painted surface. Think about it.
Paint needs a smooth, consistent surface to spread evenly. Primer provides exactly that. It fills in tiny imperfections.
It makes rough spots smooth. It seals the pores in materials like drywall or wood.
This evenness means your paint will go on more smoothly. You’ll see fewer lap marks. Lap marks happen when you paint over a line of partially dried paint.
Primer helps the wet edge of your paint stay wet longer. This allows you to blend your strokes more easily. The result is a flawless, uniform sheen across the entire surface.
This is especially important for paints with a higher sheen, like satin or semi-gloss. These finishes highlight imperfections much more than a matte paint.
Primer also affects the true color of your paint. Paint colors can look different depending on what’s underneath them. If you paint a bright red directly over a dark purple, the red might look muddy or dull.
It won’t have its true vibrancy. Primer provides a neutral base. This allows the true color of your topcoat to show through.
It’s like wearing a nude lipstick under a bright colored lipstick. It makes the bright color pop.
The texture of the finish can also be improved. Some paints, especially flat or matte finishes, can feel a bit chalky. Primer can give them a smoother feel.
It can also help create a more consistent texture, especially when you’re using a roller. A good primer reduces the ‘orange peel’ effect you sometimes get from rollers. This makes the wall feel smoother to the touch.
It looks more professional.
In short, primer helps your paint look its best. It ensures the color is true, the finish is smooth, and the application is easier. It’s the secret ingredient to a professional-looking paint job.
Without it, you’re asking your paint to do a lot of heavy lifting all by itself. It’s like asking someone to sing a song without a microphone. They can still do it, but it won’t sound as clear or as strong.
Why Your Paint Color Might Look “Off”
Problem: Paint color is dull or muted.
Cause: Painting over a dark color without primer.
Solution: Use a tinted primer or multiple primer coats.
Problem: Paint color looks patchy or uneven.
Cause: Uneven absorption into the surface without primer.
Solution: Apply a coat of primer first.
Problem: Brush strokes or roller marks are very visible.
Cause: Paint not laying down smoothly on an unprepared surface.
Solution: Prime the surface for a smoother application.
When Can You Actually Get Away Without Primer?
Okay, so we’ve talked a lot about why you should prime. But are there times you can skip it and be just fine? Yes, but you have to be really careful.
It’s all about the context of your project. You’re mostly playing it safe by priming. But sometimes, the risks are low enough.
The most common scenario is when you are painting over an already painted surface with a very similar color. Let’s say you have a light beige wall. You want to paint it a slightly different shade of light beige.
Or maybe a soft white. If the old paint is in good condition – no peeling, no stains, no major scuffs – you might be able to just paint over it. You’d still want to clean the walls well first.
But in this case, the surface is already sealed. The color change is minimal. The adhesion is likely already good.
Another situation is when you are using a high-quality paint that has built-in primer. Many “paint and primer in one” products exist. These are often good for situations where you’re doing a similar color change.
Or on surfaces that aren’t too problematic. However, be realistic. If you are painting over a dark, glossy, or stained surface, a true primer is almost always a better choice.
These “paint and primer in one” products can sometimes do a decent job. But they often don’t have the same sealing and bonding power as a dedicated primer. They might require more coats than you expect.
I’ve seen people skip primer when painting over a fresh coat of paint that’s only a few weeks old. If you painted a room, and then decided you hated the color the next day. And the paint is still fresh and in perfect condition.
You could potentially just paint over it. But again, cleaning is key. And you’re still risking a slight difference in sheen or color depth.
Honestly, the times you can truly skip primer are few and far between. It’s like trying to skip a step in a recipe. You might get away with it, but the final dish might not be as good.
For most DIYers, the peace of mind and the guarantee of a better finish make priming a worthwhile step. It’s usually the safer bet. Especially when you’re putting a lot of effort into your project.
You want it to look good and last.
When NOT to Skip Primer (The Big No-Nos)
- Bare wood or new drywall
- Painting over glossy or oil-based paint
- Covering dark or vibrant colors with light paint
- Dealing with stains, water marks, or odors
- High-moisture areas (bathrooms, kitchens)
- Surfaces that have been repaired or patched
- When maximum durability and adhesion are critical
When in doubt, prime it out!
The Role of Tinted Primer
Let’s talk about tinted primer for a moment. This is a really helpful tool. Especially when you’re making a big color change.
You know how I said primer provides a neutral base? Well, sometimes, that neutral base isn’t neutral enough. Especially if you’re going from a dark, saturated color to a very light one.
For example, if you’re painting a deep navy blue room a pale yellow. A standard white primer might not be enough to cover that dark blue completely. Even two coats of white primer might leave some of the navy showing through.
This means your yellow paint will have to work much harder to cover the dark color. You’ll likely need more coats of yellow paint. This costs you more money and takes more time.
This is where tinted primer comes in. You can ask your paint store to tint your primer. They can mix a small amount of your final paint color into the primer.
Or they can tint it to a color that’s a few shades lighter than your final color. Or even a shade that complements your final color. This creates a base that’s much closer to your target color.
It acts like a “color blocker.”
If you’re going from dark to light, a tinted primer can make a huge difference. It significantly reduces the number of topcoats needed. This saves you time and paint.
It helps achieve a more consistent and vibrant final color. For projects like this, a tinted primer is often a much better investment than a standard white primer.
I’ve used this technique myself when painting over dark reds. A white primer just wouldn’t cut it. I had the primer tinted to a light gray.
Then I painted my light cream color over it. It took only two coats of the cream to get perfect coverage. Without the tinted primer, I probably would have needed four coats.
It’s a small extra step that yields big results. It’s a pro trick that’s easy for anyone to use.
The key is to work with your paint professional. Tell them your old color and your new color. They can help you choose the right tint for your primer.
It’s often a small charge for the tinting. But the savings in paint and labor can be significant. It’s a smart move for anyone looking for a perfect finish.
What About “Paint and Primer in One”?
This is a common question! Many brands now offer “paint and primer in one” products. They promise to save you a step.
So, what’s the deal? Can they really replace a separate primer coat?
The truth is, they are often a good option for certain situations. These paints usually have higher solids content. This means they are thicker.
They can offer better coverage than a standard paint. They might also have some adhesion-promoting qualities. For projects where you’re painting a similar color, or going from a medium tone to a lighter one, and the surface is in good condition, these products can work well.
However, they are not a magic bullet. They are NOT a true substitute for a dedicated primer in all cases. If you’re painting over glossy surfaces, dark colors, stains, or bare wood, a separate, high-quality primer is almost always going to give you superior results.
Think of it this way: a “paint and primer in one” might be like a well-trained jack-of-all-trades. A dedicated primer and a good paint are like a team of specialists. Each does their job perfectly.
I’ve found that “paint and primer in one” products often require more coats than advertised, especially on tricky surfaces. They might cover okay, but the adhesion might not be as strong. Or the color might not be as vibrant as it would be over a true primer.
If you’re really trying to get the absolute best, most durable finish, it’s usually best to stick with a separate primer.
My advice? Read the labels carefully. And be honest about your surface.
If your surface is problematic, don’t try to cut corners. Use a dedicated primer. If you’re just doing a light refresh on a well-maintained wall with a similar color, a “paint and primer in one” might be a time-saver.
But always manage your expectations. It’s not always a true replacement for the power of a separate primer.
“Paint and Primer in One” vs. Separate Primer
Use “Paint and Primer in One” When:
- Painting a similar color.
- Surface is in good condition (no stains, peeling, etc.).
- Doing a light refresh or repaint.
- Time is a major factor and surface is not challenging.
Use Separate Primer When:
- Painting over dark or vibrant colors.
- Painting over glossy, slick, or oil-based paint.
- Dealing with stains, odors, or water marks.
- Painting bare wood, new drywall, or metal.
- Maximum adhesion and durability are critical.
- Wanting the truest, most vibrant color.
The Importance of Preparation: Beyond Just Priming
Priming is a huge part of getting a great paint job. But it’s not the only part. True paint success comes from proper preparation.
Skipping other steps can undo all the good work of priming. Or it can lead to problems even with primer.
Cleaning is Critical: Before you do anything else – prime or paint – you need to clean your walls. Dust, dirt, grease, and grime can all prevent paint (and primer) from sticking. Use a mild detergent solution or a good wall cleaner.
Rinse thoroughly. Let the walls dry completely. I often use a sponge mop for this on larger walls.
It makes the job faster.
Repairing Imperfections: Primer can hide some minor flaws. But it won’t fix deep scratches, holes, or cracks. You need to patch these first.
Use spackling paste for small holes and dents. Use joint compound for larger repairs. Let these dry completely.
Then, sand them smooth. Sanding creates a smooth transition between the patch and the wall. You want the surface to feel seamless.
Sanding: Even if you’re not repairing, sometimes a light sanding is a good idea. Especially on glossy surfaces. A light scuffing helps the primer (or paint) get a better grip.
You don’t need to take off the old paint. Just dull the shine. Use a fine-grit sandpaper (like 150-220 grit).
Wipe away all the dust afterward. This is crucial. Dust is the enemy of good paint adhesion.
Taping and Masking: Protect trim, windows, doors, and anything else you don’t want to paint. Use painter’s tape. Make sure the tape is pressed down firmly.
This prevents paint from bleeding underneath. You can also use drop cloths or plastic sheeting to protect floors and furniture. Good masking makes cleanup much easier.
And it gives you clean, sharp lines.
When all these steps are done correctly, the primer has the best chance to do its job. And the paint will go on smoothly. It will adhere well.
And it will look fantastic. Preparation is where the magic truly happens. It’s not glamorous, but it’s essential.
Real-World Scenarios: What to Expect
Let’s look at some everyday situations. How does skipping primer play out?
Scenario 1: The Quick Bedroom Refresh
You want to paint your guest room from a pale yellow to a soft white. The walls are in good condition. No major marks or stains.
You decide to skip primer. You clean the walls well. You apply two coats of your new white paint.
It looks okay. The color change is subtle. However, in some spots, you might notice a slight difference in sheen.
Or maybe a very faint yellow undertone if you look closely in certain light. The paint might also feel a bit less smooth to the touch. It’s not a disaster, but it’s not perfect.
Scenario 2: The Living Room Makeover (Dark to Light)
Your living room is currently a deep teal. You want to paint it a light, airy gray. You skip primer because you’re trying to save money.
You apply your light gray paint. The first coat looks patchy and still has a lot of teal showing through. You apply a second coat.
It’s better, but you can still see some gray-green undertones. You end up needing a third coat. Even then, the finish might not be as vibrant or smooth as it could be.
You used more paint than you planned. And it took much longer. The result is decent, but not as crisp as you hoped.
Scenario 3: The Kitchen Cabinet Update
You decide to repaint your kitchen cabinets. They have a glossy, factory finish. You clean them.
Then you skip primer, thinking your new “paint and primer in one” will handle it. You paint them. The color looks okay.
But within a few months, you notice small chips. Then larger flakes start to appear, especially around the handles and high-traffic areas. The paint never really bonded well to the slick surface.
You’re left with damaged cabinets that need to be scraped, sanded, primed, and repainted properly. A bonding primer would have solved this.
Scenario 4: The Bathroom Patch Job
You had a small leak in your bathroom. You patched the drywall. You let it dry.
You then paint over the patched area and the surrounding wall with your bathroom paint. The paint on the patch might look slightly different in sheen or texture. The patch might also absorb moisture differently than the rest of the wall.
Over time, this could lead to peeling or staining around the repaired area. A good drywall primer-sealer applied to the patch before painting would have made it blend seamlessly.
These scenarios show how skipping primer can lead to a range of issues. From minor imperfections to complete paint failure. The outcome depends heavily on the surface and the type of paint.
But the risk is always there.
When Is It Okay to Worry (or Not Worry)?
So, when should you be concerned if you’ve skipped primer? And when is it probably fine?
Don’t Worry If:
- You painted a very similar color over a well-maintained surface.
- You used a high-quality “paint and primer in one” on a non-challenging surface.
- The paint looks smooth and even.
- There are no signs of peeling, chipping, or poor adhesion.
- The color looks true and vibrant.
In these cases, you likely made a good decision to save a step. You probably achieved a satisfactory result.
Start Worrying If:
- You see any signs of peeling, chipping, or bubbling paint. This is a direct sign of poor adhesion.
- The color looks uneven, patchy, or dull, especially after multiple coats.
- The sheen is inconsistent across the surface.
- You notice stains or odors bleeding through the paint.
- The paint feels rough or chalky.
- You’re in a high-moisture area like a bathroom and see any signs of moisture damage.
If you notice any of these issues, it’s time to address them. You may need to scrape, sand, prime, and repaint.
Simple Checks:
To check for adhesion, try gently scraping a small, inconspicuous area with your fingernail or a putty knife. If the paint comes off easily, it’s not adhering well. To check for color evenness, view the wall from different angles and under different lighting conditions.
Look for any hints of the old color or uneven patches.
It’s important to be honest with yourself about the results. Sometimes, “good enough” is truly good enough. But if you’re aiming for a professional, lasting finish, skipping primer on problematic surfaces is a gamble.
And it’s a gamble that often doesn’t pay off.
Quick Tips for a Better Paint Job
Whether you prime or not, these tips can help.
- Cleanliness is Key: Always start with clean walls.
- Repair First: Fix any holes or cracks before priming or painting.
- Use Good Tools: Quality brushes and rollers make a difference.
- Proper Application: Apply paint evenly. Avoid overloading your brush or roller.
- Work in Good Light: This helps you see any missed spots or imperfections.
- Allow Drying Time: Don’t rush between coats.
- Proper Ventilation: Ensure good airflow while painting and drying.
- Read the Can: Always follow the manufacturer’s instructions for your specific paint and primer.
Frequent Questions About Painting Over Primer
What if I accidentally painted over my primer before it was fully dry?
If you paint over primer that isn’t fully dry, it can cause issues. The primer might not seal the surface properly. This can lead to uneven paint absorption.
It might also cause the paint to peel or bubble later. Ideally, let the primer dry completely according to the manufacturer’s instructions. Usually, this is a few hours.
If you can’t wait, at least make sure it’s dry to the touch. Then, apply your paint coats thinly.
Can I paint over old, peeling paint without priming?
No, you absolutely should not paint over peeling paint without addressing it. The new paint will not stick to the loose, peeling areas. It will likely peel off with the old paint.
You need to scrape away all loose paint until you reach a solid edge. Then, you should prime the bare areas. After priming, you can then paint the entire surface.
Proper prep is vital here.
How long does primer need to dry before painting?
This varies by primer type and brand. Most latex or water-based primers need about 2-4 hours to dry before you can paint over them. Oil-based primers might need 24 hours.
Always check the product label. It will give you the exact drying times. Painting too soon can affect adhesion and the final finish.
Does it matter what color primer I use?
Yes, it can matter. White primer is common and works well for most light-to-medium color changes. Gray primer is often recommended when painting over dark colors, as it provides a mid-tone base.
Tinted primer, mixed with your paint color, is best for drastic color changes from dark to light. Choose a primer that suits the color transition you’re making.
I used primer, but my paint still looks streaky. What did I do wrong?
Streaky paint can happen for several reasons, even with primer. It could be the paint quality. It could be how you applied it (e.g., painting too quickly, not cutting in edges properly).
It could also be the roller nap or brush type for the surface. Ensure you’re using consistent strokes and maintaining a wet edge. Sometimes a second coat of paint helps even things out.
Is a primer with built-in bug repellent necessary for exterior painting?
Some exterior primers do have additives to deter insects. Whether it’s “necessary” depends on your location and insect issues. For most standard exterior painting projects, a good quality exterior primer designed for adhesion and weather resistance is sufficient.
If insects are a major problem in your area, an additive primer might offer some benefit, but it’s not a universal requirement for a good paint job.
Final Thoughts on Primer and Your Paint Project
So, what happens if you don’t paint over primer? Usually, you’ll end up with a less durable, less attractive finish. While you might get away with it on simple projects, it’s a risk.
Primer truly acts as a bridge. It connects your surface to your paint. This connection ensures your paint looks its best and lasts as long as possible.
For most homes and projects, the extra step of priming is well worth the effort and cost. It leads to a smoother application, truer colors, and a finish you’ll be proud of.