Do You Need To Stain And Then Finish Wood? Honest Answer
The simple answer is: Yes, you typically stain wood first, and then apply a finish. Staining adds color, while finishing protects the wood and gives it a smooth surface. It’s rare to skip one if you want both color and durability.
The Wood Finishing Dance: Stain and Seal
Let’s break down what staining and finishing really do. Think of it like getting dressed. The stain is like the outfit you choose.
It gives the wood its look, its color. It changes how the wood appears. This is the fun part where you can make oak look like walnut, or give pine a rich, dark tone.
It’s all about the color.
The finish, on the other hand, is like the coat you wear over your outfit. It’s the protective layer. It shields the wood from spills, dirt, and wear.
It also makes the surface feel nice. Smooth and protected. It’s the bodyguard for your wood’s color.
So, the order matters. You put on your colorful clothes first, right? Then you add your coat.
It’s the same with wood. You add the color with stain. Then you add the protection with the finish.
This way, the color is locked in. It won’t rub off easily. And the finish goes on top of a nice, even color base.
My Own Wood Woes: The Time I Rushed It
I remember one project vividly. It was a small side table for my living room. I had this gorgeous piece of maple.
I wanted it to be a deep, warm cherry color. I’d bought a nice stain and a can of polyurethane. I was so excited to see the transformation.
I figured, “How hard can this be?”
I grabbed the stain, brushed it on, wiped it off. The color looked okay. Then, I thought, “Maybe I can just put the polyurethane on now.
It’s supposed to protect it.” I did. And that’s when I saw the problem. The polyurethane sealed the stain, sure.
But because I hadn’t let the stain fully dry and cure, the finish started to lift some of the color in a few spots. It wasn’t awful, but it wasn’t the smooth, even finish I’d imagined. I felt a pang of annoyance.
I’d rushed it. I learned then that patience is really key in wood finishing.
It’s easy to get caught up in the excitement of finishing a project. You want to see the final result. But taking that extra time for each step makes a huge difference.
It’s like following a recipe. You wouldn’t bake a cake without letting it cool before frosting it. Wood finishing has its own set of steps for a reason.
Why Wood Stain Comes First
Color Depth: Stain soaks into the wood fibers. This gives it a deep, rich color. If you put a finish on first, the stain can’t soak in well.
It would just sit on top. This would lead to a duller color.
Even Application: Applying stain to bare wood helps achieve an even color. Some woods absorb stain differently. Staining first lets you see how the wood takes the color.
You can make adjustments if needed.
Sealing the Color: The finish then acts like a clear shield. It locks in the stain’s color. It also protects it from fading or wear.
It makes the color last.
Understanding the Role of Wood Stain
So, what exactly is wood stain? At its heart, stain is a colored liquid. It’s designed to penetrate wood.
It adds color to the wood without hiding its natural grain pattern. This is super important. You don’t want to cover up those beautiful lines and swirls that make each piece of wood unique.
Stain lets that natural beauty shine through.
There are different types of stains. Oil-based stains are very common. They sink deep into the wood.
They offer rich colors. They can also take a bit longer to dry. Water-based stains dry faster.
They are easier to clean up. But they might not penetrate as deeply as oil-based stains on some woods.
Gel stains are another option. They are thicker. They sit more on the surface.
They are great for woods that tend to blotch. They give more control over application. Then there are dye stains.
These are more transparent. They give very vibrant colors. But they don’t offer much UV protection on their own.
When you apply stain, you’re essentially coloring the wood itself. Think of it like dyeing fabric. The color becomes part of the material.
You can achieve many different looks. Light, airy tones. Deep, dramatic shades.
Even special effects like aging or pickling.
The Essential Function of Wood Finish
Now, let’s talk about the finish. The finish is the protective topcoat. It’s what gives your wood its final look and feel.
It’s what keeps it looking good for years. Without a finish, even stained wood is vulnerable. Spills can soak in and stain the wood permanently.
Dust and dirt can get ground into the grain. Sunlight can fade the color over time.
The finish is the barrier. It sits on top of the wood. It seals it from the outside world.
Common finishes include polyurethane, varnish, lacquer, and shellac. Each has its own pros and cons. Polyurethane is very durable.
It’s a good choice for tabletops and floors. Varnish is also tough. It’s often used on boats because it can handle moisture and UV rays well.
Lacquer dries very fast. It gives a smooth, hard finish. It’s often used in spray applications for furniture.
Shellac is natural. It dries quickly and has a lovely warm tone. But it’s not as durable as polyurethane or varnish.
It can be damaged by alcohol or heat.
The finish can also change the appearance of the wood. You can get a matte finish. This has a dull look.
Or a satin finish, which has a slight sheen. A semi-gloss finish is shinier. And a high-gloss finish is very reflective and smooth.
When Staining Isn’t the Goal: Finishing Bare Wood
Sometimes, you might not want to stain wood at all. This is perfectly fine! Many projects look beautiful with just a clear finish on bare wood.
Think of the natural beauty of pine or oak. Sometimes, adding color can actually detract from its natural charm.
In these cases, you’ll skip the stain step entirely. You’ll go straight from preparing the bare wood to applying your chosen finish. The finish will still protect the wood.
It will also enhance its natural color and grain. A clear finish can deepen the wood’s natural tones. It often makes it look richer and more alive.
For example, a clear coat of polyurethane on a plain pine shelf will protect it. It will also give the wood a slight sheen. This can make the pine look a bit warmer.
It prevents spills from damaging the wood. It makes it easy to wipe clean. So, staining is optional.
Finishing is almost always recommended for durability.
Contrast Matrix: Stain vs. Finish
Stain:
- Adds color.
- Penetrates wood.
- Enhances grain visibility.
- Does not provide significant protection.
- Colors wood itself.
Finish:
- Protects wood surface.
- Adds sheen or matte look.
- Seals in color (if stained).
- Prevents damage from spills, wear, UV.
- Forms a top layer.
The “Why” Behind Finishing Bare Wood
Even if you decide against staining, applying a finish to bare wood is a critical step. Why? Protection.
Think about your wooden kitchen table. Do you want every dropped fork or spilled drink to leave a permanent mark? Probably not.
The finish creates a barrier. It’s like a shield. This shield prevents moisture from soaking into the wood.
It stops grease and dirt from staining the surface. It also prevents wear and tear. Imagine a wooden cutting board without any finish.
It would get deeply scratched and stained very quickly. A finished cutting board, on the other hand, lasts much longer.
Beyond protection, a clear finish can also make the wood look better. It can bring out the natural beauty of the grain. It can add a subtle depth.
It can give the surface a nice feel. A smooth, well-finished surface is much more pleasant to touch and use.
So, while staining adds color, finishing adds protection and enhances the wood’s natural appeal. You can have one without the other, but usually, you want both for the best results.
Common Scenarios and How They Work
Let’s look at some everyday situations where this order is important. This helps make it clearer.
Scenario 1: Building a Bookshelf
You buy some pine boards to build a new bookshelf. You want it to have a warm, medium brown color, like walnut. You’d first sand the pine smooth.
Then, you’d apply a medium brown wood stain. You’d let that dry completely. After it’s dry, you’d apply a few coats of a durable polyurethane.
This will protect the stain and the wood. It will make the shelf easy to dust.
Scenario 2: Refinishing a Tabletop
Your old dining table has lost its shine. The finish is scratched. You decide to give it a facelift.
You’d probably sand off the old finish. Then you might apply a new stain. Maybe a darker shade to update its look.
Once the new stain is dry, you’d apply several coats of a tough, water-resistant finish. This finish needs to handle hot plates and spilled drinks.
Scenario 3: Crafting Small Decor Items
You’re making small wooden coasters as gifts. You’ve got some nice birch wood. You decide you love the light, natural color of the birch.
You don’t want to stain it. So, you sand them smooth. Then you apply a few coats of a clear satin finish.
This protects the wood. It also gives the coasters a nice, smooth feel. The natural beauty of the birch is still the star.
Quick-Scan Table: Wood Project Steps
| Step | Action | Purpose |
| 1 | Sand wood | Smooth surface, open pores |
| 2 | Apply Stain (Optional) | Add color, enhance grain |
| 3 | Let Stain Dry | Allow color to set, prevent bleeding |
| 4 | Apply Finish | Protect surface, add sheen, seal color |
| 5 | Apply More Finish Coats | Build protection, achieve desired look |
Can You Finish Without Staining? Yes!
As we touched on, you can absolutely apply a finish to bare wood without staining it first. This is very common. It’s often the best choice when you want to highlight the wood’s natural beauty.
Think about fine furniture made from cherry or walnut. These woods have beautiful natural colors and grain patterns.
Applying a clear coat of finish will protect the wood. It will also deepen the natural tones. It can make the grain pop.
It gives the surface a smooth, polished feel. This approach lets the inherent qualities of the wood be the main attraction. It’s elegant and timeless.
So, if you like the color of the wood as it is, you can skip the stain. Just prepare the surface well by sanding. Then, apply your finish.
You’ll still get all the benefits of protection and a smooth surface.
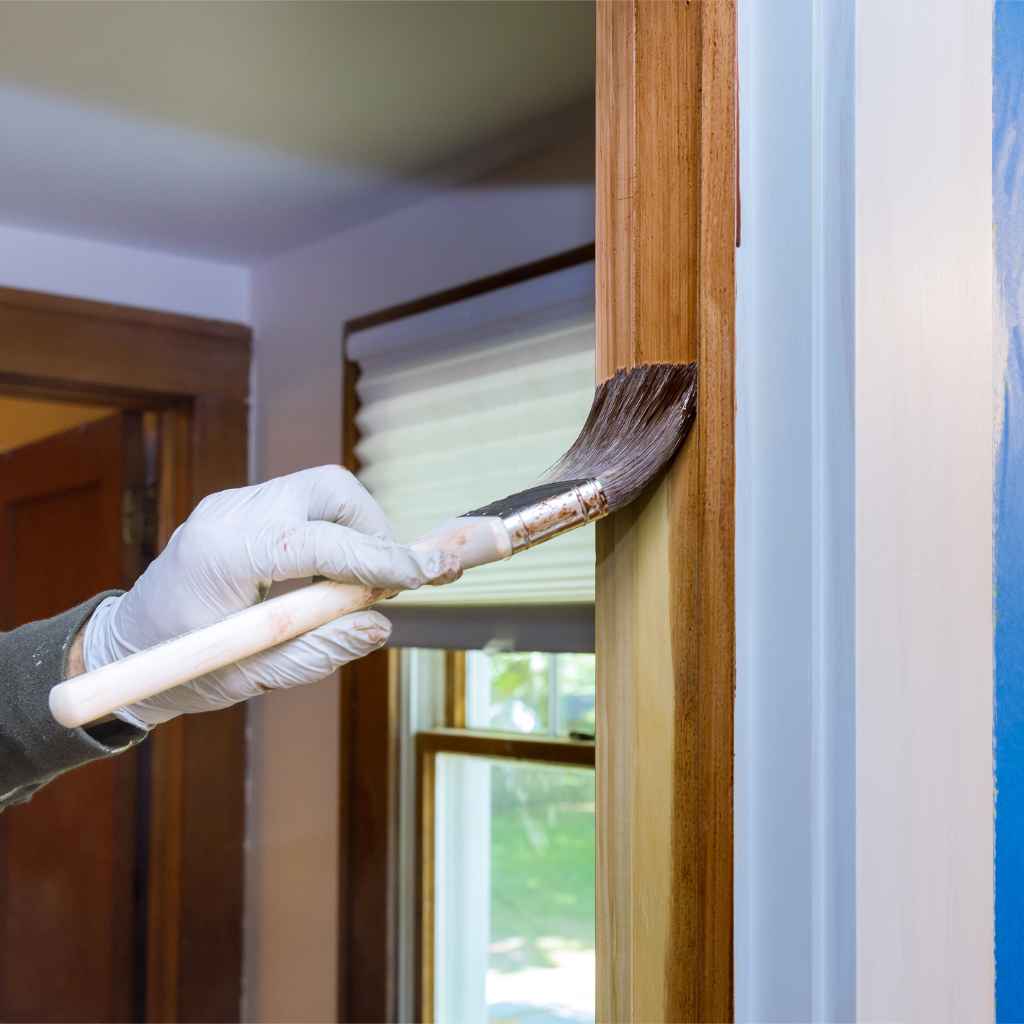
What About Staining Over an Existing Finish?
This is a bit trickier. Generally, you cannot stain over an existing finish like polyurethane or varnish. Why?
Because stain needs to penetrate wood fibers to work. A finish acts as a barrier. It seals the wood.
The stain would just sit on top of the finish. It would likely peel or wipe off. It wouldn’t soak in.
If you want to change the color of a finished piece, you typically have to remove the old finish first. This means sanding or using a chemical stripper. Once the old finish is gone, you have bare wood again.
Then you can apply your new stain and finish.
There are some products that are like a “stain and poly” in one. Or some “gel stains” that can go over existing finishes. But these often work differently.
They might be more like a colored topcoat. They don’t offer the same deep penetration and natural look as traditional stain. For most projects, the old-school method of stain first, then finish, is best.
Stacked Micro-Sections: Stain Layering
Base Color: Stain is the first color layer. It goes into the wood.
Protection Layer: Finish goes on top. It seals the stain.
Surface Feel: Finish makes it smooth. It can add shine.
Durability: Finish protects from damage. It makes it last.
Can You Apply Finish to Damp Wood? Never!
This is a big no-no. Always make sure your wood is completely dry. Especially after staining.
Most stains need time to dry and cure. This means the solvents or water in the stain are evaporating. The color is setting.
If you apply finish to damp wood, a few bad things can happen.
First, the finish might not adhere properly. It could peel or bubble later. Second, moisture trapped under the finish can cause problems.
It can lead to cloudiness or a milky appearance. It can even cause the wood to warp or swell. This is especially true with water-based finishes.
Always follow the drying times recommended on your stain and finish products. It’s better to wait a little longer than to ruin your hard work. For many stains, 24 hours is a good rule of thumb before applying a finish.
Some might be ready sooner. Always check the label.
The Real-World Implications for Your Projects
So, what does all this mean for you and your DIY projects? It means understanding the purpose of each step. It helps you make informed decisions.
For Beauty: If you want to change the wood’s color, staining is your go-to. It allows you to transform the look of inexpensive wood. It makes common woods like pine or poplar look like more exotic varieties.
You choose the color. You control the depth.
For Protection: Regardless of whether you stain or not, a finish is essential for durability. It safeguards your work from daily life. It prevents spills from becoming permanent stains.
It protects against scratches and wear. It makes your projects last longer.
For Longevity: Skipping either step can lead to premature failure. Unfinished wood degrades faster. Stained wood without a finish will fade or wash away.
A finish without stain will protect bare wood, but won’t add color.
When in doubt, always follow the product instructions. They are there for a reason. They are based on scientific testing and experience.
When is it Okay to Skip a Step?
The main time you’d skip staining is when you love the wood’s natural color. For example, if you have a beautiful piece of cherry wood. Its natural reddish-brown hue is stunning.
You might choose to only apply a clear finish to enhance and protect it. This lets the wood’s inherent beauty be the focus.
Another scenario might be very rustic projects. Where a rougher, unfinished look is desired. However, even in these cases, a light, matte finish can offer some protection without altering the look too much.
It can prevent excessive splintering.
For most functional items like furniture, tables, or cabinets, skipping both stain and finish is not recommended. You’ll end up with wood that looks worn and damaged very quickly.
Quick Fixes and Tips for Success
Here are some simple tips to help you nail the stain and finish process:
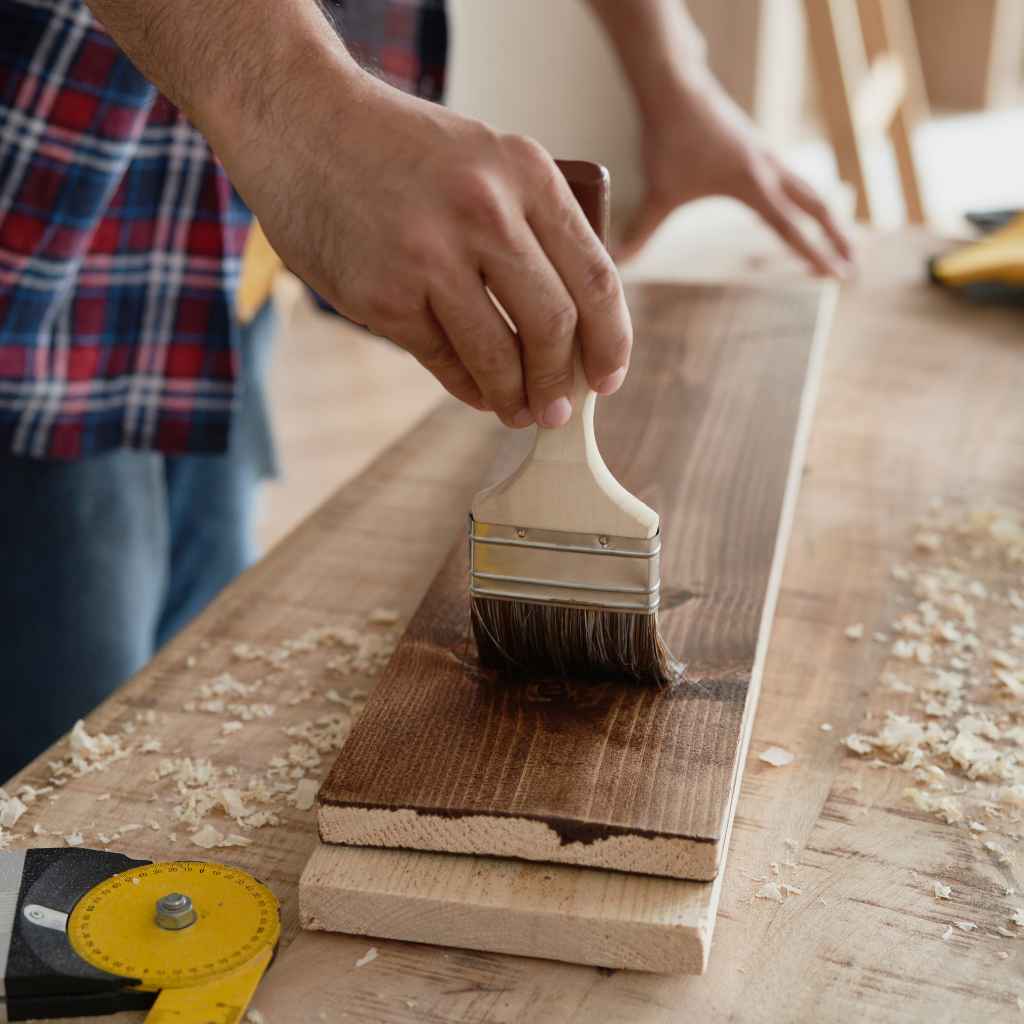
- Always test first. Get a scrap piece of the same wood you’re using. Test your stain color on it. Then, test your finish over the stain. This shows you exactly how it will look. It prevents unhappy surprises on your main project.
- Sand, sand, sand. Proper sanding is crucial. Start with a coarser grit (like 80 or 100). Then move to finer grits (like 150 and 220). This makes the wood smooth. It also helps the stain penetrate evenly.
- Wipe off excess stain. Don’t let stain dry on the surface. Wipe off the excess after the recommended time. This prevents a splotchy or gummy appearance.
- Apply thin coats of finish. It’s much better to apply multiple thin coats. Let each coat dry thoroughly. This builds a strong, smooth finish. Thick coats can look messy and take forever to dry.
- Sand lightly between coats. Use a very fine grit sandpaper (like 320 or 400). This knocks down any tiny imperfections. It helps the next coat adhere better. Wipe away dust before applying the next coat.
- Ventilate your workspace. Stains and finishes can have strong fumes. Work in a well-ventilated area. This is for your health and safety.
- Read product labels carefully. Each product is different. It will tell you how long to wait between steps. It will tell you how to apply it.
Frequently Asked Questions
Do I need to sand wood before staining?
Yes, you almost always need to sand wood before staining. Sanding smooths the surface. It also opens up the wood pores.
This helps the stain soak in evenly. Without sanding, the stain can look blotchy and uneven. It’s a vital first step for good color.
How long should I wait after staining before applying finish?
This varies by product. Most oil-based stains need at least 24 hours to dry completely before you apply a finish. Water-based stains can sometimes be ready in 6-12 hours.
Always check the product label for specific drying times. Waiting too soon can cause problems.
Can I use a tinted poly (polyurethane) instead of stain?
Yes, tinted poly is an option. It acts as both a colorant and a protective finish in one step. However, it often looks different than traditional stain.
It tends to sit more on the surface. It might not penetrate the wood as deeply. It can sometimes look less natural.
For deep, rich color, stain is often preferred.
What if I don’t like the stain color after it’s applied?
If the stain color isn’t right, you usually need to remove it. If the finish hasn’t been applied yet, you might be able to use a wood cleaner or a light sanding to lift some of the color. If a finish has already been applied, you’ll likely need to sand off both the finish and the stain.
Then you can start over with a new stain color.
Can I stain and finish at the same time?
Some products claim to do both. These are often called “all-in-one” stain and finish products. They can work for some projects.
But they typically don’t offer the same depth of color as a separate stain. They also might not offer the same level of protection as a dedicated finish. For best results, using separate stain and finish is often recommended.
Does the type of wood affect how stain and finish work?
Yes, definitely! Some woods, like pine, are very absorbent. They can easily blotch or get too dark with stain.
Other woods, like maple, are less porous and can resist stain. This means you might need different techniques or products for different types of wood. Always test on a scrap piece first.
Putting It All Together
Understanding the roles of stain and finish is key to beautiful, durable wood projects. Staining adds the color you desire. It transforms the wood’s appearance.
The finish then protects that color. It also shields the wood from daily wear and tear. For most projects, this order—stain first, then finish—is the way to go.
Remember, taking your time and following the steps will lead to the best results. Your wood projects will look great and last for years to come.