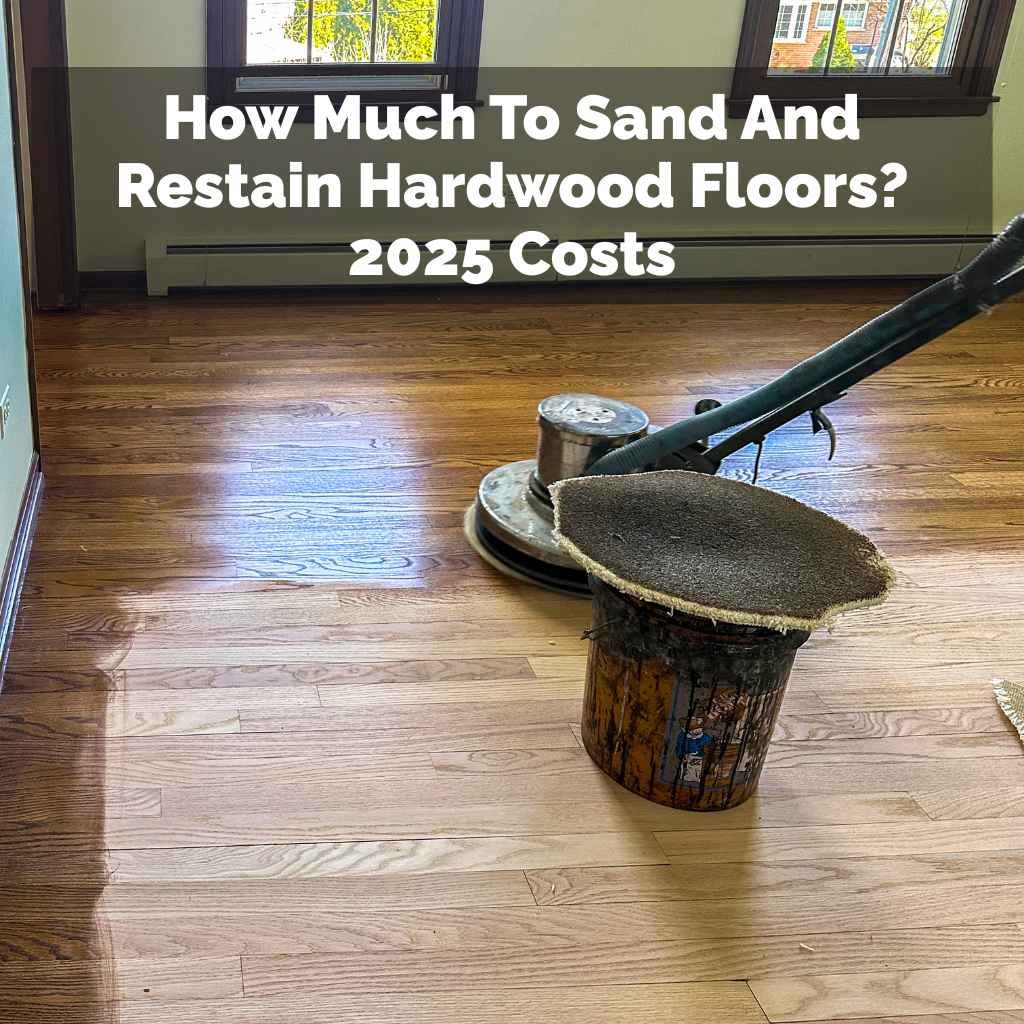
How Much To Sand And Restain Hardwood Floors? 2025 Costs
Worried about the cost and work to make your old hardwood floors look new again? It feels overwhelming when you see scratches and faded color. You want beautiful floors but fear a huge bill or a project that takes forever.
You’re looking for real numbers and clear steps. Let’s break down sanding and staining your hardwood floors so you know exactly what to expect.
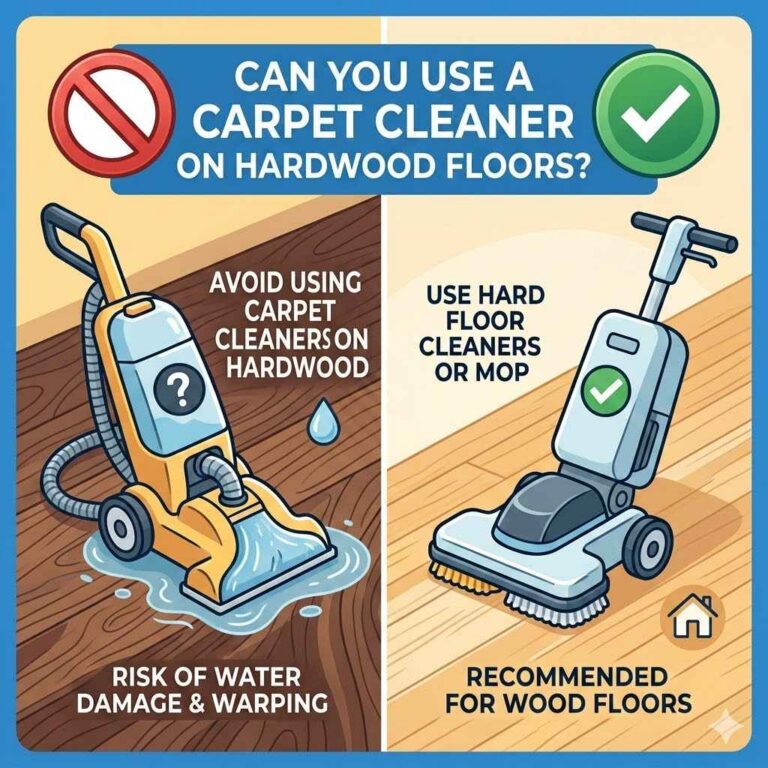
Sanding and restaining hardwood floors typically costs between $1,500 and $5,000 for a medium-sized room. This includes labor and materials. DIY sanding and staining can save money but requires careful work and tools.
The process involves removing old finish, smoothing the wood, and applying new stain and sealant.
Understanding Hardwood Floor Refinishing
Refinishing hardwood floors means bringing them back to life. Old floors get dull. They get scratches.
Sometimes they look worn out. Sanding is the key step. It removes the old, damaged top layer of wood.
Think of it like giving the floor a fresh start. After sanding, you apply a new color with stain. Then, you protect it with a clear coat, like polyurethane.
This whole process is called refinishing. It’s not just about looks. It also protects the wood.
It stops further damage. It can make your home feel much newer. Many people think about this when they move into an older house.
Or maybe they just want a change.
The cost can vary a lot. This depends on the size of your home. It also depends on the type of wood.
The condition of the floors matters too. Do you want a professional to do it? Or will you try it yourself?
Each choice changes the total price.
My Own Floor Refinishing Story
I remember one time I bought an old house. The living room had these beautiful oak floors. But they looked sad.
There were dark spots. Scratches showed up everywhere. It looked like a map of every dropped item.
I felt a knot in my stomach thinking about the cost. I walked into the room and just sighed. The afternoon sun hit the floor just right, highlighting every single flaw.
I thought, “This is going to cost a fortune.”
I got a few quotes from pros. They were high. Really high.
I started looking into doing it myself. I watched so many videos. It looked like a lot of work.
Dust everywhere. Heavy machines. But the savings looked huge.
I decided to try it. It took me a whole weekend just to sand one room. My back hurt.
My lungs felt full of dust, even with a mask. But seeing that fresh, smooth wood under the stain felt amazing. It was hard work, but worth it.
How Much Does Sanding and Restaining Cost?
The cost to sand and restain hardwood floors in 2025 really depends on a few big things. We’ll look at these one by one. This helps you guess the total amount for your home.
It’s not a one-size-fits-all price.
First, the size of the area is key. Bigger rooms mean more work. More materials are needed.
Most pros charge by the square foot. This is a good way to get an estimate. For a typical living room, say 300 square feet, you might look at around $1,500 to $3,000 for professional work.
Then, there’s the type of wood. Some woods are harder to sand. Oak is pretty common and not too difficult.
Exotic woods can be trickier. They might need special tools. This can increase the labor cost.
Also, the condition of your current floors matters.
Deep scratches or old, stubborn finishes can take more time to remove. This means more sanding. More sanding means more labor.
It could also mean needing finer grit sandpaper. This adds to material costs. If you have lots of borders or complex shapes in your rooms, that also adds to the time for the pros.
Let’s break down typical costs:
Cost Breakdown Estimates (2025)
Average Cost Per Square Foot: $3 – $8
This range covers both materials and labor for professional services. Cheaper end is for basic stains and finishes. Higher end is for premium products or more complex jobs.
So, a 500 square foot room could easily be $1,500 to $4,000. A larger home, say 1,500 square feet, might cost $4,500 to $12,000. These are big numbers.
But they are estimates.
DIY vs. Professional: What’s Your Best Bet?
Deciding whether to DIY or hire a pro is a big choice. It affects your budget and your time. Let’s look at what each option offers.
DIY (Do It Yourself):
- Pros: Saves a lot of money. You control the pace. Feels very rewarding when done.
- Cons: Requires a lot of physical effort. You need to rent or buy tools. Mistakes can be costly. It takes a lot of time. Dust can get everywhere.
Renting a floor sander is common. Drum sanders are powerful but tricky. Edge sanders get corners.
You’ll also need sandpaper in various grits. Vacuum cleaners are essential. Then you need stain and sealant.
Safety gear like masks and goggles are a must.
Professional:
- Pros: High-quality finish. Saves you time and hard labor. Pros have experience with different wood types. They have better tools.
- Cons: Much more expensive. You must schedule their time. You might not be home during the work.
Professionals use commercial-grade equipment. They know how to avoid common mistakes. They can usually finish a job faster than a DIYer.
Their expertise often leads to a smoother, more durable finish. This is especially true for intricate patterns or unique wood.
If your budget is tight and you have the time and energy, DIY can work. For most people, hiring a pro is often worth the extra cost. Especially if you want a perfect, long-lasting result.
DIY Cost Savings Estimate
DIY can save 50% to 70% compared to professional services.
This saving comes from avoiding labor costs, which are the largest part of a pro’s fee. You’ll still pay for sandpaper, stain, sealant, and tool rentals.
The Sanding Process Explained
Sanding is the most critical part of refinishing. It’s where you remove the old. You prepare the wood for its new look.
This isn’t just a quick rub. It’s a multi-step process.
First, you need to prep the room. This means moving all furniture out. Remove carpets and anything else on the floor.
You also need to protect baseboards and walls from dust. Use plastic sheeting and painter’s tape. Then, it’s time for the first pass.
This uses a coarse grit sandpaper.
Drum sanders are used for the main floor area. They remove deep scratches and old finish. You work in long, straight passes.
Overlap each pass slightly. Go with the direction of the wood grain. This is important.
Going against the grain can leave marks.
Next, you use an edge sander. This machine gets close to walls and corners. It does the same job as the drum sander.
It takes practice to use it well. You don’t want to dig too deep.
After the coarse sanding, you move to finer grits. This smooths out the wood. Each step removes the scratches from the previous one.
You might use grits like 60, then 80, then 100 or 120. Some pros go even finer.
You’ll often use a handheld orbital sander or a pole sander for the final passes. This ensures a really smooth surface. After each sanding stage, you must vacuum thoroughly.
Dust is the enemy of a good finish. It can get into the new stain and sealant.
The goal is a surface that feels like silk. No rough spots. No old finish hiding in the grain.
This can take hours per room. It’s tough, dusty work. But the smoother the wood, the better the stain will look.
Sanding Grit Progression
Coarse Grit (e.g., 36-50): Removes deep scratches and old finish.
Medium Grit (e.g., 60-80): Smooths out marks from coarse grit.
Fine Grit (e.g., 100-120+): Creates a smooth surface ready for stain.
Missing a step in sanding is a common mistake. It means the stain might look uneven. Or the finish won’t be as durable.
Pay attention to detail here. It pays off later.
Choosing and Applying Wood Stain
Once the floors are perfectly smooth, it’s time for the fun part: stain. Stain is what gives your floors their color. There are many options available.
This is where you can really change the look of your home.
You can find stains in natural wood tones. Think of honey oak, walnut, or cherry. Or you can go for darker shades like espresso or ebony.
There are also grey tones, white washes, and even colored stains. It’s a big decision!
First, consider the style of your home. A modern home might look good with grey or dark walnut. A rustic home might suit a warmer, natural tone.
Think about your furniture too. You want the floors to complement them.
Testing the stain is super important. You can buy small sample cans. Or you can use scrap pieces of the same wood.
Apply the stain to these samples. Let them dry completely. This is because the color can look different when wet versus dry.
Also, the stain will look different on your specific wood species.
Applying the stain is usually done with a foam brush, a cloth, or a special applicator pad. You apply a thin, even coat. Work in small sections.
Let the stain soak into the wood for a few minutes. The longer it soaks, the darker the color. Then, wipe off the excess stain with a clean cloth.
Again, work with the wood grain.
You can apply a second coat for a darker shade. But be careful not to make it too dark. It might look muddy.
It’s always better to start lighter and add more if needed.
After staining, you must let it dry completely. This can take 24 to 48 hours. Some stains need longer.
Check the product instructions. Any moisture trapped will affect the sealant.
Stain Application Tips
Work in small sections: Apply, soak, and wipe off quickly.
Go with the grain: Always apply and wipe along the wood lines.
Wipe off excess: Don’t let stain pool or dry on the surface.
Allow proper drying time: Rushing this step can ruin the finish.
The color you choose can affect the perceived value of your home. Lighter, natural tones are often seen as timeless. Darker stains can look very elegant but might show dust more.
It’s a balance.
Sealing and Protecting Your Floors
After the stain is dry, you need to seal the floor. This is the protective layer. It keeps the stain from wearing off.
It also protects the wood from spills and wear. This step is vital for the floor’s lifespan.
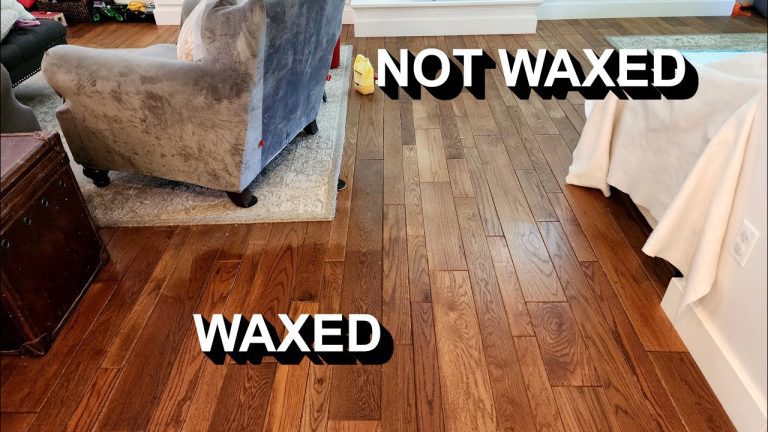
The most common sealant is polyurethane. It comes in different finishes. You can get a matte finish, a satin finish, a semi-gloss, or a high-gloss finish.
Matte and satin look more natural. Semi-gloss and high-gloss are shinier and can make floors look a bit more dated. But they are also very durable.
Polyurethane also comes in oil-based and water-based types. Oil-based polyurethanes are very durable. They give a warmer, amber tone to the wood over time.
They have strong fumes and take longer to dry. Water-based polyurethanes dry faster. They have fewer fumes.
They tend to stay clear. Many people prefer water-based for quicker project completion.
Applying sealant is similar to staining. You use a good quality brush or applicator. Apply thin, even coats.
Avoid puddles. Work in the direction of the wood grain.
You’ll need to apply multiple coats. Most floors need at least two or three coats. Some recommend even more for high-traffic areas.
Let each coat dry completely before applying the next. Lightly sand with very fine grit sandpaper (like 220 grit) between coats. This helps the next layer bond better.
Then, vacuum very well again.
After the final coat of sealant, you must let the floor cure. This is different from drying. Curing takes time.
It means the sealant reaches its full hardness. This can take several days to two weeks. During this time, avoid heavy furniture.
Try to keep pets off the floor. Wear socks in the house.
Sealant Application Steps
Apply thin coats: Avoid thick, gloppy applications.
Allow full drying between coats: Check product instructions.
Lightly sand between coats: Use fine grit sandpaper (220+).
Vacuum thoroughly after sanding: Dust is the enemy.
Allow full cure time: Protect floors during this crucial period.
The choice of finish affects how the floor looks and how it wears. A matte finish hides minor imperfections better than a high-gloss one. But high-gloss can look very striking.
Factors Affecting the Total Cost
Let’s dive deeper into what makes the price go up or down. Knowing these factors helps you budget better.
1. Area Size: This is the most obvious. A tiny bathroom will cost much less than a whole house.
A general rule is to multiply the square footage by the cost per square foot. So, 1000 sq ft at $5/sq ft is $5000.
2. Wood Type: Some woods are softer and scratch easily. Others, like maple or walnut, are harder and can be more challenging to sand.
Exotic woods might require special techniques or products, raising the price.
3. Floor Condition: Are there deep gouges? Pet stains that have soaked into the wood?
Water damage? These issues mean more intensive sanding and possibly more material. If the old finish is peeling badly, it needs more work to remove.
4. Stain Choice: While stains themselves are not hugely expensive, some custom colors or premium brands might cost a bit more. The main cost driver here is the amount of stain needed, which relates to the area size.
5. Finish Type: Water-based polyurethanes are usually pricier per gallon than oil-based. However, they dry faster, meaning less labor time for the pros.
The number of coats needed also impacts the final cost.
6. Location: Labor costs vary by region. In major cities, you’ll likely pay more for professional services than in smaller towns.
This is due to higher living costs and demand.
7. Complexity of the Job: Are there many corners, closets, or tricky angles? Staircases are also much more labor-intensive to sand and finish than flat floors.
These add significant time and cost.
8. DIY vs. Pro: As we discussed, DIY can save thousands.
But it demands your time, effort, and risk. Professionals offer convenience and expertise but at a higher price point. Many people underestimate the total time and effort required for a DIY job.
Cost Influencer: Your Existing Floor
Good Condition: Minimal sanding needed. Lower cost.
Moderate Wear: Standard sanding and refinishing. Average cost.
Severe Damage: Deep scratches, stains, or wear. Requires more aggressive sanding and potentially repairs. Higher cost.
When getting quotes, always ask what’s included. Does it cover dust containment? What type of stain and sealant are they using?
Are multiple coats included? Clarify these details to avoid surprises.
When to Call a Professional
While DIY is an option, there are times when calling a professional is the smartest move. It’s about knowing your limits and what you want for your home.
1. You Lack Time: Refinishing floors takes days of active work, plus drying and curing time. If you’re busy with work or family, trying to squeeze this in can be stressful and lead to rushed, poor results.
2. You Lack Experience: If you’ve never operated heavy floor sanding equipment, it can be daunting. Mistakes with a drum sander can be hard to fix.
Pros know how to avoid these pitfalls.
3. You Want a High-End Finish: Professionals have access to better equipment and materials. They have trained eyes to spot imperfections.
Their experience usually results in a factory-like finish that’s hard to achieve on your own.
4. Your Floors Have Major Issues: Deep gouges, water damage, or significant warping might require specialized repair skills that a DIYer might not have. A pro can assess if the floor is salvageable.
5. Budget Allows: If your budget can stretch to cover professional services, it often provides peace of mind. You know the job will be done right.
It saves you from potential costly mistakes.
6. Complex Floor Layouts: Homes with many angles, curves, or intricate inlays are challenging. Pros are better equipped to handle these complex designs.
Hiring someone means you can relax while they do the heavy lifting. You’re investing in your home’s appearance and value. It’s not just about saving money; it’s about achieving the best possible outcome for your floors.
Signs Your Floor Needs Professional Help
Deep, widespread scratches: Beyond what light sanding can fix.
Cupping or crowning: Indicates moisture issues needing expert attention.
Warped boards: Might need individual board replacement.
Extremely uneven surfaces: Previous poor refinishing or installation.
Don’t be afraid to get multiple quotes. Ask for references. Look at their past work.
This due diligence helps you find a trustworthy professional.
Understanding Hidden Costs and Considerations
Beyond the main cost of sanding and staining, there are other things to think about. These can add to your total expense. Or they might affect your decision-making.
1. Dust Containment: Professional sanding creates a LOT of dust. Reputable companies use specialized equipment to contain dust.
This can cost extra. If they don’t have good dust containment, your house will be messy for weeks.
2. Furniture Moving: If you hire professionals, they usually expect you to have moved all furniture out. If they have to move it, there’s often an extra charge for this labor.
3. Subfloor Issues: Sometimes, sanding reveals that the subfloor beneath the hardwood is damaged. This could mean needing to repair or replace parts of the subfloor.
This is a significant extra cost.
4. Floor Repair: If there are broken boards or loose planks, these will need to be fixed. This adds to the labor and material cost.
5. Disposal Fees: If they remove old carpet or materials, there might be a fee for disposal.
6. Lead Paint Concerns: If your home was built before 1978, the old finish might contain lead paint. Sanding this releases lead dust.
Professionals must follow strict EPA guidelines for lead paint removal, which adds to the cost and complexity.
7. Time Away From Home: Some finishes, especially oil-based, have strong fumes. Professionals might advise you to stay out of the house during application and curing.
This means temporary accommodation costs.
8. Future Maintenance: Remember that even a freshly refinished floor needs care. You’ll need to use the right cleaning products.
Avoid harsh chemicals. Placing felt pads on furniture legs is crucial.
Hidden Cost Checklist
Dust containment systems
Furniture moving services
Subfloor repairs
Board replacement
Lead paint remediation (if applicable)
Disposal of old materials
It’s wise to discuss all these potential issues with your chosen contractor. An experienced pro can spot potential problems early. This helps in accurate budgeting.
Making Your Floors Last Longer
Once you’ve spent the money and time to sand and restain, you want those floors to look great for years. Proper care makes a huge difference. It extends the life of your finish and keeps the wood looking beautiful.
1. Clean Regularly: Sweep or vacuum your floors often. This removes grit and dirt.
Grit acts like sandpaper underfoot. It scratches the finish over time. Use a vacuum with a hard floor attachment.
Or a soft broom.
2. Use Gentle Cleaners: Avoid harsh chemicals. Ammonia-based cleaners can dull the finish.
Stick to wood floor cleaners recommended by the manufacturer. Or a damp mop with plain water. Always wring out your mop well.
You don’t want standing water.
3. Protect from Foot Traffic: Use doormats at all entrances. This catches dirt and moisture from shoes.
Consider asking people to remove their shoes indoors. This is a big help.
4. Furniture Protection: Put felt pads on the legs of all furniture. This prevents scratches when you move chairs or tables.
Check the pads regularly. They can collect grit and need replacing.
5. Avoid Direct Sunlight: Prolonged exposure to direct sunlight can fade wood floors. Use curtains or blinds to block intense sunbeams, especially during peak hours.
6. Prevent Spills: Clean up spills immediately. Water left to sit can seep into the wood and cause damage or stains.
Have a soft cloth handy for quick cleanups.
7. Trim Pet Nails: If you have pets, keep their nails trimmed. Long nails can scratch the floor.
Some dogs can do significant damage.
8. Deep Cleaning and Re-coating: Every few years, your floor might benefit from a deeper clean. Depending on wear, you might need to re-coat the polyurethane.
This is applying a fresh layer of sealant without full sanding. It’s less work and cost than a full refinish.
Everyday Floor Care Tips
Sweep/Vacuum Daily: Remove grit and dust.
Clean Spills Immediately: Water and liquids are floor enemies.
Use Mats: At entryways, capture dirt.
Felt Pads: On all furniture legs.
Gentle Cleaners: Avoid harsh chemicals.
Taking these simple steps will help your beautifully refinished floors last for many years. It’s an investment in your home’s beauty and value. The effort you put into care now will pay off later.
Frequently Asked Questions About Sanding and Restaining
How long does it take to sand and restain hardwood floors?
For a typical living room, professional sanding and staining usually take 2-4 days. This includes drying time between coats. A full house can take a week or more.
DIY jobs often take longer due to inexperience and the physical demands.
Can I restain hardwood floors without sanding?
It’s generally not recommended. Sanding removes the old, worn finish and creates a smooth surface for the new stain to adhere to. Applying stain over an old finish without sanding will likely result in an uneven, peeling, or short-lived finish.
What is the best stain color for hardwood floors in 2025?
Trends change, but warm, natural wood tones like honey oak, walnut, and medium browns remain popular. Darker stains like espresso or greige are also fashionable. Ultimately, the “best” color depends on your home’s style, furniture, and personal preference.
How much dust is created when sanding hardwood floors?
Sanding hardwood floors creates a significant amount of fine dust. Professional companies use dust containment systems to minimize this. If doing it yourself, be prepared for dust to spread, and take precautions to seal off rooms and protect vents and furniture.
How often should hardwood floors be refinished?
Hardwood floors can typically be refinished 2-3 times in their lifetime. The frequency depends on wear. A floor in a high-traffic area might need refinishing every 5-7 years.
Floors with less wear might go 10-15 years or more between refinishing.
Can you repair deep scratches before sanding and staining?
Yes, deep scratches can often be repaired before sanding. Minor scratches can sometimes be filled with wood filler or putty that matches the wood. For severe damage, a professional might need to replace boards.
The sanding process will then smooth out the repaired areas.
Final Thoughts on Your Floor Refinishing Journey
Refinishing your hardwood floors is a big project. It can transform your home. Understanding the costs, the process, and the choices involved is key.
Whether you DIY or hire a pro, attention to detail matters. Good preparation, careful sanding, and proper sealing lead to beautiful, lasting results. Enjoy your revitalized floors!