How Soon Can You Seal Pressure Treated Wood Safely?
Sealing pressure treated wood is crucial for extending its lifespan and maintaining its aesthetic appeal, but knowing the right time to apply a sealant is key to its effectiveness. Applying sealant too early can trap moisture, leading to potential issues like warping, mold, and reduced sealant adhesion. This comprehensive guide will walk you through the essential steps and considerations for determining the perfect time to seal your pressure treated wood project, ensuring a durable and beautiful finish.
Simply put, you should wait at least 24-72 hours, and often several weeks to a few months, before sealing pressure treated wood. The exact waiting period depends on the wood’s moisture content, which is best determined by a simple water test. Proper drying ensures the sealant penetrates effectively and protects the wood from the elements.
Key Takeaways
- Sealing pressure treated wood requires patience; wait for it to dry sufficiently before applying any protective coats.
- The ideal drying time for pressure treated wood ranges from a few days to several months, determined by its moisture content.
- Perform a simple water test to gauge the wood’s dryness and readiness for sealing.
- Choose the right sealant for your project’s needs and climate for optimal protection.
- Proper sealing shields your wood from UV damage, moisture, and pests, significantly extending its lifespan.
Understanding Pressure Treated Wood
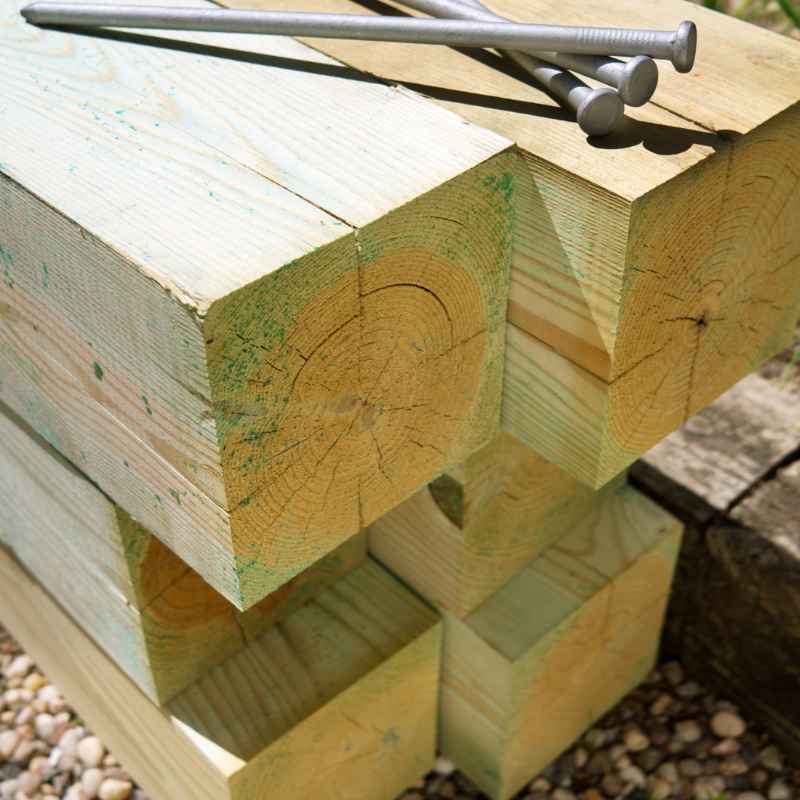
Pressure treated wood is lumber that has been chemically infused under pressure to resist rot, decay, and insect infestation. This treatment process involves forcing preservatives deep into the wood fibers, making it suitable for outdoor applications like decks, fences, and pergolas. The chemicals used can leave the wood with a slightly green or brownish tint and, crucially, a high moisture content upon purchase.
This inherent moisture is the primary reason for the waiting period before sealing. The preservatives, while beneficial, are carried into the wood by water. Until this excess water evaporates, the wood remains saturated. Sealing saturated wood is like trying to paint over a wet surface; the sealant won’t adhere properly, and the trapped moisture can lead to premature failure of the finish and the wood itself.
Understanding this basic principle is the first step to a successful project. The goal is to allow the wood to dry to a level where it can accept and hold a sealant effectively. This means considering the wood’s composition, the environmental conditions, and the type of treatment it has undergone.
Why Waiting to Seal Is Essential
The most critical reason for waiting to seal pressure treated wood is to prevent moisture entrapment. When the wood is first purchased, it can have a moisture content of 30% to 50% or even higher. If you apply a sealant at this stage, you are essentially locking that moisture inside the wood.
This trapped moisture has nowhere to go and can cause significant problems. It can lead to the wood expanding and contracting excessively as it tries to dry, resulting in warping, twisting, and cracking. Furthermore, the moisture can create an ideal environment for mold and mildew to grow beneath the sealant, which can eventually compromise the wood’s structural integrity and the sealant’s adhesion.
Moreover, many sealants are designed to bond with dry wood fibers. Applying them to wet wood will result in a poor bond, causing the sealant to peel, flake, or chalk prematurely. This not only ruins the aesthetic of your project but also leaves the wood unprotected, negating the purpose of sealing in the first place.
Here’s a breakdown of the issues caused by sealing too early:
- Warping and Twisting: Trapped moisture causes uneven expansion and contraction, leading to structural changes in the wood.
- Mold and Mildew Growth: A damp environment under the sealant fosters fungal development.
- Peeling and Flaking Sealant: Poor adhesion due to moisture prevents the sealant from bonding effectively.
- Reduced Lifespan: The combined effects of moisture damage and failed sealant shorten the wood’s usability.
- Ineffective Protection: The sealant cannot properly shield the wood if it hasn’t dried out.
Factors Influencing Drying Time
The time it takes for pressure treated wood to dry sufficiently for sealing is not a one-size-fits-all answer. Several factors play a significant role in how quickly or slowly your wood will release its moisture. Understanding these variables will help you better estimate the waiting period.
1. Type of Treatment and Preservative
Different pressure treatment processes and preservatives can affect the wood’s initial moisture content and drying rate. For example, treatments that use water-based preservatives might leave the wood wetter than those using oil-based ones, though oil-based treatments can also sometimes inhibit drying due to their nature. Modern treatments are often designed to be more stable, but always check manufacturer recommendations if possible.
2. Environmental Conditions
The climate and weather play a huge role.
- Temperature: Warmer temperatures accelerate the evaporation of moisture from the wood.
- Humidity: High humidity slows down the drying process as the surrounding air is already saturated with moisture.
- Sunlight: Direct sunlight can help dry out the wood, especially on its surface, but can also cause it to dry unevenly.
- Airflow: Good ventilation allows moisture to dissipate from the wood’s surface. Projects with poor airflow, like tightly packed deck boards, will take longer to dry.
3. Wood Species and Thickness
While pressure treated wood is typically pine or fir, the density and grain structure of the specific wood species can influence drying. Thicker boards will naturally take longer to dry than thinner ones, as moisture has further to travel to reach the surface.
4. Wood Placement and Installation
How the wood is stored and installed also matters. If the wood is laid flat and in direct contact with the ground, it will dry much slower than if it’s stacked with spacers to allow airflow. Newly installed decks or fences with good spacing between boards will dry more efficiently than a solid, enclosed structure.
The Water Test: Your Best Friend
The most reliable way to determine if your pressure treated wood is ready for sealing is the simple water test. This method directly assesses the wood’s ability to absorb moisture, indicating its dryness level. It’s a quick, easy, and accurate way to avoid sealing too soon.
To perform the water test, simply sprinkle a small amount of water (about a tablespoon) onto the surface of the wood in several spots. Observe how the water behaves. If the water beads up and sits on the surface, it means the wood is still saturated with moisture and is not ready for sealing.
On the other hand, if the water is quickly absorbed into the wood, leaving no visible wet mark after a minute or two, the wood is likely dry enough. This indicates that the wood fibers are ready to accept and bond with a sealant.
Here’s how to conduct the test and interpret the results:
- Step 1: Select a few areas on the wood surface that are representative of the overall dryness. Avoid areas that might be directly exposed to rain or excessive shade if possible.
- Step 2: Take a small amount of clean water (a few tablespoons) and gently pour it onto the selected spots.
- Step 3: Observe the water’s behavior for 1-2 minutes.
Interpreting the Results:
- Water Beads Up: The wood is still too wet. The water sits on top, indicating a low absorbency and high moisture content. Wait longer and re-test.
- Water Soaks In Quickly: The wood is likely dry enough. The water penetrates the surface, showing it’s ready to accept a sealant.
It’s recommended to perform this test in multiple locations on your project to get an accurate assessment.
Typical Waiting Times for Pressure Treated Wood
While the water test is the ultimate judge, general guidelines for waiting times can help you plan. These are estimates, and actual drying times can vary significantly.
The general consensus among professionals is that it’s best to wait at least a few weeks to a few months. For many outdoor projects, such as decks and fences, a waiting period of 60 to 90 days is often recommended. However, some manufacturers suggest a shorter period, like 24 to 72 hours for certain types of treated lumber, especially if it has been kiln-dried after treatment (KDAT). Always check the manufacturer’s recommendations for the specific product you purchased.
Here’s a general breakdown:
| Scenario | Estimated Waiting Time |
|---|---|
| Standard Pressure Treated Lumber (untreated after purchase) | 2-6 months |
| KDAT (Kiln-Dried After Treatment) Lumber | 24-72 hours to a few weeks |
| Wood installed in humid or shady conditions | Up to 6 months or longer |
| Wood exposed to direct sun and good airflow | As little as 2-4 weeks |
This table provides a general idea, but always rely on the water test for definitive results.
Preparing the Wood for Sealing
Once the water test confirms your wood is dry enough, proper preparation is key to ensuring the sealant performs as intended. This involves more than just waiting; it includes cleaning and potentially light sanding.
Cleaning the Surface
Even if your wood looks clean, it’s essential to remove any dirt, dust, mildew, or loose fibers that might have accumulated during the drying period. For new wood, a simple rinse with water and a stiff brush might suffice. If there are any signs of mold or mildew, use a dedicated wood cleaner or a mixture of one part bleach to three parts water.
Tip: Always test your cleaning solution on an inconspicuous area first to ensure it doesn’t discolor the wood. Thoroughly rinse the wood with clean water after cleaning and allow it to dry completely again (at least 24 hours) before proceeding.
Sanding (Optional but Recommended)
For a smoother finish, especially on decks or railings, light sanding can be beneficial. Use a medium-grit sandpaper (around 80-100 grit) to smooth out any rough spots or splinters. This also helps to open up the wood grain slightly, allowing the sealant to penetrate better.
After sanding, ensure you thoroughly remove all dust generated. A shop vacuum followed by a wipe-down with a tack cloth or a damp (not wet) rag is highly effective.
Choosing the Right Sealant
With the wood prepped and ready, selecting the appropriate sealant is your next important decision. There are several types of wood sealants available, each offering different levels of protection and aesthetics.
Types of Sealants
- Clear Water Sealants: These offer basic protection against moisture and UV damage without significantly altering the wood’s natural color or appearance. They are good for maintaining a natural look but offer less protection against wear.
- Toner/Transparent Stains: These add a subtle hint of color while allowing the wood grain to show through. They offer moderate UV protection and moisture resistance.
- Semi-Transparent Stains: These provide more color and pigment than toners, offering better UV protection. The wood grain is still visible but less prominent.
- Solid Stains: These provide the most color and coverage, often resembling paint. They offer excellent protection against UV rays and wear but completely hide the wood grain.
- Water Repellents: Primarily focused on preventing water absorption, these are often used as a base coat or in conjunction with other finishes.
Considerations When Choosing
- Climate: If you live in an area with harsh sun, heavy rain, or extreme temperature fluctuations, opt for a sealant with robust UV inhibitors and excellent moisture resistance.
- Wood Exposure: Decks, which experience high foot traffic and direct weather exposure, need a more durable, wear-resistant sealant than a fence or pergola.
- Desired Look: Decide whether you want to maintain the natural wood color, add a subtle tint, or achieve a completely new color.
- Maintenance: Some sealants require reapplication every year, while others can last 2-3 years. Consider the long-term maintenance commitment.
- Ease of Application: Oil-based sealants can penetrate deeper but are messier to clean up. Water-based sealants are easier to apply and clean but might offer slightly less durability.
Important: Always choose a product specifically designed for exterior wood use. Avoid interior sealants, as they won’t withstand the elements. For pressure treated wood, look for sealants that are compatible with the type of preservatives used.
Applying the Sealant for Best Results
Once you’ve chosen your sealant and the wood is confirmed dry and clean, it’s time for application. Proper application techniques will ensure an even finish and maximum protection.
Preparation and Application Process
- Read the Manufacturer’s Instructions: This is paramount. Each product has specific application guidelines.
- Apply in Suitable Weather: Avoid applying sealant on very hot, sunny, or windy days, or when rain is expected within 24-48 hours. Ideal conditions are mild temperatures (50-85°F or 10-30°C) with low humidity.
- Mix Thoroughly: If using a stain or sealant with pigments, stir it thoroughly before and periodically during application to ensure the color and components are evenly distributed.
- Apply in Thin, Even Coats: Use a high-quality brush, roller, or sprayer. Work in manageable sections, maintaining a wet edge to avoid lap marks.
- Back-brushing: If spraying, always back-brush immediately to ensure even penetration and distribution.
- Second Coat (if needed): For stains or finishes requiring more build, apply a second coat after the time recommended by the manufacturer, typically after 4-24 hours.
- Clean Up: Clean brushes, rollers, and sprayers immediately after use according to the product’s instructions (water for latex-based, mineral spirits for oil-based).
Common Application Mistakes to Avoid
| Mistake | Consequence |
|---|---|
| Applying to wet wood | Poor adhesion, peeling, mildew, wood rot |
| Applying in extreme temperatures | Uneven drying, poor film formation, premature failure |
| Not mixing the product properly | Inconsistent color and protection |
| Applying too thickly | Tacky finish, poor drying, trapping moisture |
| Not cleaning thoroughly beforehand | Sealant applied over dirt and debris, affecting adhesion and look |
Avoiding these common pitfalls will significantly improve the longevity and appearance of your sealed pressure treated wood project.
Maintenance of Sealed Pressure Treated Wood
Sealing pressure treated wood is not a one-time task. Regular maintenance is necessary to ensure its continued protection and aesthetic appeal. The frequency and type of maintenance will depend on the sealant used and the environmental conditions the wood is exposed to.
Regular Inspections
Periodically inspect your sealed wood for signs of wear, such as fading, peeling, or cracking. Also, check for any signs of moisture absorption, mold, or mildew. These inspections should ideally be done at least twice a year, typically in the spring and fall.
Cleaning
Keep the sealed wood clean by sweeping away debris and washing it with mild soap and water annually or as needed. This prevents dirt and grime from accumulating, which can break down the sealant over time and encourage mold growth.
Reapplication
Most exterior wood sealants and stains have a lifespan. When you notice the protective finish starting to wear or the wood beginning to absorb water again, it’s time for reapplication. This might be every 1-3 years, depending on the product and exposure.
Tip: Before reapplication, clean the wood thoroughly. Light sanding may be necessary if the old sealant has become glossy or flaky, but often a good cleaning is sufficient for reapplication of the same product type.
Frequently Asked Questions
How long does pressure treated wood take to dry for sealing?
The drying time can vary significantly, from 24 hours for KDAT (Kiln-Dried After Treatment) lumber to several weeks or even months for standard pressure treated wood, depending heavily on moisture content and environmental factors like humidity, temperature, and airflow. Always perform a water test to confirm dryness.
What happens if I seal pressure treated wood too soon?
Sealing too early can trap moisture within the wood. This can lead to warping, cracking, peeling sealant, mold and mildew growth, and premature wood rot, ultimately shortening the lifespan of your project and requiring costly repairs.
Can I use any type of sealant on pressure treated wood?
It’s best to use sealants specifically formulated for exterior wood use and compatible with pressure treated lumber. Water-based or acrylic-based sealants are generally safe. Oil-based sealants can also work, but always check product compatibility and manufacturer recommendations.
Does sealing prevent all damage to pressure treated wood?
No, sealing significantly enhances protection against moisture, UV rays, and pests, but it does not make pressure treated wood indestructible. It’s a maintenance treatment that complements the inherent properties of the wood. Regular cleaning and reapplication are still necessary.
Is it better to use a stain or a clear sealant on pressure treated wood?
This depends on your desired aesthetic and level of protection. Clear sealants maintain the wood’s natural look but offer less UV protection. Stains, especially semi-transparent and solid ones, provide better UV protection and color, but can hide the natural wood grain. Both need to be applied to dry wood.
Final Thoughts
Knowing exactly how soon you can seal pressure treated wood is critical for the longevity and appearance of your outdoor projects. Patience is key; resist the urge to seal immediately after purchase. Always perform the water test to ensure the wood has adequately dried, typically requiring several weeks to months for standard lumber. Proper preparation, choosing the right sealant, and careful application will ensure your pressure treated wood remains beautiful and protected for years to come.
Sponsored / affiliate links. As an Amazon Associate I earn from qualifying purchases. I may earn additional commission from eligible campaigns.