How to Fix O2 Sensor Heater Circuit Malfunction
Experiencing an O2 sensor heater circuit malfunction can be frustrating, leading to poor fuel economy, increased emissions, and a nagging check engine light. This common issue signals that your oxygen sensor’s heating element isn’t functioning correctly, preventing it from reaching optimal operating temperature quickly. This post will guide you through understanding the causes, symptoms, and detailed steps to diagnose and fix this electrical problem, ensuring your vehicle runs smoothly and efficiently.
Simply put, fixing an O2 sensor heater circuit malfunction involves diagnosing electrical faults with the sensor’s wiring, connectors, fuse, or the sensor itself, often requiring multimeter tests and potentially sensor replacement.
Key Takeaways
- An O2 sensor heater circuit malfunction often points to issues with the sensor’s wiring, fuse, relay, or the sensor’s internal heating element.
- Symptoms include a check engine light, poor fuel economy, rough idling, and failed emissions tests.
- Diagnosis requires checking fuses, relays, wiring continuity, and sensor resistance using a multimeter.
- Replacing the faulty O2 sensor is a common solution, but electrical connections and wiring must be inspected first.
- Promptly addressing this malfunction is crucial for vehicle performance and environmental compliance.
What is an O2 Sensor Heater Circuit?
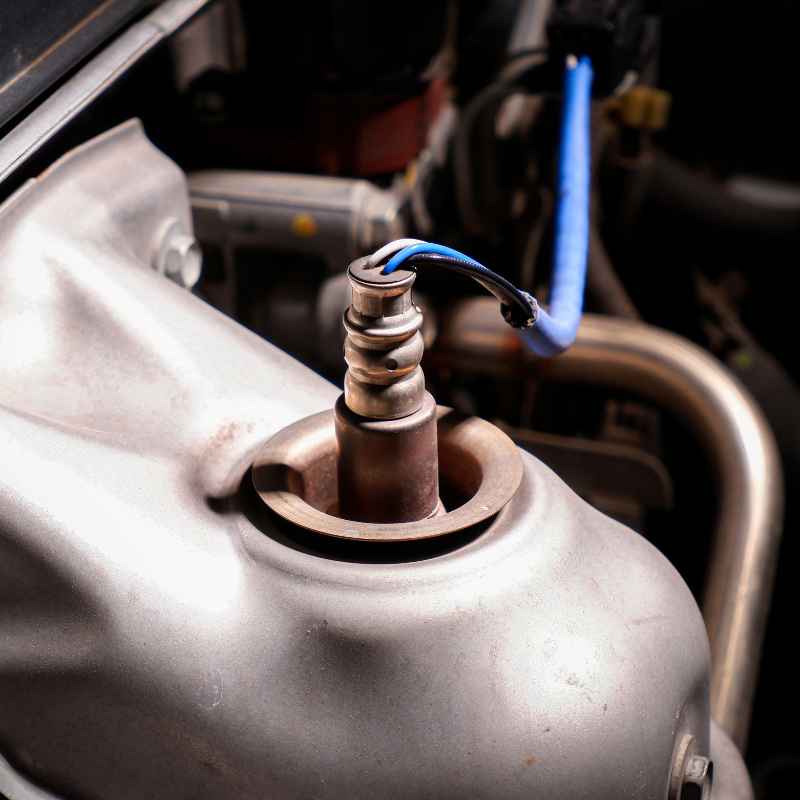
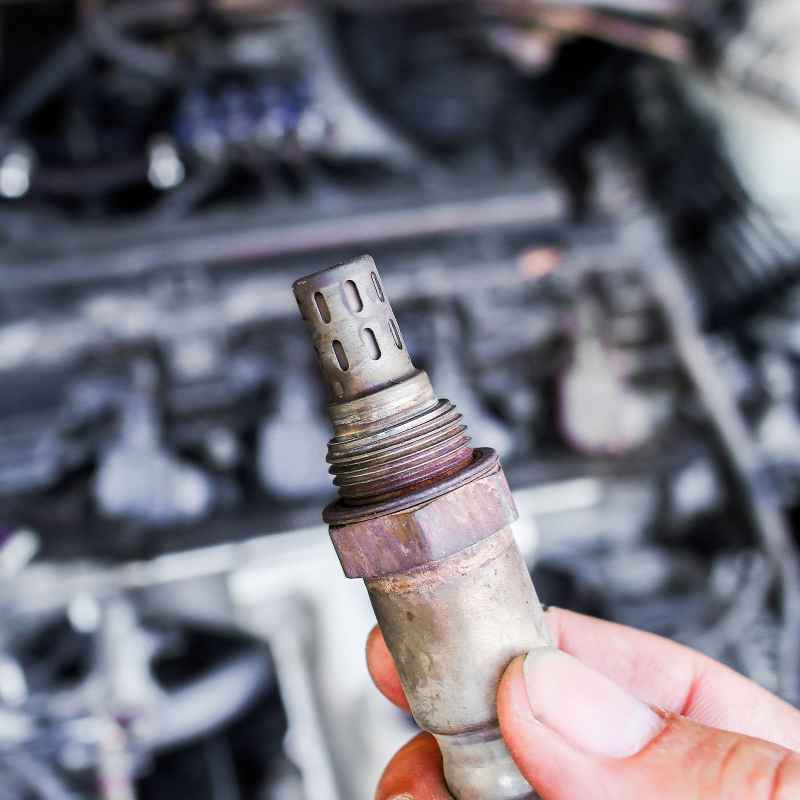
Your vehicle’s oxygen (O2) sensor plays a critical role in engine management by measuring the amount of oxygen in your exhaust gases. This data is sent to the engine control unit (ECU), which then adjusts the air-fuel mixture for optimal combustion. To do its job accurately and quickly, the O2 sensor needs to reach a high operating temperature, typically around 600°F (315°C).
The heater circuit is an integrated component within most modern O2 sensors designed to rapidly bring the sensor up to its optimal operating temperature. This is especially important during cold starts when the exhaust gases are not yet hot enough. By heating the sensor element, the heater circuit ensures that the O2 sensor can start sending accurate readings to the ECU much sooner, improving cold-start emissions and overall engine efficiency from the moment you begin driving.
When the ECU detects that the O2 sensor’s heater circuit is not functioning as expected, it triggers a diagnostic trouble code (DTC), often related to “Heater Circuit Malfunction.” This indicates a problem with the electrical supply or the heating element itself. Ignoring this can lead to increased fuel consumption, rough engine performance, and ultimately, a failed emissions inspection.
- Purpose of the Heater Circuit: To quickly bring the O2 sensor to its optimal operating temperature.
- Benefits: Faster engine computer response, improved cold-start emissions, and better fuel economy.
- Components Involved: O2 sensor’s internal heating element, vehicle’s battery power, ECU control signal, fuses, and relays.
- Operating Temperature: Typically around 600°F (315°C) for accurate readings.
- Diagnostic Trigger: A specific DTC is set by the ECU when the heater circuit fails to meet performance parameters.
Symptoms of an O2 Sensor Heater Circuit Malfunction
The most obvious sign of an O2 sensor heater circuit malfunction is the illumination of your vehicle’s check engine light. This warning light is the primary indicator that the ECU has detected a problem with one of your vehicle’s systems, and in this case, it’s specifically related to the oxygen sensor’s heating element. The light might appear intermittently at first but will likely become permanent as the issue persists.
Beyond the check engine light, you might notice a decline in your vehicle’s fuel efficiency. When the O2 sensor heater circuit isn’t working, the sensor takes much longer to reach its effective operating temperature. During this extended “cold” phase, the ECU cannot rely on the O2 sensor’s readings and defaults to a richer, less efficient fuel mixture to ensure the engine doesn’t stall.
Over time, this constant rich mixture significantly increases fuel consumption.
Other symptoms can include rough idling, hesitation during acceleration, and a generally less responsive engine. In some cases, your vehicle might even fail an emissions test because the O2 sensor is not providing the necessary data for the ECU to maintain the correct air-fuel ratio for clean combustion. These symptoms collectively point towards a system that is not operating at its peak efficiency.
- Illuminated Check Engine Light (CEL)
- Decreased Fuel Economy
- Rough Idling or Stalling
- Hesitation or Poor Engine Performance
- Failed Emissions Test
- Potential for Engine Misfires
Common Causes of O2 Sensor Heater Circuit Issues
The underlying causes for an O2 sensor heater circuit malfunction are predominantly electrical. The most frequent culprits involve the wiring harness that connects the O2 sensor to the vehicle’s ECU. Over time, these wires can become brittle, frayed, or damaged due to heat, vibration, or physical impact from road debris.
A damaged wire can lead to an open circuit, a short circuit, or poor continuity, all of which will prevent the heater element from receiving the necessary current.
Another common cause is a faulty O2 sensor itself. The internal heating element within the sensor can degrade and fail over time. Like any electrical component, it has a lifespan, and after thousands of heating and cooling cycles, it can simply burn out.
When the heating element fails, it creates an open circuit internally, preventing it from generating heat and thus triggering the malfunction code.
Beyond the sensor and its direct wiring, issues with fuses and relays can also lead to this problem. The O2 sensor heater circuit is typically protected by a fuse. If this fuse blows due to a short circuit elsewhere or simply due to age and stress, the heater will lose its power source.
Similarly, a faulty relay that controls power to the heater circuit can also cause it to malfunction. These are often overlooked but are crucial to check during diagnosis.
| Cause Category | Specific Issues | Impact |
|---|---|---|
| Wiring & Connectors | Frayed wires, corroded pins, loose connections, physical damage. | Interrupted power or ground to the heater, leading to open or short circuits. |
| Oxygen Sensor | Internal heating element failure, degradation over time. | No heat generated by the sensor, open circuit within the sensor. |
| Power Supply | Blown fuse, faulty relay, or issues with ECU power control. | Loss of power to the heater circuit, preventing it from activating. |
These electrical failures prevent the sensor from reaching its operational temperature, directly causing the heater circuit malfunction code.
How to Diagnose an O2 Sensor Heater Circuit Malfunction
Diagnosing an O2 sensor heater circuit malfunction requires a systematic approach, starting with the simplest checks. First, locate the relevant fuse for your O2 sensor heater circuit. This information can usually be found in your vehicle’s owner’s manual or by consulting an online service manual.
Visually inspect the fuse for any signs of a blown filament. If it’s blown, replace it with a fuse of the identical amperage rating. However, if the new fuse blows immediately, it indicates a short circuit somewhere in the wiring that needs further investigation.
Next, check the O2 sensor connector. These are often exposed to harsh under-vehicle conditions and can accumulate dirt, moisture, or corrosion. Disconnect the sensor and inspect the pins on both the sensor side and the vehicle harness side.
Look for any bent, broken, corroded, or loose pins. Clean the connector thoroughly with an electrical contact cleaner and reconnect it firmly. A poor connection can mimic a failed sensor or wiring issue.
The most critical diagnostic step involves using a multimeter to test for continuity, voltage, and resistance. With the ignition on (engine off), check for battery voltage at the O2 sensor’s power wire (typically red or white, but check your service manual). Then, with the ignition off, disconnect the sensor and test for continuity between the heater element pins on the sensor itself.
This resistance should fall within the manufacturer’s specified range (usually between 2-30 ohms, but always verify). A reading of infinite resistance or a reading significantly outside the spec indicates a faulty sensor. You should also test the wiring harness for continuity between the ECU and the sensor connector to rule out harness damage.
- Check Fuses and Relays: Locate and inspect the fuse for the O2 sensor heater circuit. If blown, replace it. Check any associated relays as well.
- Inspect the Connector: Disconnect the O2 sensor and examine the connector for corrosion, damage, or loose pins. Clean and reconnect securely.
- Test for Battery Voltage: With the ignition on (engine off), use a multimeter to verify battery voltage is present at the power terminal of the O2 sensor harness connector.
- Measure Sensor Resistance: With the ignition off and sensor disconnected, use the multimeter to measure the resistance across the heater element pins on the O2 sensor. Compare this to your vehicle’s specifications.
- Check Harness Continuity: Test the continuity of the wiring harness from the O2 sensor connector back to the ECU (or its main connection point) to ensure there are no breaks.
- Check for Shorts to Ground: With the ignition off and sensor disconnected, test for continuity between the heater element wires and the sensor ground wire to detect shorts.
Replacing a Faulty O2 Sensor
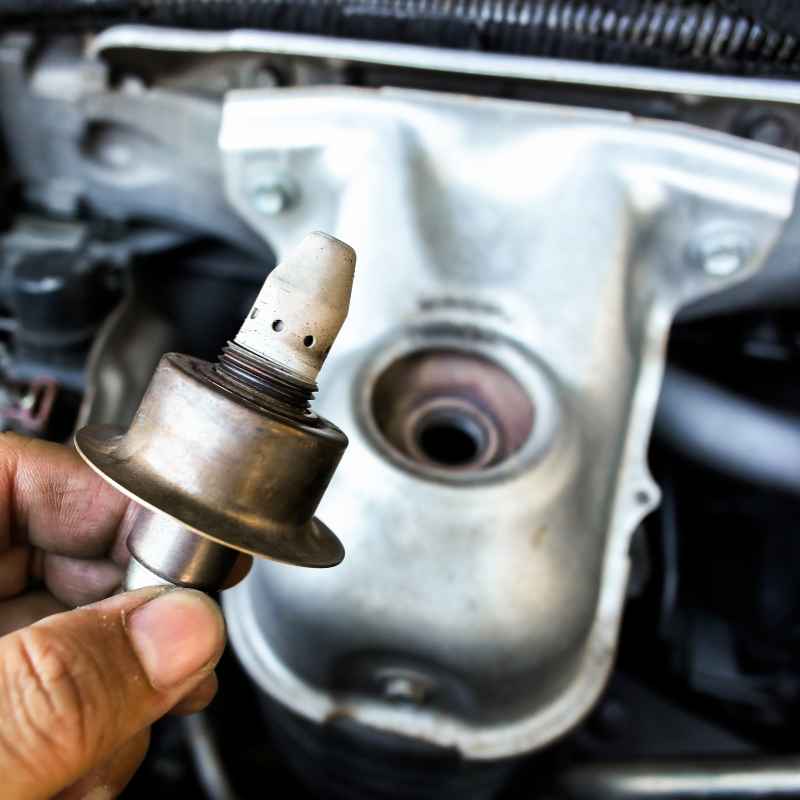
If your diagnostic tests confirm that the O2 sensor’s internal heating element has failed, replacement is the necessary step. You can purchase a new O2 sensor from an auto parts store or directly from a dealership. It’s important to get the correct sensor for your vehicle’s make, model, and year, as there can be slight variations.
Some sensors are “universal,” while others are vehicle-specific; using the wrong one can lead to incorrect readings or fitment issues.
Accessing the O2 sensor can sometimes be challenging. They are typically located in the exhaust system, either before or after the catalytic converter. You may need to lift your vehicle safely on jack stands or ramps to get underneath.
The sensor screws into the exhaust pipe with a threaded fitting. You’ll likely need a specialized O2 sensor socket wrench to remove the old sensor, as a standard wrench may not fit due to the sensor’s electrical connector and harness. Spraying the old sensor with a penetrating oil and letting it soak can help if it’s seized.
Once the old sensor is removed, clean the threads in the exhaust pipe of any debris or carbon buildup. Many new O2 sensors come with anti-seize lubricant already applied to the threads, or you may need to apply a small amount yourself (ensure it’s designed for O2 sensors, as some lubricants can contaminate the sensor). Screw in the new sensor by hand to avoid cross-threading, then tighten it with the O2 sensor socket.
Reconnect the electrical connector securely. After replacement, clear the DTCs using an OBD-II scanner and then drive the vehicle through a complete drive cycle to allow the ECU to re-learn and verify the new sensor’s operation.
- Tools Required: O2 sensor socket wrench, penetrating oil, torque wrench (recommended), OBD-II scanner, jack stands/ramps.
- Location: Exhaust manifold, downpipe, or near the catalytic converter.
- Removal: Use specialized socket; apply penetrating oil if seized.
- Installation: Clean threads, apply appropriate anti-seize (if needed), hand-thread, then tighten to spec.
- Post-Replacement: Clear DTCs, perform a drive cycle to confirm proper function.
What If It’s Not the Sensor? Troubleshooting Other Causes
If testing reveals that the O2 sensor itself is functioning correctly, or if a new sensor doesn’t resolve the issue, the problem lies further up the electrical circuit. The most common culprits in this scenario are the wiring harness and its connections. Exhaust systems are subjected to significant heat and vibration, which can cause wires to fatigue, break, or chafe.
This can happen anywhere along the harness from the sensor all the way to the ECU.
Carefully trace the entire length of the O2 sensor wiring harness. Look for any signs of damage, such as melted insulation (from proximity to the exhaust), cuts, kinks, or corrosion on the connectors. Pay close attention to areas where the harness passes through grommets or is secured by clips, as these can be points of abrasion.
If you find damaged wiring, you’ll need to repair it properly. This usually involves cutting out the damaged section, stripping the wires, and splicing in new wire using heat-shrink connectors for a durable, weather-resistant repair.
Don’t forget to re-examine the fuses and relays. A fuse can blow due to a transient short that might not be present when you test it. A faulty relay might not be completely dead but could be intermittently failing.
Swapping a suspect relay with a known good one of the same type is a quick way to test its functionality. If you’ve exhausted all other possibilities and suspect an ECU issue, it’s best to consult a professional technician, as diagnosing ECU problems is complex and requires specialized equipment.
| Troubleshooting Step | Description | Outcome If Solved |
|---|---|---|
| Inspect Wiring Harness | Trace wiring for damage, chafing, melted insulation, or loose connections. | Repairing damaged wires restores circuit integrity. |
| Test Connectors | Check pins for corrosion, bending, or poor contact at both ends. | Cleaning and securing connectors ensures good electrical contact. |
| Verify Fuse/Relay | Confirm fuses are not blown and relays are functioning correctly (swap test). | Replacing faulty fuses or relays restores power. |
| ECU Integrity | Advanced diagnostic check of the Engine Control Unit itself. | Rarely the cause, but requires professional diagnosis if other components are ruled out. |
Thoroughness in checking these often-overlooked components can save you from unnecessary O2 sensor replacements and ensure a lasting repair.
Statistics on O2 Sensor Failures and Emissions
Oxygen sensors are among the most common automotive sensor failures. According to the U.S. Department of Energy, faulty oxygen sensors are responsible for approximately 70% of all vehicle emissions-related failures.
This highlights just how crucial these sensors are for maintaining environmental standards and vehicle performance.
A study by the National Highway Traffic Safety Administration (NHTSA) indicated that about 25% of vehicles on the road have a check engine light illuminated, and a significant portion of these are due to O2 sensor issues, including heater circuit malfunctions. The average fuel economy penalty from a malfunctioning O2 sensor can be as high as 15-30%.
Replacing a faulty O2 sensor can not only improve your vehicle’s fuel efficiency but also reduce harmful emissions. The Environmental Protection Agency (EPA) estimates that functioning O2 sensors can reduce carbon monoxide emissions by up to 80% and hydrocarbons by up to 50%. This is why keeping your O2 sensors in good working order is important for both your wallet and the environment.
- Roughly 70% of vehicle emissions failures are linked to faulty oxygen sensors.
- An estimated 25% of vehicles have a check engine light on, with O2 sensors being a common cause.
- A malfunctioning O2 sensor can decrease fuel economy by 15-30%.
- Properly functioning O2 sensors can reduce carbon monoxide emissions by up to 80%.
- Hydrocarbon emissions can be reduced by up to 50% with working O2 sensors.
Frequently Asked Questions
What does “O2 sensor heater circuit malfunction” specifically mean?
This diagnostic trouble code (DTC) means the vehicle’s computer (ECU) has detected that the internal heating element within the oxygen sensor is not functioning correctly. This could be due to a break in the element, a problem with the wiring supplying power to it, or an issue with the fuse or relay controlling that circuit.
Can I drive with an O2 sensor heater circuit malfunction?
Yes, you can typically drive your vehicle with this issue, but it’s not recommended for extended periods. You’ll likely experience reduced fuel efficiency, increased emissions, and potential engine performance problems. It can also cause your vehicle to fail an emissions test.
It’s best to address the problem as soon as possible.
How much does it cost to fix an O2 sensor heater circuit?
The cost can vary significantly. If it’s just a blown fuse or a loose connection, the repair could be minimal, perhaps $20-$50 for a fuse or contact cleaner. Replacing the O2 sensor itself can range from $150 to $400 or more, depending on the vehicle and the specific sensor’s cost.
Professional labor can add another $100-$200.
How long does it take to replace an O2 sensor?
For a straightforward replacement on a vehicle where the sensor is easily accessible, it can take as little as 30 minutes to an hour. However, if the sensor is seized, in a difficult-to-reach location, or if additional wiring repairs are needed, it could take several hours of labor.
Are all O2 sensors the same?
No, O2 sensors are not all the same. They vary in design, number of wires (2, 3, 4, 5, or 6), and connector type. Some are designed for specific locations (upstream/downstream of the catalytic converter) and specific vehicle makes and models.
Using the wrong sensor can lead to inaccurate readings or prevent proper installation.
Final Thoughts
Addressing an O2 sensor heater circuit malfunction is a crucial step in maintaining your vehicle’s optimal performance, fuel economy, and environmental compliance. By understanding the symptoms, common causes, and diagnostic procedures, you can effectively pinpoint the issue, whether it’s a simple fuse, damaged wiring, or a faulty sensor. Prompt diagnosis and repair will not only save you money on fuel and prevent failed emissions tests but also ensure your engine operates efficiently and cleanly.
Sponsored / affiliate links. As an Amazon Associate I earn from qualifying purchases. I may earn additional commission from eligible campaigns.