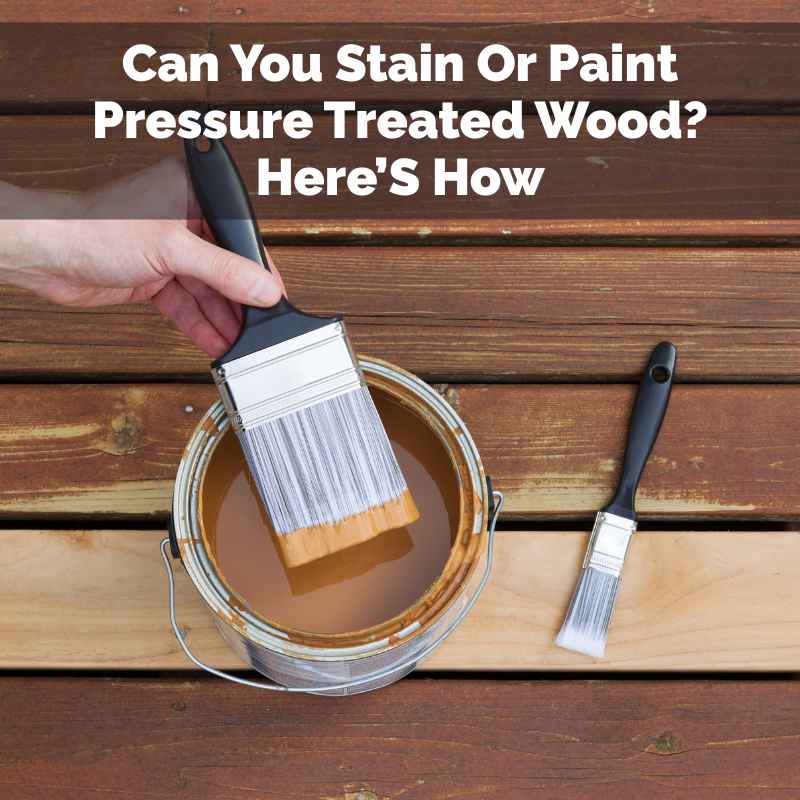
Can You Stain Or Paint Pressure Treated Wood? Here’S How
So, what exactly is pressure treated wood? Think of it as wood that’s been given a super-powered defense. It’s wood that’s forced to soak up special chemicals.
This process makes it tough. It can fight off rot, bugs, and decay. This is why it’s a top choice for outdoor projects.
It lasts a long time even when exposed to rain and sun. Common uses include decks, fences, pergolas, and even playground equipment. It’s built to withstand the elements.
The chemicals used are usually copper-based. They are forced deep into the wood fibers under pressure. This process gives the wood its characteristic greenish or sometimes brownish tint.
It’s this very treatment that can make applying finishes tricky. The wood is often still a bit wet. It also has a surface that might repel paint or stain at first.
That’s the main hurdle people run into. But don’t worry, there are ways to get around it.
Understanding the wood’s moisture content is key. When you first get pressure treated lumber, it holds a lot of moisture from the treatment process. This moisture needs to go before you can apply any finish successfully.
If you try to paint or stain too soon, the finish won’t stick well. It might peel or bubble later. You’ll end up with a mess and wasted product.
Patience is a big part of the success here.
The type of pressure treatment can also play a role. Most modern treatments use waterborne preservatives. These are generally easier to work with than older types.
Older treatments might have left more residue. But for current lumber, the main challenge is still moisture. Once that dries out, you’re usually in good shape.
It’s about letting the wood breathe and release that excess water.
The goal is to get the wood ready for the finish. This means ensuring it’s dry enough. It also means cleaning off any surface dirt or residue.
You want a clean, dry canvas for your paint or stain. Think of it like preparing a wall for paint. You wouldn’t just slap paint on a dusty surface.
You’d clean it, maybe sand it a bit. Wood requires similar prep, especially treated wood.
It’s also good to know that not all pressure treated wood is the same. Some may have different chemical concentrations. Some might be rated for ground contact, while others are for above-ground use.
These differences don’t usually affect staining or painting much. But it’s good background knowledge. The main thing to remember is that the treatment is there to protect the wood.
So, when you look at that greenish wood, know that it’s a great base. It’s strong and built to last. The next step is making it look the way you want it to.
And yes, you absolutely can. It just takes a little know-how and the right timing. Let’s dive into the steps to get there.
Yes, you can stain or paint pressure treated wood. The most important factor is allowing the wood to dry out sufficiently after treatment before applying any finish. Once dry, it can be stained or painted just like other types of wood, but proper preparation is crucial for lasting results.
The Drying Process: Patience is Key
This is the single most important step. Pressure treated wood comes from the factory wet. The chemicals are forced into it with water.
This water needs to evaporate. If you don’t let it dry, your paint or stain will have a hard time sticking. It’s like trying to put a sticker on a wet surface.
It just won’t hold well.
How long does it take to dry? This varies a lot. It depends on the weather, how much rain there’s been, and the specific wood.
A good rule of thumb is to wait at least a few weeks. Some experts say a month is even better. For some projects, it could take up to two or three months.
Think about it like this: the wood needs to breathe.
You can do a simple test to see if your wood is dry enough. Take a small piece of the wood. Place a small amount of water on its surface.
If the water beads up, it’s still too wet. The water needs to soak in a bit. If the water soaks in or disappears quickly, the wood is likely dry enough.
This is a common test.
Another sign is that the wood’s color will change. Freshly treated wood often looks a bit darker or has a greenish hue. As it dries, it lightens up.
It might also start to show a bit of checking or small cracks. This is normal as the wood shrinks. The color change is a good indicator that moisture is leaving.
Consider the environment where the wood is. If it’s in a humid area or gets a lot of rain, it will take longer to dry. If it’s in a hot, dry, and sunny spot, it will dry faster.
You can help speed up drying by stacking the wood with spacers. This allows air to circulate around all sides. Don’t leave it in a big, solid pile.
Using a moisture meter is the most accurate way to tell. You can buy these at hardware stores. They are inexpensive.
Stick the probes into the wood. It will give you a reading of the moisture content. For most stains and paints, you want the moisture content to be below 15% or even 12%.
Check the product label of your finish for specific recommendations.
I remember building a deck once. I was so excited to stain it. It had rained a lot that week.
I didn’t wait long enough. I stained it after about two weeks. Within a year, the stain started to flake off in spots.
It looked terrible. I had to power wash it all off and start over. That taught me a big lesson about letting the wood dry.
It saved me a lot of work in the long run.
So, resist the urge to finish it right away. Give the wood the time it needs. This waiting period is crucial.
It sets the stage for a beautiful, long-lasting finish. Without this step, all the effort you put into staining or painting might be wasted. It’s worth the wait, trust me.
Quick Drying Tips
- Stack It Right: Place wood so air can flow around it.
- Sunny Spot: Position wood in a dry, sunny area if possible.
- Check with a Meter: Use a moisture meter for accuracy.
- Wait It Out: Aim for at least 3-4 weeks, often longer.
Preparing the Surface: Cleaning and Sanding
Once your pressure treated wood is dry, it’s time to get it ready. This means cleaning it. You need to remove any surface dirt, mildew, or mold.
Even if it looks clean, there might be a fine layer of dust. This dust can prevent the stain or paint from bonding properly. You can clean it using a stiff brush and a mild detergent.
Or, a specialized wood cleaner works well.
A power washer can also be used. But you need to be careful. Use a low-pressure setting.
Hold the nozzle a good distance away. Too much pressure can damage the wood fibers. It can make the surface fuzzy or even gouge it.
If you’re not comfortable with a power washer, a good scrub brush is perfectly fine. Gentle is the keyword here.
After cleaning, rinse the wood thoroughly. Make sure all soap or cleaner residue is gone. Then, you need to let it dry again.
This might take another day or two, depending on the weather. You don’t want to paint or stain wet wood, even after cleaning.
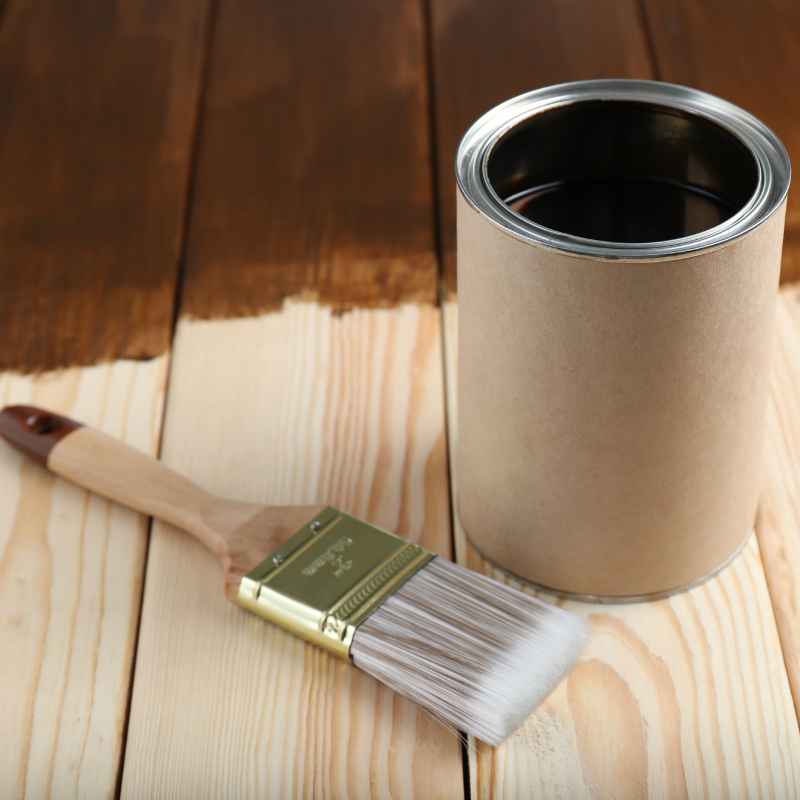
Sanding is often the next step. It smooths out any rough spots. It also opens up the wood’s pores a bit.
This helps the finish penetrate better. Use medium-grit sandpaper, like 80 or 100 grit. You don’t need super fine grit.
The goal is not to make it silky smooth like furniture. It’s to prep it for the finish.
If you’re using a stain, sanding is very helpful. It ensures an even color. Without sanding, you might get blotchy results.
For paint, sanding is also good. It creates a surface for the primer to grip. It helps the paint last longer and look smoother.
Always sand in the direction of the wood grain. This is important for a good finish. After sanding, clean off all the dust.
You can use a vacuum cleaner with a brush attachment. A damp cloth or tack cloth also works well. Make sure there’s no dust left behind.
Dust is the enemy of a good paint or stain job.
I had a friend who skipped the sanding step on his fence. He just cleaned it and painted. The paint looked okay at first.
But after a year, it started peeling badly, especially on the parts that got the most sun. He later told me, “I should have listened. That sanding step makes a big difference.” It’s a bit of extra work, but it’s worth it.
Surface Prep Checklist
- Clean: Remove dirt, mildew, or mold.
- Rinse Well: Ensure no cleaner residue remains.
- Dry Again: Let the wood dry completely after washing.
- Sand: Use medium-grit sandpaper along the grain.
- Dust Off: Remove all sanding dust thoroughly.
Choosing the Right Stain or Paint
Once your wood is prepped, you’re ready to pick a finish. There are two main options: stain or paint. Both can work on pressure treated wood.
The choice depends on the look you want and the protection you need.
Staining Pressure Treated Wood
Stains come in different opacities. There are transparent stains. These let the wood grain show through.
They offer some color and UV protection. Semi-transparent stains offer more color. They still allow some wood grain to be visible.
They give a richer look. Solid stains are like thin paint. They cover the wood grain almost completely.
They offer the most color and protection.
For pressure treated wood, semi-transparent or solid stains are often good choices. They provide more pigment. This pigment helps block UV rays.
UV rays can damage wood over time. They also offer a more uniform color. This can be helpful if your wood has some slight color variations from the treatment.
Look for stains specifically designed for decks and outdoor wood. These stains are made to withstand weather. They are flexible and won’t crack or peel easily.
They also contain mildewcides to prevent mold growth. Always read the product label. It will tell you if it’s suitable for pressure treated wood.
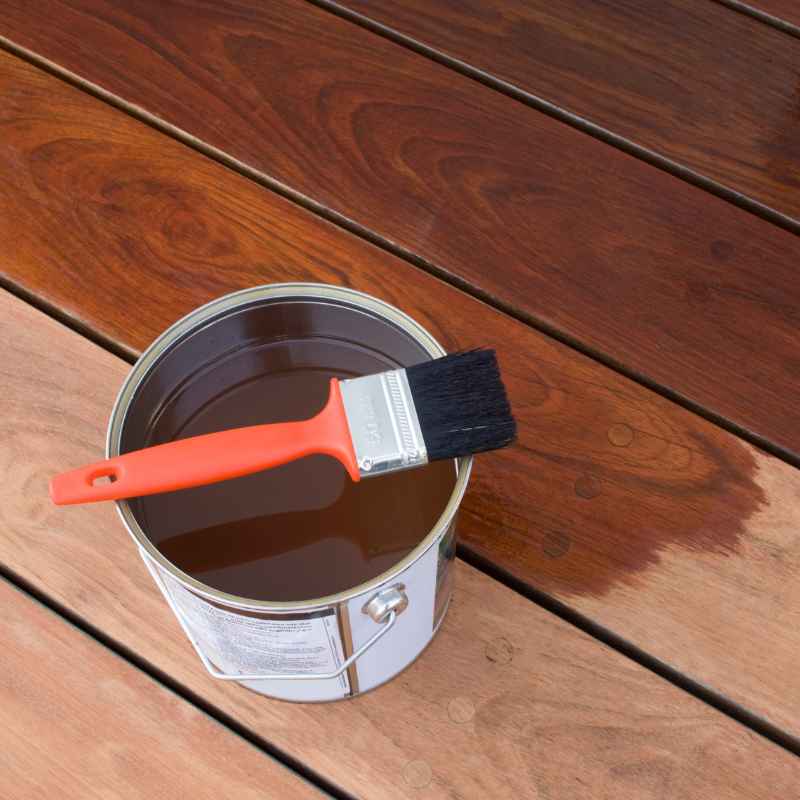
When applying stain, stir the can well. Don’t shake it. Shaking can create air bubbles.
These bubbles can affect the finish. Apply the stain evenly. Work in small sections.
Follow the direction of the wood grain. Wipe off any excess stain that doesn’t soak in after about 15-20 minutes. This prevents a sticky or tacky surface.
A common mistake is leaving too much stain on the surface. This creates a film. That film can peel later.
The stain should soak into the wood. It should look like it’s part of the wood, not just sitting on top. If you’re using a solid stain, it acts more like paint.
You’ll apply it more like paint, often with less wiping off of excess.
Painting Pressure Treated Wood
Painting pressure treated wood is also very doable. It offers the widest range of color options. It also provides excellent protection against the elements.
However, paint can sometimes chip or peel if not applied correctly. This is especially true if the wood wasn’t fully dry or prepped well.
You’ll need a good quality exterior primer. This is crucial. The primer acts as a bonding layer.
It helps the paint adhere to the wood. It also seals the wood surface. This prevents the chemicals in the wood from bleeding through the paint.
Look for an exterior oil-based or stain-blocking primer. These are best for treated wood.
After priming, apply your exterior paint. Use a high-quality exterior latex paint. Apply it in thin, even coats.
Most jobs will require at least two coats of paint. Again, always paint in the direction of the wood grain. Allow each coat to dry completely before applying the next.
Check the paint can for drying times.
Some people prefer to paint first and then stain. Others stain first and then paint. If you want a wood-like finish with color, a solid stain is the way to go.
If you want a solid color, paint is your best bet. Both require good prep work. Both need to be applied in the right conditions.
I once helped a neighbor paint their old deck. It was pressure treated but faded and worn. We cleaned it, sanded it, primed it with a good stain-blocking primer, and then used a nice dark gray exterior paint.
It looked like a brand new deck! The key was the primer. Without it, the old greenish tint might have shown through.
Stain vs. Paint for Treated Wood
| Feature | Stain | Paint |
|---|---|---|
| Look | Shows wood grain (semi-transparent) or opaque color (solid) | Solid color, hides wood grain |
| Protection | Good UV and water protection (especially solid) | Excellent UV and water protection |
| Application | Penetrates wood; needs excess wiped off | Forms a film; requires primer |
| Maintenance | Easier touch-ups, less prone to peeling | Can chip/peel; may need more prep for recoating |
Application Tips for a Great Finish
Applying your chosen finish correctly is just as important as prep. Even the best stain or paint can fail if applied poorly. Here are some tips to help you get a professional-looking result.
When to Apply
Avoid applying finishes in direct, hot sunlight. The heat can cause the finish to dry too quickly. This leads to lap marks and uneven color.
It can also make it hard to spread evenly. Choose a cloudy day or work in the shade. Also, make sure the temperature is right.
Most products recommend temperatures between 50°F (10°C) and 90°F (32°C).
Do not apply finishes if rain is expected. Check the weather forecast. You need dry conditions for application and for the finish to cure properly.
Rain can wash away fresh stain or paint. It can also damage the finish before it hardens.
Tools of the Trade
Use good quality brushes and rollers. For stains, natural bristle brushes work well for oil-based products. Synthetic bristles are better for latex or water-based stains and paints.
Use rollers with the correct nap for the surface. A thicker nap is good for rougher wood. A thinner nap is better for smoother surfaces.
For decks, you can use a deck-specific roller applicator. These often have long handles. They make the job much faster and easier.
You can also use a sprayer for large areas like fences or decks. But if you spray, you’ll likely need to back-brush. This means brushing over the sprayed area right away.
This pushes the finish into the wood. It prevents drips and ensures even coverage.
Technique Matters
Always apply in the direction of the wood grain. This is a golden rule. It makes the finish look natural.
It helps it adhere better. Work in manageable sections. If you’re staining a deck, do one or two boards at a time.
This helps you avoid visible lap marks where one section ends and another begins.
For stains, apply a liberal coat. Let it soak in for the time recommended on the can. Then, use a clean rag to wipe off any excess.
If you leave too much on, it can dry sticky. This is a very common mistake. For solid stains and paints, apply thin, even coats.
Avoid thick applications that can sag or drip.
Multiple thin coats are always better than one thick coat. This is true for both paint and stain. It ensures better adhesion.
It provides a more durable finish. It also looks much better. You can achieve a deep, rich color with two or three thin coats.
I learned this the hard way on a small outdoor table. I was in a hurry. I just slapped on one thick coat of stain.
It looked blotchy and uneven. Some spots were too dark. Some were too light.
I had to scrape it off and start again. This time, I did two thin coats, wiping off the excess. It looked so much better.
The patience paid off.
Application Best Practices
- Work in Shade: Avoid direct sun and extreme heat.
- Check Forecast: Ensure no rain is expected.
- Use Good Tools: Quality brushes and rollers make a difference.
- Follow the Grain: Always apply along the wood’s natural lines.
- Thin Coats are Best: Build up color and protection slowly.
- Wipe Excess Stain: Prevent tackiness and peeling.
Sealing for Extra Protection
Some people wonder if they need a separate sealer. If you use a good quality exterior stain or paint, it usually has sealing properties built in. Solid stains and exterior paints are designed to protect the wood from moisture and UV rays.
However, if you choose a transparent or semi-transparent stain, you might consider a clear topcoat sealer. This can add an extra layer of protection. It can help the color last longer.
Look for a clear exterior sealer that is compatible with your stain. Again, follow the manufacturer’s instructions.
For painted surfaces, the primer and top coats of paint usually provide all the sealing needed. The key is using exterior-grade products. These are formulated to stand up to the weather.
They are flexible enough to expand and contract with the wood.
It’s also worth noting the maintenance cycle. No exterior finish lasts forever. You’ll likely need to reapply stain or paint every few years.
The exact timeline depends on your climate, the amount of sun exposure, and the quality of the product you used. Regular cleaning and inspection can help you catch issues early.
If you notice faded color, slight peeling, or mildew growth, it’s time to consider recoating. Usually, you can clean the surface and reapply a new coat. You might need to do some light sanding.
For painted surfaces, if there’s significant peeling, you might need to scrape and sand more thoroughly before repainting.
I have a small picnic table made of pressure treated wood. I stained it with a semi-transparent stain about five years ago. It’s under a covered patio, so it doesn’t get direct rain.
It still looks pretty good. The color has faded a bit. I plan to clean it this summer and add another coat of stain.
It’s a simple process and keeps it looking nice.
Sealer Considerations
- Built-in Protection: Most quality stains/paints seal well.
- Transparent Stains: May benefit from a clear topcoat sealer.
- Painted Surfaces: Primer and paint layers provide sealing.
- Maintenance is Key: Reapply finishes every few years.
Real-World Context: Decks, Fences, and More
Let’s talk about where you’ll most likely use pressure treated wood and how staining or painting fits in.
Decks
Decks are a prime candidate for pressure treated wood. They are exposed to everything: sun, rain, snow, and foot traffic. Staining a deck is very popular.
It gives a warm, inviting look. You can choose a natural wood tone or a bold color.
When staining a deck, it’s important to consider the wear and tear. People walk on it constantly. Solid stains offer the most durability here.
They are tough and can handle the abrasion. Semi-transparent stains are also popular. They offer more wood character but might need recoating sooner on high-traffic areas.
Painting a deck is less common. Paint can be more prone to peeling from foot traffic and moisture. If you do paint, a very durable exterior floor paint is recommended.
The prep work needs to be exceptionally thorough. Most people opt for stain for decks.
Fences
Fences get constant exposure to the elements. They can be painted or stained. Staining offers a classic look.
It can match your home’s exterior. Painting can provide a bold statement. You can choose any color you like.
For fences, solid stains or exterior paints are common. They offer good coverage and protection. Applying stain or paint to a fence can be a big job.
Consider using a sprayer for efficiency. Remember to back-brush to ensure good adhesion.
I helped a friend paint their entire privacy fence a deep navy blue. It totally changed the look of their backyard. It took a few weekends, but the result was stunning.
The key was getting the prep just right and using a good quality exterior paint.
Outdoor Furniture
Pressure treated wood is also used for outdoor furniture, like picnic tables and benches. These pieces can be stained or painted. For furniture, durability is important, but so is aesthetics.
You might want a finish that feels smooth to the touch.
For furniture, you can use stains or paints. If you use a semi-transparent stain, you can achieve a beautiful, natural look. For a more finished feel, a solid stain or paint works well.
Sanding well is extra important for furniture. You want a comfortable surface.
Playground Equipment
When treating wood for playgrounds, safety is paramount. Always use pressure treated wood rated as safe for such applications. When finishing, use low-VOC or zero-VOC paints and stains.
These products have fewer harmful chemicals.
The finish needs to be durable. It needs to withstand weather and play. Stains and paints can add a cheerful color.
They also protect the wood from sun damage. Ensure the finish is fully cured before children use the equipment.
Project Spotlights
- Decks: Best with stains (solid or semi-transparent) for beauty and protection.
- Fences: Stains or paints work well; consider spray application for ease.
- Furniture: Aim for a smooth finish with stains or paints; prep is key.
- Playgrounds: Use safe, low-VOC finishes and ensure full curing.
When is it Normal and When to Worry?
It’s important to know what to expect with pressure treated wood and its finishes.
Normal Signs
Slight Fading: Over time, the color of your stain or paint will likely fade. This is normal, especially on surfaces exposed to a lot of sun. It doesn’t mean the finish has failed.
Mild Texture Changes: As wood ages outdoors, it can develop a slightly rougher texture. This is natural weathering. A good finish slows this down.
Occasional Mildew: In damp, shaded areas, a bit of mildew might appear on the surface. This is usually easy to clean off with a mild solution.
Small Cracks (Checking): Pressure treated wood can develop small cracks as it dries. This is called checking. It’s usually cosmetic and doesn’t affect the wood’s strength, especially if it’s well-maintained with a finish.
When to Worry
Peeling or Chipping Paint: If large sections of paint are peeling or chipping, it’s a sign of poor adhesion. This could be due to not letting the wood dry, improper priming, or using the wrong type of paint.
Blistering or Bubbling: This often means moisture is trapped under the finish. It can happen if the wood was too wet when painted or if water is getting in through cracks.
Significant Mold or Rot: If you see widespread mold or signs of rot, the wood’s protection has failed. This could be due to the treatment not being effective anymore, or the finish not doing its job.
Warping or Twisting: While pressure treated wood is designed to resist warping, extreme moisture or lack of proper support can still cause issues over time. A good finish helps maintain stability.
If you see these worrying signs, it’s time for a closer look. You might need to strip the old finish, make repairs, and reapply a new finish. Prevention through proper prep and timely maintenance is always the best approach.
Quick Fixes and Tips
Here are some handy tips for tackling your project.
- Test First: Always test your stain or paint on a scrap piece of pressure treated wood. See how it looks and dries.
- Clean Tools: Clean your brushes and rollers immediately after use. This makes them last longer.
- Ventilation: When working with stains or paints, ensure good ventilation. Open windows or doors. Work outdoors when possible.
- Storage: Store leftover stain or paint properly. Seal the lid tightly. Store in a cool, dry place.
- Safety Gear: Wear gloves, eye protection, and a mask if needed.
Frequently Asked Questions
How long after buying pressure treated wood can I stain it?
It’s best to wait until the wood is dry. This typically takes at least 3-4 weeks, but can be 2-3 months depending on weather. Use a moisture meter to confirm it’s below 15% moisture content.
What is the best way to clean pressure treated wood before staining?
Use a stiff brush with mild soap and water, or a specialized wood cleaner. Rinse thoroughly. For tough dirt, a low-pressure washer can be used, but be gentle.
Can I use a solid stain on pressure treated wood?
Yes, solid stains work very well on pressure treated wood. They act much like paint, offering good color and protection. Ensure the wood is dry and prepped.
Do I need to prime pressure treated wood before painting?
Yes, priming is highly recommended. Use an exterior stain-blocking primer. It helps the paint adhere better and prevents chemicals from bleeding through.
Will painting hide the greenish color of pressure treated wood?
Yes, a good quality exterior paint, especially when applied over a stain-blocking primer, will completely hide the greenish tint of pressure treated wood.
How often should I reapply stain or paint to my pressure treated wood?
This varies greatly. Generally, every 2-5 years is a good timeframe. Factors like climate, sun exposure, and product quality play a role.
Regular inspection helps.
Can I stain pressure treated wood in humid weather?
It’s not ideal. High humidity can slow down drying and curing times, potentially affecting the finish. Try to work on dry, less humid days if possible.
Conclusion
You absolutely can stain or paint pressure treated wood. The key is patience and proper preparation. Allowing the wood to dry thoroughly is the most critical step.
Then, cleaning, sanding, and choosing the right products will ensure a beautiful and lasting finish. Enjoy your project!