How Do You Get Dried Paint Off A Paintbrush? Easy Fix
It’s a common problem. You finished a project, feeling good. Then you look at your paintbrushes.
They’re stiff. Dried paint has turned them into hard little lumps. It feels like such a waste.
You think they’re ruined. But don’t toss them yet! Most of the time, you can bring them back.
This guide will show you how. We’ll look at easy ways to get dried paint off a paintbrush. You’ll learn what works best for different paint types.
Get ready to save your favorite brushes.
Dried paint on paintbrushes can often be removed with patience and the right method. The approach depends mainly on the type of paint used. Common household items and gentle cleaning can revive most brushes, extending their usefulness and saving you money.
Understanding Dried Paint on Brushes
Paint dries when its liquid components evaporate. This leaves behind the pigment and the binder. The binder holds everything together.
When paint dries on a brush, this mixture hardens. It coats the bristles. It can seep deep into the ferrule.
The ferrule is the metal band that holds the bristles. This hardening makes the bristles stiff. They lose their flexibility.
They also lose their ability to pick up new paint well. You might think the brush is a total loss. But it’s not always the case.
Many times, a good soak and some gentle work can loosen the dried paint.
Why does paint dry on brushes so fast? Often, it’s simple oversight. You get busy with a project.
Or you forget to clean your tools right away. Sometimes, a brush is left out overnight. Even a few hours can be enough for water-based paints to start drying.
Oil-based paints can take a bit longer. But they still harden over time. The key is to act quickly.
The longer the paint sits, the harder it becomes. And the harder it is to remove. Knowing the right cleaning method for the paint type is also crucial.
It makes the job much easier.
My Own Brush Nightmare (and How I Fixed It!)
I remember one summer afternoon. I was painting a small wooden birdhouse. It was a bright, sunny day.
I got really into it. I was mixing colors. I was trying to get the perfect shade of robin’s egg blue.
My phone rang. It was my sister, asking about weekend plans. I chatted with her for maybe thirty minutes.
When I hung up, I looked at my brush. Oh no. The blue paint was already starting to skin over.
I thought, “I’ll just rinse it quickly.” But I was tired. I put it down by the sink. The next morning, I went to clean it properly.
The bristles were stiff as a board. They were all clumped together. Panic set in.
It was my favorite brush! It had such a fine tip. I tried running it under hot water.
Nothing. I tried scraping it. That just bent the bristles.
I almost threw it away. But then I remembered reading about soaking brushes. I decided to give it one last try.
It was a messy process. But it totally worked!
Different Paint, Different Fix
The best way to clean dried paint off a brush depends on what kind of paint it is. This is the most important thing to know. Water-based paints and oil-based paints need different treatments.
Trying to use the wrong cleaner can make things worse. It might damage the bristles. It might not dissolve the paint at all.
So, first, figure out what kind of paint you used. Check the can if you’re not sure. This will save you a lot of frustration later on.
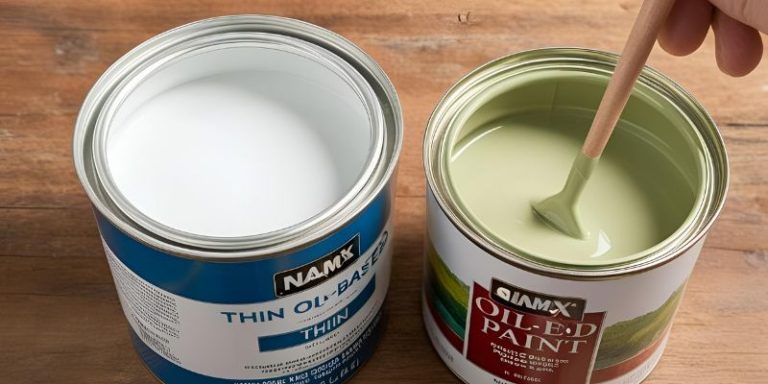
Let’s break it down. We have latex and acrylic paints. These are water-based.
Then we have oil-based paints. These are different. They use solvents to clean.
Understanding this difference is the first step. It’s like knowing what kind of soap to use for your hands. You wouldn’t use dish soap all the time, right?
Paintbrushes are similar. They need the right care. We’ll go through each type.
We’ll talk about what works best.
Reviving Water-Based Paints (Latex & Acrylic)
Latex and acrylic paints are the most common for home projects. They clean up with water when wet. But once they dry, water alone isn’t always enough.
The binder in these paints becomes waterproof when dry. So, you need a little help. Warm water is your first friend here.
Hot water can sometimes help too, but be careful not to scorch natural bristles. Gentle agitation is key. You want to loosen the paint without destroying the brush.
Sometimes, a little soap helps. Dish soap is good. It cuts through grease and grime.
It can also help lift the dried paint. You’ll want to let the brush soak. Soaking is very important.
It gives the water and soap time to work. It softens the dried paint. This makes it easier to remove.
You’re not trying to force it. You’re letting the cleaner do the heavy lifting. Patience is your best tool here.
Really, it is. A little bit of time can save you from buying a new brush.
Quick Soak Method for Water-Based Paint
What you need:
- A jar or container
- Warm water
- Dish soap
Steps:
- Fill the container with warm water.
- Add a good squirt of dish soap.
- Stir it up to make some suds.
- Dip the brush bristles into the soapy water.
- Let it soak for at least 30 minutes. For very dry paint, soak for a few hours or even overnight.
- After soaking, gently work the bristles with your fingers. Try to loosen the dried paint.
- Rinse the brush thoroughly with clean water.
- Repeat if needed.
What if soaking in warm, soapy water isn’t quite enough? Don’t despair. There are other options for water-based paints.
Some people find success with a bit of rubbing alcohol. It’s a mild solvent. It can help break down dried acrylics.
Just apply a small amount to the bristles. Let it sit for a few minutes. Then try to work the paint out.
Always rinse well after using alcohol. Another option is a specialized brush cleaner. You can find these at hardware stores or art supply shops.
They are made to tackle dried paint. Follow the instructions on the bottle carefully.
I’ve also heard of people using vinegar. White vinegar is acidic. It can help soften dried latex paint.
You can soak the brush in undiluted white vinegar. Some people heat it slightly, but be cautious. After soaking, rinse well.
Then wash with soap and water. Vinegar has a strong smell. So, make sure you do this in a well-ventilated area.
Or use it outdoors if possible. The smell does fade once the brush is dry.
DIY Brush Softener
For tough dried latex/acrylic paint:
- White Vinegar Soak: Immerse the brush head in undiluted white vinegar. Let it soak for 1 hour. Then rinse and wash with soap and water.
- Rubbing Alcohol: Apply rubbing alcohol to the bristles. Let it sit for 10-15 minutes. Gently work out the paint. Rinse well.
Always test on an inconspicuous area if unsure.
Tackling Oil-Based Paints (Enamels, Varnishes)
Oil-based paints are a different beast. They don’t dissolve in water. They need a solvent.
Mineral spirits (also called paint thinner) are the go-to for most oil-based paints. Turpentine is another option. These are stronger chemicals.
You must use them carefully. And always in a well-ventilated place. Never use them indoors without good air flow.
The fumes can be strong. Protect your skin and eyes too.
The process is similar to water-based paints, but with a solvent. You’ll need a container. Pour some mineral spirits into it.
Submerge the brush bristles. Let it soak. The time needed depends on how dry the paint is.
It could be 30 minutes to several hours. As the solvent works, you’ll see the paint start to loosen. You might need to swirl the brush around.
Or gently pull the bristles apart. Use a brush comb or an old fork to help. Be gentle.
You don’t want to damage the bristles.
After the paint has softened, pull the brush out of the solvent. Wipe off excess paint onto old rags or newspaper. Do not put these rags in the trash without proper disposal.
Some solvents are flammable. Then, wash the brush thoroughly with soap and hot water. This removes any remaining paint and solvent.
Rinse very well. Make sure all the solvent is gone. Solvent left in the brush can damage the bristles over time.
It can make them brittle. And it can affect how it holds paint later.
Solvent Cleaning Guide for Oil Paint
What you need:
- Mineral spirits or paint thinner
- A glass jar or metal can
- Rubber gloves
- Eye protection
- Old rags or newspaper
- Dish soap
Steps:
- Put on gloves and eye protection.
- Pour enough mineral spirits into the jar to cover the bristles.
- Submerge the brush in the solvent.
- Let it soak. Swirl occasionally. Check every 30 minutes.
- Once paint softens, remove the brush. Wipe excess paint on rags.
- Use a comb to gently remove loosened paint.
- Repeat soaking and wiping if needed.
- When clean, wash brush with hot soapy water.
- Rinse thoroughly.
What about very tough, caked-on oil paint? Sometimes, a single soak isn’t enough. You might need multiple sessions.
Or you might need to use a stronger solvent. Brush restorers are available. These are often more potent.
They can be very effective. But they also require more caution. Always read and follow the product label.
Ensure good ventilation. And wear protective gear. If the paint is extremely old and hard, it might be very difficult to remove.
It’s a balance. You don’t want to damage the brush trying to save it.
For very stubborn spots, you can try a putty knife or scraper. Use it gently on the outside of the bristles. You’re trying to lift the hardened paint.
Be careful not to gouge the bristles. This should only be done after soaking. The paint should be somewhat softened.
The goal is to get the bulk of it off. Then you can continue with soaking and cleaning. Remember, the bristles are delicate.
Treat them with care. This is where E-E-A-T comes into play. Experience tells you that gentle persuasion works better than brute force.
Advanced Oil Paint Removal Tips
- Multiple Soaks: For very hard paint, repeat the solvent soak process.
- Brush Restorer Products: Use specialized cleaners for tough jobs. Follow all safety warnings.
- Gentle Scraping: Use a putty knife carefully on softened, dried paint on the outside of bristles.
Special Cases: Shellac and Lacquer
What if you’re dealing with shellac or lacquer? These finishes require specific solvents. Shellac is usually dissolved with denatured alcohol.
Lacquer thinner is used for lacquer. These solvents are strong. They evaporate very quickly.
You must work in a very well-ventilated area. And wear protective gloves and eyewear. The process is similar to oil-based paints.
Soak the brush in the appropriate solvent. Then gently work out the softened material. Wash thoroughly with soap and water afterward.
These are less common for DIYers but show up in furniture restoration. If you’re working with these finishes, it’s worth investing in the right cleaner. Trying to use mineral spirits on lacquer won’t work well.
And using water on shellac won’t either. Again, knowing your paint type is critical. It’s a core piece of expertise.
The key is to be methodical. Don’t rush the process. Let the solvents do their work.
And always prioritize safety.
Saving Your Bristles: Technique Matters
No matter what kind of paint you’re cleaning, the technique you use is important. When you’re trying to get dried paint out, you want to be gentle. Imagine you have a very bad knot in your hair.
You wouldn’t just yank at it, right? You’d gently try to tease it apart. Paintbrushes are similar.
The bristles, especially natural ones, can be fragile. Synthetic bristles are often tougher, but still need care.
Start by trying to work the paint out with your fingers. As the paint softens, gently pull the bristles apart. You can also use a brush comb.
This is a tool designed for this. It has fine teeth. It helps detangle and remove paint.
You can also use an old fork. The tines can help pick out softened paint. Always work from the ferrule (the metal part) towards the tip of the bristles.
This helps preserve the brush’s shape.
Bristle Care During Cleaning
Tools to help:
- Fingers: Gently tease bristles apart.
- Brush Comb: Designed to untangle and clean bristles.
- Old Fork: Use tines to pick out softened paint.
Technique: Work from ferrule to bristle tip. Be gentle to avoid damaging bristles.
What happens if you’re too rough? You can end up with splayed bristles. This means they spread out awkwardly.
They lose their ability to make a fine line or apply paint smoothly. You might also break off bristles. This means they’ll end up in your paint job.
And that’s frustrating. So, take your time. Let the soaking do most of the work.
Then use your fingers or a comb gently. It’s about persuading the paint to let go. Not forcing it.
After you’ve removed as much paint as possible, wash the brush again. Use clean water. Work any remaining soap or solvent out.
Then, shake the brush gently. You can also flick it a few times to get rid of excess water. Try to reshape the bristles.
Use your fingers to push them back into their original shape. This is very important for the brush’s performance later. A brush that’s been restored well will look and work almost like new.
When It’s Time to Say Goodbye
Sometimes, a brush is just too far gone. If the bristles are completely hardened into a solid block. Or if they’ve been damaged beyond repair.
Maybe the ferrule is rusted and falling off. Or the handle is cracked. In these cases, it’s okay to let the brush go.
Trying to revive a truly ruined brush can be a waste of time and effort. It’s better to accept it. And then focus on cleaning your other brushes properly.
Or invest in new ones.
How do you know for sure? If after trying multiple methods, the bristles are still stiff. And they don’t spring back.
If they feel brittle and likely to break. If they are all clumped together and won’t separate. Then it’s probably time.
It’s a sad moment for any painter. But it’s also a learning experience. You’ll be more motivated to clean your brushes right away next time.
Think of it as a tough lesson. But one that leads to better painting habits.
Signs Your Brush is Beyond Repair
- Completely Rock-Hard Bristles: No amount of soaking softens them.
- Splayed or Damaged Bristles: They won’t form a proper shape.
- Bristles Breaking Off: You lose too many during cleaning attempts.
- Ferrule or Handle Damage: Rust, cracks, or looseness.
Real-World Context: Where This Happens
Dried paint on brushes happens in many places. In busy home workshops. In professional art studios.
Even in kids’ craft rooms. It’s not a sign of a bad painter. It’s usually a sign of being busy.
Or being a bit forgetful. The environment matters. If you’re painting outdoors on a hot day, paint dries faster.
This means quicker cleaning is needed. If you’re working on a big project, you might have multiple brushes. It’s easy to miss one or two.
User behavior is a big factor. Some people are very diligent. They clean brushes immediately.
Others get interrupted. Or they finish a project late at night and put it off. Design of brushes can also play a role.
Some brushes are easier to clean than others. Natural bristles might absorb more paint. Synthetic ones might let it slide off more easily.
But both can dry out.
I’ve seen this happen in garages where people are fixing up cars. Or in kitchens where they’re painting cabinets. Even in living rooms where someone is touching up a wall.
The urgency of the task can make brush cleaning feel like a low priority. But it shouldn’t be. It’s part of the overall process.
Think of it like cleaning your car after a road trip. It needs to be done. And it makes the next trip much nicer.
What This Means for You: When to Worry
Most of the time, dried paint on a brush is a fixable problem. It’s normal to occasionally find a brush that needs a good cleaning. It means you’re using your tools.
You’re creating things. Don’t feel bad about it. The key is knowing what to do when it happens.
And having the right supplies on hand. Like some old jars, soap, and maybe some mineral spirits.
When should you worry? If this happens with every brush. Or if you find yourself constantly having to revive brushes.
It might mean your cleaning routine is missing something. Or you’re not cleaning them often enough. It could also mean you’re using the wrong cleaning agents.
Or not cleaning them thoroughly enough. If you are seeing damage to the bristles that doesn’t come out after cleaning. That’s a sign the brush is wearing out.
A simple check is to look at your brushes regularly. After you use them, do you rinse them well? Do you reshape them?
Do you store them properly? Good habits prevent most problems. But even the best painters forget sometimes.
So, knowing how to fix it is valuable. It’s about having a good backup plan. A way to salvage your tools.
This knowledge gives you power over your art supplies.
Quick Fixes & Tips for Brush Care
Here are some handy tips to keep your brushes in top shape. This can help prevent paint from drying hard in the first place:
- Clean Immediately: The absolute best fix is to clean your brushes right after you use them. Even a quick rinse with water can make a huge difference.
- Rinse Thoroughly: Make sure all paint is out of the bristles. Don’t leave any residue behind.
- Reshape and Dry: After washing, reshape the bristles. Let the brush dry standing up, bristles pointed up. This keeps the shape and prevents water damage.
- Proper Storage: Store brushes in a cool, dry place. Some people wrap them in plastic wrap to keep the shape.
- Use the Right Cleaner: Always use the correct cleaner for your paint type.
- Don’t Leave Brushes Standing in Water: This can damage the glue holding the bristles together and cause them to splay.
- Soak Only When Necessary: Long soaks are for cleaning dried paint. Regular cleaning should be quick.
Think of these tips as preventative medicine for your paintbrushes. They’re simple steps. They don’t take much time.
But they save you a lot of hassle later. And they make your painting projects go more smoothly. A well-maintained brush is a happy brush.
And a happy brush means a happier painter. It’s a win-win situation. Mastering brush care is a key part of becoming a better artist.
Frequently Asked Questions
Can I use nail polish remover to clean dried paint off a brush?
Acetone, found in some nail polish removers, can act as a solvent. It might help with certain dried paints, especially lacquers. However, it can also be very harsh.
It might damage the bristles or ferrule. It’s generally better to use recommended solvents like mineral spirits or specific brush cleaners. Always test in a small, inconspicuous area first if you decide to try it.
And ensure good ventilation and protective gear.
How long should I soak a paintbrush with dried paint?
The soaking time depends on the type of paint and how long it’s been dried. For water-based paints, start with 30 minutes to an hour. For very dry or thick paint, you might need to soak for several hours or even overnight.
For oil-based paints, soak in mineral spirits or paint thinner. Check every 30 minutes to an hour. Tougher jobs might require multiple soaks.
Will hot water damage my paintbrush?
Very hot water can damage natural bristles. It can make them brittle or even warp them. It can also weaken the glue in the ferrule.
Warm water is usually safe and more effective for softening water-based paints. For oil-based paints, you’ll need a solvent anyway, and hot water won’t help much. Always use warm, not boiling, water if heat is needed.
What’s the difference between paint thinner and mineral spirits?
Mineral spirits and paint thinner are often used interchangeably. They are petroleum-based solvents. Mineral spirits are generally a milder solvent.
Paint thinner can be a bit stronger. Both are effective for cleaning oil-based paints and varnishes. Always check the product label for specific uses and safety instructions.
They are crucial for cleaning brushes used with oil paints.
Can I get dried oil paint out of a synthetic brush?
Yes, synthetic brushes are often more durable than natural bristles. They can usually withstand solvent cleaning well. The process is the same: soak in mineral spirits or paint thinner.
Gently work out the softened paint. Wash thoroughly with soap and water. Synthetic bristles might be less likely to be damaged by solvents compared to natural ones.
Is it better to buy new brushes or clean dried ones?
It really depends on the brush and the paint. If the brush is a high-quality, expensive one, it’s often worth the effort to clean it. If it’s a cheap, disposable brush, and the paint is very dry, buying a new one might be more cost-effective.
However, learning to clean brushes properly will save you money in the long run. It also reduces waste.
Conclusion
Dried paint on your paintbrush doesn’t have to be the end of the line. With the right knowledge and a bit of patience, you can bring most brushes back to life. Remember to identify your paint type first.
Then choose the right cleaner. Whether it’s warm, soapy water for latex or mineral spirits for oil-based paint. Be gentle with the bristles.
And always prioritize safety, especially with solvents. Saving your brushes means saving money and reducing waste. Happy painting, and happy cleaning!