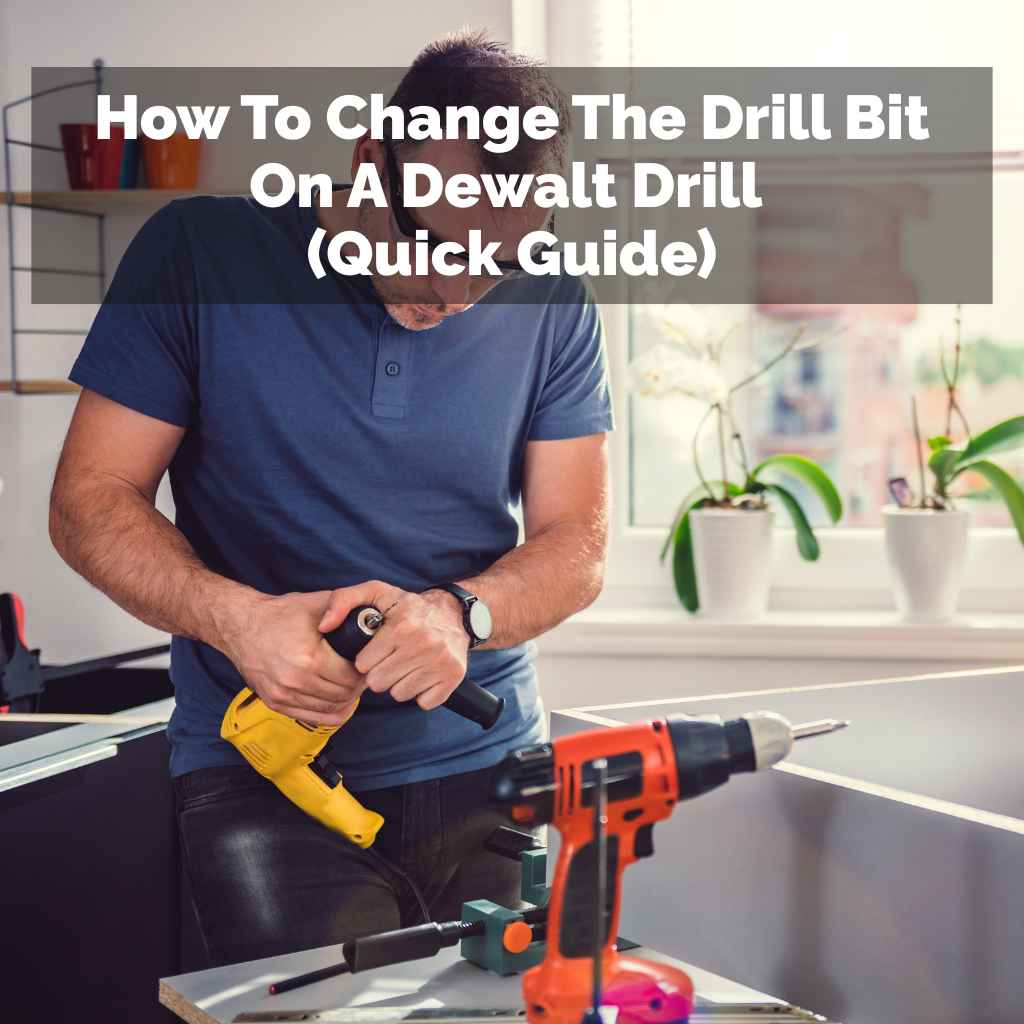
How To Change The Drill Bit On A Dewalt Drill (Quick Guide)
Changing a drill bit on a DeWalt drill is straightforward. For keyless chucks, twist the collar until it opens and insert the new bit, then twist to secure. For keyed chucks, use the chuck key to loosen the jaws, swap the bit, and then tighten securely.
Understanding Your DeWalt Drill Chuck
The part that holds the drill bit is called the chuck. DeWalt drills come with a couple of main types. Knowing which one you have makes the bit change super easy.
Most newer DeWalt drills use a keyless chuck. Older or more heavy-duty models might use a keyed chuck. Each works a little differently but serves the same purpose: gripping the bit firmly.
The chuck has jaws inside. These jaws move in and out. They grab the shank of the drill bit.
When you tighten the chuck, the jaws close. This holds the bit in place. When you loosen it, the jaws open wide.
This lets you take the old bit out. Then you put the new bit in and tighten it up again. It’s like a strong hand holding your tool.
Learning about your specific chuck type is the first step. It saves you confusion. It also helps you do the job right.
This means the bit won’t slip while you’re drilling. Safety is key here. A loose bit can be dangerous.
A bit that’s too tight can be hard to remove later.
How to Change a Drill Bit on a Keyless Chuck DeWalt Drill
This is the most common type you’ll find. Keyless chucks are designed for speed and ease. You don’t need any extra tools.
That’s a big plus when you’re on a ladder or in a tight spot. The process is very intuitive once you know the steps. Most people can do it in under a minute.
It’s all about the twist.
Look at the front of your drill. You’ll see the chuck. It’s usually cylindrical.
It has ridges for grip. For a keyless chuck, there are two parts you can turn. One part is fixed to the drill body.
The other part is a sleeve or collar that spins freely. This spinning collar is what you’ll use to open and close the jaws.
To open the chuck, you need to twist the collar. Most DeWalt keyless chucks twist counter-clockwise. You twist it until you hear a click or feel it loosen up a lot.
You might see the jaws inside start to retract. They’ll pull back into the chuck body. Keep turning until the opening is wide enough.
It needs to be wider than the shank of the drill bit you want to put in.
Once the chuck is open, take out the old bit. Gently pull it straight out. Don’t force it.
If it’s a little tight, a slight wiggle might help. Now, take your new drill bit. Line up its shank with the opening of the chuck.
Push the new bit in as far as it will comfortably go. Make sure it’s seated properly against the back of the chuck.
Now it’s time to tighten it. Twist the collar back in the opposite direction. This is usually clockwise.
As you twist, you’ll feel the jaws close around the bit. They’ll grip it. Keep turning until it feels snug.
You don’t need to use extreme force. The chuck has a mechanism that tightens it really well. A good grip is what you want.
You should feel it lock into place.
Many modern DeWalt drills have an auto-lock feature. This means it locks automatically when you stop tightening. You might hear a loud click as it sets.
Some drills also have a torque setting. You can adjust how much power the drill uses. This helps prevent over-tightening.
But for changing bits, just make sure it’s firm. A quick tug test will tell you if it’s secure. No wobbling allowed!
Keyless Chuck: Quick Steps
- Identify the spinning collar on the chuck.
- Twist the collar counter-clockwise to open the jaws.
- Remove the old bit.
- Insert the new bit firmly.
- Twist the collar clockwise to tighten the jaws.
- Ensure the bit is secure and does not wobble.
I remember the first time I used a keyless chuck drill. I was helping my dad build a deck. He handed me this new drill.
I’m used to the old-school ones with keys. I looked at the front, saw the spinning part, and just went for it. It was so easy!
I swapped bits for drilling pilot holes and then for driving screws in seconds. It felt like magic compared to fumbling with that little key.
That experience really stuck with me. It showed me how much simpler tools can make work. Keyless chucks are brilliant for that reason.
They remove a barrier to getting tasks done. If you’re not comfortable with tools, this makes it less intimidating. It’s a small design detail that makes a big difference in user experience.
How to Change a Drill Bit on a Keyed Chuck DeWalt Drill
Keyed chucks are a bit less common now, but they are still around, especially on older or more robust DeWalt models. They offer a very secure grip. This can be beneficial for tough jobs.
The main difference is that you need a special tool: the chuck key. This little metal piece is essential for operating this type of chuck. Don’t lose it!
The keyed chuck also has jaws. But instead of a twistable collar, it has holes around the chuck body. These holes are where the chuck key fits.
There are usually three holes. Each hole connects to a gear mechanism inside. Turning the key in these holes makes the jaws open or close.
To change the bit, find your chuck key. It’s often stored in a holder on the drill itself or might have come in the drill’s case. Insert the chuck key into one of the holes.
You’ll likely want to start with the top hole for ease. Turn the key counter-clockwise. You will feel resistance as the jaws begin to loosen.
Keep turning the key counter-clockwise. You’ll hear a ratcheting sound. This is normal.
The jaws will retract. Continue until the opening is wide enough to accept your new bit. Ensure the jaws are fully retracted to avoid scratching the new bit’s shank.
It’s important that the jaws are open enough so the bit can be inserted straight.
Once the chuck is open, remove the old drill bit. Just pull it straight out. If it’s a bit stuck, try wiggling it gently.
Now, take your new drill bit. Insert its shank into the chuck opening. Push it in as far as it can go.
Make sure it’s sitting straight and centered.
Now it’s time to tighten the chuck. Take your chuck key again. Insert it into one of the holes.
Turn the key clockwise. You’ll feel the jaws start to tighten around the bit. Continue turning until it feels very snug.
For extra security, insert the key into the other two holes and give them a good turn clockwise as well. This ensures all jaws are gripping the bit evenly and firmly.
The goal is a secure fit. The bit shouldn’t twist or wobble at all. If it does, it’s not tight enough.
A loose bit can break or cause damage. It can also make your drilling very inaccurate. Keyed chucks offer a very positive lock.
You can really feel when it’s tight.
Keyed Chuck: Step-by-Step
- Locate your chuck key.
- Insert the key into one of the chuck holes.
- Turn the key counter-clockwise to loosen and open the jaws.
- Remove the old bit.
- Insert the new bit straight and deep.
- Turn the key clockwise in all three holes to tighten firmly.
- Check for wobble; tighten further if needed.
I remember helping a neighbor a few years back. He had this older DeWalt hammer drill. It had a keyed chuck.
I hadn’t used one in ages. I spent a good five minutes looking for the chuck key. He finally found it tucked away in a drawer.
When I went to change the bit, I was surprised by how much turning it took. It felt like I was winding up a toy. But once it was tight, that bit wasn’t going anywhere.
It’s a different kind of secure feeling.
It’s a reminder that older tools often have different mechanics. While keyless is convenient, the keyed chuck has its place. It’s robust.
It’s reliable. For heavy-duty tasks where absolute bit stability is paramount, a keyed chuck can be a great option. Just keep that key handy!
Troubleshooting Common Drill Bit Changing Issues
Even with the right steps, sometimes things don’t go perfectly. A drill bit might feel stuck. Or the chuck might not tighten properly.
These are common frustrations. But usually, there’s a simple fix. Don’t get discouraged if it’s not smooth sailing the first time.
One of the most frequent problems is a stuck drill bit. This often happens with keyed chucks. The jaws might have dug into the bit’s shank.
Or, if the bit was used for a long time without changing, it might have gotten hot and expanded slightly. With keyless chucks, sometimes a bit of dust or debris can get into the mechanism.
If a bit is stuck in a keyless chuck, try this: make sure you are twisting the collar far enough counter-clockwise. Sometimes, you need to give it a good, firm twist. If it’s still stuck, try lightly tapping the chuck body with the handle of a screwdriver or a rubber mallet.
Don’t hit it hard. Just a gentle tap can sometimes loosen things up. Then, try opening the chuck again.
For a stuck bit in a keyed chuck, the same principles apply. Ensure you’re turning the key counter-clockwise as far as it will go. If it’s really jammed, you might need to apply a penetrating oil.
Let it sit for a bit. Then, try loosening the chuck again. Sometimes, rotating the bit slightly while you loosen the chuck can help.
But be careful not to twist your wrist.
Another issue is when the chuck won’t tighten. For keyless chucks, this often means there’s something preventing the jaws from closing. Check for debris inside the chuck opening.
Make sure the bit is inserted straight and fully seated. If it still won’t tighten, the chuck mechanism might be worn out. This is less common but can happen over time.
With a keyed chuck, if it won’t tighten, it’s usually because the jaws are not fully retracted. Make sure you’ve opened them wide enough. Or, the gear mechanism might have an issue.
Sometimes, a bit of grit in the gears can cause problems. Cleaning out the chuck and the key can help. If the key itself is damaged, you might need a new one.
It’s also worth noting that not all drill bits are the same size. You need to make sure the chuck can accommodate the bit’s shank. Small drill bits fit easily.
Larger bits need a wider opening. If the bit is too thick for the chuck, it simply won’t go in or won’t be gripped properly.
Troubleshooting Tips: Bit Won’t Come Out?
- Keyless Chuck: Twist collar firmly counter-clockwise. Tap chuck gently.
- Keyed Chuck: Turn key fully counter-clockwise. Try penetrating oil. Wiggle bit slightly.
Troubleshooting Tips: Chuck Won’t Tighten?
- All Chucks: Ensure bit is straight and fully inserted. Check for debris.
- Keyless: Jaws might be blocked or worn.
- Keyed: Ensure jaws are fully open. Check key and gear mechanism.
I once spent nearly an hour trying to get a bit out of an old drill. It was so frustrating. I was convinced I was going to break the drill.
My neighbor, who’s a carpenter, came over. He just looked at it, grabbed a can of WD-40, sprayed it in there, and let it sit for ten minutes. Then, he took a block of wood and tapped the chuck.
It popped right out. It taught me patience and the value of the right tool, even for simple jobs.
Remember that your DeWalt drill is a tool built to last. Most issues are minor and solvable with a bit of patience. If you ever feel like you’re forcing something too much, stop.
Take a break. Reassess. That’s usually when the solution becomes clear.
Real-World Scenarios: When and Why You Change Bits
Changing drill bits isn’t just a random task. It’s a fundamental part of using a drill effectively. We change bits for different materials, different hole sizes, and different functions.
Understanding these scenarios helps you appreciate why the process is important.
The most common reason is moving between drilling holes and driving screws. You’ll drill a pilot hole for a screw. Then, you’ll swap to a screwdriver bit to drive the screw in.
This prevents the wood from splitting. It also makes driving the screw much easier. You need a specific drill bit for making holes.
You need a different bit (like a Phillips or Torx head) for screws.
Another reason is changing hole size. You might start with a small bit to make a pilot hole. Then, you’ll switch to a larger bit for the main hole.
Or you might need to switch from a wood bit to a metal bit. Or a masonry bit for concrete. Each material requires a specific type of drill bit.
Using the wrong bit can damage the bit, the material, or the drill itself.
Sometimes, a bit can get dull. When a drill bit is dull, it doesn’t cut well. It requires more force.
It can overheat. This is especially true when drilling through hard materials like metal or concrete. A dull bit will make the job take much longer.
It can also leave a rougher finish. Swapping for a sharp bit makes a huge difference.
You might also change bits for specialized tasks. For example, using a spade bit for larger holes in wood. Or a Forstner bit for clean, flat-bottomed holes.
There are also hole saws for cutting large circular openings. Each of these requires the chuck to be opened and closed securely.
The environment where you’re drilling also plays a role. If you’re working in a dusty workshop, debris can get into the chuck. This might make bit changes a bit trickier.
If you’re working outdoors, rain or mud could cause similar issues. Keeping your drill and bits clean is always a good idea.
Common Bit Change Triggers
- Task Switch: Drilling pilot holes vs. driving screws.
- Material Change: Wood to metal, drywall to concrete.
- Hole Size: Small pilot hole to larger main hole.
- Bit Condition: Swapping a dull bit for a sharp one.
- Specialty Bits: Using spade bits, hole saws, or Forstner bits.
I was recently working on a shelf project. I needed to drill small pilot holes. Then, I needed to put in larger screws.
I started with a tiny drill bit. It felt fiddly. I had to swap it out for a slightly bigger one to fit the screw threads better.
That simple swap made the whole process much smoother. It’s those small adjustments that make a big difference in the final result. Plus, it saves you a lot of frustration.
Thinking about why you’re changing the bit helps. It reinforces the idea that each tool and bit has a purpose. And that changing them is a normal part of the process.
It’s not a sign of failure, but a sign of adaptability.
What This Means for You: Normal vs. Concerning Signs
When you’re changing drill bits, there are signs to watch for. Some are totally normal. Others might mean something is wrong with your drill or chuck.
Knowing the difference helps you maintain your tool and stay safe.
Normal Signs:
- A distinct “click” when tightening a keyless chuck. This is the auto-lock engaging.
- A bit of resistance when turning the chuck to open or close.
- A slight ratcheting sound with a keyed chuck.
- The drill bit being held very firmly, with no play or wobble.
- The chuck jaws moving smoothly in and out.
These are all indicators that your chuck is working as it should. It’s gripping the bit properly. It’s ready for use.
A firm grip is essential for safety and performance.
Concerning Signs:
- The chuck spins freely in one direction but doesn’t tighten.
- The drill bit feels loose or wobbles even after tightening.
- Grinding or crunching sounds from inside the chuck when trying to open or close.
- The chuck body is very hot after normal use.
- Excessive force is needed to open or close the chuck.
- The chuck key slips or doesn’t engage the gears properly.
- Rust or significant damage on the chuck jaws or body.
If you notice any of these concerning signs, it’s worth investigating. A loose chuck is a safety hazard. A malfunctioning chuck can damage drill bits or even the drill itself.
It might also mean your drill is not performing at its best.
For keyless chucks, if it won’t tighten, it might be a sign of wear. Sometimes, debris can get trapped, as we discussed. For keyed chucks, damaged gears or a worn-out key are common culprits.
It’s always a good idea to consult your DeWalt drill’s manual. It will have specific information about your model. If you’re unsure about a problem, it’s best to contact DeWalt support.
Or take it to a qualified tool repair shop. Trying to force a broken mechanism can cause more damage.
Quick Check: Is My Chuck Okay?
Normal: Smooth operation, firm grip, clear clicks (keyless), expected resistance.
Concerning: Wobbling bit, grinding sounds, chuck won’t tighten/loosen, excessive force needed.
I had a drill once where the keyless chuck just wouldn’t tighten all the way. The bit would slip under pressure. I tried everything.
Finally, I realized the plastic collar had a small crack in it. It was barely visible. That crack was enough to prevent the internal mechanism from locking properly.
I had to get the chuck replaced. It was a good reminder to look closely for any physical damage.
Paying attention to how your drill feels and sounds is important. It’s like listening to your own body. If something feels off, it probably is.
Addressing small issues early can prevent bigger problems down the line. It keeps your tools working well for longer.
Quick Tips for Easy Drill Bit Changes
Here are some simple habits and tricks that can make changing your DeWalt drill bits a breeze:
- Keep it Clean: After each use, especially if you’ve been working in a dusty environment, give your chuck a quick wipe down. A small brush can help remove debris from the jaws.
- Use the Right Bit: Make sure the bit shank fits your chuck. Trying to force the wrong size bit can damage both.
- Insert Fully: Always push the drill bit as far into the chuck as it will comfortably go before tightening. This ensures maximum grip.
- Tighten Firmly: Don’t be afraid to tighten the chuck securely. A loose bit is unsafe. For keyless chucks, listen for the click. For keyed chucks, use all three holes to tighten.
- Test the Grip: Before starting your drilling, give the bit a gentle pull and twist. It shouldn’t budge or wobble at all.
- Store Bits Properly: Keep your drill bits organized in a case. This protects them from damage and makes them easy to find.
- Chuck Key Safety (Keyed Chucks): If you have a keyed chuck, always know where your chuck key is. Keep it in the designated holder or a safe, known spot.
- Gentle Release: When removing a bit, ensure the chuck is fully open before pulling. If it’s still a bit tight, a slight wiggle is usually enough.
These small practices add up. They make your drilling tasks smoother. They also help your DeWalt drill and its accessories last longer.
It’s about working smarter, not harder.
Frequently Asked Questions About DeWalt Drill Bits
How do I know if I have a keyless or keyed chuck on my DeWalt drill?
Look at the front of your drill where the bit goes. If there are three small holes around the chuck body, you likely have a keyed chuck. If you can twist a sleeve or collar on the chuck to open and close it without a tool, it’s a keyless chuck.
Most modern DeWalt drills use keyless chucks.
Can I use any brand of drill bit with my DeWalt drill?
Yes, generally you can. DeWalt drills are designed to accept standard drill bits with round shanks. As long as the shank size fits within the chuck’s capacity, most brands will work.
However, using high-quality bits will give you better performance.
My DeWalt drill bit keeps slipping. What should I do?
First, ensure the chuck is tightened securely. For keyless chucks, make sure you’ve twisted the collar enough. For keyed chucks, use the key in all three holes.
Also, check that the drill bit shank is clean and fully inserted into the chuck. If the problem persists, the chuck itself might be worn or damaged.
How do I remove a drill bit that’s stuck in my DeWalt drill chuck?
For keyless chucks, try twisting the collar counter-clockwise firmly. Gentle tapping on the chuck body might help. For keyed chucks, ensure the key is turned fully counter-clockwise.
You can try applying a penetrating oil and letting it sit. Wiggling the bit slightly while loosening can also work.
Is it okay to change drill bits while the drill is still powered on?
Never. Always ensure the drill is unplugged (if corded) or the battery is removed (if cordless) before changing a drill bit. This is a critical safety step to prevent accidental starts and serious injury.
My keyed chuck key is lost. Can I use something else to change the bit?
It’s strongly recommended to get a replacement DeWalt chuck key. Using improvised tools can damage the chuck mechanism, the keyhole, or even cause injury. You can usually order a replacement key from DeWalt or from tool supply stores.
Conclusion
Changing a drill bit on your DeWalt drill is a simple skill. Whether you have a keyless or keyed chuck, the process is designed for ease. Understanding your chuck type and following these steps will save you time and frustration.
Keep your chuck clean and bits secure. You’ll be drilling like a pro in no time!