How to Tell Which Pipe Is Frozen in Your House
To tell which pipe is frozen in your house, start at the fixtures, compare flow room by room, and shut off water if you suspect a burst. Then trace the coldest no-flow section back toward the main line. Guessing wrong can crack a pipe when it thaws and turn a blockage into flooding. This guide gives a room-by-room search order, a fixture-by-fixture log table, and a symptom-to-freeze-point decision tree so you can localize the problem before you thaw anything.
What you need to check first

- Flashlight
- Paper or phone notes for fixture-by-fixture results
- Access to the main water shut-off valve near the meter or utility area
- A thermometer or thermostat reading from the affected area
- Dry towels for spotting new moisture
Use a thermometer or thermostat reading as a context clue, not proof of a freeze. The U.S. Army Corps of Engineers and local cold-weather guidance both treat very low indoor or unheated-space temperatures as a freeze risk, and the CDC notes that exposed pipes are more likely to freeze when the surrounding area drops below freezing. Note the reading before you move farther into the house. CDC freeze safety guidance and Ready.gov winter weather guidance both emphasize prevention around pipes exposed to extreme cold.
How to tell which pipe is frozen in your house
Start by deciding whether you have a frozen line or an already burst line. If there is dripping, streaming, spraying, wet drywall, stained ceilings, or bulging walls, use the main shut-off valve first and stop looking for a thaw point until the leak is contained. For emergency pipe damage, the Red Cross advises shutting off the water supply and addressing active leakage before cleanup begins. Red Cross flood and water emergency guidance
If there is no visible leak, localize the problem by comparing fixtures. A frozen section usually cuts off one branch, one fixture, or one side of a split supply line before it affects the whole house. That pattern tells you where to search, and it is faster than warming the whole building.
What an already burst pipe looks like
A burst pipe often shows up as water where it should not be: dripping, spraying, wet walls, wet ceilings, puddles on the floor, or staining that spreads. If you see any of those signs, close the main water shut-off valve near the meter or utility area right away by turning it clockwise.
- Do not start thawing first.
- A frozen pipe can split while it thaws.
- Hidden leaks can lead to mold growth quickly, especially after prolonged moisture exposure. EPA guidance notes mold can begin growing in as little as 24 to 48 hours after water intrusion. EPA mold guidance
How do I find where a pipe is frozen?
Use a room-by-room search order that starts with colder areas and follows the likely pipe route. Begin with exterior walls and any unheated spaces, then move to basements, crawl spaces, utility closets, and finally attics or upper-floor bathrooms if the layout fits. The coldest exposed section is often the likely freeze point.
| Search order | Where to look | What it suggests |
|---|---|---|
| 1 | Exterior walls | Freeze risk where the pipe is closest to outside cold |
| 2 | Basements | Exposed runs near foundation walls or rim joists |
| 3 | Crawl spaces | Cold air under the floor can chill supply lines quickly |
| 4 | Utility closets | Short branches or grouped fixtures may freeze here |
| 5 | Attics and upper-floor bathrooms | Inspect only if the pipe route actually passes there |
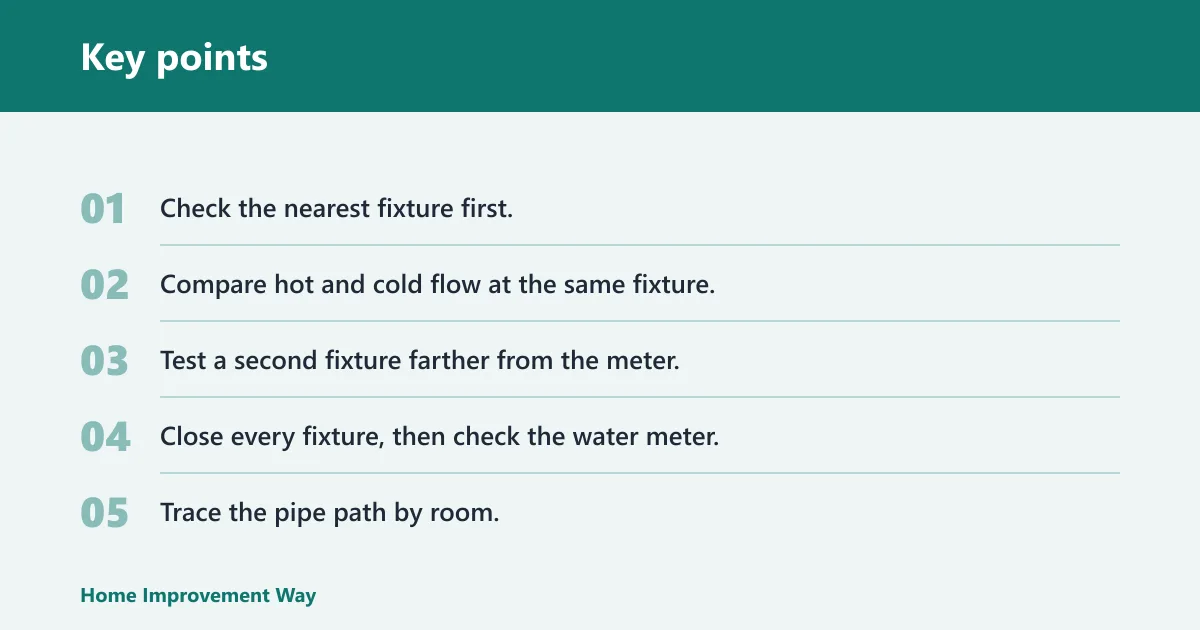
- Check the nearest fixture first. Open a cold tap fully and note whether it gives a normal stream, a weak trickle, or nothing.
- Compare hot and cold flow at the same fixture. If hot works and cold does not, the cold supply branch is the likely problem.
- Test a second fixture farther from the meter. If the nearer fixture works and the farther one does not, the freeze is likely on that branch or on the section feeding that zone.
- Close every fixture, then check the water meter. If the meter dial still moves, there may be hidden flow from a leak or a partially open valve, so do not treat the reading as proof of a freeze.
- Trace the pipe path by room. Look first at the pipe sections nearest exterior walls, then any run in a crawl space, basement, attic, or utility closet.
- Mark the coldest exposed point you can find. That is the best candidate for the frozen section, especially if the pipe is bare and against a cold surface.
Say your kitchen sink on an outside wall has no cold water, but the nearby bathroom sink still runs normally. That pattern points to a localized branch, not a whole-house shutdown. If the kitchen line crosses a basement ceiling near a drafty rim joist, that exposed stretch becomes the first place to check. For related cold-air risk points, see crawl space insulation.
Which rooms should you check first?
Start where plumbing meets cold air. Begin with exterior walls, since supply lines there face outdoor temperatures directly. After that, check basements, crawl spaces, and utility closets, since unheated areas can pull a pipe close to freezing even when the rest of the house feels comfortable.
Then move to attics and upper-floor bathrooms if your layout puts supply lines there. Do not assume every upstairs pipe is the issue. Follow the branch that lost flow and inspect the spaces it crosses.
| Search order | Where to look | What it suggests |
|---|---|---|
| 1 | Exterior walls | Freeze risk where the pipe is closest to outside cold |
| 2 | Basements | Exposed runs near foundation walls or rim joists |
| 3 | Crawl spaces | Cold air under the floor can chill supply lines quickly |
| 4 | Utility closets | Short branches or grouped fixtures may freeze here |
| 5 | Attics and upper-floor bathrooms | Inspect only if the pipe route actually passes there |
How do I confirm the freeze point?
Confirm the freeze point by matching the symptom to the coldest exposure point on the pipe path. A frozen section is often the spot that is both most exposed and closest to the fixture that lost flow. If the pipe is inaccessible, use the pattern of affected fixtures to narrow the branch instead of guessing.
If you find active leaking, shut the main water off first and stop. If the line is frozen but intact, you can plan a careful thaw only after you have identified the branch and checked the nearby pipe for swelling, splits, or moisture.
Faucet pressure test
Use one fixture at a time. Open the cold side fully, then the hot side, and compare the result. If cold fails at one sink but hot works, that points to a cold supply freeze, not a drain issue. If both fail at the same fixture, compare that fixture with one farther from the meter.
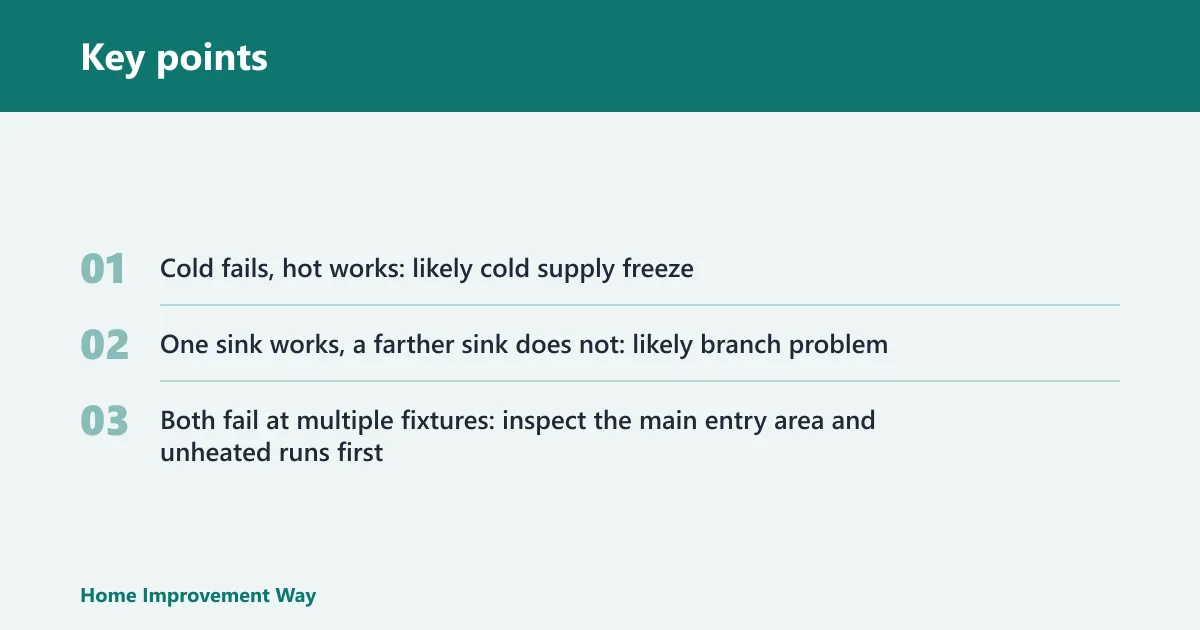
- Cold fails, hot works: likely cold supply freeze
- One sink works, a farther sink does not: likely branch problem
- Both fail at multiple fixtures: inspect the main entry area and unheated runs first
Fixture-to-fixture comparison matters because a local supply freeze behaves differently from a whole-house pressure loss. A sink near the meter that still works while a farther bath has no cold flow can suggest the affected branch is farther from the source.
Meter check with all fixtures closed
Close every tap, shut off dishwashers and washing machines if they are running, and then look at the meter. A still meter is a no-flow screen, not proof of a frozen pipe. It only tells you there is no obvious movement at that moment.
If the meter dial moves even a little, that can mean hidden flow. The burst-pipe guide says the meter dial can move even on tiny flows, so any movement deserves a closer leak check before you assume a freeze.
Frozen pipe checklist
This checklist gives a practical search order, a fixture-by-fixture test, and a decision tree for the more likely freeze points.
| Check | What to do | What it points to |
|---|---|---|
| Room search | Start at exterior walls, then basements, crawl spaces, utility closets, and attic runs | Likely exposure point |
| Fixture test | Compare hot and cold flow at one fixture, then test a second fixture farther from the meter | Localized branch versus broader supply issue |
| Meter check | Close every fixture and watch the meter | Hidden flow, leak, or open valve |
| Damage check | Look for dripping, spraying, wet drywall, wet ceilings, or staining | Already burst line |
| Cold reading | Note the thermometer or thermostat reading in the affected space | Cold exposure and urgency |
Decision tree for likely freeze points
- If there is dripping, spraying, or wet drywall, close the main shut-off valve and stop.
- If only one fixture lost cold water, inspect that fixture’s supply route first.
- If a fixture near the meter works but a farther fixture does not, inspect the branch between them.
- If all fixtures lose pressure, check the main line area, meter area, and any unheated space near the service entry.
- If the coldest exposed pipe section is against an exterior wall, in a crawl space, basement, attic, or utility closet, treat that section as the likely freeze point.
Suppose the second-floor hall bath has weak cold flow, but the first-floor bath and kitchen both run normally. That pattern makes the bathroom branch the target, not the whole house. If that bath shares a wall with an unheated attic knee space, inspect the pipe run there before opening any cabinets farther away.
Common mistakes
Do not start thawing before checking for burst signs. A split pipe can look frozen one minute and leak the next. Do not rely on the meter reading alone either; a still dial does not prove a freeze, and a moving dial can mean a leak rather than a blockage.
- Do not skip the room order and jump straight to the warmest space.
- Do not ignore a single wet patch on drywall, ceiling, or flooring.
- Do not use open flame for thawing.
- Do not assume the nearest fixture will fail first.
If you need to warm the area later, use gentle warm air only. The Red Cross and Ready.gov recommend safe, gradual thawing methods such as warm air from a hair dryer or heating pad, while keeping the heat source moving and avoiding direct flame. Ready.gov winter weather guidance A thaw can take from one to several hours, and heavily iced piping can take much longer.
Frequently asked questions
How do I check for frozen pipes?
Open one cold tap, compare it with the hot side, then test another fixture farther from the meter. Close every fixture and check the meter dial last. That sequence gives you a no-flow screen, a branch comparison, and a hidden-flow check without using tools beyond a flashlight.
What does a frozen pipe look like?
Sometimes it looks normal from the outside. The clues are the symptoms: no cold water at one fixture, weak flow on one branch, and a pipe section that sits in a colder space. If the pipe has already split, you may also see dripping, spraying, or wet drywall.
How do I know if my pipes froze or burst?
If water flow stops without visible moisture, the pipe may be frozen and still intact. If you see dripping, spraying, wet ceilings, bulging drywall, or staining, treat it as burst until proven otherwise. In that case, close the main shut-off valve near the meter or utility area.
For cleanup after a burst, follow burst pipe cleanup guidance as soon as the leak is contained. If you keep having weak flow after repairs or thawing, low water pressure diagnosis can help separate a freeze from a supply issue.
Sponsored / affiliate links. As an Amazon Associate I earn from qualifying purchases. I may earn additional commission from eligible campaigns.
 Water Flow Control Shut Off Valve with Brass Adjustable Hand Level Water Pressure Regulator for Hand Held Shower Head & Bidet Sprayer, Brushed Nickel Water Saver G1/2
 Moisture Meter for House, Water Meter, Tester Hygrometer for Indoor Outdoor Garden Lawn Farm, No Batteries Needed, Accurate Sensor for Gardening(White)