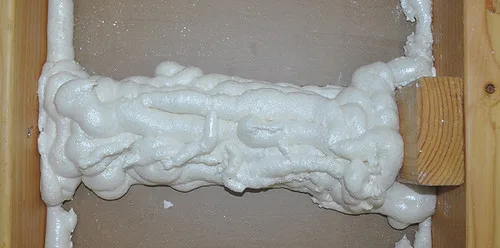
How to Air Seal an Attic Before Adding Insulation
Air seal the attic floor before you add insulation. Start with the biggest bypasses first: attic hatch or pull-down stairs, then plumbing and wiring penetrations, top plates, recessed lights, flue and chimney clearances, and duct chases. Skip this step and your new insulation can hide leaks, waste heat, and create moisture or fire-safety problems. This guide shows the sealing order, the materials to use, and the places you should leave vented or protected.
What you’ll need


- High-quality caulk for tight cracks and seams
- Low-expansion spray foam for larger non-heat gaps
- Weatherstripping for the attic hatch or pull-down stairs
- Foil tape or gasket material where the attic access design calls for it
- Fire-rated caulk or fire-rated foam only where the fixture or listing allows it
- Metal flashing, blocking, or other approved parts for chimney and flue areas when required by the appliance or vent instructions
- Utility knife, caulk gun, flashlight, tape measure, and marker
- Gloves, eye protection, respirator, and a stable ladder
- Soffit baffles for the eaves before blown insulation goes in
Why air seal first
Air sealing should happen before insulation because insulation slows heat flow, but it does not stop moving air. Warm indoor air rises and escapes through bypasses around the ceiling plane. ENERGY STAR says sealing plus insulating can save about 15% on annual energy bills, and its seal-and-insulate guidance puts attic air sealing at the front of the project sequence.
Start at the ceiling plane
Trace the attic floor, not the roof deck. Your goal is an air barrier at the ceiling plane before insulation hides the leaks. ENERGY STAR’s seal-before-insulate approach is built around that order: stop air movement first, then add thermal resistance.
- Enter through the hatch and inspect the attic floor from end to end.
- Mark the largest bypasses first: hatch, top plates, penetrations, fixtures, and chases.
- Seal accessible leaks before any loose-fill or batts go in.
Which attic leaks should be sealed first?
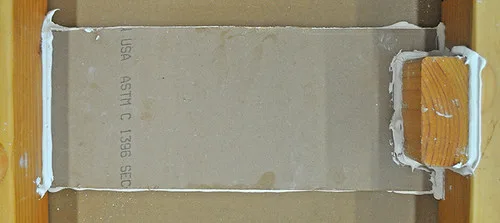
Start with the largest accessible air leaks at the ceiling plane, because they move the most air and are usually the easiest to reach. Top plates and the attic hatch are typically addressed before small wire holes. Treat flues, knob-and-tube wiring, mold, and vermiculite as inspect-first or pro-only conditions, not a normal DIY caulk job.
Priority order
- Top plates at the tops of walls.
- Attic hatch or pull-down stairs with weatherstripping and insulation.
- Plumbing stacks and wiring penetrations at the ceiling plane.
- Bath fan housings and other larger ceiling openings.
- Recessed lights only after checking fixture type and clearance.
- Flues and chimneys only after checking label, instructions, and code clearance.
Picture a large attic access opening over a hallway. If that cover is thin and leaky, it can leak more air than a dozen tiny wire holes. Seal the large opening first, then come back for the smaller gaps.
Attic sealing priority matrix
| Rank | Leak type | Why it matters | Safe material choice | Status | Do not seal this way |
|---|---|---|---|---|---|
| 1 | Top plates | Often long cracks at the wall top; they can leak a lot of conditioned air into the attic | Caulk for narrow cracks; low-expansion foam for larger non-heat gaps | DIY | Do not leave long cracks unsealed under insulation. |
| 2 | Attic hatch or pull-down stairs | Major bypass point at the ceiling plane; ENERGY STAR recommends sealing this kind of opening before insulation goes in | Weatherstripping, rigid insulation on the hatch, latch adjustment | DIY | Do not rely on loose batt insulation alone. |
| 3 | Plumbing stacks | Vertical chases can move warm air fast through the ceiling plane | Caulk for small gaps; low-expansion foam for larger voids | DIY | Do not pack foam into moving parts or around hot devices. |
| 4 | Wiring penetrations | Many small openings add up across the attic floor | Caulk for small cracks; foam only where the gap is larger and the label allows it | DIY | Do not seal around questionable wiring until it is inspected. |
| 5 | Bath fan housings | Leaky housings and duct joints can dump humid air into the attic | Seal housing gaps only if the fan vents outdoors and the fixture allows it | Inspect-first | Do not seal a fan that still dumps into the attic. |
| 6 | Recessed lights | Older cans can overheat if covered; fixture listing and insulation clearance govern what is safe | Airtight IC-rated replacement or fire-rated repair only if the fixture listing allows it | Inspect-first | Do not bury non-IC fixtures or ignore the manufacturer label. |
| 7 | Flues | Heat and combustion safety matter more than air sealing; clearance is governed by the appliance listing, vent instructions, and code | Approved metal flashing or blocking, and only fire-rated products where allowed by the appliance or vent instructions | Pro-only or inspect-first | Do not treat flues like ordinary gaps or fill the clearance zone with foam. |
| 8 | Duct and soffit chases | Hidden chases can connect the attic to wall cavities and undermine the air barrier | Seal accessible joints and openings with code-appropriate materials before insulation is added | DIY or inspect-first | Do not block soffit ventilation or seal a chase that is serving another system without verifying it. |
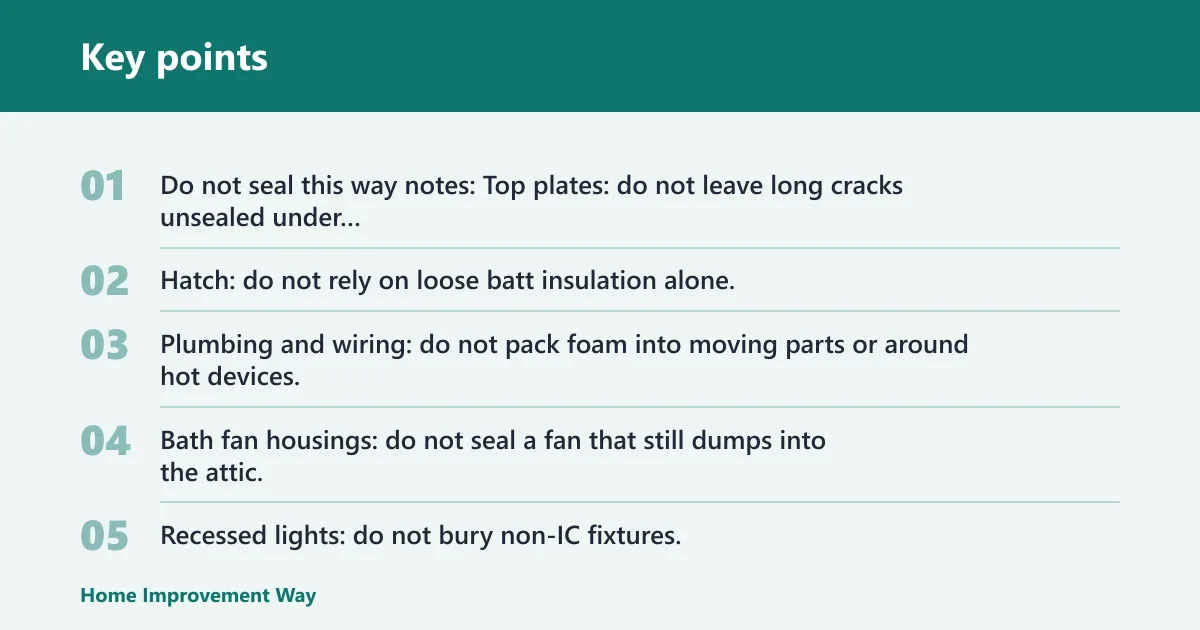
Do not seal this way notes: Top plates: do not leave long cracks unsealed under insulation. Hatch: do not rely on loose batt insulation alone. Plumbing and wiring: do not pack foam into moving parts or around hot devices. Bath fan housings: do not seal a fan that still dumps into the attic. Recessed lights: do not bury non-IC fixtures. Flues: do not treat them like ordinary gaps.
How do you seal small and larger gaps?
Use caulk for small cracks, usually under 1/4 inch, at the ceiling plane and around trim-sized gaps. Use low-expansion foam for larger non-heat openings where the product label allows it. Around hot venting, do not guess. Check the appliance label, chimney instructions, and local code before you touch the clearance zone.
Keep the cutoff simple
- Under 1/4 inch: caulk.
- Larger non-heat gaps: low-expansion foam.
- Near flues or combustion equipment: check the required clearance first.
Suppose you find a 3/16-inch gap along a top plate and a 1-inch opening around a pipe. The narrow joint gets caulk. The larger non-heat opening gets low-expansion foam. If the opening is near a flue, stop and verify the clearance instead of sealing it on sight.
What materials are safe around chimneys and flues?
Do not treat flues and chimneys like ordinary attic leaks. ICC/IRC-style code requirements and the appliance or vent listing control the clearance to combustibles, and the exact clearance depends on the assembly. That zone may need approved metal flashing or blocking instead of sealant, so verify the label, vent instructions, and local code before any work begins.
Use this rule
- Check the appliance label first.
- Check the chimney or vent instructions next.
- Check local code for the required clearance to combustibles.
- Use fire-rated products only where the listing and instructions allow them.
Do not push foam into the clearance zone. Do not bridge the gap with insulation. Keep the required space open unless the listed assembly specifically calls for another approved method.
How do you handle recessed lights and bath fans?
Older recessed cans need extra caution because fixture listings, not guesswork, determine whether insulation can touch the housing. The same goes for bath fans. Manufacturer installation instructions govern how the housing is sealed, how the duct is routed, and whether the unit may be insulated over. If the fixture or fan is not rated for the condition, stop and correct it first.
Fix the failure points first
- Identify whether each recessed light is IC-rated and airtight.
- Replace older non-IC fixtures or keep the required clearance.
- Confirm that bath fans vent outdoors, not into the attic.
- Seal fan housing leaks only after the vent path is corrected.
A common first-timer mistake is blowing insulation over an older can light because it looks harmless. That can create a fire and heat problem. Leave the area accessible until you know the fixture rating and the required clearance.
How do you keep soffit vents open?
Install soffit baffles before blown insulation reaches the eaves. The baffles keep a clear air channel from the soffit intake up into the attic, so added insulation does not block ventilation. Do not stuff insulation into the vent path or seal the soffit openings shut.
At the eaves
- Fit the baffle from the soffit up into the rafter bay.
- Leave a continuous air space behind it.
- Stop insulation below the baffle line.
This step matters before any final fill. If the intake closes off, the attic can lose its ventilation path and trap moisture at the eaves.
Should the attic hatch be insulated too?
Yes. The hatch or pull-down stair cover should be weatherstripped and insulated, because it is a major leak point and often a very easy one to improve. If the lid is thin, add rigid foam or another insulated cover that still closes tightly. A leaky access panel can undo a lot of careful sealing elsewhere.
Finish the access opening
- Apply weatherstripping around the hatch frame.
- Insulate the hatch cover itself.
- Check that the latch closes evenly on all sides.
- Recheck after insulation is installed nearby.
Seal the hatch before the final insulation pass. If the cover still leaks, the attic will continue to pull conditioned air through the opening.
After air sealing, add insulation to the target depth without covering vents or unsafe fixtures. Air sealing sets the air barrier; insulation is the thermal layer that follows. The follow-up work can be straightforward on an uncluttered attic, but it takes longer when inspect-first conditions are present.
Step-by-step order
- Clear the attic floor enough to see the ceiling plane.
- Seal the largest accessible leaks first.
- Install soffit baffles at the eaves.
- Fix hatch weatherstripping and insulation.
- Check recessed lights, fans, and flue clearances.
- Add insulation in even coverage after the air barrier is complete.
What if the attic has mold, vermiculite, or knob-and-tube wiring? Stop and inspect further before continuing. EPA and DOE guidance treat vermiculite and knob-and-tube as conditions that require special handling, not routine insulation prep.
Common mistakes
Most attic problems come from sealing the wrong thing, in the wrong order, or with the wrong product. Avoid those errors and the insulation job will work the way it should.
- Sealing flues like ordinary gaps: check the label, instructions, and code clearance first.
- Burying non-IC recessed lights: verify fixture type before adding insulation.
- Leaving bath fans venting into the attic: reroute the duct outdoors first.
- Blocking soffit vents: install baffles and keep the intake path open.
- Skipping the hatch: weatherstrip and insulate the access cover.
- Insulating before air sealing: you can hide leaks and keep the bypasses active.
If that did not work, step back and inspect the attic floor again from the hatch. Move from the biggest bypasses to the smallest, and stop any area that involves heat, combustion, or questionable wiring until it is verified.
Frequently asked questions
Do I need to air seal before adding attic insulation?
Yes. Air sealing comes first because insulation slows heat transfer, but it does not stop air movement. Seal the ceiling plane before you add loose-fill or batts, or the leaks can keep moving conditioned air through the attic and cut into comfort, moisture control, and energy savings. ENERGY STAR’s seal-and-insulate guidance follows that order.
How do I keep soffit vents open when insulating?
Install soffit baffles before the insulation reaches the eaves. The baffles hold open the vent channel so blown insulation does not block intake air. Keep the insulation below the baffle line and check from the attic side that the air path stays continuous.
Sponsored / affiliate links. As an Amazon Associate I earn from qualifying purchases. I may earn additional commission from eligible campaigns.