How to Install Wood Screws Without Splitting the Board
Use a pilot hole about the screw’s root or minor diameter in softwood, and slightly larger in hardwood, then keep the screw far enough from the edge for the wood species and thickness you’re working with. Woodworkers’ guidance commonly puts edge distance at about 2 screw diameters in ordinary stock and closer to 3 diameters in brittle hardwood; standards and extension guidance also warn that end grain, thin trim, and dense hardwood need extra care. This guide shows how to match screw type, pilot size, countersink, and edge distance to wood thickness so you can drive screws cleanly without splitting the board.
What you’ll need


- Drill/driver with adjustable clutch
- Drill bits for pilot holes, sized to the screw core or shaft
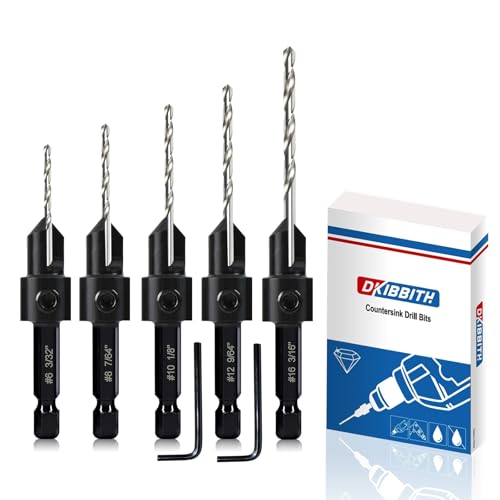
- Countersink bit, or a combined pilot-and-countersink bit
- Screws matched to the wood: coarse thread for softwood, fine thread for hardwood
- Torx or square-drive screws and matching bit
- Combination square or tape measure
- Clamp or quick-grip clamp
- Scratch awl or marking pencil
- Optional: brad-point bit for cleaner starts in softwood
How do you keep wood from splitting when you screw it?

Use a pilot hole sized to the screw’s root or minor diameter, not the outside thread diameter, and adjust slightly larger in dense hardwood. Drill deep enough for the full screw length, keep the screw far enough from the edge or end, and stop before the head crushes the surface fibers. Those four steps reduce wedging force and lower split risk. [USDA Forest Service, Forest Products Laboratory; fastener-manufacturer installation guidance]
| Do not do this | Why it causes trouble | Do this instead |
|---|---|---|
| Undersize the pilot in hardwood | Dense fibers wedge apart and crack | Use a slightly larger pilot matched to the screw root/minor diameter |
| Assume end grain behaves like side grain | Withdrawal and holding vary with grain direction and loading | Fasten for the load direction and expect end grain to hold less reliably |
| Drive near the edge without planning | Edge fibers split first | Increase edge distance, or choose a smaller screw |
Drill in the right order
- Mark the screw location and confirm grain direction.
- Clamp the board so it cannot shift.
- Drill the pilot hole straight, using a depth stop or tape flag.
- Add a countersink only when the head needs to sit flush or the surface is prone to splitting.
- Drive the screw slowly with a clutch set low enough to stop before the head crushes the fibers.
Use pressure, not speed
A common first-timer mistake is forcing the screw while the driver bit wanders. Say the screw lands near the end of a 3/4-inch trim board. If the pilot is undersized and the bit is Phillips, the screw can cam out and the board can split before the head seats. A Torx or square drive gives better torque control and helps keep the screw straight. [Fastener-manufacturer guidance]
Which pilot hole size fits?
The pilot hole should track the screw’s root or minor diameter, with the size shifted by wood density and stock thickness. In softwood, a common rule of thumb is about 70% of screw diameter; in hardwood, closer to 90% is often safer. Those figures are starting points, not absolutes: standards-based and manufacturer guidance typically tie pilot size to the shank/core that clears the screw body without over-widening the hole. [USDA Forest Service, Forest Products Laboratory; fastener-manufacturer guidance]
Use screw gauge as the starting point
Smaller screws can still split narrow trim if the pilot is wrong. #4 to #6 screws suit light trim and small hardware. #8 to #10 are common for general construction and furniture. #12 screws can carry more load, but they can also raise split risk in thin material, so pilot-hole control becomes more important.
Match depth to screw length
Drill the pilot at least as deep as the screw length. A slightly deeper hole gives room for dust and keeps the tip from bottoming out early. That matters most in hardwood and near board ends, where extra wedging force shows up fast.
What screw should you choose?
Coarse-thread screws are commonly used for softwood, and fine-thread screws are commonly used for hardwood. Coarse threads bite well in pine, cedar, and other less dense woods. Fine threads move with less wedging force in dense hardwoods, so they reduce the chance of cracking while still holding firmly.
Use drive type to control torque
Torx and square drives are the safer choice when the hole is close to an edge or end. Phillips heads strip more easily, which makes it harder to stop at the right depth. If the screw spins without seating, the hole is often too large, the bit is wrong, or the clutch is set too high.
When self-tapping screws help
Self-tapping screws have a sharp point and threads that can reduce driving force, especially in softer stock. They do not eliminate the need for pre-drilling in wood. In hardwood, thin trim, or edge fastening, a pilot hole still helps the screw start straight and keeps the wood from splitting before the head seats. Manufacturer literature and wood-engineering guidance treat self-tapping features as helpful for starting, not as a substitute for proper pilot sizing. [Fastener-manufacturer guidance; USDA Forest Service, Forest Products Laboratory]
Wood screw decision table
This table gives a practical starting point for common DIY cases. It uses the screw’s core diameter as the pilot-hole target, then adjusts for wood density, thickness, and edge risk.
| Wood type | Board thickness | Screw gauge | Recommended pilot-hole approach | Countersink? | Split-risk notes |
|---|---|---|---|---|---|
| Softwood, clear grain | 3/4 inch | #6 to #8 | Pilot about 70% of screw diameter, full screw length or slightly deeper | Optional | Good general case; keep at least 2 screw diameters from the edge |
| Softwood, near an edge | 3/4 inch | #8 to #10 | Pilot sized to the core, with extra care on depth and straight drilling | Yes, if the head is near the surface edge | Edge distance matters more than thread type here |
| Hardwood | 3/4 inch to 1 inch | #6 to #8 | Pilot closer to 90% of screw diameter, depth at least screw length | Optional to helpful | Dense fibers resist the screw; too-small pilots crack the board |
| Hardwood trim | Under 3/4 inch | #4 to #6 | Use a precise pilot and test on scrap first | Yes, often | Thin stock splits fast; keep away from ends and use light clutch pressure |
| Furniture parts | 1 inch or thicker | #8 to #12 | Core-sized pilot, straight drill, deep enough for full screw length | Yes, when a flush head is needed | Strong stock tolerates larger screws better, but hardwood still needs tight control |
Failure cases to avoid
| Situation | What usually fails first | Better fix |
|---|---|---|
| End grain | Screw wanders or splits the face fibers | Pre-drill deeper, clamp tightly, and back the screw away from the end |
| Thin trim | Surface blowout under the head | Use a countersink and a smaller gauge screw |
| Hardwood | Cracking along the grain | Use a slightly larger pilot matched to the screw’s root or minor diameter and fine-thread screw |
| Edge fastening | Split starts at the edge and runs outward | Increase edge distance and reduce screw diameter if needed |
Common mistakes
The most common problems are simple: the pilot is too small, the screw is too large, or the hole is too close to the end. Wet or warped lumber also raises failure risk because the fibers do not clamp evenly around the screw.
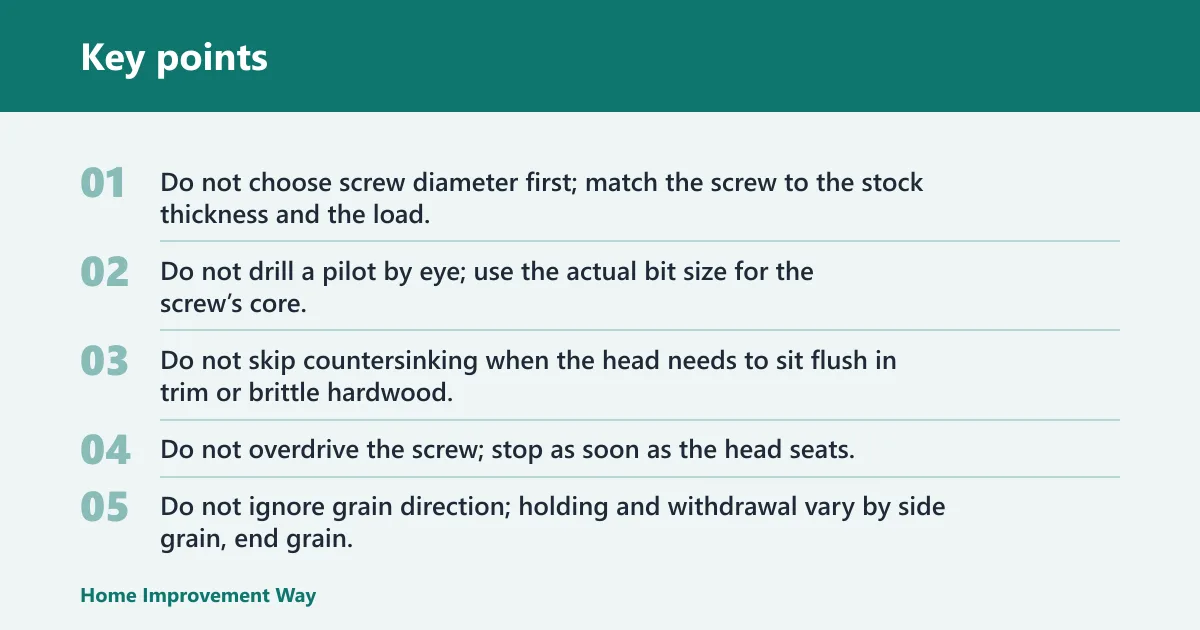
- Do not choose screw diameter first; match the screw to the stock thickness and the load.
- Do not drill a pilot by eye; use the actual bit size for the screw’s core.
- Do not skip countersinking when the head needs to sit flush in trim or brittle hardwood.
- Do not overdrive the screw; stop as soon as the head seats.
- Do not ignore grain direction; holding and withdrawal vary by side grain, end grain, and loading direction.
If that didn’t work, try this next
If a board still splits, increase the pilot diameter by 1/64 inch and recheck on scrap of the same wood. If the screw still feels tight, switch to a smaller gauge, move the hole farther from the edge, or change from Phillips to Torx so you can control torque better.
Picture a 3/4-inch pine trim piece with a #8 screw 1/2 inch from the end. A pilot hole that is too small can split the corner even if the screw is coarse-threaded. Moving the hole farther in and adding a light countersink usually fixes the problem before the board cracks.
Prevention
Mark every hole before drilling, then keep the same bit size for the same wood type across the job. That habit reduces guesswork and makes the next screw behave the same way as the last one.
Frequently asked questions
Do I need to drill a pilot hole for wood screws?
In most cases, yes. Softwood may tolerate a slightly looser pilot, but hardwood, trim, end grain, and edge fastenings usually need one. The pilot should run at least the screw length deep so the shank does not wedge the fibers apart near the tip.
What size pilot hole should I drill for a wood screw?
Size it to the screw’s core, not the threads. A common rule of thumb is about 70% of screw diameter in softwood and closer to 90% in hardwood. Test on scrap when using #10 to #12 screws or when the board is thin.
How close to the edge can you screw into wood without splitting?
A practical starting point is at least 2 screw diameters from the edge, with 3 diameters safer in brittle hardwood. The deck-board guidance also uses 1.5 inches from edges for fasteners in that setting. Thin trim often needs even more room. [Building-code/fastener installation guidance; USDA Forest Service, Forest Products Laboratory]
Should I use coarse-thread or fine-thread screws?
Use coarse-thread screws in softwood and fine-thread screws in hardwood. Coarse threads grab soft fibers well, while fine threads reduce wedging force in dense wood. The wrong thread choice can raise insertion force and make splitting more likely before the head seats.
Do countersink bits help prevent wood splitting?
Yes, when the head would otherwise crush the top fibers or sit proud of the surface. A countersink creates a recess and spreads head pressure over a wider area. It is optional in some softwood joints, but more useful in trim, brittle hardwood, and flush-finish work.
What is the best way to screw into hardwood without cracking it?
Use a fine-thread screw, a pilot hole closer to 90% of screw diameter, and a driver with a low clutch setting. Keep the hole straight and deep enough for the screw length. If the piece is thin, add a countersink and move the hole farther from the edge.
Can self-tapping screws skip the pilot hole in wood?
Sometimes in softwood, but not as a blanket rule. In hardwood, thin stock, or edge fastenings, a pilot hole still reduces splitting and keeps the screw from wandering. Self-tapping points help, but they do not replace hole sizing when the board is fragile.
Sponsored / affiliate links. As an Amazon Associate I earn from qualifying purchases. I may earn additional commission from eligible campaigns.