How To Stain Hardwood Floors Without Sanding (Works Great)
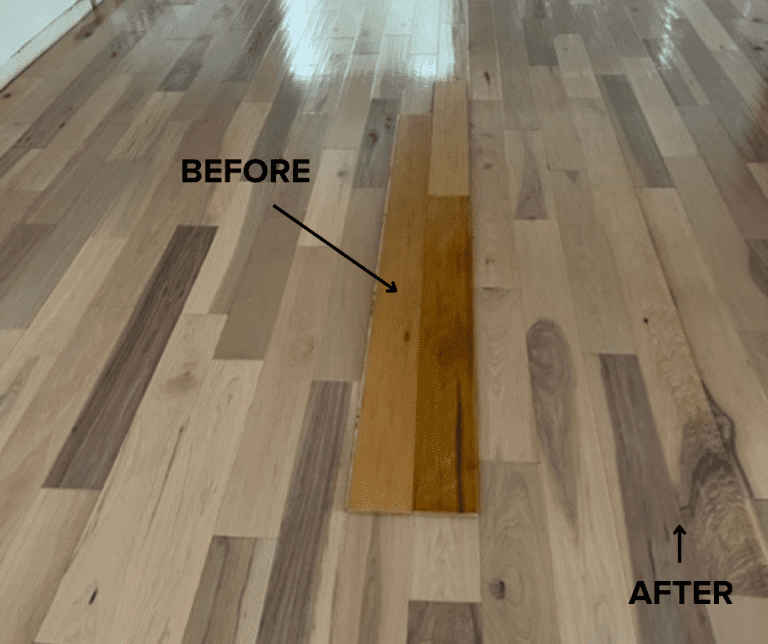
Yes, you can often stain hardwood floors without completely sanding them down to bare wood. Special refinishing products and techniques allow you to refresh and re-stain existing finished floors. This saves time, effort, and money compared to traditional sanding and staining methods.
It’s a great option for floors that are in decent condition but just need a color update.
Understanding the “No-Sand” Stain Option
Most people think staining hardwood floors means you must sand them first. This is true for a brand new, raw wood look or for fixing deep scratches and damage. Sanding takes away the old finish and any old stain.
It creates a smooth, even surface for new stain to soak into. But what if your floors are already in pretty good shape? They might just have a worn-out finish or a color you don’t like anymore.
This is where the “no-sand” method shines.
Instead of removing everything, the idea here is to prep the surface in a less intense way. You’re cleaning it thoroughly. You might even use a liquid degreaser or a special cleaner.
Then, you might use a product that slightly etches or dulls the existing finish. This helps the new stain stick. Think of it like giving your old paint job a good scrub and a light scuff before painting it a new color.
It’s not as deep as a full repaint, but it can work wonders.
There are a few main ways this “no-sand” staining works. Some products are stain-and-seal combinations. Others are stains designed to go over existing finishes.
The key is that they don’t require you to strip the floor down to its natural wood fibers. This makes the whole project much more doable for a DIYer. It’s a fantastic way to refresh your floors and change their look without a major renovation.
One thing to remember is that “no-sand” methods are best when your existing floor is in decent shape. If you have deep gouges, warped boards, or significant water damage, you might still need to sand. But for a color change or a worn finish, this approach can be a real game-changer.
It’s all about choosing the right method for your floor’s condition.
My Own “Uh Oh” Moment with Staining
I remember one time, years ago, I decided to give my living room floors a new look. They were a light, almost honey-colored oak. I wanted something warmer, like a rich walnut.
I’d seen plenty of tutorials on sanding floors. They looked so dusty and hard. I thought, “There has to be an easier way.” So, I found a product that claimed to stain hardwood floors without sanding.
It sounded too good to be true, and honestly, it almost was.
I followed the instructions to a T. Clean the floor really well, wipe it down, and then brush on the stain. I did a small section first.
It looked… okay. A little patchy. But I figured one coat wouldn’t be enough.
I kept going, my excitement fading with each brushstroke. By the time I finished the room, it looked like a toddler had finger-painted on my floors. Some areas were dark, others were barely changed, and there were visible brush marks everywhere.
I felt a knot of panic in my stomach. It was worse than before!
What I learned that day was crucial. The “no-sand” method isn’t a magic wand. It requires meticulous prep.
My “cleaning” wasn’t enough. The old wax and grime were still there. The product couldn’t get to the wood properly.
It just sat on top, looking awful. I ended up having to rent a floor buffer with a special pad to rough up the surface just enough. Then I reapplied the stain.
It wasn’t perfect, but it was a thousand times better. That experience taught me that even the “easy” ways need respect and careful attention to detail.
Why “No-Sand” Might Be Your Best Bet
Saves Time: No need for hours of sanding.
Less Mess: Avoids the huge dust clouds.
Cost-Effective: Cheaper than renting heavy sanding equipment.
DIY Friendly: Often simpler for homeowners.
Good for Minor Updates: Perfect for changing color or refreshing worn finishes.
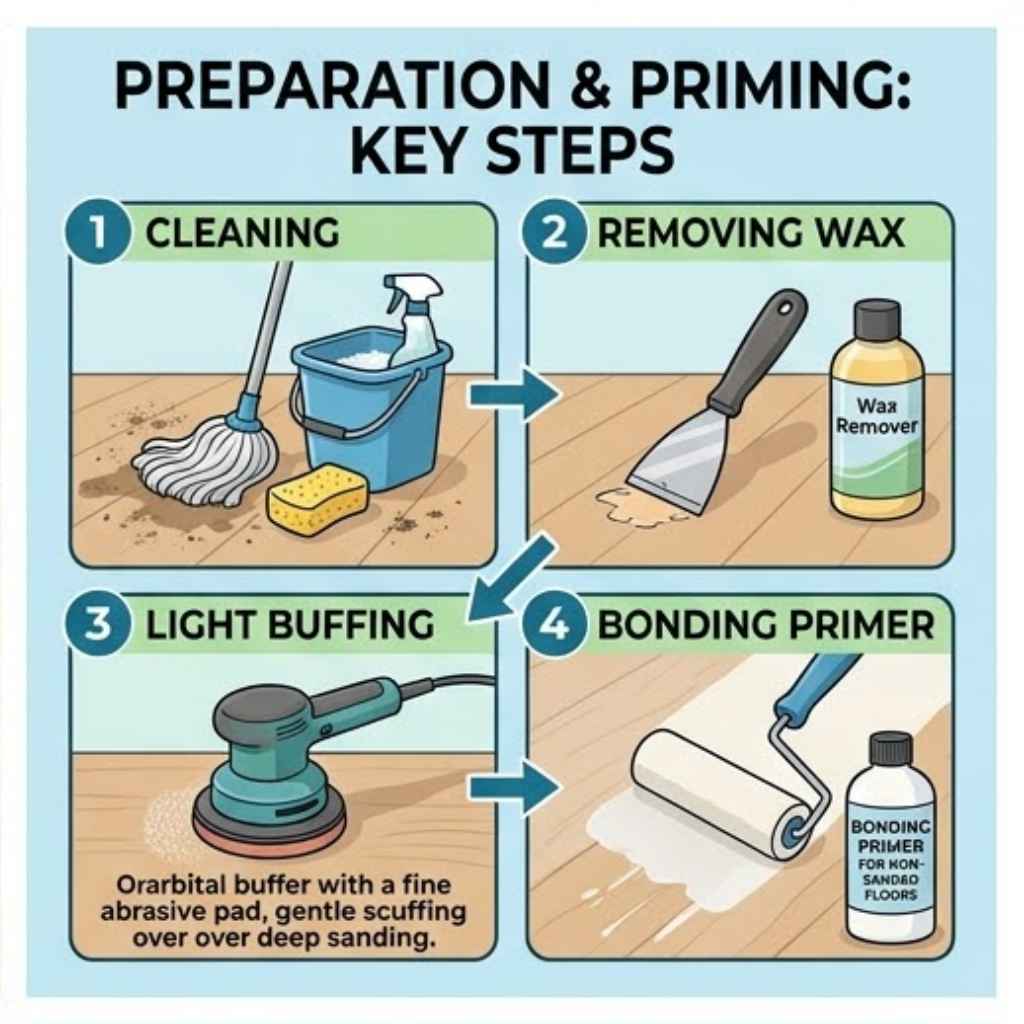
Prep Work is Key: The Foundation of Success
This is where most people stumble when they try to stain hardwood floors without sanding. The cleaner and better prepped the surface, the better the stain will look. You can’t just mop your floor and expect magic.
You need to be thorough. This prep work is probably the most important step you’ll take.
First, you need to clear the room. Move all furniture out. If that’s not possible, move it to the center and cover it with plastic sheeting.
Then, vacuum every nook and cranny. Get under baseboards and into corners. Use a brush attachment on your vacuum.
Next, you need to deal with any existing finish. If your floors are waxed, you’ll need a wax remover. If they’re just dusty or have a polyurethane finish, you need a good degreaser.
Products like mineral spirits or a TSP (Trisodium Phosphate) substitute cleaner can work well.
You’ll need to clean the floor multiple times. After applying the degreaser or cleaner, you’ll wipe it up with clean rags. You might need to rinse with plain water and a damp mop.
Let it dry completely. Any residue left behind will block the stain. Think of it like trying to put a sticker on a greasy window.
It just won’t stick well.
Some “no-sand” products recommend a light scuff-sanding. This isn’t the same as full sanding. It’s usually done with a pole sander and a fine-grit paper (like 150 or 220 grit).
The goal is just to dull the shine of the old finish slightly. This gives the new stain something to grip onto. If your product doesn’t require it, you can skip this.
But if you notice a thick, glossy layer, a light scuff can make a big difference. Always follow the specific product instructions.
After any scuff-sanding, you must vacuum again. Then, wipe the floor down with a tack cloth. A tack cloth is a sticky cloth that picks up the tiniest bits of dust.
This is crucial. Even a few dust specks can ruin the finish. So, take your time here.
This thorough prep work sets the stage for beautiful results.
Quick Prep Checklist:
- Clear the room completely.
- Vacuum thoroughly.
- Use a degreaser or wax remover.
- Wipe and rinse clean.
- Let dry completely.
- (Optional) Light scuff-sand if recommended.
- Vacuum again.
- Wipe with a tack cloth.
Choosing the Right “No-Sand” Product
The world of floor finishes can be confusing. For “no-sand” staining, you have a few main types of products to consider. Each works a bit differently.
Knowing which one to pick depends on your floor’s current condition and the look you want.
One popular option is a gel stain. Gel stains are thicker than traditional wood stains. This means they sit more on the surface rather than soaking deep into the wood.
They are often used over existing finishes. Because they are thick, they tend to be less streaky. They also offer good color coverage.
Some gel stains can be applied directly over a clean, prepped polyurethane finish. You might still need a topcoat after applying them.
Another type is a stain-and-seal combination. These products combine the color of a stain with the protective layer of a sealant, like polyurethane. They are designed for convenience.
You apply one product, and it stains and protects. These are often very user-friendly. However, they might not offer the same depth of color as a traditional stain plus a separate topcoat.
Also, check if they are compatible with your existing floor finish.
Some companies offer refinishing kits that are specifically made for “no-sand” application. These kits usually include a cleaner, a scuff pad, and the stain or colorant. They are designed to work together.
Following the kit’s specific instructions is usually the best way to get good results with these products. They take a lot of the guesswork out of the process.
Finally, there are some newer water-based stains that are formulated for easier application over existing finishes. These can be a good option if you’re sensitive to the fumes of oil-based products. Always read the product label carefully.
It will tell you what kind of finish it’s designed to go over and if sanding is required or recommended. Pay attention to the expected durability and the type of topcoat needed, if any.
My best advice here? If you are unsure, buy a small test can of the product. Try it on an inconspicuous spot, like inside a closet or under a rug.
This way, you can see how it looks and how it applies before you commit to the whole room. This small step can save you a lot of heartache.
Product Spotlight: Gel Stains
What they are: Thick, opaque stains.
Why they work for no-sand: Sit on top, good coverage, less streaky.
Best for: Changing color on pre-finished floors.
Need to know: May require a topcoat.
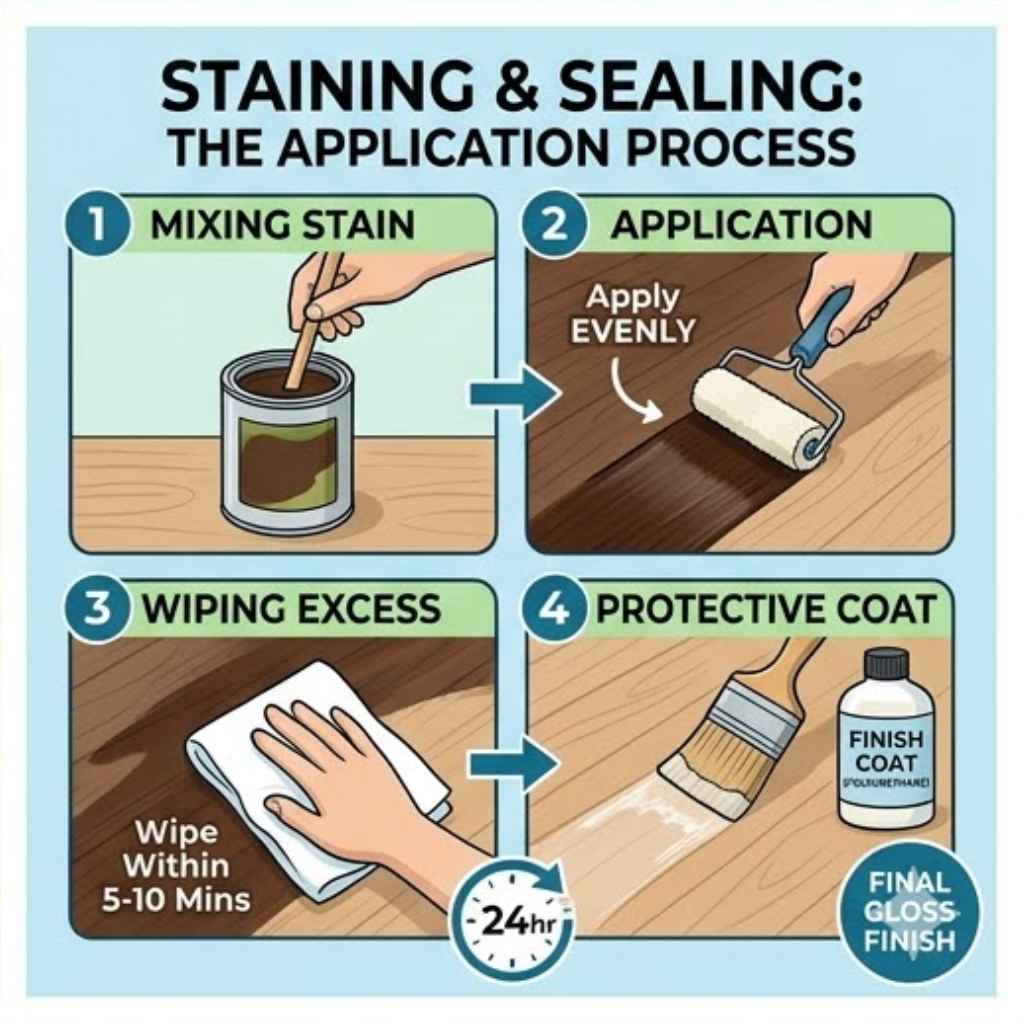
Applying the Stain: Patience and Precision
Once your floor is prepped and you have your product, it’s time for the fun part – applying the stain! This is where your careful prep work really pays off. It’s also where you need to be patient.
Rushing this step can lead to uneven color and visible mistakes.
Start in a corner of the room, usually the one farthest from your exit. Work your way backward out of the room. This way, you won’t have to walk on the wet stain.
You’ll likely need a good quality synthetic brush or a foam applicator. Some people prefer a cloth for applying gel stains, similar to how you’d apply furniture stain.
If you’re using a brush, apply the stain in long, even strokes. Follow the direction of the wood grain. Don’t brush it on too thickly.
You want a thin, even coat. As you go, keep an eye out for any drips or puddles. Wipe them up immediately with a clean rag.
If you’re using a cloth, apply the stain in a circular motion, then smooth it out with the grain.
Work in small sections. This is really important. Don’t try to stain the whole floor at once.
Aim for maybe a 3×3 foot area. Apply the stain, smooth it out, and then move to the next section. Overlap slightly with the previous section.
This helps avoid lap marks, which are those dark lines where one section of stain meets another that has already started to dry.
If you’re using a gel stain or a stain that requires wiping off excess, do so according to the product instructions. Some stains need to sit for a few minutes before wiping. Others need to be wiped off almost immediately.
The goal is to get an even color. If you’re not happy with the color after the first coat, let it dry completely. Then you can apply a second coat for a deeper shade.
Humidity and temperature can affect drying times. Always check the product label for specific drying and recoating times. Don’t rush it.
Trying to apply a second coat too soon can cause the first coat to lift or become streaky. It’s better to wait an extra hour or two than to have to fix a mess.
One technique I’ve found helpful is to have plenty of clean rags on hand. You’ll go through them quickly, especially if you need to wipe off excess stain. Keep a trash bag nearby for used rags.
Be aware that some stain-soaked rags can be a fire hazard. Check product safety information and lay them flat to dry outdoors or soak them in water before disposal.
Application Tips for a Smooth Finish:
- Work from the farthest corner out.
- Apply thin, even coats.
- Follow the wood grain.
- Work in small sections.
- Wipe up drips immediately.
- Use plenty of clean rags.
- Check drying times carefully.
The Crucial Topcoat: Protection and Polish
Once your stain is dry, you’re not quite done yet. The stain itself is just color. It doesn’t offer any protection against wear and tear.
For hardwood floors, this means you absolutely need to apply a topcoat. This is usually a clear protective finish, most commonly polyurethane.
There are two main types of polyurethane: oil-based and water-based. Oil-based polyurethanes are known for their durability and rich, amber tone, which can deepen the color of your stain. However, they have strong fumes and take longer to dry.
Water-based polyurethanes dry much faster, have low odor, and dry clear, meaning they won’t alter the color of your stain. They are also generally more resistant to yellowing over time.
You’ll need to apply multiple coats of the topcoat. Most manufacturers recommend at least two, and often three, coats for good durability. Make sure the stain is completely dry before you start applying the topcoat.
Check the stain’s drying time on the product label.
Apply the topcoat using a high-quality synthetic brush or a lambswool applicator. Again, work in long, even strokes with the grain of the wood. Avoid applying it too thickly.
Too much topcoat can lead to a sticky or uneven finish. You want thin, even layers. Each coat should dry thoroughly before you apply the next.
Some manufacturers recommend a light sanding with very fine grit sandpaper (like 220 or 320) between coats. This isn’t to remove the topcoat, but to smooth out any imperfections and give the next coat something to adhere to. Always vacuum and tack cloth after sanding between coats.
Be mindful of foot traffic during the drying process. You can usually walk on the floor with socks on after about 24-48 hours. But it can take several days, or even up to 30 days, for the finish to fully cure and reach its maximum hardness.
During this curing period, be extra gentle with your floors. Avoid dragging furniture. Use felt pads under any furniture legs.
The right topcoat will seal in your beautiful new stain color. It will also protect your floors from spills, scuffs, and everyday wear. This step is non-negotiable for the longevity and appearance of your “no-sand” stained floors.
It’s the final polish that makes everything look professional and last for years.
Topcoat Essentials:
Purpose: Protects stain, adds durability.
Types: Oil-based (rich color, strong fumes) vs. Water-based (fast dry, low odor, clear).
Application: Multiple thin, even coats.
Drying/Curing: Allow proper time before full use.
Sanding: Lightly sand between coats if recommended for smoothness.
When “No-Sand” Is (and Isn’t) the Right Choice
It’s important to be realistic about what “no-sand” staining can achieve. It’s a fantastic method, but it’s not a miracle cure for every flooring problem. Understanding its limitations will save you frustration and ensure you get the best possible outcome.
“No-Sand” is great when:
- Your existing floor finish is in good condition. No major peeling, deep scratches, or water damage.
- You want to change the color of your floors but keep the existing sheen.
- You’re on a budget and want to save money on professional sanding or equipment rental.
- You don’t have a lot of time for a major renovation.
- You are comfortable with a slightly less perfect finish than a full sand and stain job might offer. (Though with careful work, it can look very close!)
“No-Sand” is NOT the best choice when:
- Your floors have deep scratches, gouges, or dents. These will still be visible under the stain.
- There is significant wear through the finish, showing bare wood in many spots.
- You have old wax finishes that are difficult to remove completely.
- There are signs of water damage, like warping or dark stains. These usually require sanding to address.
- You want a completely smooth, raw wood look. “No-sand” methods work over an existing finish.
- You have very old or delicate wood floors that might not withstand even light preparation.
In situations where “no-sand” isn’t ideal, a full sand and stain is the way to go. It’s more work, but it offers a fresh start. It can fix almost any existing floor issue and gives you the most control over the final look.
But for many common situations, the “no-sand” method is a surprisingly effective and accessible solution.
Contrast Matrix: “No-Sand” vs. Full Sanding
| “No-Sand” Method | Full Sanding Method |
| Best for refreshed color or minor wear. | Best for deep damage, raw wood look, or complete repair. |
| Less mess, less time, less cost. | More mess, more time, more cost. |
| Works over existing finish. | Removes old finish down to bare wood. |
| Results may vary based on existing finish. | Results are highly predictable. |
Common Issues and How to Avoid Them
Even with the best intentions, things can go sideways. Knowing the common problems with “no-sand” staining can help you prevent them. And if they do happen, you’ll know how to fix them.
Issue: Patchy or Uneven Color. This is the most common problem. It usually happens because the floor wasn’t prepped well enough. Old wax, grease, or dirt can block the stain.
Or, the stain was applied unevenly. How to avoid: Meticulous cleaning and degreasing are key. Apply stain in thin, even coats.
Work in small sections and feather the edges. Don’t let stain dry in puddles. If it’s patchy, you might need a second coat, applied evenly.
Sometimes, a gel stain can help mask slight patchiness due to its opacity.
Issue: Streaks or Lap Marks. These are those visible lines where one application of stain meets another. They happen when you overlap wet and dry areas. How to avoid: Work quickly but carefully.
Maintain a “wet edge” by overlapping slightly into the previously stained section. Always work with the grain. If you see a lap mark forming, try to blend it out immediately with a clean brush or rag.
Issue: Stain Not Sticking or Peeling. This usually means the surface wasn’t clean or prepped properly. The stain is sitting on top of a slick, old finish. How to avoid: Ensure thorough cleaning.
If the product calls for it, do a light scuff-sand. This dulls the existing finish and gives the stain something to grip. Make sure you vacuum and tack cloth after any scuffing.
Issue: Bubbling or Fisheyes in Topcoat. These are small craters in the clear finish. They are usually caused by silicone contamination. Silicones can be found in some cleaning products, polishes, or even furniture waxes.
How to avoid: Use specific floor cleaners designed for prep. Avoid household cleaners that might leave residue. Always use tack cloths to remove all dust before applying the topcoat.
If you suspect contamination, clean the floor again with mineral spirits and let it dry completely.
Issue: Color is Too Light or Too Dark. This is about color choice and application. How to avoid: Test your stain in an inconspicuous area first. Gel stains often build color with multiple coats.
If you want a darker color, apply a second or third coat after the first has dried. If it’s too dark, it’s harder to fix without sanding. This is why testing is so vital.
Remember, these floors are still hardwood. They are subject to wear and tear. The “no-sand” method refreshes them, but it doesn’t make them invincible.
Regular maintenance with appropriate cleaners and protective pads on furniture will help keep them looking great.
Troubleshooting Quick Guide:
Problem: Patchy Color
Solution: Better prep, thin even coats, test first.
Problem: Streaks
Solution: Maintain wet edge, work with grain, blend quickly.
Problem: Stain Not Sticking
Solution: Thorough cleaning, scuff-sand if needed, tack cloth.
Problem: Bubbles in Topcoat
Solution: Check for silicones, use proper cleaners, tack cloth.
Real-World Scenarios: Who Benefits Most?
Let’s look at some actual homes and see how the “no-sand” staining method makes a difference. These are situations where this approach truly shines.
Scenario 1: The Young Family’s Refresh. A family with two small children has floors that are functional but a bit dated. They’re a light oak with a worn finish from everyday play. They don’t have the budget or the time for a full reno.
They decide to use a dark walnut gel stain. They follow all the prep steps meticulously, clean everything spotless, and apply the stain. They then add two coats of water-based polyurethane.
The result? Their living room looks brand new. The darker color hides scuffs better, and the new finish is more durable.
It feels like a whole new home without the huge expense.
Scenario 2: The Renter’s Upgrade. Someone renting an apartment or a house has floors they dislike. They want to make the space feel more “theirs” without making permanent, major changes. A “no-sand” stain product that is known to be removable or compatible with a simple topcoat might be an option.
They could apply a stain over the existing finish, then a clear coat. This makes the space feel updated. When it’s time to move, they might be able to remove the finish carefully or leave it as an upgrade for the next tenant.
Scenario 3: The Condo Color Change. An empty-nester couple is downsizing into a condo. The floors are a golden maple, which they find too yellow. They want a more modern, gray-toned wood look.
They use a gray-toned gel stain over their existing finish. They carefully prep, apply the stain, and then seal it. This instantly updates the condo’s aesthetic.
It’s a much faster and less disruptive process than sanding would be in a condo setting, where noise and dust can be major issues.
Scenario 4: The Quick Flip. A homeowner is selling their house. The floors are generally okay but look tired. A quick “no-sand” refresh can add significant visual appeal without a huge investment of time or money.
A neutral, popular color like a medium brown or a slightly grayish tone can appeal to a wide range of buyers. This quick update can make a big difference in perceived home value.
These examples show that the “no-sand” method is highly practical. It’s about achieving a significant aesthetic upgrade with less effort. It’s about making your home feel more beautiful and updated without tearing everything apart.
The key is always good preparation and choosing the right product for your specific floor.
Who Benefits Most?
- Homeowners wanting a color update.
- Renters seeking temporary aesthetic improvements.
- DIYers looking for a manageable project.
- People on a tight budget.
- Sellers wanting to boost home appeal.
Maintenance for Your Newly Stained Floors
You’ve put in the work, and your floors look amazing! Now, how do you keep them that way? Proper maintenance is key to ensuring your newly stained and finished hardwood floors last for years to come.
It’s not difficult, but it does require some attention.
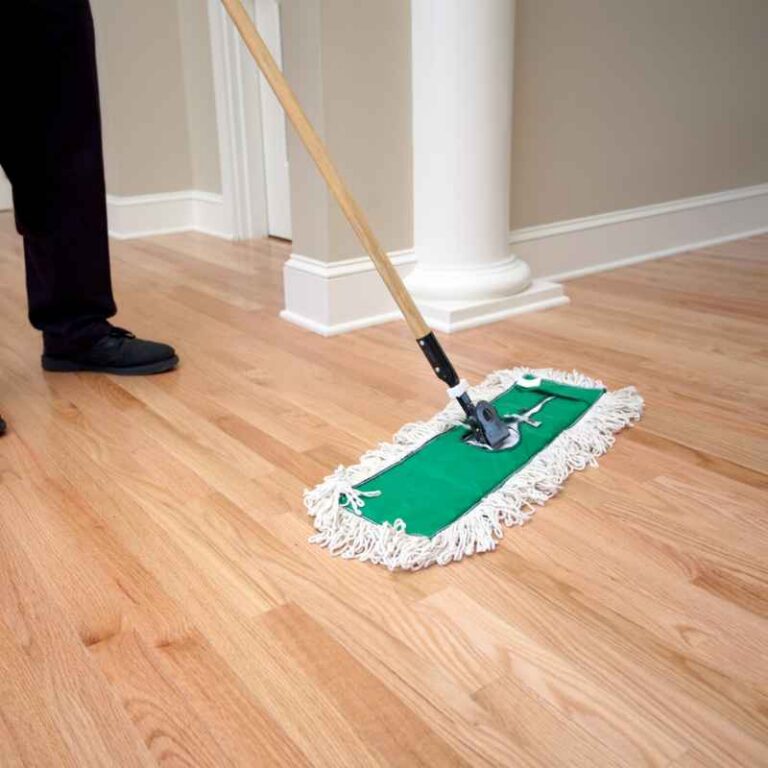
Regular Cleaning: The best way to clean your floors is with a dry microfiber mop. This picks up dust and debris without scratching. For slightly dirtier floors, use a damp (not wet!) mop.
Use a cleaning solution specifically made for hardwood floors. Avoid using too much water, as excess moisture can damage the wood and the finish. Never use steam mops, as the heat and moisture can be harmful.
Avoid Harsh Chemicals: Steer clear of ammonia-based cleaners, abrasive powders, or all-purpose cleaners not approved for hardwood floors. These can dull the finish or even damage the stain. Stick to pH-neutral cleaners designed for wood.
Always check the manufacturer’s recommendations for your specific finish.
Protect from Scratches: Place felt pads under all furniture legs. This is super important. Regularly check the pads and
Manage Spills Immediately: Wipe up any spills as soon as they happen. Even water can leave a mark or damage the finish if left to sit for too long. Have a clean cloth or paper towel handy.
Be Mindful of Sunlight: Prolonged exposure to direct sunlight can cause wood floors to fade or discolor over time. Use curtains or blinds to protect your floors from harsh UV rays, especially during peak sun hours.
Avoid Area Rugs with Rubber Backing: Some rubber or latex backing on rugs can react with certain floor finishes and cause discoloration. If you use area rugs, opt for ones with breathable fabric backing or use a rug pad specifically designed to be safe for hardwood floors.
Recoating: Over time, even the best finish will show signs of wear. Depending on traffic, you might need to recoat your floors every few years. This usually involves a light cleaning and then applying another coat or two of your chosen topcoat (polyurethane).
This maintenance step can renew the protection and appearance of your floors without needing to restain or sand again.
By following these simple maintenance tips, you can keep your “no-sand” stained hardwood floors looking beautiful and protected for many years to come. It’s about consistent, gentle care.
Floor Care Quick Tips:
- Dry mop daily.
- Damp mop with hardwood cleaner weekly/as needed.
- Use felt pads on furniture.
- Wipe spills immediately.
- Protect from direct sun.
What This Means for You
Learning how to stain hardwood floors without sanding opens up a world of possibilities for your home. It means you don’t have to be afraid of tired-looking floors. You have a more accessible, less intimidating option to refresh their look.
This method can boost your home’s appeal and your own satisfaction with your living space.
It means you can likely tackle a project that might have seemed too big before. With the right product and careful preparation, you can achieve beautiful results. You can change the color to match your decor or simply bring back a vibrant look to worn-out wood.
Remember, this method works best on floors that are already in decent shape. It’s about updating, not major repair.
This knowledge empowers you to make informed decisions about your flooring. You can weigh the pros and cons of “no-sand” versus full sanding. You understand that meticulous cleaning and following product directions are the keys to success.
It means you can potentially save money and time while still achieving a stunning transformation.
Frequently Asked Questions
Can I really stain my floors without any sanding at all?
Yes, in many cases. You can often use products like gel stains or special refinishing kits that are designed to adhere to existing finishes. The key is very thorough cleaning and preparation.
Some methods might recommend a very light scuff-sanding to help the stain grip, but it’s not the same as full sanding down to bare wood.
What kind of floors can I stain without sanding?
This method works best on hardwood floors that have an intact polyurethane or similar durable finish. Floors that are heavily damaged, have peeling finishes, or significant water damage will likely still require traditional sanding. Always check the specific product’s compatibility with your existing floor type.
How long will “no-sand” stained floors last?
With proper application and maintenance, the stain and topcoat can last for many years. The durability depends heavily on the quality of the products used, the thoroughness of the prep work, and how well you maintain the floors afterward. Expect them to be as durable as any other finished hardwood floor.
Will the “no-sand” stain hide scratches on my floor?
A darker or more opaque stain, like a gel stain, can help to camouflage minor surface scratches. However, deep gouges or dents will still be visible as they affect the wood itself. This method is more about changing the color and refreshing the finish, not major repair.
Do I need to use a topcoat after applying the “no-sand” stain?
Absolutely, yes. The stain itself is just color; it provides no protection. You must apply at least two coats of a clear protective finish, such as polyurethane, to seal the stain and protect your floors from wear and moisture.
Can I use any stain over my existing floor finish?
No, not just any stain. You need to use specific products designed for application over existing finishes, such as gel stains or specialty refinishing products. Traditional wood stains are meant for raw wood and will not adhere properly to a finished surface without sanding.
Conclusion
Updating your hardwood floors doesn’t always require the daunting task of full sanding. By understanding the “no-sand” method and dedicating yourself to thorough prep work, you can achieve a beautiful new look. This approach offers a more accessible, time-saving, and budget-friendly way to refresh your home’s foundation.
Enjoy your beautifully transformed floors!