Screw Repair and Tools Guide: Least-Damage Fixes
For screw repair, start with the least destructive move: match the bit, add hand pressure, and stop once the bit starts camming out or slipping, then switch tools or repair method. Keep forcing it and you strip heads, tear threads, split wood, or turn a five-minute fix into drilling and patching. I use this screw repair and tools guide as a decision tree for stripped, seized, loose, painted-over, and thread-damaged screws in wood, drywall, and metal.
Start here: diagnose the screw before you touch it


Separate head damage, thread damage, and base-material failure
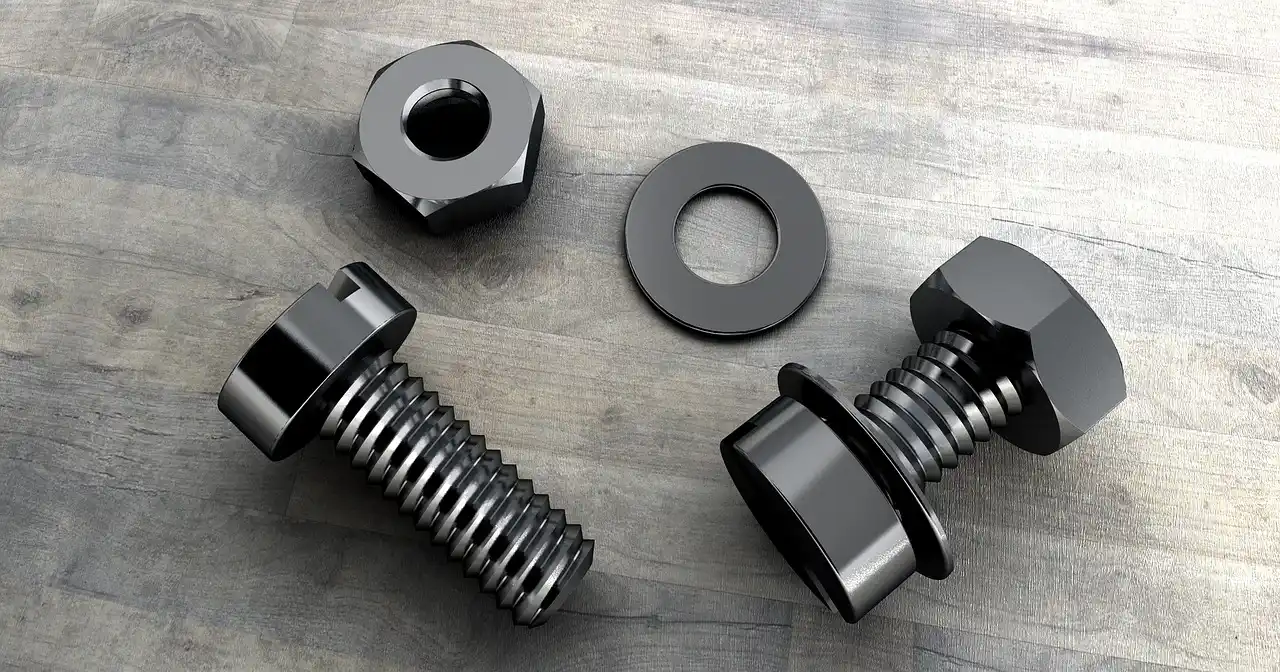
A screw is a threaded fastener with spiral threads on the outside of its shank, tightened or removed by applying torque at the head. Most screws tighten clockwise, called a right-hand thread. Those basics matter less than the first call you need to make: is the failure in the drive recess, the screw threads, or the material holding the screw?
Head damage means the bit slips in the drive. Thread damage means the screw turns without clamping, binds halfway, or cross-threads. Base-material failure means the wood fibers, drywall core, or metal threads are no longer holding.
Treating all three the same is how repairs go bad fast. A stripped Phillips head in steel needs a different fix than a loose hinge screw in a pine jamb.
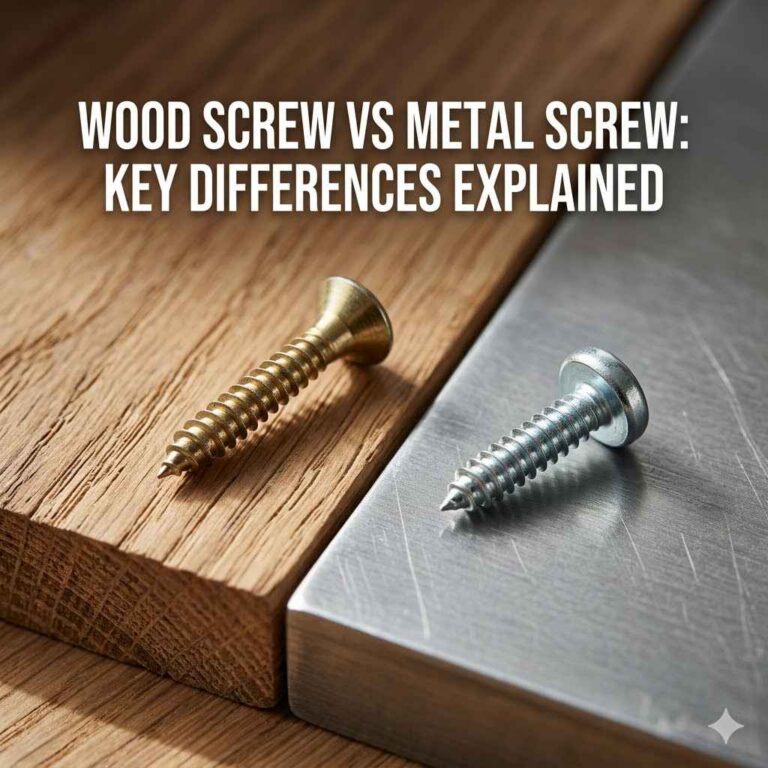
What changes with wood, drywall, and metal
Wood usually fails by crushed fibers, split grain, or an oversized pilot hole. Drywall fails by paper tear-out or a blown-out cavity. Metal fails by seized threads, galling, or internal thread damage.
The stop points change too. In wood, stop when the screw starts lifting fibers or the surrounding stock begins to split. In drywall, stop when the paper face wrinkles or spins. In metal, stop at repeated slip, rising heat, or signs of broken tool steel.
Safe first moves before adding torque
- Identify the drive type and clean the recess fully.
- Confirm whether the head is damaged or only clogged with paint, rust, or debris.
- Seat the correct bit by hand before using a drill or driver.
- Use steady inward pressure and low speed.
- Stop after the second cam-out or the first clear slip.
A screw drive is the shaped recess or external form where the tool engages the screw to turn it. The head is usually broader than the shank and thread, so damage often starts there because that is where all the turning force enters.
How do I tell which screwdriver bit fits this screw head?
Match the recess shape first, then confirm full tip contact before adding torque. The right bit should seat deeply, sit square, and resist wobble when twisted by hand. If it rocks, bottoms out too early, or needs force to stay centered, it is the wrong bit or a worn bit.
Visual ID for common screw head types
Slotted has one straight slot across the head. I see it most on older hardware and trim plates, and it slips easily if the blade is too narrow, too wide, too thick, or too thin.
Phillips has a cross-shaped recess with tapered walls. It is common in general household hardware and drywall screws. It cams out more readily than Torx or square.
Pozidriv looks close to Phillips at first glance, but it has extra smaller marks between the main cross slots. It is common on cabinet hardware, European hinges, and many imported screws.
Torx has a six-lobed star recess. It gives strong bit engagement and better cam-out resistance, so it is common in deck screws, structural screws, and appliance work. (en.wikipedia.org)
Square has a square recess, often called Robertson. It holds the bit well and shows up in cabinetry and some construction screws.
Hex may be an external head for a wrench or an internal socket for a hex key. Common tools for driving screws include screwdrivers, spanners, wrenches, coins and hex keys.
Bit fit checks that prevent cam-out
Press the bit into the recess and look for daylight around the tip. There should be little to no rocking. Turn by hand a fraction before using power. A correct Torx or square bit feels locked in. A correct Phillips still has some play, but it should not climb out under light hand torque.
Bit quality matters. Harder bits hold shape longer, but very hard brittle tips can chip. Impact-rated bits usually tolerate shock better in drivers, while standard bits can be fine for hand tools and low-speed drilling. Replace bits with rounded corners, polished flanks, or a shiny twisted tip, those are common wear signs.
What’s the difference between Phillips and Pozidriv screws?
Phillips and Pozidriv are not interchangeable. Pozidriv has extra ribs between the main slots and a blunter geometry, so a Phillips bit feels loose in it; a Pozidriv bit jams poorly in Phillips. That mismatch strips recesses fast, especially with painted heads, coated screws, or power drivers.
If the bit seems close but keeps rising under pressure, stop and recheck. Many stripped “Phillips” heads are actually Pozidriv.
Why do screws strip, seize, or loosen in the first place?
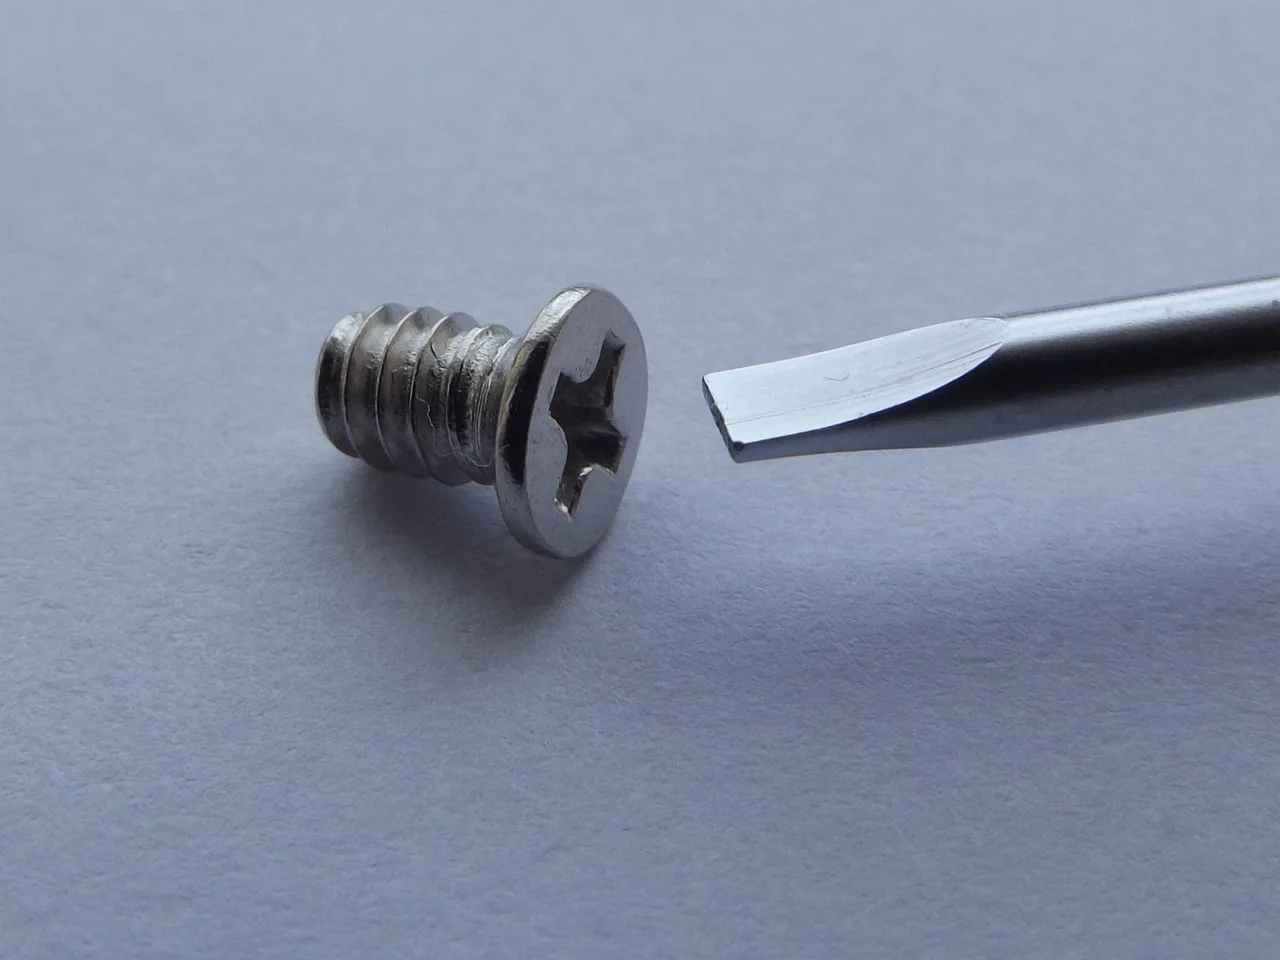
Screws fail when torque exceeds what the drive, threads, or base material can hold. The usual causes are poor bit fit, worn bits, no pilot hole where one was needed, overtightening, repeated removal, rust, paint, and thread damage. The repair choice should target the failure mode, not the symptom.
Cam-out, wrong geometry, and worn driver tips
Cam-out is the bit climbing out of the recess under torque. Phillips is more prone to it by design than Torx or square. Add a worn bit, weak inward pressure, or a tilted driver, and the recess rounds quickly.
Tip geometry matters more than many guides admit. A nearly correct bit can fail faster than an obviously wrong one because it invites extra force before it slips.
Overtightening, missing pilot holes, and split-prone wood
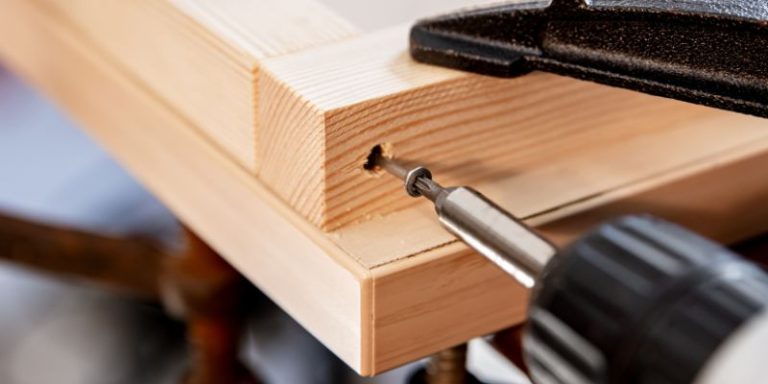
In wood, a pilot hole gives the screw shank a path and leaves enough wood for the threads to bite, which cuts driving torque and lowers the chance of splitting. Thread pitch is the distance between each thread, and coarse wood threads bite differently than fine machine threads. If the pilot is too small, torque rises and heads strip. If the pilot is too large, holding power drops and the joint loosens.
In brittle trim or near board ends, forcing an unpiloted screw often splits the stock before the screw seats.
Rust, paint, thread damage, and repeated removal
Paint fills the recess and hides the drive type. Rust bonds the threads and raises breakage risk. Repeated removal wears wood fibers, deforms drywall holes, and can damage internal metal threads by cross-threading or galling.
The screw mechanism is one of the six classical simple machines, but that does not make every stuck screw a brute-force job. Friction often wins when prep is skipped.
What should I do before trying to remove a stripped screw?
Clean the recess, expose the real drive shape, and improve bit bite before trying extraction. Use hand pressure, low speed, and the best-fitting fresh bit first. If the head slips twice, the shank twists, or surrounding material starts failing, stop and change methods before the damage spreads.
Clean, expose, and reset the bit fit
Pick paint out with a sharp point. Brush rust flakes away. If needed, tap the bit lightly into the recess to seat it. On painted trim or drywall, score the paint ring around the head before turning so the surface does not tear.
If the screw is proud of the surface, grip options improve. If it is flush or countersunk, focus on preserving the recess until extraction becomes necessary.
Lower-risk removal moves before extraction
- Use a new, exact-fit bit.
- Switch from power driver to hand screwdriver for better feel.
- Add firm inward pressure and reduce speed.
- Try slight tightening first to break paint or corrosion.
- Apply penetrating oil for rusted threads and give it time.
- Use light shock on metal fasteners before reaching for an extractor.
Heat can help on all-metal assemblies, but it has limits near finishes, drywall paper, vinyl, glue lines, and plated hardware. Where trim, paint, or composite parts are at risk, lubrication and controlled shock are safer first moves.
Painted-over screw removal without tearing trim or drywall paper
Score the perimeter, clear the recess fully, and test-fit the bit before turning. If the paint bridges the head to the surface, break that bond first. On drywall, tearing the face paper creates a repair bigger than the fastener problem.
When is a screw extractor the right tool to use?
A screw extractor is the right tool when the head is too damaged for a bit to hold, the screw is still worth saving the surrounding material for, and drilling can be kept centered. It is a later-stage move, best after cleaning, bit correction, lubrication, and lower-risk removal attempts have failed.
Extractor kit contents, reverse use, and drill-bit pairing
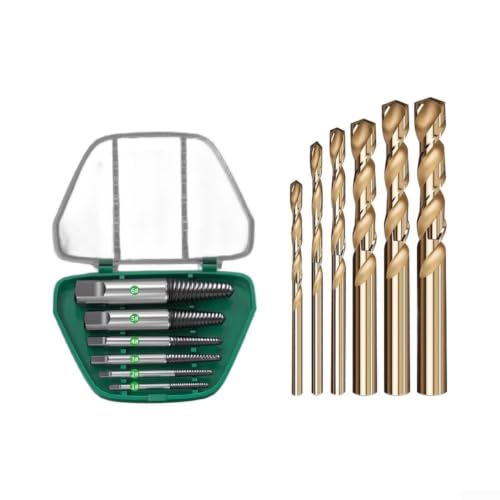
Many extractor kits use a left-hand reverse process: drill a centered hole, then turn the extractor counterclockwise so it bites while backing the screw out. Thread repair kits normally consist of a screw tap, twist drill, install handle, break tool and thread inserts, but extractor kits are different and usually include multiple extractor sizes plus matching drill guidance.
Pair the extractor with the drill bit size called for in the kit. Too small a hole and the extractor wedges so hard it snaps. Too large a hole and it will not bite.
Best cases and poor candidates
Best cases include stripped heads in wood or soft metal where the screw shank is intact and centered drilling is possible. Poor candidates include tiny hardened screws, screws seized hard in steel, off-center countersunk screws, and any job where surrounding finish damage from drilling is unacceptable.
If the screw is rust-welded in place, extraction can fail because the extractor bites harder as resistance rises.
When to stop and switch methods
Stop if the pilot hole drifts off center, the extractor flexes, the screw does not move after a modest turn, or the extractor starts binding. Broken extractors are miserable to deal with because the steel is hard to drill.
At that point, drilling the head off, removing the hardware, and dealing with the remaining shank is often safer than pushing harder.
Matching a screw extractor set to the specific fastener failure
The right screw extractor depends entirely on how the fastener failed. Left-hand drill bits work for stripped heads, spiral-flute extractors grip broken screws, and two-step kits handle rusted or seized hardware. Buying by screw size range, steel hardness, and your ability to drill straight prevents rounded holes, snapped tools, and unnecessary drilling.
A larger kit only adds value if its sizes actually match the job in front of you. Choosing the wrong type turns a quick repair into a much bigger problem. Our guide to the best screw extractor set breaks down which style fits each failure mode, what size range covers typical home repairs, and what material quality separates reliable tools from ones that snap under pressure.
How do I choose the right drill bit size for a pilot hole?
Choose a pilot hole by the screw’s shank and thread size, the material, and whether the screw is cutting new threads or entering a tapped hole. In wood, the pilot should lower driving torque while leaving thread bite. In metal, the bit size must suit either a clearance hole or the tap size.
Bit sizing by screw diameter in wood
For wood screws, compare the bit to the screw body without the threads. The pilot should be close to the shank in dense hardwood and slightly smaller in softwood. The deeper and longer the screw, the more pilot accuracy matters because torque rises along the drive.
Depth control prevents blow-through and overdriving. Tape on the bit can work as a visual marker, but a stop collar is cleaner when finish surfaces matter.
Pilot holes in metal: clearance, tapping, and depth control
In sheet metal, a clearance hole lets the screw pass one layer while threading into the next. For machine screws in thicker metal, drilling for a tap is a separate operation from drilling a clearance hole. Metric and imperial systems should not be treated as interchangeable by guesswork.
Thread repair tools restore damaged, worn, rusted, or cross-threaded internal and external threads. If the original tapped hole is damaged beyond chasing, a thread repair insert may be the better route than an oversized screw.
How pilot size affects grip, torque, and split prevention
Undersized pilots raise torque, increase cam-out risk, and can split thin stock. Oversized pilots reduce grip and make repeat stripping more likely. In metal, a wrong hole size can leave too little thread engagement or break a tap.
For repair work, the best pilot hole is the smallest one that lets the screw seat without distressing the material.
How do I fix a loose screw hole in wood, drywall, or metal?
Fix a loose hole by matching the repair to the material and the load. Wood can often be rebuilt with fibers or a plug, drywall usually needs an anchor or relocation, and metal often needs chased threads, re-tapping, oversizing, or an insert. Filler alone is rarely durable for loaded hardware.
Wood repairs: toothpicks, dowels, plugs, and filler limits
For light-duty wood repairs, glued toothpicks or wood slivers can restore bite. Trim them flush, let the glue cure, and redrill a pilot. This is acceptable for catches, small stops, and light plates, but not for a heavily used door hinge screw.
For hinge screws, strike plates, and load-bearing hardware, drill the damaged hole clean and glue in a dowel or plug. After cure, trim flush and drill a fresh pilot in the correct location. That repair is much more durable because it replaces crushed fibers with continuous wood.
Wood filler works for appearance and very light duty, but it is a poor choice where the screw sees repeated pull or side load.
Drywall repairs: anchors, toggles, relocation, and load limits
If a drywall screw hole has stripped and the fastener carries any real load, use an anchor sized for the item or move to a stud. Toggle-style anchors spread load better in hollow wall than filler. Filler alone is weak for towel bars, shelves, and curtain hardware.
For small picture loads, a fresh anchor in sound material can be enough. For a blown-out hole near other damage, relocation is cleaner than trying to rebuild crushed gypsum.
Metal repairs: chasing, re-tapping, oversizing, and inserts
Start by checking whether the threads are dirty or truly damaged. A chaser or tap may clean minor distortion. If threads are too far gone, re-tap to the next suitable size only if the part has enough material and the mating hardware can change too.
For stronger restoration, use a thread repair insert. Thread repair kits normally consist of a screw tap, twist drill, install handle, break tool and thread inserts. GSR says its thread repair solutions support metric threads, UNC threads, UNF threads, and SAE threads. That matters because the drill and tap sizes must match the thread system exactly.
Helicoil-style repairs are common for restoring internal threads in metal when original size retention matters.
Loose hinge screw repair by material
In a wood jamb, use a glued dowel or plug for the best long-term hold. In MDF, oversize repairs hold less reliably than in solid wood, so a larger insert-style repair plate or relocation may last better. In a metal door frame or cabinet hinge plate, restore the metal threads with re-tapping or an insert rather than stuffing the hole.
Repair decision table: safest first move by damage type
How to use the table
Read across by failure mode, then check the base material. Start with the lowest-risk move in the fourth column. If it fails, move one level right. The stop point matters as much as the tool choice; it is where extra force stops being repair work and starts becoming collateral damage.
| Damage type | Material | Safest first move | Escalation tool | Stop point |
|---|---|---|---|---|
| Stripped Phillips head | Wood | Clean recess, confirm Phillips vs Pozidriv, use fresh exact-fit bit by hand | Left-hand drill bit, then extractor | After 2 cam-outs or head starts mushrooming |
| Stripped Torx head | Deck board wood | Seat fresh Torx bit fully and apply strong inward pressure | Cut slot for hand driver or drill head off | If star lobes round further or board surface crushes |
| Painted-over screw | Drywall or trim | Score paint ring and pick paint from recess | Manual impact or extractor | If drywall paper tears or trim finish chips wide |
| Rusted screw | Metal bracket | Penetrating oil, light shock, exact-fit bit | Heat on metal-only assembly, then extractor | If head twists, tool binds, or finish nearby is heat-sensitive |
| Seized machine screw | Tapped metal hole | Lubricant and slight tighten-then-loosen motion | Left-hand bit, then drill out and restore threads | If screw will not move and extractor load rises sharply |
| Loose hinge screw | Wood jamb | Remove screw, assess hole depth and fiber damage | Glue-and-dowel repair, redrill pilot | If hole is elongated or surrounding wood is split |
| Loose hinge screw | MDF cabinet side | Check for stripped particle core | Oversize screw only for light duty, otherwise repair plate or relocate | If fibers crumble or hinge sees frequent pull |
| Stripped drywall hole | Drywall | Remove loose debris and assess load | Appropriate anchor or toggle, or relocate to stud | If hole edge is crushed wide or item is safety-critical |
| Damaged metal threads | Steel or aluminum part | Chase threads with correct tap if damage is light | Re-tap oversize or install thread repair insert | If tap cuts crooked or wall thickness is too thin |
| Rounded hex socket | Metal | Clean socket and try fresh sharp hex bit | Hammer-in driver bit, extractor, or cut slot | If socket rounds deeper or heat threatens nearby parts |
| Overdrilled pilot hole | Wood | Stop driving and remove screw | Glue plug or dowel, then redrill proper pilot | If screw spins without clamping |
| Split wood at pilot | Hardwood trim | Back screw out and clamp if needed | Glue repair, new pilot farther from edge | If split runs beyond hardware footprint |
| Broken driver bit in recess | Any | Remove fragment with pick or magnet if loose | Micro pliers or drill head off | If fragment is jammed and drilling would damage visible finish |
| Extractor started slipping | Metal | Stop torque immediately | Drill head off or machine-shop removal for hard fastener | Before extractor snaps |
What tools should be in a basic screw repair kit?
A useful screw repair kit covers diagnosis, controlled driving, extraction, drilling, and thread restoration without pushing every problem straight to brute force. The goal is fewer damaged heads and cleaner stop points. Good bits, a driver with feel, and pilot-hole tools matter more than owning every specialty extractor.
Bits, drivers, and torque control tools worth owning
- Fresh slotted, Phillips, Pozidriv, Torx, square, and hex bits in common sizes
- Stubby hand screwdriver and standard handle for inward pressure
- Low-speed drill/driver with clutch
- Impact-rated bits for impact driver use
- Bit holder that keeps the tip square to the head
The clutch on a drill/driver helps prevent repeat stripping during reassembly. For fragile trim and small hardware, hand tools still give better feedback.
Extraction, drilling, and thread repair tools by repair level
- Left-hand drill bits
- Screw extractor set with clear drill pairing
- Center punch or awl for accurate drilling starts
- Twist drill bits for pilot, clearance, and drill-out work
- Tap set and thread chaser for metal repair
- Thread repair insert kit for common internal thread sizes
Thread repair tools restore damaged, worn, rusted, or cross-threaded internal and external threads. Keep metric and imperial tools separated and labeled. Mixing them by eye is a common way to ruin a repairable hole.
Consumables and small accessories
- Penetrating oil
- Paste wax or screw wax for wood driving
- Wood glue, toothpicks, dowels, and plugs
- Drywall anchors and toggles
- Spare screws in matching drive types
- Tape or stop collars for depth control
- Pick, brush, and magnet for cleaning recesses
Frequently asked questions
How do I tell which screwdriver bit fits this screw head?
Identify the recess shape, then test for full seating and low wobble. The bit should sit square, reach full depth, and resist twisting out by hand. If it rocks, rides high, or needs pressure to stay centered before torque is applied, switch bit type or replace a worn tip.
What should I do before trying to remove a stripped screw?
Clear paint, rust, and debris from the recess, score around painted heads, and switch to a fresh exact-fit bit. Then use a hand tool or low-speed driver with strong inward pressure. If the bit slips twice or the surrounding material starts failing, stop and change methods.
When is a screw extractor the right tool to use?
Use an extractor after lower-risk steps fail and only when a centered pilot hole can be drilled safely. It suits damaged heads with an intact shank better than heavily rusted screws locked in steel. Stop early if the extractor binds hard or the pilot hole wanders off center.
How do I choose the right drill bit size for a pilot hole?
Match the pilot to the screw body and the material. In wood, the pilot should lower driving torque while preserving thread bite. In metal, choose either a clearance size or the exact tap-drill size needed for the thread system. Wrong sizing causes weak grip, splitting, or tap failure.
What’s the difference between Phillips and Pozidriv screws?
Phillips has a simple cross recess with more tendency to cam out. Pozidriv adds smaller secondary marks and a different tip geometry that holds better with its matching bit. The two look similar, but mixing them strips heads quickly because the contact surfaces do not align properly.
How do I fix a loose screw hole in wood, drywall, or metal?
In wood, rebuild the hole with glued toothpicks for light duty or a dowel or plug for hinges and loaded hardware. In drywall, use an anchor, toggle, or move to a stud. In metal, chase the threads, re-tap if suitable, or restore the original size with an insert.
Sponsored / affiliate links. As an Amazon Associate I earn from qualifying purchases. I may earn additional commission from eligible campaigns.