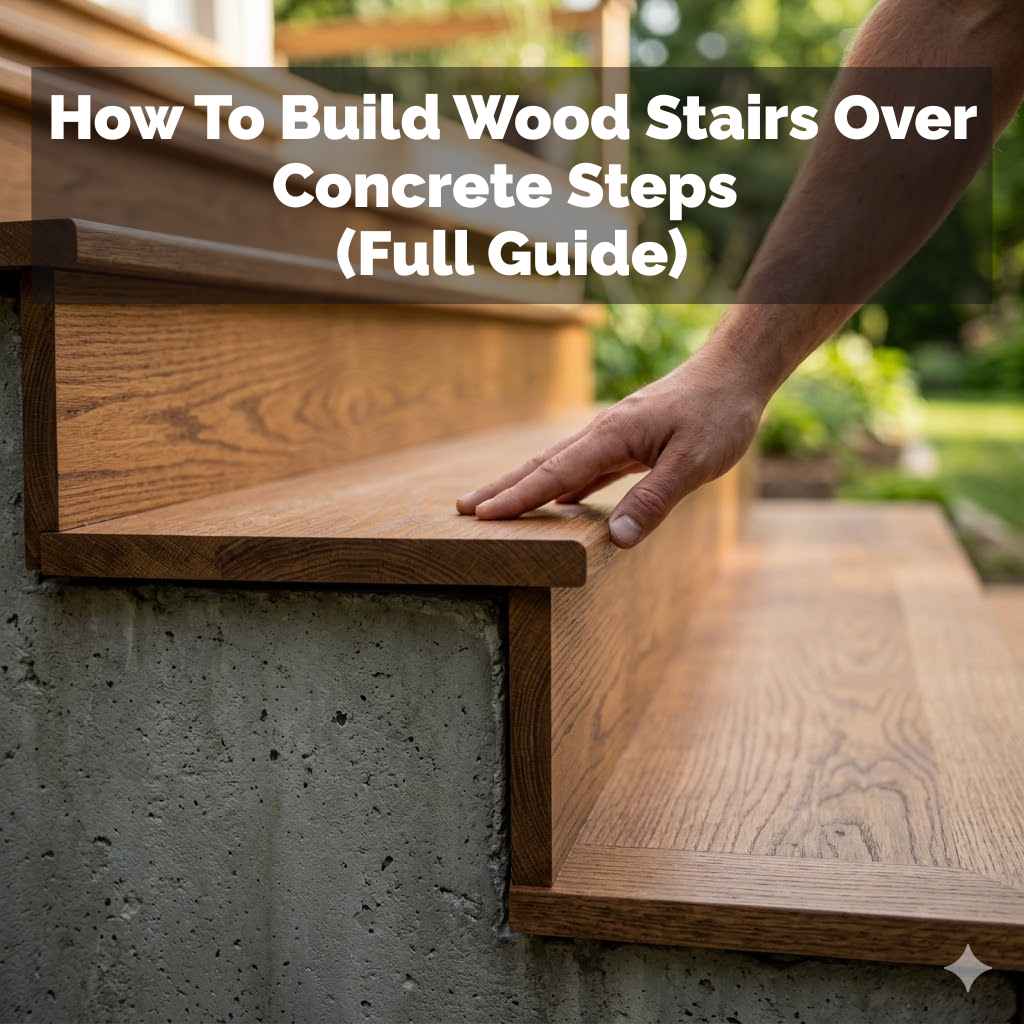
How To Build Wood Stairs Over Concrete Steps (Full Guide)
Building wood stairs over concrete steps involves careful planning and execution. You need to measure accurately, choose the right materials, and secure everything firmly. This process transforms your entrance into something both attractive and safe, improving your home’s look and feel.
Understanding Your Concrete Steps
Before you even think about wood, let’s look at your concrete steps. Are they cracked? Do they slope?
Are they very uneven? These are important questions. You need to know what you’re working with.
Small problems can become big ones later.
Your concrete steps are the base. They must be strong. They must be level.
If they aren’t, you might need to do some repairs first. Filling small cracks is easy. Big structural issues need a pro.
This is key for safety. It’s also key for how your new wood stairs will look and last.
Think about the shape too. Are your concrete steps a simple rectangle? Or are they curved?
Most of the time, they are straight. But if yours are not, this will change how you plan your wood covering. Straight steps are much simpler to cover.
Curves need custom cuts. That takes more skill and time.
Also, consider the height of each concrete step. This is called the rise. And the depth, called the run.
Your new wood stairs will follow these. But you might want to adjust them slightly. For example, you might want a slightly deeper tread.
This makes walking easier. Always check local building codes. They have rules for rise and run.
Why Cover Concrete Stairs with Wood?
Many people choose wood for stairs. It looks warm and inviting. Concrete can feel cold and dull.
Wood adds a natural beauty. It can match your home’s style. You can paint it or stain it.
This gives you many options.
Wood stairs can also feel more comfortable. They often have a bit of give. This is nicer than hard concrete.
Plus, wood can hide imperfections. If your concrete has minor chips or discolorations, wood covers them up well. It’s a great way to refresh an old entrance.
Safety is another big reason. Worn concrete can be slippery. Wood, especially with the right finish or treads, can offer better grip.
It also looks more finished. A beautiful wooden staircase welcomes people. It makes a good first impression for your home.
Finally, it’s often more affordable than ripping out concrete. Removing old concrete can be costly. Building new wood stairs on top is usually less work.
Less work often means less money spent. This makes it a smart choice for many homeowners.
Planning Your Wood Stair Project
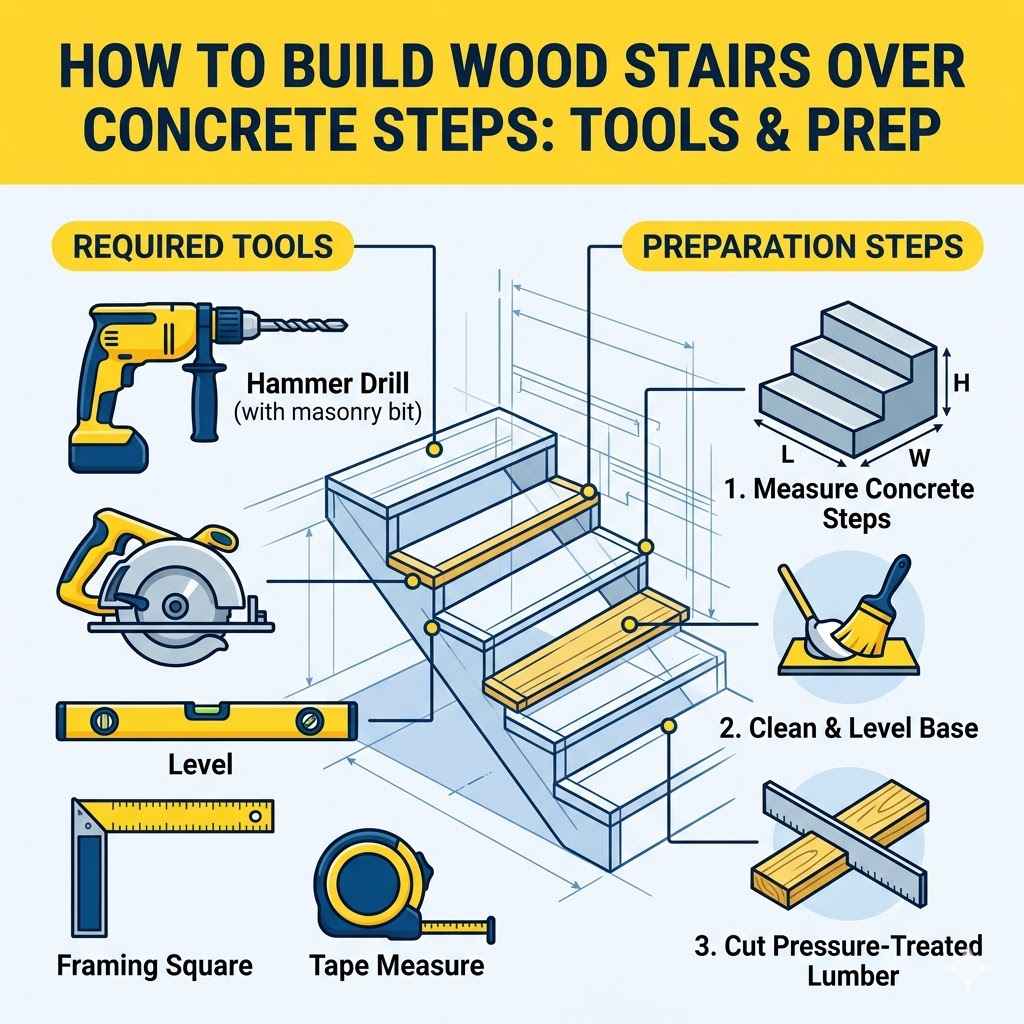
Good planning prevents problems. First, measure everything. Measure the total height.
Measure the width of each step. Measure the depth of each step. Write all these numbers down.
Double-check them. It’s better to measure twice and cut once.
Decide on your wood type. Hardwoods like oak or maple are strong. They last a long time.
They cost more. Softwoods like pine are cheaper. They scratch easier.
They might need more care. Cedar is good for outdoor stairs. It resists rot and bugs.
Consider your budget and how you’ll use the stairs.
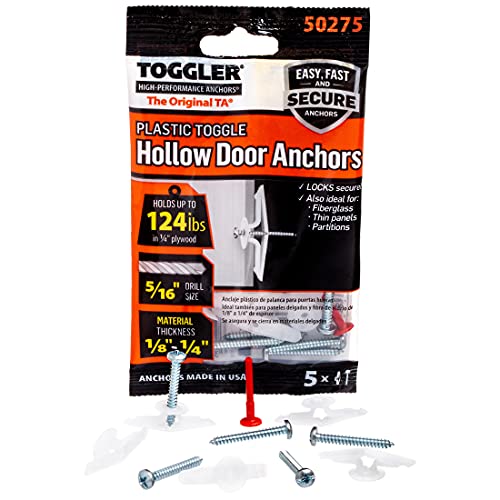
You’ll need to think about fasteners. How will you attach the wood to the concrete? Screws are strong.
But you need special concrete screws. You can also use a strong adhesive. Sometimes, a combination works best.
Your plan should include this. It ensures the stairs are secure.
What about the design? Will you have just treads? Or will you add risers?
Risers are the vertical parts of the step. Treads are the horizontal parts you step on. Most stairs have both.
This makes them look complete. It also adds strength.
Consider safety features. Will you add a railing? This is often required by law.
It’s also a good idea for safety. Think about non-slip strips. These can be added to the treads.
They help prevent slips, especially when wet.
Your plan should also list all the tools you’ll need. Measure twice, plan well. This saves time and money later.
It makes the job much smoother.
Essential Planning Steps
1. Measure: Total height, width, and depth of each concrete step. Note any slopes.
2. Wood Choice: Select wood based on durability, cost, and desired look (e.g., oak, pine, cedar).
3. Fastening Method: Decide on screws, adhesive, or a combination. Get the right type for concrete.
4. Design: Plan for treads, risers, and any decorative elements.
5. Safety: Include railings and non-slip options if needed.
6. Tools: List all necessary tools before starting.
Gathering Your Materials and Tools
Having everything ready makes the job faster. For materials, you’ll need your chosen lumber. Buy a little extra.
Sometimes wood warps or has defects. You’ll also need fasteners. These could be Tapcon screws for concrete or construction screws.
Consider wood glue. A good quality exterior wood glue adds strength. You might need shims.
These are thin pieces of wood used to level things. They are very handy for stairs.
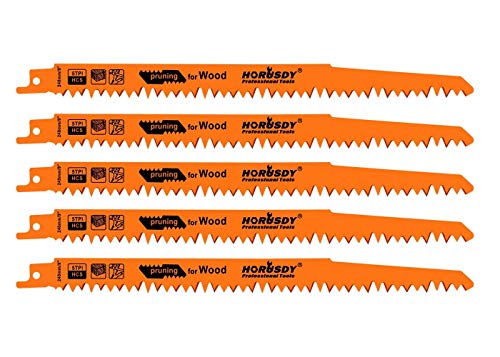
For tools, a good saw is a must. A circular saw or a miter saw works well. You’ll need a tape measure.
A level is crucial. A chalk line helps mark cuts. You’ll need a drill.
A hammer is also useful.
Safety gear is non-negotiable. Safety glasses protect your eyes. Work gloves protect your hands.
Hearing protection is good when using power saws. A dust mask is important when cutting or sanding.
You might need a chisel. This is for cleaning up edges. Sandpaper or a sander helps smooth surfaces.
A utility knife is good for many small tasks. Make sure you have enough screws and drill bits.
If you’re adding risers, you’ll need wood for those too. Consider primer and paint or stain and sealant. These protect the wood and make it look nice.
Buy these based on your design. Having the right tools makes the job safer and gives better results.
Key Materials List
- Lumber for treads and risers (buy extra)
- Concrete screws (e.g., Tapcons) or construction screws
- Exterior wood glue
- Wood shims
- Primer, paint, or stain/sealant
- Optional: Non-slip strips, railing materials
Essential Tools Checklist
- Measuring tape
- Level (2ft and 4ft recommended)
- Circular saw or miter saw
- Drill/driver with bits
- Hammer
- Chisel
- Sander or sandpaper
- Safety glasses, gloves, hearing protection, dust mask
- Chalk line
- Utility knife
Preparing the Concrete Steps
This step is vital for a long-lasting staircase. First, clean the concrete thoroughly. Remove any loose debris.
Sweep it well. If there’s old paint, try to remove it. Use a wire brush.
A pressure washer can also help. Make sure the surface is dry.
Next, check for cracks and holes. Fill them with concrete patching compound. Let it dry completely.
Smooth any rough spots with sandpaper. You want a solid, even surface for the wood to sit on.
If your concrete has an old sealant or wax, it might prevent glue from sticking. You might need to etch the concrete. A mild acid wash can do this.
Follow the product instructions carefully. Always wear protective gear.
Consider the pitch of the concrete steps. They might slope slightly for drainage. If the slope is too much, your wood stairs will be uneven.
You might need to use leveling compound or shims. You want the surface as flat as possible. A good level is your best friend here.
For outdoor stairs, ensure good drainage. Water should not pool on the wood. Think about how water will run off.
Proper preparation means the wood will last longer. It also makes the installation much easier.
I remember working on a project where the concrete wasn’t prepped well. The homeowner had skipped cleaning. There was old paint and some loose bits.
We installed the wood, but it didn’t feel completely solid. A few years later, some boards started to creak. It was a clear sign that the base wasn’t perfect.
It’s a lesson I learned: don’t skip the prep!
Cutting the Wood for Treads and Risers
Now for the fun part: cutting the wood. Measure your first step carefully. You’ll need a tread board and a riser board.
The tread needs to cover the entire depth of the concrete step. It should also overhang slightly at the front. This is called the nosing.
The riser board covers the vertical part. It should fit snugly. Cut your lumber precisely.
Use your chalk line and level to mark your cuts. Make sure your saw is set to the correct angle. Usually, this is a straight 90-degree cut.
For the treads, the length should match the width of the concrete step. Add about 1 inch for overhang. The depth should be enough to cover the concrete depth plus a bit more for the nosing.
A common nosing is 1 inch.
If your steps are not all the same size, measure each one individually. It’s unlikely all concrete steps are perfectly uniform. This is where precision is key.
Cut one tread and one riser. Test fit them on the first step.
Adjust your measurements if needed. Once you have the first set cut perfectly, use them as templates for the others. This speeds up the process.
If you’re using a miter saw, it’s great for making clean, accurate cuts. Make sure your blade is sharp for a smooth finish.
Cutting wood can create a lot of dust. Always wear your dust mask and safety glasses. For outdoor stairs, you might consider using a pressure-treated lumber for the framing parts.
This adds extra protection against moisture and insects.
I had a friend who rushed this part. He just cut everything to the same size. When he went to install them, one step was slightly wider.
He had to make an extra trip to the lumber store. He said it was a frustrating waste of time. It taught me to measure each step, even if they look the same.
Cutting Tips for Accuracy
Measure Twice, Cut Once: Always double-check your measurements.
Use a Guide: A straight edge or clamp helps guide your saw for clean cuts.
Sharp Blade: A sharp saw blade makes a big difference in cut quality.
Test Fit: Try each piece on the step before cutting the rest.
Template: Use a perfectly cut piece as a template for others.
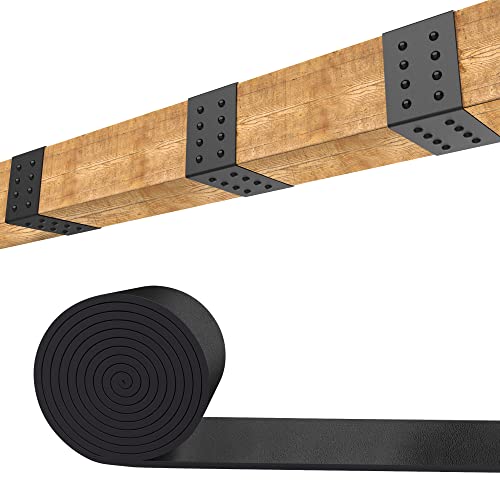
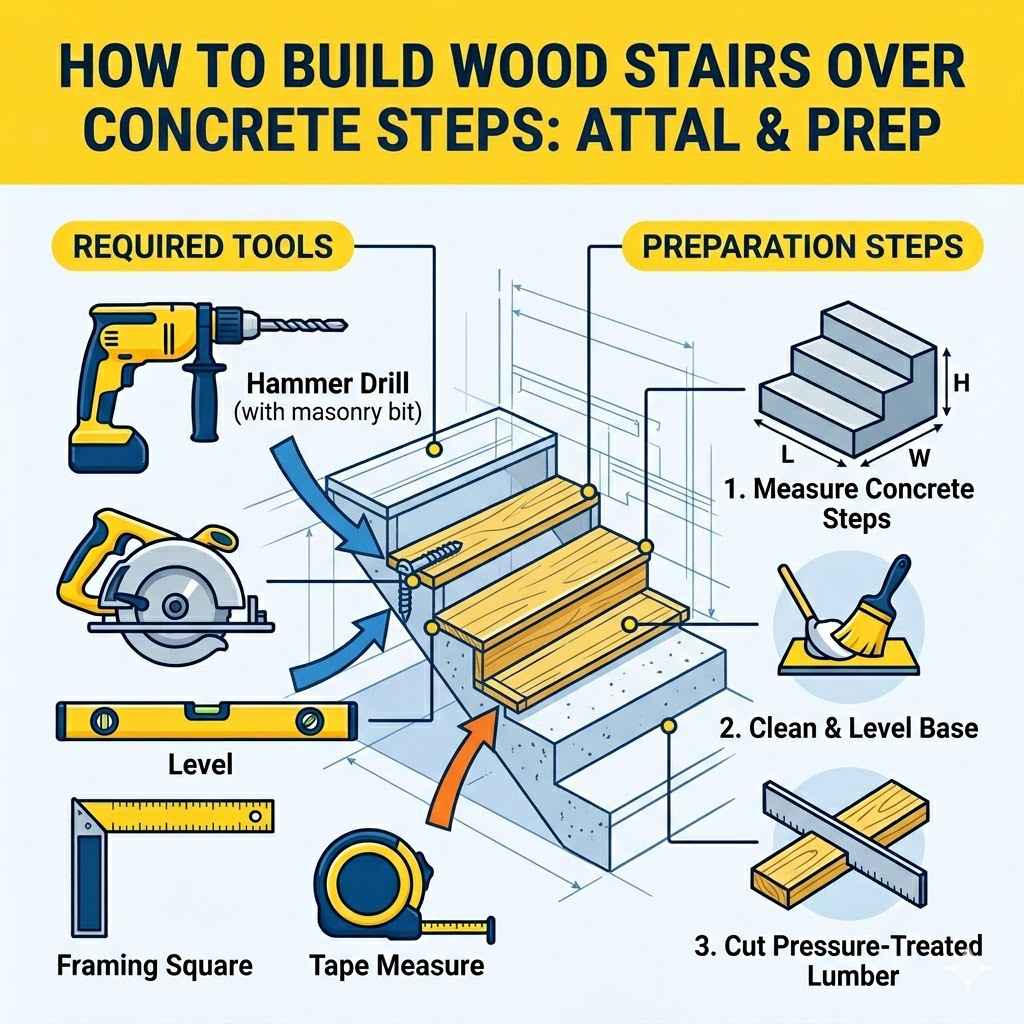
Installing the Risers
Risers are the vertical boards. They go between the treads. They cover the front face of each concrete step.
This gives a clean, finished look. It also adds structural support.
Start with the first riser. Apply wood glue to the back of the riser board. Then, position it on the concrete step.
It should sit flush against the back of the next tread you’ll install. You can also glue it to the concrete itself.
Secure the riser. Use concrete screws. Drill pilot holes through the wood.
Then drill into the concrete. Use screws long enough to get a good grip. About 1.5 to 2 inches into the concrete is usually enough.
Space screws every 6-8 inches.
If the riser is loose, use shims. Tap them in gently behind the board. This makes it snug.
Make sure the riser is plumb (perfectly vertical). Use your level to check. A crooked riser will make the whole stair look off.
For outdoor stairs, use screws that are corrosion-resistant. Stainless steel or galvanized screws are good choices. This prevents rust stains from forming on the wood.
Sometimes, the concrete step isn’t perfectly square. You might have a small gap. Wood filler can fix minor gaps later.
But try to get the riser as flush as possible. This is the foundation for your tread.
I saw a DIYer once who only used glue on the risers. It looked okay at first. But over time, with the weight and weather, they started to sag.
That’s when I learned that screws are essential for risers. They provide the strength needed for years of use.
Riser Installation Flow
1. Apply Glue: Spread exterior wood glue on the back of the riser.
2. Position: Place the riser on the concrete step. Ensure it’s vertical.
3. Secure: Drill pilot holes and use concrete screws. Use shims if needed.
4. Check Level: Make sure the riser is plumb.
5. Repeat: Do this for each step.
Attaching the Treads
Treads are the parts you step on. They rest on top of the concrete steps, over the risers. This is where the main weight will be.
So, secure attachment is critical.
Start with the first tread. Apply wood glue to the top of the riser you just installed. Also, apply glue to the concrete surface underneath where the tread will sit.
Place the tread board carefully. It should line up with the riser at the front. The back of the tread should rest on the concrete.
Make sure the front edge, the nosing, overhangs slightly. This overhang should be consistent on all steps.
Now, secure the tread. Use concrete screws driven through the tread and into the concrete below. Drill pilot holes first.
Space screws about 6 inches apart along the length of the tread. You can also put a few screws from the riser into the back of the tread.
Ensure the tread is level. Use your level on top of the tread. If it’s slightly off, you might need to use thin shims underneath.
This is important. An uneven tread is a tripping hazard.
I once helped a neighbor with his deck stairs. The treads were attached with just a few screws. They started to flex when you walked on them.
He later added more screws and some blocking underneath. It made a huge difference. For treads, more fasteners are usually better.
They bear all the weight.
For outdoor stairs, consider the wood grain. You want the grain running front to back. This helps water drain off.
It also makes the tread stronger.
When you install the last tread, it will sit on the concrete landing. Make sure it’s flush with the landing or slightly lower. This creates a smooth transition.
It prevents anyone from catching their toe.
Tread Installation Best Practices
1. Glue: Apply glue to the riser and concrete base.
2. Position: Place the tread, ensuring proper overhang (nosing).
3. Level Check: Verify the tread is perfectly level.
4. Secure: Use plenty of concrete screws from the top. Consider screws into the riser.
5. Transition: Ensure the last tread transitions smoothly to the landing.
Adding Nosing and Edging
Nosing refers to the front edge of the tread. It’s the part that extends beyond the riser. A good nosing provides a finished look.
It also adds safety by giving your foot a solid edge to step on.
If your tread boards are wide enough, you can cut the nosing directly into them. This is the simplest way. You just need to ensure the overhang is consistent.
About 1 inch is common and safe.
Sometimes, you might want a more pronounced nosing. You can add a separate piece of wood to the front edge. This is often a profile molding.
It can give a more decorative touch. Attach this piece with glue and small brad nails or screws.
For very worn concrete steps, the nosing can help bridge any unevenness. It gives the illusion of a perfectly straight edge.
Consider edging for the sides of the stairs. If your wood treads don’t fully cover the concrete edges, you might want to add trim. This covers any exposed concrete.
It makes the whole staircase look neat and professional.
This trim can be simple quarter-round molding. Or it can be a more decorative piece. Attach it with wood glue and finishing nails.
Make sure the nails are countersunk. You can fill the holes later with wood filler.
The nosing and edging are the finishing touches. They make a big difference in the final appearance. It’s these details that elevate a DIY project.
They show attention to detail. I always advise people to spend time on these parts. It’s worth it.
Nosing and Edging Details
Nosing: The front overhang of the tread. Provides a finished edge and safety. Typically 1 inch.
Nosing Methods:
- Cut directly into tread board.
- Add a separate molding piece.
Edging: Trim pieces to cover exposed concrete edges. Use quarter-round or other molding.
Attachment: Use wood glue and finishing nails or small screws. Countersink nails.
Finishing and Protecting the Wood
Once the wood is installed, it’s time to make it last. This is crucial, especially for outdoor stairs. Protecting the wood from weather is key.
First, fill any nail holes or small gaps. Use wood filler. Let it dry completely.
Then, sand the entire surface smooth. Start with medium-grit sandpaper. Finish with fine-grit sandpaper.
This prepares the wood for its finish.
Clean off all the dust. A damp cloth or a tack cloth works well. Now you can apply your finish.
If you want the natural wood look, use a stain. Then apply a protective sealant. Exterior-grade sealants are best.
They offer UV protection and water resistance.
If you want painted stairs, start with a good primer. Use at least two coats. Then apply your paint.
Exterior latex paint is a good choice. Choose a durable finish. Consider a porch and floor paint.
These are made to withstand foot traffic and weather.
For outdoor stairs, choose a finish that can handle moisture and temperature changes. Cedar is naturally resistant to rot. But it still benefits from a good finish.
Pine needs more protection as it’s softer.
Apply finishes in thin, even coats. Let each coat dry thoroughly before applying the next. Follow the product instructions.
Proper finishing not only protects the wood but also enhances its beauty. It makes your new stairs look amazing and last for years.
I learned the hard way about outdoor finishes. I used a standard interior stain on some outdoor steps. Within a year, it was peeling and faded.
The wood underneath was getting gray. Now, I always use exterior-rated products. They are specifically made for the elements.
It’s a small detail that makes a huge difference.
Finishing Steps for Longevity
1. Fill & Sand: Use wood filler for holes. Sand smooth with fine-grit paper.
2. Clean: Remove all dust with a damp cloth.
3. Prime (if painting): Apply 1-2 coats of exterior primer.
4. Stain/Paint: Apply your chosen color or stain in thin coats.
5. Seal: Use an exterior-grade sealant or topcoat for protection.
6. Dry Time: Allow adequate drying time between coats.
When Are Your Wood Stairs Safe?
Safety is the most important thing. You want your new stairs to be secure. They should feel solid underfoot.
There should be no wobbling or creaking.
Check that all screws are tight. Make sure the wood is firmly attached to the concrete. Tap on the treads.
They should sound solid. There shouldn’t be any give.
If you have a railing, ensure it is sturdy. It should not move when you put weight on it. Check all connections where the railing meets the stairs or wall.
Consider adding non-slip strips. These are especially important for outdoor stairs. They help prevent slips when the steps are wet or icy.
You can get adhesive strips or ones that are screwed in.
The transition from the last step to the landing should be smooth. There should be no lip. This prevents tripping.
Ensure all edges are rounded slightly. Sharp edges can be dangerous.
Building codes often have specific requirements for stairs. This includes the maximum rise and minimum tread depth. They also specify railing height and spacing.
It’s wise to check your local building department. Ensure your stairs meet these standards.
If you notice any loose boards, squeaks, or instability after installation, address it immediately. Small issues can become big safety hazards. Regular checks are a good idea.
Especially after the first few months of use.
Safety Checklist
- Solid Feel: Stairs should feel firm with no wobble.
- Secure Fasteners: All screws must be tight.
- Sturdy Railing: If present, the railing must be secure.
- Smooth Transitions: No lips between steps or to the landing.
- Non-Slip Surfaces: Consider for wet or icy areas.
- Building Codes: Ensure compliance with local regulations.
Maintenance for Your New Wood Stairs
Even the best-built stairs need care. Regular maintenance keeps them looking good and lasting longer.
For outdoor stairs, sweep them often. Remove leaves and debris. This prevents moisture from sitting on the wood.
Moisture can lead to rot or mold. Check the finish periodically. Look for any signs of wear, cracking, or peeling.
If you see damage, touch it up. Sand the area lightly. Apply a new coat of sealant or paint.
For minor scratches, a touch-up pen might work. For deeper gouges, you might need to use wood filler.
Clean spills promptly. Especially oil or grease. These can stain the wood.
Use a mild soap and water. Avoid harsh chemicals. They can damage the finish.
For indoor stairs, vacuum them regularly. Clean spills immediately. If the finish starts to dull, you might need to reapply a sealant or wax.
This depends on the type of finish you used.
Periodically, check all the fasteners. Make sure screws are still tight. Especially on treads.
This is a quick check that can prevent future problems.
A little bit of effort goes a long way. Taking care of your wood stairs ensures they remain a beautiful and safe part of your home for many years.
Simple Maintenance Tasks
Sweep/Vacuum: Remove dirt and debris regularly.
Clean Spills: Address spills immediately to prevent stains.
Inspect Finish: Check for wear, peeling, or fading annually.
Touch-Up: Repair minor damage to the finish as needed.
Tighten Fasteners: Ensure all screws remain secure.
Common Issues and How to Address Them
Even with careful work, you might run into small issues. It’s good to know how to fix them.
Squeaking Stairs: This is common. It often means wood pieces are rubbing against each other. For wood stairs over concrete, it’s often the tread rubbing the riser or the concrete.
You can try to inject wood glue into the gap. Then, clamp it tight. Sometimes, adding an extra screw can fix it.
Warped Boards: If a board warps, it might need to be
Gaps: Small gaps between boards or trim can be filled with wood filler. For larger gaps, you might need to recut the piece or add a wider trim.
Loose Treads: If a tread feels loose, it’s usually a fastener issue. Check the screws. Add more if needed.
Ensure they are driven into the concrete well.
Splinters: Always sand thoroughly. Use a fine-grit sandpaper. If splinters appear later, sand them down.
Apply a fresh coat of finish.
Remember, these issues are usually fixable. The key is to catch them early. Don’t let a small problem become a big one.
I’ve found that often, the solution is simpler than people think. A well-placed screw or a bit of wood filler can do wonders.
Frequently Asked Questions About Wood Stairs Over Concrete
Can I build wood stairs over any concrete steps?
Yes, you generally can. However, the concrete steps must be structurally sound and relatively level. Significant cracks or slopes might require repair first.
Always check local building codes for specific requirements.
What kind of wood is best for outdoor stairs?
For outdoor stairs, pressure-treated lumber, cedar, redwood, or composite decking materials are excellent choices. They resist rot, insects, and weather better than untreated softwoods like pine.
How do I make sure my wood stairs are safe?
Ensure all treads are securely fastened with strong screws driven into the concrete. Check for stability and lack of wobble. Install handrails if required or desired.
Non-slip strips can add extra safety, especially in wet conditions.
Do I need to remove old paint from concrete steps?
It’s highly recommended. Old paint, sealants, or waxes can prevent adhesives and screws from getting a good grip. Cleaning the concrete down to its bare surface ensures the best adhesion and a more durable stair installation.
How much should the tread overhang the riser?
A common and safe overhang for the tread, known as the nosing, is about 1 inch. This provides a finished look and a clear edge for stepping. Ensure the overhang is consistent across all steps.
Can I use wood glue alone to attach the treads?
No, wood glue alone is not sufficient for attaching treads to concrete. While glue adds strength, you must use mechanical fasteners like concrete screws to securely anchor the treads to the underlying concrete for safety and longevity.
Final Thoughts on Your Stair Project
Transforming concrete steps with wood is a rewarding project. It adds beauty and value to your home. By planning carefully and working methodically, you can achieve great results.
Take your time with each step. Measure twice, cut once. And always prioritize safety.
Your beautiful, durable wood stairs will be a welcome addition.