How To Remove A Radiator From The Wall Without Draining
It’s a common home project. You need to repaint a wall. Maybe you’re upgrading to a new heating system.
You look at that bulky radiator. It’s right in your way. The thought of draining your entire house’s heating system feels overwhelming.
You wonder if there’s a simpler way. Can you actually take off a radiator without emptying all that water? This guide is here to help you figure it out.
We’ll walk through the process step-by-step. You’ll learn what you need. You’ll also learn what to watch out for.
Removing a radiator from the wall without draining the entire heating system is possible for specific scenarios, primarily if you can isolate the radiator using its own valves. However, it carries risks and may not be suitable for all radiator types or system setups. Careful preparation and the right tools are essential.
Understanding Radiator Systems and Draining
Most homes in the U.S. use a hydronic heating system. This means hot water circulates through pipes to radiators.
These radiators then give off heat. A central boiler heats the water. Then, a pump pushes it through the system.
The water returns to the boiler to be heated again. This creates a loop.
When you want to remove a radiator, you need to stop the water flow. The usual way is to drain the entire system. This involves connecting a hose to a drain valve.
Often, this valve is at the lowest point of the system. Then you let all the water out. This can take a long time.
It also makes a big mess if not done carefully.
For a standard central heating system, draining is often the safest bet. This is especially true if you’re working on pipes or the boiler itself. It prevents leaks and water damage.
But what if you only need the radiator out for a short time? What if it’s just a single unit? That’s where the idea of bypassing a full drain comes in.
Can You Really Remove a Radiator Without Draining?
The short answer is: sometimes. It really depends on how your radiator is connected. Many modern radiators have two valves.
One is a lockshield valve. This one controls the flow of water into the radiator. It’s usually on one end.
The other is a thermostatic radiator valve (TRV) or a simple manual valve. This is on the other end. You use this to adjust the temperature.
If your radiator has these two valves, you might be able to isolate it. This means you can close off the water supply to that specific radiator. You don’t touch the rest of the house’s heating.
This is a much less disruptive approach. It saves time and water. It also means less clean-up.
But it’s not always foolproof. There are still risks involved.
Older systems might not have these specific valves. They might have fixed pipes. In those cases, draining is usually the only safe option.
Trying to cut pipes without draining can lead to a flood. That’s a much bigger problem to fix. Always check your setup first.
When a Full Drain Might Still Be Best
System Age: Older homes often have simpler plumbing. They might lack the isolation valves needed for a partial drain. Trying to work around this can be risky.
Pipework: If the radiator is directly piped into the main system without separate valves, draining is safer. You can’t easily stop the flow to just one radiator.
Leaky Valves: If your radiator valves are old or leaky, they might not seal properly. This means water could still enter the radiator even when closed. A full drain is then necessary.
Major Work: If you are doing significant plumbing work on the pipes connected to the radiator, a full drain is highly recommended. This ensures no water is present during the work.
My Own Radiator Removal Scare
I remember one time I needed to move a radiator. It was for a client who wanted to install a new, larger window. This old radiator was right in the middle of where the new window would go.
It was a beautiful cast-iron piece. It looked heavy and very permanent. My first thought was, “Oh no, I have to drain the whole house.” My heart sank a little.
This house was older, built in the 1950s. I wasn’t sure if it had the right valves. I went to look at the radiator.
Thankfully, it had two valves. One was a simple manual wheel valve. The other was a modern-looking thermostatic valve.
This was good news! It meant I might not need to drain everything.
I closed both valves slowly. I waited about fifteen minutes. Then, I very carefully loosened the connection nut on one side.
Just a tiny bit of water trickled out. It was a relief! I thought I was in the clear.
But then, as I loosened the other side, a steady stream of water started. It wasn’t a flood, but it was more than a drip. It was enough to make a mess and potentially damage the floor.
I quickly tightened the nut back up. I had to admit defeat. The full drain was the only way.
It taught me that “maybe” isn’t good enough when dealing with water. Safety first, always!
Tools and Materials You’ll Need
Before you even think about touching a radiator, gather your supplies. Having everything ready makes the job smoother. It also means you’re less likely to stop mid-way and find you’re missing something.
This is key when working with water.
- Adjustable Wrenches (or two): You’ll need these for the valve nuts and union fittings. Make sure they are the right size for your radiator fittings.
- Pipe Wrench: This can be useful for stubborn connections, but use it gently. You don’t want to damage the pipes.
- Bucket(s): You’ll need these to catch any residual water. Have a few on hand.
- Old Towels or Rags: Lots of them. Water can surprise you. These will soak up spills.
- Protective Gear: Gloves are a good idea. Goggles can protect your eyes from any drips.
- Radiator Key: This is for bleeding air out of the radiator. You might need this if you’re not fully draining.
- Soft Cloth or Old Sheet: To protect the floor beneath the radiator connections.
- Optional: Small Section of Hose: If you do need to drain a small amount, a hose can direct the water to a bucket.
- Optional: PTFE Tape (Thread Seal Tape): For re-sealing connections if you’re confident in your ability to reassemble. However, for this method, we’re aiming to avoid reassembly of the main pipework.
- Optional: Plumbing Vice Grips: For holding one part of a fitting while turning another.
Having the right tools makes a big difference. It’s like trying to cook without the right utensils. You can sometimes get by, but it’s harder and messier.
For this particular task, the adjustable wrenches are your best friends. Make sure they are sturdy and can grip the nuts well.
Quick Tool Checklist
Essential:
- Adjustable Wrenches (2)
- Bucket
- Towels/Rags
- Gloves & Goggles
Helpful:
- Pipe Wrench
- Radiator Key
- Floor Protection
Step-by-Step: Isolating the Radiator
This is the crucial part. If your radiator has the right valves, you can try to isolate it. This means closing off the water supply to that single unit.
You want to keep the rest of your heating system running.
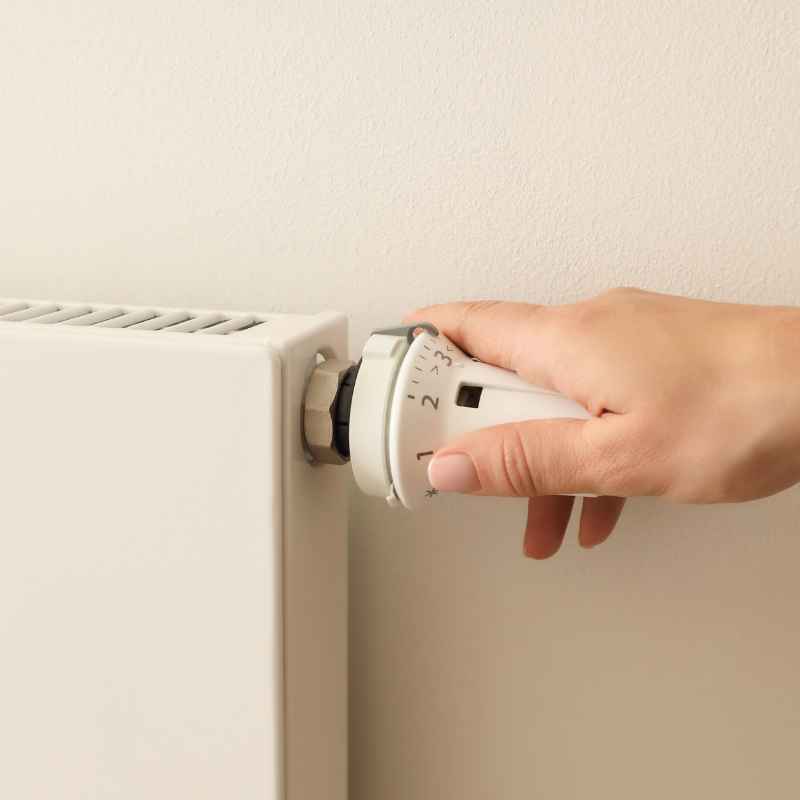
Step 1: Identify Your Radiator Valves
Look at your radiator. You should see two main connections coming out of the wall or floor. Each connection will have a valve.
One is usually the control valve. This is often a lever or a dial (like a TRV). The other is the lockshield valve.
This one often has a plastic cap or a small wheel. It’s usually found at the back of the radiator.
Key Indicator: If you have a TRV with a numbered dial on one side and a small cap or wheel on the other, you likely have isolation capability. If you see pipes directly entering the radiator without any valves, you probably don’t. You’ll need to drain the system.
Step 2: Close the Valves
First, turn the control valve (the one you use for temperature) all the way off. If it’s a TRV, turn the dial to the lowest setting, usually marked with a snowflake or a ‘0’. If it’s a manual wheel, turn it clockwise until it stops.
Don’t force it.
Next, find the lockshield valve. You might need to remove a small plastic cap. Underneath, you’ll find a spindle.
Turn this spindle clockwise using a small wrench or pliers until it stops. Again, don’t force it. Just close it gently.
Important: Do NOT turn off the main boiler or any other valves in your home at this stage. You are only targeting this one radiator.
Step 3: Let the Water Settle
Once both valves are closed, give the radiator some time. Wait for at least 30 minutes. This allows any hot water inside to cool down.
It also lets the system pressure equalize a bit. This reduces the chance of a sudden rush of water when you disconnect it.
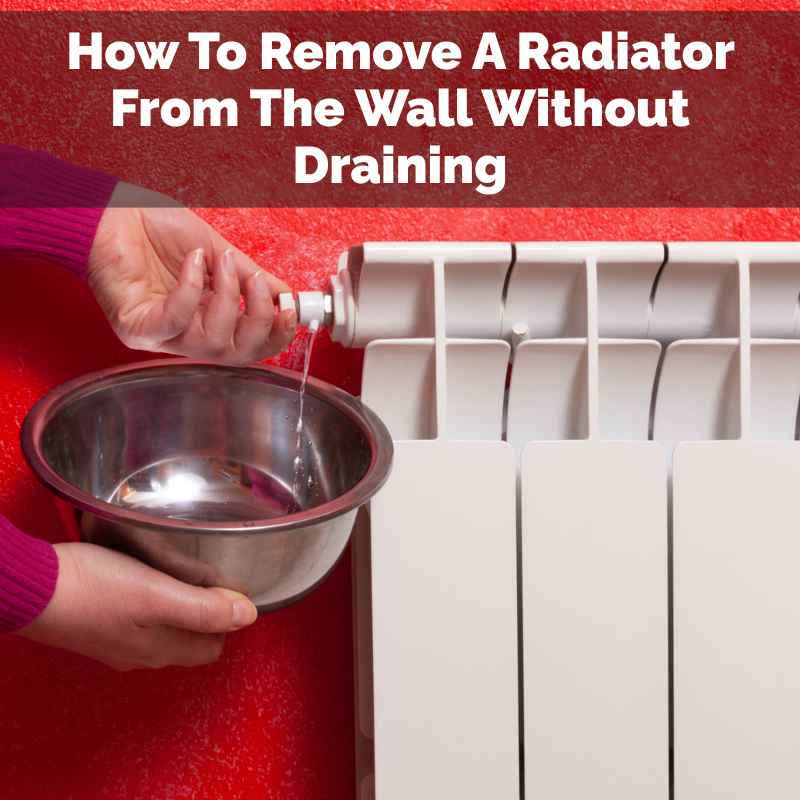
Step 4: Check for Leaks (Carefully!)
After waiting, you need to test if your isolation worked. Get your bucket and rags ready. Have them right under the radiator connections.
Using an adjustable wrench, very slowly loosen the fitting on one side of the radiator. This is usually the union nut where the pipe connects to the valve. Be ready for a tiny drip.
If only a few drops of water come out, and then it stops, that’s a good sign. You can then carefully tighten it back up a bit, but not fully.
Now, try the same on the other side. Loosen that fitting very slowly. If, at either connection, you get more than a slow drip, or a steady flow of water, stop immediately.
Tighten the fitting back up. This means your isolation didn’t work. You will likely need to drain the whole system.
Don’t risk a flood.
Isolation Test Results
Scenario A: Only a few drips, then stops. You are likely good to proceed with removing the radiator. Keep towels ready.
Scenario B: Steady flow or gushing water. Your isolation failed. Stop immediately and prepare for a full system drain. It’s not worth the risk of damage.
Removing the Radiator (If Isolation Worked)
If your isolation test was successful, you can now proceed with removing the radiator. This is where you’ll use your wrenches. Be prepared for a small amount of residual water.
Step 5: Loosen the Union Nuts
Make sure your bucket and rags are perfectly positioned under the connections you are about to loosen. You will be working with the union nuts. These are the larger nuts that connect the radiator valve to the pipework coming from the wall.
Using your adjustable wrench, turn the union nut counter-clockwise. You might need a second wrench to hold the valve body steady. This prevents the valve from twisting.
Work slowly. As you loosen it, some water will escape. Let it drip into the bucket.
Don’t remove the nut completely yet.
Repeat this on the other side of the radiator. Again, work slowly and catch any water. The goal is to loosen them enough so the radiator can be lifted off the wall brackets.
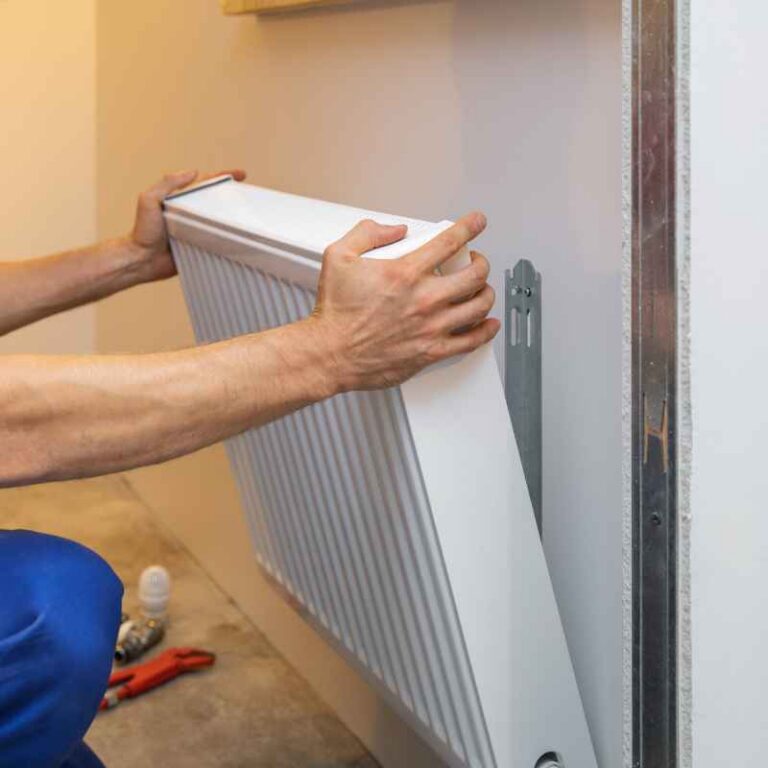
Step 6: Detach Radiator From Wall Brackets
Most radiators are secured to the wall with brackets. These brackets hold the weight of the radiator and the water inside. Before you fully detach the pipework, you need to free the radiator from these brackets.
Look at the top and bottom of the radiator. You should see where it sits on the wall brackets. There might be a clip or a securing mechanism.
You may need to lift the radiator slightly. Then, pull the bottom away from the wall. Sometimes, the radiator simply lifts straight up off its brackets.
Others might need a slight tilt.
Two-person job: Radiators can be surprisingly heavy, even when empty of most water. It’s a good idea to have a second person help you with this. One person can support the radiator while the other works on the fittings.
This prevents it from dropping unexpectedly.
Step 7: Remove the Radiator
Once the radiator is free from its brackets, you can carefully maneuver it away from the wall. Continue to let any residual water drip into the bucket. You can then place the radiator somewhere safe.
Keep it upright if possible to minimize leaks.
What about the pipes? The pipes are now exposed but hopefully only dripping a little. You can leave them as they are for now. If you’re going to be working on them, you’d normally cap them.
But for simply removing the radiator, you’ll likely want to reattach it or cap it later. For now, just let them drip into the bucket.
Radiator Removal: A Snapshot
Valves: Check for TRV and lockshield valves. If present, proceed with caution.
Close Valves: Turn both valves clockwise until they stop. Gently.
Wait: Allow at least 30 minutes for water to cool and settle.
Test: Loosen fittings slowly, one at a time, checking for drips. If water flows, stop.
Detach: Free radiator from wall brackets. Have help if needed.
Remove: Carefully pull radiator away, catching drips.
When Isolation Fails: The Full System Drain
If you tested your valves and water poured out, or if you never had isolation valves to begin with, it’s time for the full drain. Don’t worry; it’s a standard procedure for plumbers. You can do it yourself too.
Step 1: Locate the Drain-Off Valve
Find the lowest point in your heating system. This is usually where the main pipework enters or exits your boiler. There should be a valve there.
It might have a small lever or a square spindle that needs a special key.
Step 2: Connect a Hose
Attach a garden hose to the drain-off valve. Make sure it’s securely fitted. Run the other end of the hose to a drain, an outside area, or a large bucket.
Make sure the hose end is lower than the drain valve. Gravity will do the work.
Step 3: Open the Drain-Off Valve
Slowly open the drain-off valve. You will hear water start to flow. Water will begin to leave the system.
As water drains, the pressure in the system will drop. You might hear some gurgling sounds. This is normal.
Step 4: Vent Radiators (Optional but Recommended)
As the water level drops, air can get trapped in the radiators. You might want to open the bleed valve on each radiator (usually at the top corner) to let air out. This helps the system drain more completely.
Have a rag ready for any water that might come out with the air.
Step 5: Wait for Draining
Let the water drain until no more comes out. This can take a while, depending on the size of your home and system. Be patient.
Step 6: Close the Drain-Off Valve
Once draining is complete, close the drain-off valve securely. Disconnect the hose. Now, your system is empty, and you can remove the radiator without any water escaping.
Full System Drain in Short
Find Valve: Locate the lowest drain-off valve, usually near the boiler.
Attach Hose: Connect a hose securely to the valve. Run it to a drain or bucket.
Open Valve: Slowly open the drain-off valve. Let water flow out.
Bleed Air: Open radiator bleed valves to release trapped air.
Wait: Allow the system to drain completely.
Close Valve: Securely close the drain-off valve. Disconnect hose.
What Happens After Removal?
So, you’ve got the radiator off the wall. What next? This depends on your plan.
Are you replacing it? Are you leaving the space empty for a while?
If replacing: You’ll need to prepare the new radiator for installation. Make sure it’s compatible with your system. You might need to fit new valves.
If leaving empty: The exposed pipes are a potential hazard. They can snag on things or be accidentally bumped. You can buy temporary pipe caps from a hardware store.
These screw onto the exposed pipe ends. They prevent dust and debris from entering the system. They also give a cleaner look.
Re-filling and Re-pressurizing: If you drained the whole system, you’ll need to refill it. This usually involves opening the filling loop valve connected to your mains water supply. You’ll need to watch the pressure gauge on your boiler.
Most systems need to be between 1 and 2 bar. Once filled, you’ll need to bleed all the radiators again to remove any air that entered the system. This is a critical step.
Reattaching the Radiator: If you are putting the same radiator back, clean the threads on the valves and pipework. Apply PTFE tape or jointing compound if you are experienced. Then, carefully reassemble.
Hand-tighten the union nuts first. Then, use wrenches to tighten them firmly but not excessively. Open the valves and check for leaks.
Bleed any air from the radiator.
Post-Removal Options
- Replacement: Fit a new radiator.
- Temporary Caps: Use caps to cover exposed pipework if leaving empty.
- System Refill: If you drained the system, refill and re-pressurize.
- Re-bleed: Remove all air from radiators after refilling.
- Reassembly: Reattach the radiator, checking for leaks.
When to Call a Professional
While removing a radiator can be a DIY project, there are times when you should call a plumber. Your comfort and safety are worth it. Don’t hesitate to get expert help.
You are unsure about your system. If you look at your pipes and valves and feel completely lost, it’s best to stop. A professional can quickly assess your setup.
You don’t have isolation valves. As we’ve discussed, if your system requires a full drain and you’re not comfortable with that, a plumber can do it efficiently.
The radiator is very old or heavy. Cast-iron radiators, in particular, can be extremely heavy. If you’re not physically able to lift and maneuver it safely, get help.
You encounter stubborn fittings. Sometimes, nuts and pipes are corroded and won’t budge. Forcing them can cause damage. A plumber has the right tools and techniques.
You’re uncomfortable with re-pressurizing the system. Refilling and correctly setting the pressure can be tricky for beginners. Incorrect pressure can damage your boiler or heating system.
You discover leaks after reassembly. If you put the radiator back and it leaks, a plumber can find and fix the problem. It’s better to fix it right away.
My own experience: I once had a situation where a pipe fitting was so corroded, it started to crumble when I tried to loosen it. I immediately stopped. I knew I couldn’t fix that on the spot.
I called a local plumber. He had to cut back the pipe and install a new fitting. It was a more involved repair than I anticipated.
It would have been a disaster if I had kept trying myself.
Frequently Asked Questions About Radiator Removal
Is it safe to remove a radiator without draining the system?
Yes, it can be safe if your radiator has functioning isolation valves (a lockshield valve and a control valve) that allow you to shut off water to that specific radiator. If your system lacks these, or if the valves are faulty, draining the entire system is the safest approach to prevent leaks and water damage.
What happens if I remove a radiator without draining?
If you remove a radiator without properly isolating or draining the system, water will likely leak out. This can cause significant water damage to your floors, walls, and belongings. It can also lead to a loss of pressure in your heating system, making it inefficient or non-functional.
How much water is in a radiator?
The amount of water in a radiator varies based on its size and type. A typical panel radiator might hold between 1 to 4 gallons of water. Older, larger cast-iron radiators can hold considerably more, potentially up to 10-15 gallons.
Do I need to turn off my boiler before removing a radiator?
If you are successfully isolating the radiator with its own valves, you do not need to turn off the main boiler. However, if you are draining the entire system, it is generally recommended to turn off the boiler to prevent it from trying to heat water that is no longer in the system.
How long does it take to drain a central heating system?
Draining a central heating system can take anywhere from 30 minutes to several hours, depending on the size of the system, the speed of your drain-off valve, and how much water it holds. It’s a process that requires patience.
Can I leave the pipes open after removing a radiator?
No, you should not leave exposed pipes open for long. They are a trip hazard and can allow debris into your system. You should either reattach the radiator, cap the pipes temporarily with valve caps, or have a plumber fit proper blanking ends.
What is a lockshield valve for?
A lockshield valve is used to balance the heating system. It allows you to control and set the amount of hot water flowing into a specific radiator. Once set for optimal heating, it is usually closed off to prevent accidental adjustment, hence the “lock” in its name.
Conclusion: A Calculated Approach
Removing a radiator without draining the entire system is often achievable. It relies on having functional isolation valves. Always check your system carefully.
Be prepared for the possibility that a full drain might be necessary. Having the right tools and a calm, methodical approach is key. Remember, water damage can be costly.
It’s better to be safe and take your time. If in doubt, a professional plumber is your best resource. They can ensure the job is done correctly and safely.