How to Use Window Insulation Film Step by Step
Clean the frame, run a tape test, apply the film with double-sided tape, then shrink it with a hair dryer. Skip prep, and the film peels, wrinkles, leaks air, and wastes the kit. This guide covers each step, plus fixes for painted trim, vinyl frames, old wood, and windows that keep failing at the corners.
Best windows for film and when to skip it


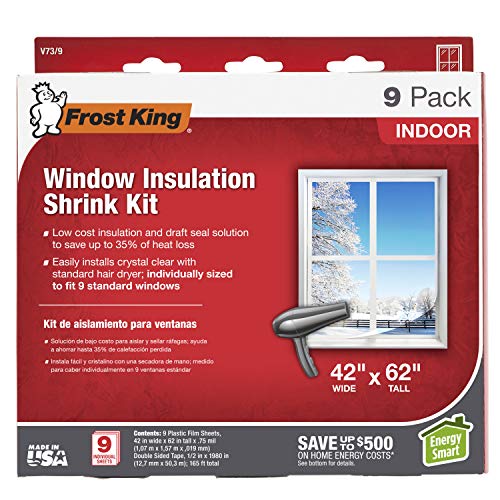
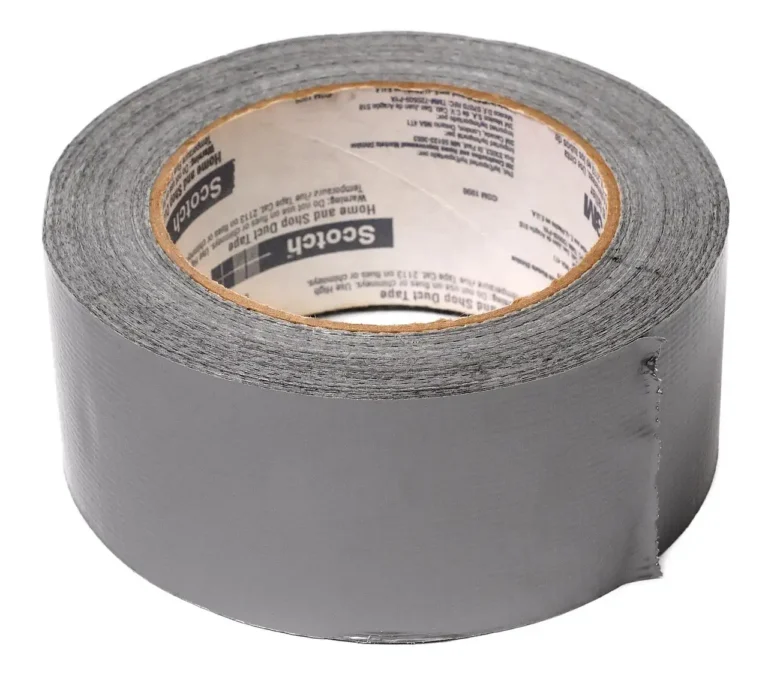
Window insulation film is a seasonal shrink film that adds a temporary air barrier over the inside of a window. Most kits include clear plastic film, double-sided tape, and enough material for several standard windows, with prices often listed around $20 to $50, though some lower-cost kits run about $10 to $20. familyhandyman.com
It fits older, draftier, single-pane windows best, where heat loss is higher and the frame is still in decent shape. It is a weaker choice for newer sealed units, and it is often frustrating on sliding windows or casement windows because those frames can have tighter clearances, moving parts, and more places for tape to fail.
When another winter fix is better
If the gap is around the sash, weatherstripping or caulk may solve the leak more directly. If the window already has major air leakage, loose glazing, or recurring condensation between panes, condensation control steps or repair may be the better route. Film is a temporary overlay, not a permanent insulation upgrade.
What you’ll need
Start with the kit and the few tools that keep the install predictable. The frame surface has to be clean and dry before tape goes on, so cleaning supplies matter as much as the film itself.
Tools and materials
- Window insulation film kit with clear shrink film and double-sided tape
- Measuring tape
- Scissors
- Hair dryer with high or medium heat
- Isopropyl alcohol
- Clean cloth or paper towels
- Optional: a microfiber cloth for final wipe-down
Check the window type first: wood, vinyl, and metal frames behave differently, and metal is especially prone to moisture problems. A kit that covers about 2 to 8 windows is common, but always compare the stated coverage with your actual count before buying.
Before you start
Make sure the room is warm enough for the tape to bond and the frame is dry enough to stay that way. If the window is already showing drafts around the sash, see window draft repair first so you do not seal in a larger leak than the film can handle.
How do you measure and prep the window?
Measure the outside edge of the window trim before you buy or cut anything, then clean the frame and casing until they are dry, smooth, and free of residue. If the surface feels cold, damp, greasy, or rough, tape adhesion can fail even if the film itself is fine.
Measure width and height first
Measure the width and height of the opening at the outside edge of the trim. Add extra film for trimming: another common guideline is about 8 to 10 cm of extra film. For example, a 30 x 40 inch inside-trim opening can use a sheet cut several inches larger on all sides so the film can be trimmed after shrinking, not before.
Clean the frame and casing
Wipe the tape path with isopropyl alcohol to remove grease, dust, and old residue. Moisture must be removed first, and metal frames are harder because they attract moisture quickly. Let the surface dry fully before tape touches it.
Check for a tape-friendly surface
Run a quick tape test on one small spot if the frame looks questionable. Press a short piece of tape onto the cleaned surface, wait a moment, and peel it back. If it lifts right away, the surface is still too damp, dusty, or slick. Paint residue on trim, oxidized metal, and rough or peeling wood all reduce holding power.
How do you apply the film step by step?
Apply the tape to the inside perimeter, attach the oversized film, then shrink it after the film is fully taped down. Work in one window at a time. If the tape path is uneven or the film is handled too early, wrinkles and corner lift become much harder to fix.
Install steps
- Clean and dry the frame, then confirm the tape will stick.
- Apply double-sided tape around the inside perimeter, keeping it about 2 cm from the edge if you want a little working room.
- Cut the film larger than the opening, leaving the extra two inches or 8-10 cm for trimming.
- Attach the film to the top edge first, then work down the sides so the sheet hangs flat.
- Press the film onto the remaining tape without stretching it.
- Use a hair dryer on high heat or medium heat, kept moving, to shrink the film after it is taped.
- Trim the excess film with scissors once the surface is tight.
A common first-timer mistake is shrinking the film before every edge is fully taped. That traps slack near the corners and creates wrinkles that do not disappear cleanly. Picture a bathroom window about 30 x 40 inches: if the top edge is secure but one side floats loose, the film puckers there the moment heat reaches it.
How do you shrink window insulation film with a hair dryer?
Use the dryer after the film is attached, not before. Keep it moving a few inches from the surface and use high heat or medium heat so one spot does not soften too much. Start in the center and work outward in short passes. If one section tightens sooner than the rest, pause there and move on.
Heat distance and motion
Hold the dryer about 8-10 cm away from the film and keep it in motion. The goal is even tension, not maximum heat. If the film starts to bow, gloss over, or pull unevenly, back off and sweep the dryer across the slack area in shorter passes.
How do you handle tricky windows?

Single-pane windows are usually the best fit because they have a higher heat-loss profile and benefit more from a temporary barrier. Sliding windows, casement windows, metal frames, and very tall windows need more patience because the tape path and film tension are easier to disturb.
Single-pane windows
These are the most forgiving. The frame is usually simpler, and the payoff is more noticeable than on modern sealed units. Use the standard tape-and-shrink method, but still check for loose glazing, peeling paint, or damp corners before you begin.
Sliding windows
Sliding windows often have track hardware and narrow edges that limit tape placement. Clean the track side carefully, then expect more gap risk around moving parts. If the sash needs to operate often during winter, film may interfere with use.
Casement windows
Casement windows are harder because the sash swings on hardware and the sealing surface may not be flat. Tape can bridge gaps poorly, and the moving sash can catch the film. Measure carefully, and avoid forcing a film install on a window that needs frequent opening.
Metal frames and painted trim
Metal frames attract moisture quickly, so tape failure is common if the surface is even slightly damp. Painted trim can leave residue when tape is removed, especially if the paint is old or soft. If the finish is fragile, expect slower removal and use low heat later.
If the film fails, fix
This table covers the most common failure points and the fastest next move. Start with the likely cause, not the symptom. If the tape will not hold, the frame condition matters more than the film itself.
| Problem | Most likely cause | Exact fix | Restart or salvage |
|---|---|---|---|
| Tape won’t stick | Surface is damp, greasy, cold, or dusty | Remove the tape, wipe the path with isopropyl alcohol, dry it fully, then retape | Restart the window |
| Film tears | Film was cut too tight or handled roughly | Replace the sheet and cut it larger by the full extra margin | Restart the window |
| Wrinkles persist | Film is loose at the edges or not fully warmed | Retape any loose side, then apply heat in slow passes from center outward | Salvage if the tear-free sheet is intact |
| Corners lift | Corner surface has residue or tape was placed too close to a gap | Clean the corner again, add a fresh strip of tape, and press firmly before shrinking | Salvage if the main sheet is sound |
| Bubbles appear | Air is trapped under a loose section | Lift the nearest edge, smooth outward, then reheat lightly | Salvage if the film is not torn |
| Metal frame condensation | Moisture formed too quickly on the frame | Dry the frame, warm the room slightly, and wait until the surface is dry before retaping | Restart the window |
| Painted trim residue | Old paint, soft paint, or strong tape bond | Use low heat during removal, pull slowly at a low angle, and clean residue with alcohol | Salvage the frame, not the tape |
| Uneven shrink | Heat was concentrated on one side | Rewarm the slack areas in short passes while keeping the dryer moving | Salvage if the film is still intact |
Common mistakes
Most failures come from skipping the surface check, not from the shrink step. A tape path that looks clean but still feels damp or slick will fail later, often at one corner first. Buying the kit before measuring, cutting the film too small, or heating before the tape is set can also undo the install.
- Buying the kit before measuring the outside edge of the trim
- Applying tape over moisture, dust, or residue
- Cutting the film too small for the opening
- Heating the film before it is fully taped down
- Using too much heat in one spot and creating uneven shrink
- Trying to force the method onto sliding or casement windows with tight clearances
How long does it take? Family Handyman says installation can take only a few minutes, while other guides put a typical window at 15 to 30 minutes. The difference usually comes down to prep, the window shape, and whether the first tape test passes.
How do you remove window insulation film without damaging paint?
Warm the film gently, peel it back slowly, and keep the pull angle low so the tape releases instead of tearing paint. This matters most on painted trim, vinyl, and metal, where residue or surface damage can show up if the tape is yanked off fast.
After the film is off, remove leftover tape in short sections. If residue remains, wipe it with isopropyl alcohol and a soft cloth. On fragile paint, test one small corner first and stop if the finish starts to lift.
Prevention
Before removal season, leave a small tab of film or tape where you can grip it cleanly. That makes the peel more controlled and reduces the chance of grabbing paint or soft vinyl finish.
Frequently asked questions
How do you apply window insulation film step by step?
Clean and dry the frame, tape the inside perimeter, cut the film larger than the opening, attach it to the tape, shrink it with a hair dryer, then trim the excess. The key is to keep the surface dry and the film oversized until after shrinking.
How do you install window insulation film without wrinkles or bubbles?
Press the film onto the tape without stretching it, then heat from the center outward in short passes. If a wrinkle stays, lift the nearest edge, smooth it, and reheat lightly. A loose corner usually means the tape bond failed first.
What do you need to install window insulation film?
You need a kit with clear shrink film and double-sided tape, plus scissors, a measuring tape, a hair dryer, and isopropyl alcohol. A clean cloth helps too. If the frame is dusty or damp, the tape path needs another cleaning pass.
How do you measure a window for insulation film?
Measure the outside edge of the trim for width and height, then add extra material for trimming. The same source recommends two extra inches, and another common allowance is 8-10 cm. That extra room makes corner trimming much easier after shrinking.
Will window insulation film work on single-pane windows?
Yes, and that is one of the best uses for it. Single-pane windows lose more heat than modern sealed windows, so the temporary air barrier tends to matter more. It is less compelling on newer windows that already seal well.
Can you use window insulation film on sliding or casement windows?
You can try, but these are harder installs and often need more adjustment. Sliding windows have track and gap issues, while casement windows have moving hardware that can interfere with the film. Expect more tape failure risk and less forgiving alignment.
Sponsored / affiliate links. As an Amazon Associate I earn from qualifying purchases. I may earn additional commission from eligible campaigns.