
Window Weatherproofing Guide
Weatherproof a window by diagnosing the failure first: moving air calls for air sealing, rain after storms points to exterior water management, and moisture that forms on the room side points to condensation control, not caulk alone. Read the symptom wrong and you can trap water, rot trim, raise heating bills, or leave the draft exactly where it was. This guide sorts leaks by symptom, then matches materials and fixes to wood, vinyl, basement, and seasonal windows.
A window is a glazed opening in a wall, door, roof, or vehicle that admits light and, in some designs, also opens for air and sound. That basic definition matters here, because weatherproofing has to control air and water without disabling the parts built to move.
Windows can be repaired to close leaks and frame gaps. That does not mean every symptom needs the same product. Weatherstripping, caulk, shrink film, gaskets, flashing, and storm windows each address a different failure mode.
Start here: identify the problem before you seal anything
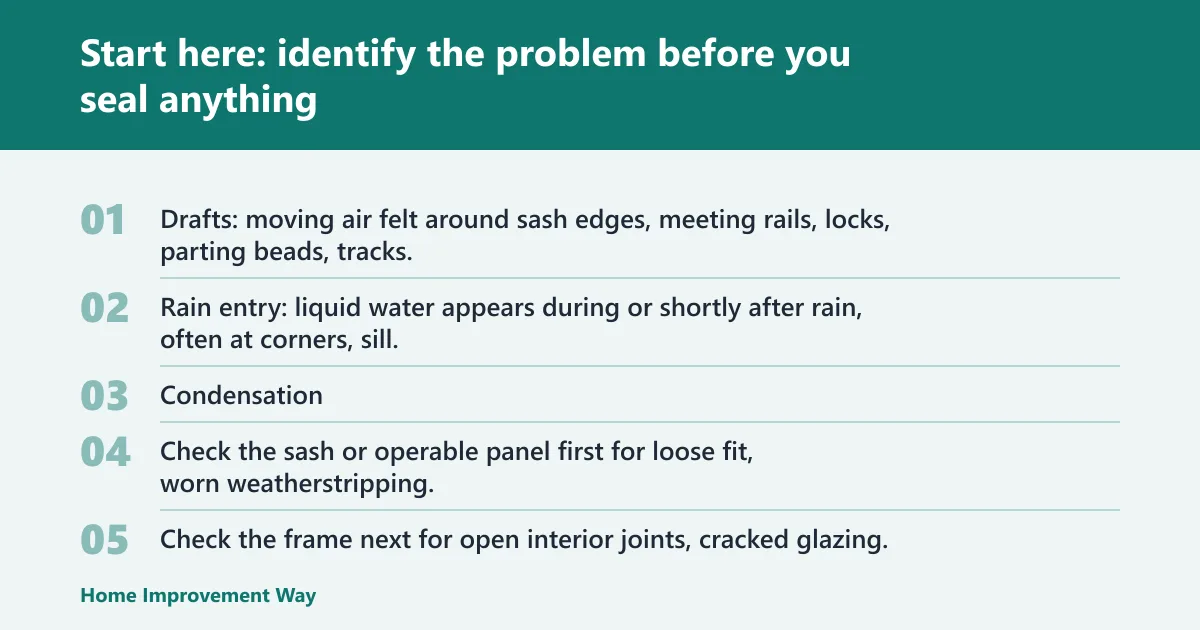


The three failure types
There are a few common problems, and each may call for a different repair path.
- Drafts: moving air felt around sash edges, meeting rails, locks, parting beads, tracks, or at trim-to-wall joints.
- Rain entry: liquid water appears during or shortly after rain, often at corners, sill, stool, side trim, or below the frame.
- Condensation: water forms on the room-side glass or frame in cold weather, often without any rain outside.
Condensation is the one people misread most often. Water on interior glass can come from indoor humidity hitting a cold surface. It is not proof that exterior sealant failed.
How to test: smoke, hand, and infrared checks
Use a smoke pencil, incense stick, or a thin strip of tissue to check for air movement when conditions make leaks easier to notice. Move slowly around meeting rails, side jambs, lock areas, the sill, and trim joints. If smoke bends or tissue flutters, mark that exact point.
A hand test helps, but it is less exact. Use the back of your hand because it senses air movement better than fingertips. An infrared thermometer can help spot colder lines along a sash edge or frame, which often line up with leakage paths or missing contact seals.
For rain problems, check after a real storm first. If needed, inspect outside in dry weather for open joints, failed caulk, cracked glazing, trim gaps, and sill issues before you try any hose testing.
Best testing conditions and how to mark leak locations
Draft testing works best when temperature differences make leakage easier to notice and some wind pressure reaches the wall. Night checks in winter are often easier than mild afternoons. Mark each leak with painter’s tape on the trim or glass so the fix goes back to the right spot.
Recording locations matters because one window can have more than one failure. A common mistake is finding a draft at the meeting rail, then caulking the exterior trim instead of sealing the moving sash contact point that actually leaks.
Inspection order: sash, frame, sill, trim, then exterior
- Check the sash or operable panel first for loose fit, worn weatherstripping, missing gaskets, or poor lock alignment.
- Check the frame next for open interior joints, cracked glazing, and gaps where trim meets the frame.
- Inspect the sill for softness, poor slope, blocked drain paths, peeling finish, and dark staining.
- Look at interior and exterior trim for cracks, movement, and corner separation.
- Only then inspect exterior drainage details, flashing sequence, and sealant joints.
📊 Microsoft says Windows 10 support ends on October 14, 2025. Source: Download Windows 10 Disc Image (ISO File).
What is the best way to stop drafts around windows?

The best way to stop drafts is to seal moving contact points with weatherstripping and fixed joints with caulk, after locating the exact leak path. Double-hung, sliding, casement, and basement windows leak in different places, so the right material depends on whether the joint slides, compresses, or never moves.
Match the fix to the location: moving parts versus fixed joints
If the sash, panel, or vent has to move, use a compressible or low-friction weatherstripping product. Do not caulk it shut. If the joint is between trim and wall, frame and siding, or another stationary seam, use caulk or exterior sealant instead.
Picture a double-hung bedroom window with air at the meeting rail and side channels. Foam tape on the exterior trim will not fix that path. A better choice is V-strip or another sash-contact product at the moving joint, with separate caulk only at fixed trim cracks.
Weatherstripping types compared
- Foam tape: easy to cut and stick, useful for temporary or semi-permanent air sealing on uneven contact points. It is common around removable interior panels and some stop surfaces, but it can lose thickness and adhesion faster in friction zones.
- V-strip: a folded plastic or metal-backed strip that springs against the sash. It works well on double-hung side channels and meeting rails where a sash slides and still needs low resistance.
- Felt: cheap and fast for low-wear seasonal use. It is best treated as temporary. Felt absorbs moisture, compresses quickly, and usually fails fast at wet or high-friction locations.
- Rubber: better for repeated compression where the window closes against a stop. It is common on some replacement sashes, basement vents, and retrofit kits. Look for brittleness or flattening.
- Brush: good on some sliders and metal basement or storm assemblies where a panel moves past a track. Brush handles motion well, but it does less for water if the track design itself is poor.
Compression set, adhesion, and expected service life
Weatherstripping fails in predictable ways. Foam and felt often fail by compression set, where the material stays flattened and no longer rebounds. Peel-and-stick products also fail when dirt, old finish, or cold application conditions weaken adhesion.
As a rule of thumb, temporary felt and low-density foam are short-life options, especially in sun, condensation, or frequent operation. Semi-permanent V-strip, rubber, and brush products usually last longer if the sash is aligned and the contact pressure is consistent. If a seal looks shiny, brittle, flattened, or torn at corners, replacement is usually more effective than layering more material on top.
Window-type guidance: double-hung, sliding, casement, and basement
Double-hung: prioritize side jamb contact points, the meeting rail, and the lower sash-to-sill contact. V-strip is often the cleanest retrofit on sash edges and channels. Use caulk only at fixed trim and frame joints.
Sliding: check interlock rails, track edges, and fixed-panel perimeter seals. Brush or low-friction weatherstripping often suits the track better than foam, which can drag or peel.
Casement and awning: these rely on full-perimeter compression seals. If closing pressure is weak or hinges are sagging, a new gasket alone may not solve the draft until the hardware pulls the sash tight.
Basement: hopper and slider basement windows often leak at metal frame corners, vent latches, and frame-to-masonry joints. Use gaskets or brush at moving parts, and a masonry-compatible sealant at fixed perimeter gaps.

When should you use caulk instead of weatherstripping?
Use caulk on stationary gaps that should not move in normal operation, such as trim-to-wall joints, frame-to-siding seams, and other fixed exterior joints. Do not use caulk on sliding, swinging, or compression contact points. If the joint opens when the window operates, it needs weatherstripping or a gasket, not caulk.
Stationary gaps that should be caulked
Typical caulk locations include interior casing to wall, exterior casing to siding, head trim joints, and non-operable frame seams. For wider fixed gaps, insert backer rod first so the sealant bridges the joint instead of filling it too deeply.
Caulk can also help where a stationary accessory meets the frame, such as a fixed storm window perimeter or a sealed AC cutout panel. It should not be used to glue shut weep paths, drainage slots, or sash movement areas.
Silicone vs acrylic latex vs paintable sealants
Silicone: best where long-term water resistance and movement tolerance matter, especially on exterior joints. The tradeoff is repainting. Standard silicone usually is not paintable, and removal can be tedious.
Acrylic latex: easier to tool, clean up, and repaint, so it is often used on interior trim and some sheltered exterior paint joints. It is less forgiving in demanding wet locations.
Paintable hybrid or paintable exterior sealants: useful when exterior durability and a paint finish both matter. Product labels vary, so check whether the sealant is rated for painted wood, vinyl, aluminum, and exterior exposure.
Surface compatibility: painted wood, vinyl, and aluminum
Painted wood usually accepts acrylic latex and many paintable exterior sealants if the surface is sound, dry, and not chalking. Vinyl and aluminum need cleaner, more selective product matching because some caulks bond poorly to oxidized or contaminated surfaces.
On old painted trim, scrape loose finish and clean off dust before sealing. On vinyl or aluminum, wash residue away and let the surface dry fully. A failed bond is often a prep problem rather than a product problem.
Removal, repainting, and common caulk failure signs
Caulk that has split, pulled away on one side, cracked at corners, or turned loose from glossy paint needs removal before resealing. Smearing fresh caulk over a failed bead rarely lasts.
If repainting is planned, choose a paintable product where the finished joint will show. If future removal matters, such as on trim likely to be repaired later, avoid burying fasteners and inspection lines under oversized beads.
How do you keep rain from leaking through a window?

Rain leaks are controlled from the outside by restoring water-shedding details, not by treating every wet spot as a draft. Start with the sill, trim joints, corners, and drainage paths, then repair flashing and exterior sealant in the order water should shed: top overlaps sides, sides drain to the sill, and the sill drains out.
How rain paths differ from air-leak paths
Air often slips through tiny interior contact gaps. Rain usually needs a path, pressure, and a failed drainage detail. That is why a sash can feel drafty without leaking liquid water, and a window can leak during storms even when it feels fairly tight on a calm day.
Suppose a first-floor slider stays dry in light rain but leaks at one lower corner during wind-driven storms. That pattern points away from interior shrink film and toward an exterior corner, track drainage issue, or failed perimeter seal exposed to pressure.
Sill, trim, and corner failure points to check first
Check the sill slope and condition first. Water should shed away, not sit against the frame. Look for soft wood, peeling paint, open end-grain joints, dark staining below corners, and gaps where side trim meets the sill or head trim.
Basement windows deserve extra attention because soil splash, masonry contact, and grade issues can mimic a failed window. If the wall below is damp after rain, the leak path may be around the frame, not through the sash.
Exterior flashing, sealant joints, and water-shedding sequence
Exterior repair should follow drainage sequence. Head flashing or trim above the window should overlap side elements. Side joints should guide water down to the sill. The sill should shed out. If a lower joint is sealed while an upper overlap still directs water behind trim, the leak simply moves.
Failure signs that point outside the window unit include repeated staining at trim corners, bubbling paint on exterior casing, rot at the sill nose, and leakage after storms even when the sash seals appear intact. Those signs call for trim repair, flashing correction, or sealant replacement outside the window.
When wider gaps need backer rod before sealant
Backer rod belongs in wider fixed joints before sealant is applied. It limits sealant depth, supports the bead, and reduces the chance of a weak, sagging fill. This matters around frames set against siding, masonry returns, or trim with noticeable seasonal movement.
Do not force sealant deep into a void and hope it replaces flashing. Sealant is a surface joint treatment. It is not a substitute for missing water-shedding layers.
How do you weatherproof windows for winter without blocking operation?
For winter, improve air sealing at movable contact points and add seasonal insulation only where opening the window is not essential. Interior shrink film can reduce heat loss and make interior glass warmer, but it does not stop rain leaks and should not trap a needed exit window or a frequently used operable sash.
Interior shrink-film kits: where they help and where they do not
Shrink-film kits create a still air layer on the room side. They help most on older single-pane or loose-fitting windows where comfort is limited by cold interior glass and small air leaks around the trim. They do not repair exterior water entry, rotten sills, or worn compression gaskets.
Low-E replacement windows are marketed as energy-efficient and heat-saving, but replacement is not the only path. Seasonal film and storm windows can improve older assemblies when the frame is still sound.
Condensation risks and how film changes interior surface temperature
Film can make the room-side surface feel less cold because the still air layer slows heat loss to the glass. That may reduce visible condensation on the room side of the film. It can also hide developing moisture at the actual window if indoor humidity is high and the assembly stays cold behind the film.
If condensation is the main issue, lower indoor humidity, improve ventilation, and address cold surfaces first. Sealing alone cannot fix moisture created inside the room.
Seasonal insulation for rarely opened windows
Film is best on windows that stay shut all season. It is removable, relatively low-cost, and useful for renters or owners avoiding exterior work during winter. Apply it only to clean, dry surfaces, and plan to remove it before warm weather if the window needs regular operation.
For old wood windows that are sound but loose, an interior or exterior storm window often outperforms plastic film because the air gap is more durable and the primary sash can still be serviced.
Safe use on operable windows and planned removal
Do not cover an emergency egress window that may need quick use. On frequently opened units, seasonal film usually becomes annoying or short-lived. In those cases, focus on weatherstripping and sash adjustment instead.
For AC cutouts or seasonal inserts, seal the removable panel itself with foam or gasket material and caulk only the fixed trim around the framed opening. Many winter draft complaints start at those insert edges, not at the window beside them.
Decision matrix: the right fix by leak type and window type
How to read the matrix
Use the matrix by matching the symptom first, then the window type, then the exact location. The last column gives a practical lifespan expectation rather than a guarantee, because sun, moisture, movement, and operation frequency change how long a repair holds.
Window weatherproofing guide decision matrix
| Leak type | Window type | Typical location | Best material | Install method | Expected lifespan |
|---|---|---|---|---|---|
| Draft | Double-hung | Side jambs, meeting rail, lower sash contact | V-strip or spring weatherstripping; foam only for low-wear temporary spots | Clean sash edges, apply to moving contact points, relock and test | Foam: seasonal to short-term; V-strip: semi-permanent if sash is aligned |
| Draft | Casement | Full perimeter where sash closes to frame | Compression seal or rubber gasket | Match bulb profile and size, replace brittle or flattened gasket, adjust hardware for full contact | Semi-permanent; shorter if closing pressure is poor |
| Draft | Sliding | Interlock rail, track edges, fixed panel perimeter | Brush or low-friction weatherstripping | Install in track-compatible channel, avoid drag points | Semi-permanent; shorter in dirty tracks |
| Draft | Basement | Vent panel edges, frame-to-masonry joint | Rubber or brush at moving edges; paintable masonry-compatible sealant at fixed perimeter | Seal moving and fixed joints separately | Moving edge seals: semi-permanent; perimeter sealant: depends on moisture exposure |
| Rain | Double-hung | Exterior trim joints, sill corners, head casing | Exterior sealant plus flashing repair where needed | Repair in water-shedding order; use backer rod in wider fixed gaps | Longer-term if flashing logic is correct; short-lived if underlying trim is rotten |
| Rain | Casement | Frame perimeter, sill nose, hinge-side corner | Exterior sealant; replace gasket if wind-driven rain passes failed compression seal | Confirm sash pulls tight, then seal exterior stationary joints | Gasket: semi-permanent; exterior joint sealant varies with exposure |
| Rain | Sliding | Track drains, lower corners, fixed panel perimeter | Track cleaning, exterior sealant, flashing correction | Keep drains open, reseal fixed joints only | Good if drainage remains open; poor if track design is blocked |
| Rain | Basement | Frame-to-masonry perimeter, well cover area, sill | Masonry-compatible sealant, flashing or well drainage correction | Address exterior water load before resealing interior signs | Often limited unless grade and drainage are corrected |
| Condensation | Any operable type | Room-side glass and frame | Humidity control, ventilation, seasonal film, storm window | Reduce indoor moisture first; add seasonal insulation only if operation is not needed | Film: seasonal; storm window: longer-term retrofit |
Can you weatherproof old windows without replacing them?
Yes, many old windows can be weatherproofed without replacement if the frame is stable, the sill is not structurally rotten, and the sash can still be tuned to close properly. Repair plus weatherstripping or a storm window often makes more sense than replacement when the main problems are looseness, worn finish, or missing seals.
Old wood windows: where repair still makes sense
Old wood windows need a separate diagnosis because many fail from neglect rather than design alone. Loose stops, worn parting beads, failed glazing putty, and paint buildup can all reduce contact and increase drafts. Those issues are repairable if the wood is still sound.
Storm windows pair especially well with old wood units because they create a durable air space while letting the primary sash remain serviceable. That approach is often better than stacking temporary foam in every gap.
Compression seals, sash tuning, and stop adjustments
Casement and awning units depend on continuous contact pressure around the perimeter. If the gasket is flattened or brittle, replace it with the right bulb profile and size. If the latch or hinge no longer pulls the sash tight, adjust the hardware before judging the new gasket a failure.
On double-hung wood windows, modest stop adjustment can improve sash contact, but over-tightening can make operation miserable or damage paint lines. The goal is even contact, not brute force.
Storm windows: interior versus exterior options
Exterior storm windows are common on older wood homes and can improve air control while protecting the prime window from weather. Interior storms are useful where exterior appearance, access, or lead-paint concerns complicate outside work.
Either way, the air gap matters. A well-fitted storm adds a more durable secondary layer than shrink film. The tradeoff is ventilation: the primary window and the storm need a practical plan for seasonal opening, cleaning, and moisture management.
When repair no longer makes sense because of rot or movement
Repair gives way to replacement when the sill is structurally rotten, the frame has major movement, glazing failure is widespread, rain intrusion keeps returning after exterior repairs, or the window no longer supports safe operation. Sealing over decayed wood only delays a larger fix.
What window weatherproofing works for renters?
For renters, the safest weatherproofing is usually removable interior film, low-tack or peel-off weatherstripping at non-damaging contact points, draft blockers for seasonal inserts, and landlord-approved repairs for anything involving rain. Avoid exterior sealants, permanent caulk, or adhesive products that can tear paint from trim or leave residue on vinyl.
Low-damage weatherstripping and removable film options
Removable shrink film is often the best renter option for windows that stay closed in winter. Low-adhesion foam can help at small, non-critical interior contact points, but test a hidden area first because paint condition matters more than the package claims.
Brush seals in a removable panel, such as a seasonal insert, can also work if they do not alter the landlord-owned frame. Keep the original hardware and note where each temporary piece belongs for removal.
What to avoid on painted trim, vinyl, and landlord-owned frames
Avoid standard silicone on visible interior trim because it is hard to paint later and often unwelcome in rentals. Avoid aggressive adhesives on brittle old paint. Do not caulk shut operable sash joints, weep openings, or metal tracks.
If rain is entering, document it and report it. Tenants can often reduce splash and protect finishes inside, but exterior water management belongs with the owner or manager.
Temporary rain-management steps that do not alter exterior assemblies
Inside, move curtains and rugs away from a wet sill, catch drips, and dry the area after storms to limit finish damage while waiting for repair. Outside, do not add improvised tapes or sealants to siding or flashing without approval, those patches often fail fast and can trap water behind trim.
Common mistakes that cause fast failure
Using the wrong product on a moving joint
The most common mistake is treating every gap as a caulk job. Sliding, swinging, and compressing joints need weatherstripping or gaskets. Caulk at those points usually tears loose, blocks operation, or hides the real leak path.
Sealing over wet, dirty, or failing surfaces
Exterior sealants fail early on wet wood, dusty vinyl, oxidized aluminum, or loose paint. Temporary fixes also fail quickly in exterior UV exposure, on condensation-prone surfaces, and in joints with a lot of seasonal movement.
Ignoring drainage, sill slope, or exterior trim gaps
Rain control depends on shedding and draining water away. If the sill holds water, corner joints are open, or flashing above the window is wrong, a perfect-looking bead of sealant may still leak.
Mistaking condensation for a failed exterior seal
Room-side moisture in cold weather often points to indoor humidity and cold glass, not outside rain. Air sealing may help by warming surfaces slightly, but condensation control usually also needs ventilation, moisture-source control, or an added interior storm or film layer.
Frequently asked questions
how to weatherproof windows
Start by identifying whether the symptom is a draft, rain entry, or condensation. Use weatherstripping on moving sash contact points, caulk on fixed interior or exterior joints, and seasonal film or storm windows for added winter insulation. Mark the exact leak spots before sealing so the repair matches the real failure.
how to protect windows from rain
Protect windows from rain by checking sill slope, trim corners, frame-to-siding joints, and flashing sequence outside the unit. Use exterior sealant only on stationary joints, add backer rod in wider gaps, and correct drainage details before resealing. Rain control starts outside, not with interior film or draft tape.
how to weatherproof windows for winter
For winter, tighten operable sash edges with weatherstripping, seal fixed trim cracks with paintable caulk, and use removable shrink film on windows that stay closed all season. If the main issue is cold old glass, a storm window often gives a better long-term result than temporary tape or felt alone.
what should I use to seal a drafty window
Use weatherstripping if the draft comes from a moving sash, meeting rail, track, or casement perimeter. Use caulk if the air leak is at a stationary trim or frame joint. Foam, V-strip, brush, rubber, and compression gaskets all fit different window parts, so location matters more than brand.
how do I keep rain from leaking through a window
Keep rain out by repairing exterior water-shedding details in order: head area, side joints, sill, and drainage paths. Inspect for failed trim joints, cracked sealant, corner gaps, blocked tracks, and sill rot. Interior patches rarely solve a true rain leak because the water path usually begins outside the sash.
what window weatherproofing works for renters
Renters usually get the best results from removable interior film, low-damage temporary weatherstripping, and landlord-approved repairs for any rain leak. Avoid permanent exterior sealants, silicone on visible trim, and products that can tear paint or block operation. For water entry, document the location and report it rather than improvising an exterior patch.
Sponsored / affiliate links. As an Amazon Associate I earn from qualifying purchases. I may earn additional commission from eligible campaigns.


