Exterior Siding Guide
Choose siding in this order: fix the failure, match the climate, then match the project scope. If damage is limited to a relatively small part of one wall, repair is often still an option. If you pick by looks alone, you can trap moisture, ignore wind or fire exposure, and turn a local repair into a full replacement. This guide sorts siding options by failure mode, climate stress, mixed-material conditions, and repair-versus-replacement scope.
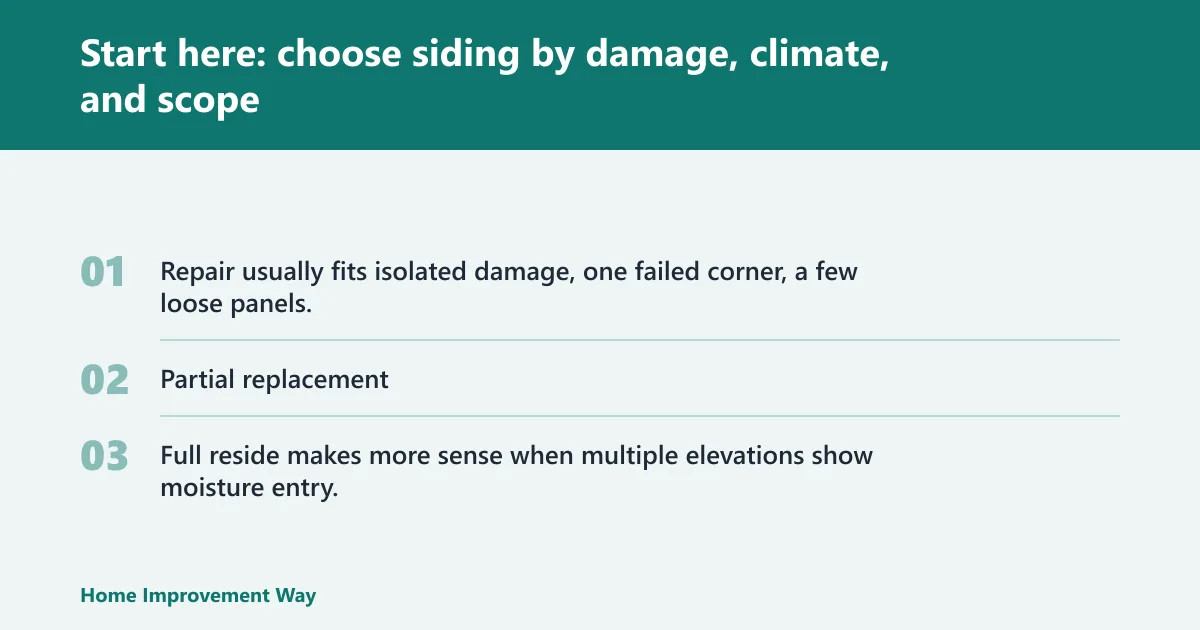
Start here: choose siding by damage, climate, and scope

Why a material list is not enough
A plain ranking of siding products misses the real decision. You need to know whether the wall still sheds water, whether the local climate is tough on that material, and whether the job is a repair, a partial replacement, or a full reside.
Those three filters cut out common, costly misses. Even a long-lasting cladding can fail if kick-out flashing, head flashing, or WRB laps are wrong. A cheap repair can also fail if moisture has already reached the sheathing or framing, and a full reside can waste money if the problem is limited to one elevation and the profile can still be matched.
The three filters: failure mode, climate stress, and project scope
Failure mode comes first. Cosmetic wear includes faded color, isolated chipped paint, minor surface scratches, and small impact damage that has not opened the wall to water. Moisture-related failure is different: bubbles or blisters, soft spots, rot, warped boards, cracked panels, failed joints, mold near seams, or interior peeling paint.
Climate stress narrows the field. Freeze-thaw, high wind, hail, wildfire zones, termites, coastal salt air, and strong sun all change what holds up and how often you will need to inspect, repaint, wash, or recaulk.
Project scope decides whether matching matters more than an ideal material choice. On mixed-material homes, or where one discontinued profile covers only a small section, partial replacement may look patched even if it performs well.
When repair, partial replacement, or full reside usually makes sense
- Repair usually fits isolated damage, one failed corner, a few loose panels, or localized trim leaks where the rest of the wall is dry and the profile is still available.
- Partial replacement fits one wall with sun damage, hail strikes, or moisture failure limited by a roof intersection or gutter problem, especially if color and profile can be matched or intentionally re-trimmed.
- Full reside makes more sense when multiple elevations show moisture entry, profiles are discontinued, many joints have failed, or trim, WRB, flashing, and substrate repairs are needed across the house.
Say your north wall has warped lap siding below a leaking gutter, while the other three sides are sound. That points to targeted repair or one-wall replacement, plus gutter and flashing correction, not an automatic whole-house tear-off.
Quick comparison: siding family, lifespan, cost, and maintenance
Use this as a screening table, not a winner board. Lifespan depends heavily on flashing, clearances, finish upkeep, and local exposure. Cost ranges below reflect broad national guidance and move by market, tear-off needs, trim complexity, and hidden sheathing repairs.[1][2][3][4]
| Siding family | Broad lifespan guidance | Typical installed cost range | Maintenance level | Best fit notes |
|---|---|---|---|---|
| Vinyl | Often 20–40+ years in service, depending on climate and installation[1][4] | Often among the lower installed-cost options[2][3] | Low to moderate | Good budget baseline when profile matching is possible |
| Fiber cement | Often 30–50 years or more when detailed and finished correctly[1][4] | Usually mid-range to upper-mid-range installed[2][3] | Low to moderate | Strong option for moisture-prone climates and lower repaint frequency than wood |
| Engineered wood | Often several decades with disciplined moisture management and finish care[1][4] | Usually between vinyl and premium wood in many markets[2][3] | Moderate | Wood-look choice for homeowners who will monitor edges, cuts, and lower-wall details |
| Wood | Can last for decades with regular painting or staining and prompt repairs[1][4] | Varies widely by species, profile, and finish scope[2][3] | Moderate to high | Best when style matters and upkeep is acceptable |
| Brick veneer | Very long service life; drainage and flashing still govern performance[1] | Usually high installed cost[2][3] | Low | Durable exterior with different repair logic than panel siding |
| Metal | Often long-lasting, but coating and corrosion exposure matter[1][4] | Mid-range to high depending on profile and metal type[2][3] | Low to moderate | Useful for modern exteriors and many severe-weather regions |
| Stucco | Often decades-long service life if crack control and drainage are right[1] | Mid-range to high, depending on assembly type[2][3] | Moderate | Climate-sensitive choice that depends on correct wall design |
Before you price cladding, it helps to verify the wall build-up and accessory scope. Homeowners comparing replacement should also look at siding takeoff and wall measurements, drainage-layer repairs, and the timing of trim, window, and door work.
How do you know if your siding needs repair or replacement?
Start by separating finish wear from water-entry risk. Repair is usually possible when damage is localized, the substrate is dry, and the siding profile still matches. Replacement becomes more likely when panels or boards are loose, warped, rotted, cracked across multiple areas, or when interior finishes show moisture-related symptoms.
Cosmetic wear versus wall-assembly risk
Cosmetic issues change appearance more than performance. Think faded vinyl, chalking paint, a few dented aluminum panels, or hairline coating wear on fiber cement where the board itself is still solid. These defects still matter, but they do not always mean the wall assembly is failing.
Wall-assembly risk shows up when water gets behind the cladding or can no longer drain out. At that point, siding work stops being a paint or patch problem and becomes a flashing, WRB, sheathing, insulation, or framing problem.
Warning signs that point to deeper moisture problems
Bubbles or blisters commonly point to trapped water in a coating system or moisture pressure behind the cladding. Rotting, warped, or cracked siding may no longer protect the home from water and weather. Mold, mildew, or fungus clustered along seams, below overflowing gutters, or at lower wall edges usually points to repeated wetting, poor drainage, or splashback; interior peeling paint can point the same way. These are standard moisture-red-flag symptoms in building-envelope guidance from the U.S. Department of Housing and Urban Development and inspection-industry references.[5][6]
Loose panels, open butt joints, failed caulk at trim transitions, and swelling at lower board edges also deserve attention. They may not stand out from the curb, but they often signal repeated wetting behind the cladding.
What to inspect at butt joints, trim edges, penetrations, and near grade
Check butt joints and end joints first. Gaps, swelling, or repeated caulk failure there often mean movement or water entry. At trim edges, look for dark staining, softness, and cracked sealant where siding meets corner boards, windows, and doors.
At penetrations such as hose bibs, vents, and light fixtures, look for loose trim blocks, split sealant, and missing top flashing details. Near grade, check for soil or mulch contact, splashback staining, insect activity, and panel bottoms that stay wet.
When matching existing siding makes repair impractical
A technically repairable wall can still be a replacement case if the profile is gone. Older or hard-to-match siding lines, faded colors, unusual trim details, and custom corner treatments can make a patch stand out or be harder to seal neatly.
Suppose one sun-baked elevation has brittle vinyl with a profile no longer sold. The damaged area may cover only a small section, but if color and lock profile do not match, replacing that full wall often gives a cleaner result than piecing in mismatched courses.

What signs mean siding has moisture damage?
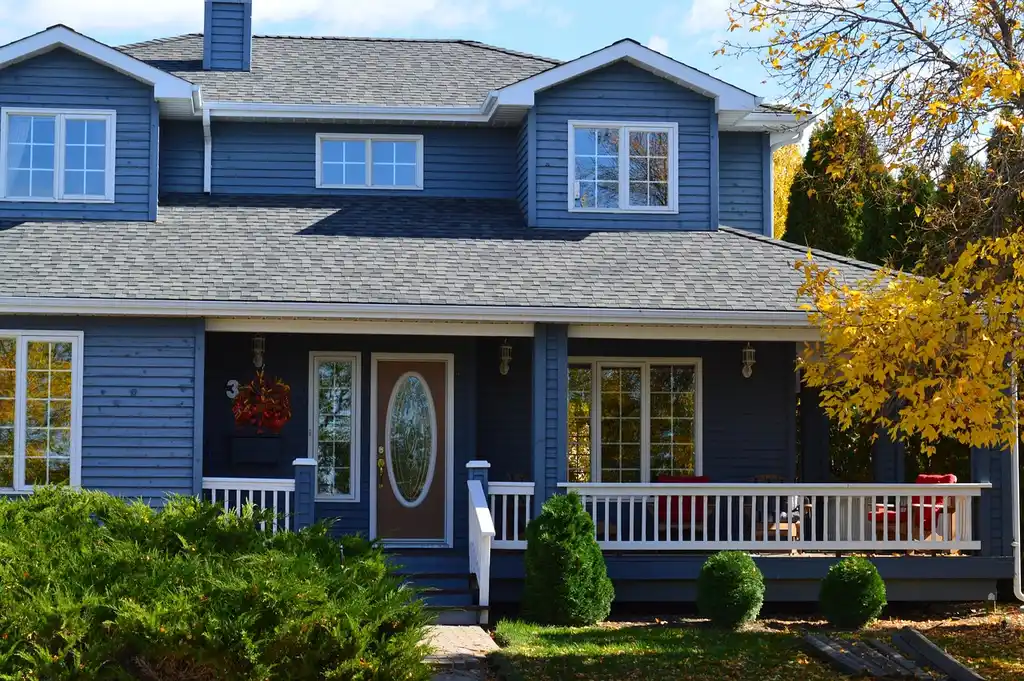
Moisture damage usually shows as distortion, softness, fungal growth, or finish failure linked to wetting, not simple age. Bubbles or blisters can mean trapped water. Rot, warping, cracks, mold near seams, and interior peeling paint matter more than faded color because they suggest the wall may no longer be managing water.
Bubbles, blisters, peeling paint, and what they can indicate
Bubbles or blisters can point to water trapped within siding or behind coatings. Peeling paint may be a paint-prep issue, but when it shows up with soft trim, open joints, or staining, it often means repeated moisture is moving through the wall and pushing finishes loose.
Interior peeling paint or loose wallpaper is especially important because it shifts the inspection inward. That symptom does not prove siding is the only cause, but it raises the stakes for checking flashing, WRB continuity, and hidden moisture around windows and doors.
Rot, mold, mildew, warping, and soft sheathing clues
Rot means organic material has stayed wet long enough to decay. Mold and mildew near seams or gutter lines often point to chronic splash, overflow, or blocked drainage. Warping and cupping show uneven moisture exposure or fastening problems. Soft sheathing under a pressing hand is often a sign of more advanced deterioration.
Cracks matter differently by material. Hairline stucco cracking may be cosmetic, while cracked wood or fiber cement at joints can admit water. Vinyl cracking after impact often starts local, but repeated cracking on a sun-heavy wall may mean the panels have become brittle.
How trapped water moves behind siding
Water rarely travels straight down the face and stops. Wind pushes it sideways, capillary action pulls it into end joints, and horizontal trim, ledger connections, and unflashed penetrations can hold it in place. Once behind the siding, it can wet sheathing, insulation, and framing before it becomes visible indoors.
That is why surface condition alone can mislead. A wall can look acceptable from ten feet away yet hold wet sheathing behind a failed butt joint or a poorly integrated window flange.
Why flashing, WRB, and drainage details matter more than surface appearance
Siding is the outer cladding, not the only water-control layer. The wall also relies on flashing, a drainage plane or moisture-resistant barrier, and sometimes a rainscreen or drainage gap. If those layers are missing or cut apart during old repairs, premium siding will not fix the assembly by itself.
Replacement bids should say whether step flashing, kick-out flashing, head flashing, WRB patching, and drainage detailing are included. If those items are absent, the quote may be leaving out the work that actually solves the leak. That is also why siding decisions connect closely to roof runoff corrections and trim transitions, not just panel choice.
Which exterior siding materials fit your house and upkeep limits?
The best fit depends on what failed, how much upkeep is acceptable, and whether the project is a patch, one-wall replacement, or a full reside. Vinyl and fiber cement are common low-upkeep choices. Wood and some engineered wood options need more finish monitoring. Masonry and stucco bring different repair and moisture-detail demands.
Vinyl, fiber cement, engineered wood, and wood
Vinyl is typically the budget baseline and is often one of the lowest installed-cost siding families in national cost guides.[2][3] It is widely used for partial replacements when profile matching is possible. Watch for brittleness in strong sun or cold climates, impact damage from hail, and trim details that rely too heavily on caulk. Broad lifespan guidance from the National Association of Home Builders and InterNACHI places vinyl in a long-service category when installed correctly, but exposure and repair history can shorten that in practice.[1][4]
Fiber cement suits homeowners who want a non-vinyl look with lower repaint frequency than traditional wood. It performs best when clearances, flashing, and paint systems are done correctly. It is heavier, cutting takes more work, and installation quality matters.
Engineered wood can give a wood-like appearance with factory finishes and panel or lap options. It still needs careful moisture management at cut ends, joints, and bottom edges.
Wood remains a strong style match for historic, cottage, and high-detail homes. It rewards regular paint or stain upkeep and close inspection for rot, open joints, and insect exposure.
Brick, stucco, metal, and stone veneer
Brick has long service life and low routine upkeep, but cracked mortar, missing weeps, and improper flashing still cause moisture problems. Repairs are less about panel replacement and more about drainage and masonry detailing.
Stucco can suit dry climates and certain regional styles. In wet climates, crack control, drainage design, and window flashing details become the deciding factors.
Metal, including steel and aluminum siding or panels, handles many climates well and can fit modern or agricultural-inspired designs. It needs correct fasteners, edge treatment, and attention to corrosion risk near salt air.
Stone veneer is often used as an accent rather than full cladding. It adds scope at transitions, ledgers, and kick-out flashing. Choose it for targeted visual use, not as a shortcut around moisture detailing.
Low-upkeep versus repaint-cycle materials
If low upkeep is the main filter, vinyl, fiber cement, brick, and many metal systems usually rise to the top. If periodic repainting is acceptable in exchange for a certain look, wood and some engineered wood products stay in the running.
No siding is maintenance-free. Washing, caulk inspection, gutter control, vegetation clearance, and periodic checks after storms belong on every house.
Matching material families to farmhouse, traditional, and modern exteriors
Farmhouse projects often use board and batten, lap siding, or a mix of painted siding with masonry accents. Traditional houses usually handle lap, shingle, brick, or fiber cement profiles well. Many modern houses tend to use wide panels, vertical siding, metal accents, and fewer trim breaks.
Style should be the last filter, not the first. A modern profile on a damp wall with poor flashing still fails. A farmhouse look in a termite-heavy area may push the decision away from all-wood assemblies toward fiber cement, metal, vinyl, or engineered wood variants.
How do you choose exterior siding for your climate?
Choose siding by asking what your climate attacks first: moisture, movement, impact, fire, insects, or corrosion. Humid regions punish poor drainage details. Freeze-thaw rewards disciplined clearances and water control. Coastal zones challenge fasteners and finishes. Wildfire, hail, and termites can remove otherwise good-looking options from the shortlist.
Humid and rainy climates
In wet regions, drainage details matter as much as the cladding itself. Favor assemblies with dependable flashing, WRB integration, and drainage space where appropriate. Materials that tolerate frequent wetting better, such as fiber cement, brick veneer, many metal systems, and well-detailed vinyl, often make sense.
Wood and engineered wood can still work, but only if the homeowner accepts closer inspection of paint, end cuts, lower edges, and caulked transitions.
Freeze-thaw, snow, and severe temperature swings
Repeated freezing magnifies small water-entry points. Prioritize proper clearances above roofs, decks, and grade, plus flashing that keeps meltwater from backing up behind the siding. Materials that move less with temperature changes can reduce visual distortion, though every system still needs expansion and fastening rules followed.
Severe swings also stress sealants. That raises the value of designs that shed water without relying on caulk alone.
Hail, high wind, wildfire, termites, and coastal salt exposure
Hail can crack brittle vinyl and dent metal. High wind rewards secure fastening schedules, good edge detailing, and impact-resistant trim layouts. In wildfire-prone areas, homeowners often consider less combustible claddings and careful ember-resistant detailing around gaps and vents.
Termites change the math for wood-based products, especially near grade or where landscaping stays damp. Coastal salt air can shorten the life of poorly chosen fasteners and coatings, making metal type and corrosion resistance part of the siding decision.
How climate changes fasteners, clearances, finishes, and maintenance
Climate also changes small but costly details: stainless or coated fasteners near salt air, larger roof and grade clearances in wet snow regions, UV-stable finishes in strong sun, and more frequent washing where mold and airborne salts collect.
Picture a house near the coast with metal accent panels and fiber cement lap. The panel choice may be fine, but the wrong fasteners or cut-edge treatment can shorten service life long before the siding itself is worn out. That same project should be sequenced with roof edge, gutter, and runoff corrections so wall repairs are not undermined by repeated water dumping.
How to Select Siding for High-Wind Zones
High wind forces create uplift pressures that can loosen panels and force moisture into wall cavities. The guide at siding for wind-prone areas evaluates fiber-cement, steel, and rated vinyl against specific uplift, fastener retention, and impact resistance metrics. It helps you determine which materials maintain structural integrity during storms exceeding 110 mph.
You will also find detailed installation protocols that prevent water intrusion at panel seams. The resource clarifies how code requirements, warranty standards, and moisture control measures directly influence long-term storm performance for homes in severe weather regions.
Board and batten siding: when it works and what to watch
Traditional and modern uses
Board and batten siding uses wide vertical planks joined by thin vertical strips. It gained popularity in America around the middle of the 19th century, and historically, board and batten was used to make buildings more airtight.
Today it works on farmhouses, cottages, sheds, and sharply modern elevations. Vertical lines make walls appear taller, but they also put more focus on layout, joint spacing, and water management at horizontal transitions.
Material variants: wood, engineered wood, fiber cement, metal, and vinyl
Board and batten is available in wood, fiber cement, metal, vinyl, and engineered wood. That matters because “board and batten” is a profile family, not a single material with one upkeep level or one service life.
Wood versions bring the most traditional look and the most finish upkeep. Fiber cement and engineered wood can approximate that look with different maintenance demands. Metal can read crisp and modern. Vinyl versions can reduce upfront cost, though profile depth and trim crispness vary by product line.
Spacing, battens, and profile choices
Board and batten can be customized through batten spacing and incorporating other materials. Wider spacing reads more modern. Tighter spacing can feel more traditional or agricultural. Trim width, corner treatment, and whether the battens are applied or formed into a panel all change the look.
Those same choices affect repairability. A custom batten layout or unusual reveal can make later spot replacement harder, especially if only one wall is damaged.
Repair, replacement, and moisture-detail considerations for vertical siding
Vertical siding depends on clean bottom-edge clearances, careful flashing at horizontal band boards, and reliable detailing where it meets windows, doors, and roof lines. Water that gets behind vertical boards can track down long concealed paths.
Professional board and batten installation averages $10.50 to $13.90 per square foot, and a 2,000 square foot house can cost between $21,000 and $27,800 for board and batten siding. Material costs can range from $0.75 to $10 or more per square foot. Board and batten may require flashing, moisture-resistant barriers, trim pieces, caulk, nails, and paint or stain.[2][3]
How much does exterior siding cost per square foot?
Exterior siding cost per square foot depends less on the panel itself than many homeowners expect. Material, labor, tear-off, disposal, flashing, WRB work, trim, and substrate repair drive the final number. Compare bids only after confirming the same scope, especially around moisture repairs and trim details.
Material-only and installed cost ranges
| Siding family | Material-only range | Installed cost notes | Typical cost drivers |
|---|---|---|---|
| Vinyl | Often the low end of common siding options | Installed price rises with tear-off, trim, and wall prep | Profile matching, corners, housewrap patches |
| Fiber cement | Mid-range to upper-mid-range in many markets | Higher labor than vinyl due to weight and cutting | Paint system, flashing, clearances, labor |
| Wood | Varies widely by species and profile | Labor changes with detailing and finish work | Paint or stain, repairs to trim and sheathing |
| Engineered wood | Often between vinyl and premium wood | Installed cost depends on panel versus lap format | Edge sealing, trim, WRB integration |
| Board and batten | $0.75 to $10 or more per square foot | $10.50 to $13.90 per square foot professionally installed | Batten layout, trim, flashing, paint or stain |
Hidden line items that change the quote
Many bids look low because they leave out the work between the siding and the studs. Review line items for labor, removal, disposal, WRB or housewrap, flashing, trim pieces, corners, soffit or fascia tie-ins, caulk, nails or fasteners, profile-specific accessories, and repairs to sheathing or framing.
If door trim, window trim, or ledger flashing is being reused, ask how the installer will inspect and patch the WRB behind those areas. That single question often reveals whether the quote addresses the leak path or only the visible cladding. It also helps to compare the siding bid to related scopes such as gutter correction, trim repainting, and opening replacements so sequencing stays coherent.
How to compare bids on the same scope
| Line item | Included? | Notes to confirm |
|---|---|---|
| Tear-off and disposal | Yes / No | One layer or multiple layers removed |
| Sheathing inspection and repair allowance | Yes / No | Per sheet, allowance, or time-and-materials |
| WRB or moisture-resistant barrier | Yes / No | Full replacement or localized patching |
| Flashing | Yes / No | Kick-out, head, step, ledger, and penetration flashing |
| Trim and corners | Yes / No | New or reused; profile and material listed |
| Caulk and sealant scope | Yes / No | Where used, and where drainage is left open |
| Paint or stain | Yes / No | Factory finish versus field finish |
For a tighter apples-to-apples comparison, ask each contractor to mark whether their price includes sheathing replacement, full WRB replacement or patching only, new window and door trim, kick-out flashing, and any transitions to masonry or roofing. If one quote omits those items, it is not truly cheaper; it is simply smaller in scope.
How to calculate total exterior siding quantities
Accurate material ordering starts by calculating your gross wall area. This process involves measuring every exterior wall section, accounting for gables, and determining whether to subtract windows and doors based on your specific product and local building codes.
Using a structured takeoff prevents costly installation delays and avoids purchasing excessive surplus material. The guide covers how to convert square footage into exact panel counts, bundles, or squares while factoring in a standard 5% to 15% waste allowance for cuts.
How long does siding last, and when should it be replaced?
Siding should be replaced based on condition, water control, and repairability, not age alone. Broad guidance from the National Association of Home Builders and InterNACHI shows that service life varies by material family, but actual replacement timing changes sharply with climate exposure, installation quality, finish upkeep, and whether moisture has reached the wall assembly.[1][4]
Typical lifespan ranges by siding family
Vinyl commonly falls into a decades-long service range in consumer and trade guidance, though some walls fail sooner from impact, heat, or poor installation and some last much longer in mild conditions. Fiber cement is commonly treated as a long-service cladding when painted and flashed correctly. Wood can last a long time with disciplined maintenance, but neglect shortens it fast.[1][4]
Metal, stucco, brick, and stone veneer can have long service lives, but they are not set-and-forget systems. Corrosion, cracking, failed mortar, trapped moisture, and poor flashing still determine whether a wall is due for repair or major replacement.
Why installation quality and moisture control change service life
A premium product installed over bad flashing still has a short useful life. Missing kick-out flashing, bad clearances, back-caulked drainage paths, and reused wet sheathing can turn a long-life material into a short-term fix.
That is also why replacement timing should follow inspection findings. If the wall is dry and the profile is available, repair may beat age-based replacement.
What should be replaced first: doors, windows, or siding?
Door units usually come first when they are being replaced, because siding and trim need to lap and flash correctly to the new frame size. Window timing depends on the scope, but replacing siding before known door or window changes often creates rework, mismatched trim, and repeated disturbance of flashing.
Why door units often come first
Exterior door replacement can change brick mold width, threshold height, side flashing, and trim returns. If new siding is installed first, those details may need to be cut back later, and the WRB or flashing continuity may be broken during door work.
How window replacement affects trim and flashing scope
If windows are planned soon, treat them as part of the siding scope even if they are priced separately. Trim dimensions, head flashing, casing thickness, and WRB integration all affect the final siding layout.
For insert windows in otherwise sound walls, siding can sometimes proceed first. For full-frame windows, coordinated sequencing is safer because the rough opening and flashing package are being rebuilt.
Typical exterior project sequencing to avoid rework
- Fix roof, gutter, and bulk-water issues first.
- Replace door units first if sizes, trim, or thresholds are changing.
- Replace full-frame windows before final siding and trim.
- Open walls as needed, repair sheathing or framing, then install WRB and flashing.
- Install siding, then final trim details and sealants where specified.
In practice, this means siding is usually not the first trade on site. Water-management fixes and opening changes come ahead of finish cladding. That sequencing protects the new wall assembly from being cut apart later.
Homeowner decision checklist and replacement scope worksheet

Checklist: map symptoms to likely action
| Visible symptom | Likely issue | Usual next step |
|---|---|---|
| Faded color only | Cosmetic wear | Clean, repaint if applicable, monitor |
| Bubbles or blisters | Trapped water | Inspect substrate, flashing, WRB, and hidden moisture |
| Rot or soft spots | Chronic wetting | Open wall and repair damaged materials |
| Warping or cupping | Moisture imbalance or fastening issue | Check drainage, clearances, fastening, and sheathing |
| Cracks across multiple areas | Aging, impact, or movement | Assess repairability and profile availability |
| Mold or mildew near seams or gutters | Recurring moisture exposure | Correct water source and inspect substrate |
| Peeling paint inside | Possible wall moisture problem | Investigate siding, flashing, and interior moisture path |
| Loose panels or failed joints | Loss of weather-shedding function | Repair or replace affected section promptly |
| Profile mismatch after prior repair | Patchability problem | Consider replacing one wall or elevation |
Checklist: map climate and maintenance tolerance to siding families
| Climate or priority | Often suitable families | Watch-outs |
|---|---|---|
| Humid, rainy | Fiber cement, brick veneer, vinyl, metal | Drainage, flashing, mold-prone trim zones |
| Freeze-thaw | Fiber cement, brick veneer, metal, well-detailed vinyl | Clearances, meltwater, sealant stress |
| Low upkeep | Vinyl, fiber cement, brick, many metal systems | Still inspect caulk, trim, and storm damage |
| Wood look with moderate upkeep | Engineered wood, fiber cement, selected metal profiles | Factory finish limits, edge treatment, matching details |
| Farmhouse style | Board and batten in fiber cement, engineered wood, vinyl, wood, or metal | Vertical water detailing, batten matching |
| Modern style | Metal panels, vertical siding, smooth fiber cement, mixed materials | Fastener corrosion, trim crispness, joint layout |
Worksheet: line-item scope for accurate contractor comparisons
- List each wall or elevation and note repair, partial replacement, or full replacement.
- Write the exact siding profile, reveal, texture, and color to match or replace.
- Mark areas with bubbles, rot, warping, cracks, mold, peeling paint, loose panels, or failed joints.
- Add climate exposures: wind-driven rain, hail, snow, salt air, wildfire zone, termites, strong sun.
- State whether doors or windows will be replaced during the project.
- Require line items for tear-off, disposal, sheathing repair, WRB, flashing, trim, corners, caulk, and paint or stain.
- Ask how the quote handles mixed-material transitions and discontinued profiles.
- Compare allowances for hidden damage before judging the lowest bid.
Worksheet: visible symptoms + climate exposure + maintenance tolerance = recommended siding family
Fill this out before calling contractors. It converts what you can actually see into a shortlist that matches both exposure and upkeep tolerance.
| Visible symptoms | Climate exposure | Maintenance tolerance | Recommended siding family | Why it rises to the top |
|---|---|---|---|---|
| Mostly faded finish, no softness, no open joints | Mild to moderate exposure | Low | Repair existing siding or replace in-kind vinyl | When the wall is dry, matching and scope control usually matter more than upgrading materials |
| Warping, repeated wetting near trim, one elevation affected | Humid or rainy | Low to moderate | Fiber cement or well-detailed vinyl for the affected wall | Both can work well if the repair includes flashing, WRB patching, and corrected runoff |
| Rot, soft sheathing clues, recurring paint failure | Any; worse in wet or freeze-thaw climates | Moderate | Replacement after substrate repair; fiber cement, brick veneer, or metal often shortlist well | The wall assembly needs repair first, then a cladding that fits exposure and desired upkeep |
| Cracking from impact or brittleness | Hail or severe temperature swings | Low | Fiber cement, metal, or upgraded impact-conscious profile choices | These families are often considered when repeated impact or brittleness rules out another vinyl patch |
| Historic look required, repairable wood details present | Moderate climate, manageable insect risk | High | Wood | Wood remains the best stylistic match when the owner accepts repaint cycles and close inspection |
| Need vertical farmhouse look on a replacement project | Mixed climates | Low to moderate | Board and batten in fiber cement, engineered wood, vinyl, or metal | The profile can be preserved while material choice adjusts for upkeep and exposure |
| Modern exterior, coastal or high-UV site | Salt air or strong sun | Low | Metal or smooth fiber cement | These families often align better with crisp modern detailing and lower repaint frequency |
| Termite pressure near grade with recurring splashback | Humid, insect-heavy | Low to moderate | Fiber cement, brick veneer, vinyl, or metal | They usually reduce risk compared with all-wood assemblies, provided clearances are corrected |
Bid-scope checklist homeowners can hand to contractors
Use this checklist to force scope clarity. A complete bid should answer these items directly instead of burying them in exclusions.
- Exact siding family, profile, reveal, texture, and color or closest-match note
- Repair, one-wall replacement, multi-elevation replacement, or full reside clearly stated
- Tear-off included or excluded, with disposal method and dump fees
- Sheathing inspection method and repair pricing basis
- WRB scope: full replacement, patching, or tie-in only
- Flashing scope: kick-out, step, head, sill, ledger, Z-flashing, and penetration flashing
- Window and door trim treatment: reuse, replace, or resize
- Corner boards, starter strips, J-channel, trim blocks, soffit, and fascia tie-ins
- Clearance corrections at roofs, decks, porches, paving, and grade
- Caulk locations and drainage openings that must remain unsealed
- Paint or stain scope, including primer and field-finish touch-up responsibility
- Fastener type for coastal, treated-wood, or wildfire-adjacent conditions
- Allowance for hidden framing or insulation repairs
- How discontinued profiles or mixed-material transitions will be handled
- Who is responsible for gutters, downspouts, and runoff corrections that caused the siding failure
Homeowners who work through this worksheet tend to get cleaner bids because the conversation shifts from “price per square” to “what exactly is being rebuilt.” That is the difference between a cosmetic reside and a leak-solving scope.
Fire resistance and material safety standards
Choosing siding materials with high fire resistance reduces the risk of ember ignition during wildfires. The supporting article compares fiber-cement, metal, stucco, and brick against combustible options like vinyl and wood. It details how noncombustible assemblies and sealed joints prevent wall penetration by hot embers. This analysis helps homeowners select the safest profile for remodels or new builds without sacrificing aesthetics.
Understanding whole-wall fire behavior is critical for protecting property from exposure. Learn which specific siding types offer the best balance of safety and cost in our guide to fire-resistant exterior siding options to ensure your home withstands high-heat events effectively.
Fire resistance: material selection and wall assembly details
Selecting siding for high-fire-risk zones requires evaluating material flammability alongside the integrity of the entire wall assembly. The supporting guide breaks down fiber-cement, metal, and stucco, explaining why gaps in installation can allow embers to ignite the structure before the siding itself matters.
Use the exterior siding fire resistance analysis to compare specific materials against your budget and aesthetic goals. This data helps you identify which noncombustible options and joint sealing techniques will best protect your investment during wildland-urban interface exposures.
Frequently asked questions
what is the best exterior siding for a house
The best exterior siding is the one that fits the wall’s actual problem, your climate, and your maintenance tolerance. A dry wall with isolated damage may only need matching repair, while a wet wall usually needs flashing, WRB, and substrate work before any material choice delivers lasting performance.
What are the best residential siding options?
The main residential siding options are vinyl, fiber cement, engineered wood, wood, brick veneer, stucco, metal, and stone veneer. The best shortlist depends on climate exposure, upkeep expectations, and whether you need a repair, one-wall replacement, or a full reside with new flashing and trim integration.
Which siding lasts longest with the least maintenance?
Brick veneer, many metal systems, and properly detailed fiber cement are often chosen for long service with relatively low routine upkeep. They still need washing, storm checks, and drainage maintenance. Long lifespan does not mean no maintenance; most premature siding failures still trace back to water-management defects, not simple age.
Should I replace the doors or siding first?
Replace doors first when frame size, threshold height, or trim layout will change. That lets the new siding and flashing tie into the finished opening correctly. If siding goes on first and the door package changes later, the project often ends up with cut-back trim, disturbed WRB, and avoidable rework.
How often should siding be replaced?
Siding should be replaced when it no longer manages water, can no longer be repaired cleanly, or the wall behind it is damaged. There is no universal schedule. Condition, climate exposure, installation quality, and profile availability matter more than age alone when deciding between repair, partial replacement, and full reside.
Sources
- [1] National Association of Home Builders, Life Expectancy of Home Components. Used for broad service-life guidance by material family.
- [2] Angi, national siding cost guides. Used for broad installed-cost positioning and board-and-batten cost benchmarks.
- [3] HomeAdvisor, national siding cost guides. Used to cross-check installed and material-only cost ranges by siding family.
- [4] InterNACHI, home-exterior and component life-expectancy references. Used to support condition-based lifespan framing and variation by installation and exposure.
- [5] U.S. Department of Housing and Urban Development, building-envelope maintenance guidance. Used for moisture-warning signs and why hidden water intrusion matters.
- [6] FEMA and building-envelope best-practice guidance on water intrusion, flashing, and drainage-plane continuity. Used for the repair-versus-replacement emphasis on flashing and WRB details.
Sponsored / affiliate links. As an Amazon Associate I earn from qualifying purchases. I may earn additional commission from eligible campaigns.