Winter Weatherproofing: How to Draft-Proof Your Home
Find leaks before you start sealing. Close gaps of about 1/4 inch or less with caulk or weatherstripping, but if air is moving through larger openings, wet insulation, or rotten parts, repair the assembly before adding insulation. If you treat the wrong leak the wrong way, you can trap moisture, lose heat, and still end up with rooms that feel cold.
What you’ll need


- Flashlight
- Tissue, incense stick, or smoke pencil for air movement checks
- Tape measure
- Marker or painter’s tape to flag leak spots
- Step stool
- Silicone caulk
- Caulk gun
- Weatherstripping in foam or rubber
- Adhesive foam tape for operable window parts
- Low-expansion expanding filler for larger voids around frames
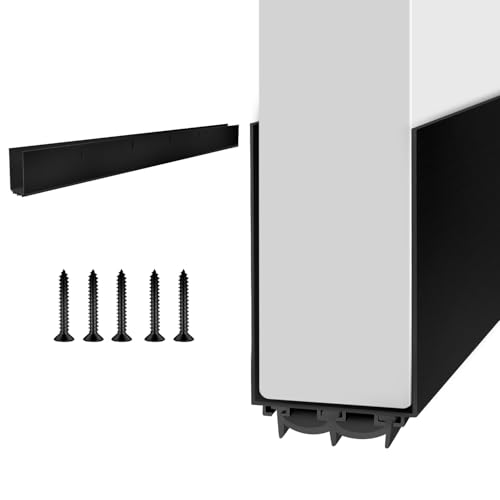
- Door sweep in vinyl, rubber, bristle, or U-shaped style
- Door draft excluder or door snake for seasonal use
- Window insulation film kit with double-sided tape
- Thermal curtains or drapes
- Interior storm windows with magnetic attachment if needed
- Scraper or putty knife for old residue
- Cleaning wipes or mild cleaner
- Scissors or utility knife for trim-to-fit products
- Gloves
Draft symptoms matrix
| Leak symptom | Likely cause | Best DIY fix | Materials needed | Difficulty | When to call a pro |
|---|---|---|---|---|---|
| Tissue moves at window trim edge | Stationary crack between frame, trim, or masonry | Seal seam with silicone caulk | Silicone caulk, caulk gun, wipes | Easy | If trim is rotten, loose, or moisture stained |
| Cold air at meeting rail or sash edge | Moving joint at operable window | Apply adhesive foam tape or sash weatherstripping | Foam tape or rubber weatherstripping, scissors | Easy | If sash is warped, loose, or will not latch |
| Visible light around closed exterior door | Worn weatherstripping or misaligned door | Replace frame weatherstripping, then adjust latch if needed | Foam or rubber weatherstripping, screwdriver if screw-fixed | Easy to moderate | If hinges sag or frame is out of square |
| Draft under front door | Bottom gap or damaged threshold seal | Install door sweep matched to threshold | Door sweep, drill or screwdriver, tape measure | Moderate | If door slab is bowed or threshold is broken |
| Large gap between frame and wall hidden by trim | Void too large for caulk | Use low-expansion expanding filler | Low-expansion filler, knife, gloves | Moderate | If cavity is wet, moldy, or open to pests |
| Window feels cold but no air movement | Conductive heat loss through glazing | Add window insulation film or interior storm window | Film kit or interior storm panel, hair dryer | Easy to moderate | If glass has failed seals or frame is decayed |
| Frost or condensation near drafty window | Cold glass plus air leakage | Seal leaks first, then add film | Caulk or foam tape, film kit | Easy | If condensation is persistent inside wall or sash pockets |
| Room drafts only when dryer or bath fan runs | Pressure imbalance pulling outside air in | Check vent dampers and obvious bypasses | Flashlight, replacement vent flap if needed | Moderate | If issue points to duct leakage or combustion safety concerns |
| Cold air near attic hatch or pull-down stairs | Unsealed attic opening and stack effect | Weatherstrip hatch and improve insulation cover | Foam or rubber weatherstripping, insulation cover materials | Moderate | If attic bypasses are widespread or access is unsafe |
| Sliding door rattles and leaks at panel edge | Worn pile seal, poor roller alignment, weak latch compression | Replace sliding-door weatherstrip and adjust rollers | Replacement seal, screwdriver, cleaner | Moderate | If frame is bent or glass panel drags badly |
| Cold trim and stained casing around a window | Missing insulation around opening or water intrusion | Remove trim selectively and fill concealed voids | Pry tool, low-expansion filler, caulk | Moderate | If staining suggests flashing or exterior water failure |
| Light at dryer vent flap or range hood damper | Exterior flap not closing tightly | Clean, adjust, or replace damper assembly | Replacement flap or damper, screws, sealant | Moderate | If duct run is damaged or inaccessible |
How do you find where cold air is coming into your house?
Check for moving air first, then separate that from plain cold surfaces. Air leakage shows up as tissue movement, visible light, rattling sash, or a draft that changes with wind or exhaust fans. Conductive heat loss feels cold to the touch without actual air movement, which points to glazing, missing insulation, or both.
Use symptom clues in the right order
Start at exterior doors, openable windows, attic openings, and utility penetrations. Those areas often give you the biggest comfort gain per repair. Draftiness is often caused by poor insulation and poorly sealed windows and doors, so one cold room can have more than one source.
Use a flashlight after dark. Check for visible light at door perimeters, around sliding doors, and at attic hatches. If light gets through, air usually does too. A smoke pencil, incense stick, or a strip of tissue will show airflow far better than your hand.
Cold trim needs a second look. If the trim feels cold but the tissue stays still, the issue may be missing insulation around the frame or simple heat transfer through the assembly, not a direct draft.
Check the missed edge cases
Dryer vents, range hood dampers, pull-down attic stairs, and older sliding doors often get skipped because they do not look like windows. They still leak. A room that feels fine until the dryer runs may be dealing with pressure imbalance, not a bad window seal.
If a back bedroom feels drafty only when the bath fan is on, stop shopping for more window film and check whether the fan is pulling replacement air through a weak attic hatch seal, a vent flap, or an unsealed window stop.
Mark and rank before buying materials
Mark each leak with painter’s tape and sort it into one of five types: stationary crack, moving joint, large hidden void, bottom-of-door gap, or whole-window heat loss. That quick sort prevents common errors, such as caulking a sash track or using film when a latch adjustment is the real fix.
How to Stop Cold Air Coming Through a Dryer Vent
If your dryer vent is letting in cold air, the problem is usually a stuck exterior damper, a blocked hood, or a leaky duct connection. This supporting guide walks through how to pinpoint the source from both inside the laundry room and outside at the vent cap, so you can fix the right part instead of sealing over a bigger issue.
It also explains which repairs are safe at each access point, what mistakes to avoid, and when a draft points to a larger vent problem. If you’re trying to reduce heat loss, pest entry, and lint-related moisture issues, dryer vent draft troubleshooting is the next step.
Insulate the attic access point that fits your home
Attic access is a common place heat escapes, but the right fix depends on the type of opening. A ceiling hatch usually needs a gasketed, insulated cover, while pull-down stairs are best handled with an insulated tent or box that seals the stair opening. For knee-wall doors, the key steps are weather-stripping the frame and adding rigid foam so the panel itself blocks heat transfer. The attic door insulation guide explains how to choose the right method, seal the leak paths first, and avoid common mistakes that leave DIY insulation underperforming.
Do closed interior doors actually make a room warmer?
Usually, yes: shutting an interior door can reduce room-to-room air mixing and cut small drafts, so the room may feel warmer faster. The tradeoff is airflow. In some homes, a closed door can limit supply and return air paths, which may create pressure imbalance, uneven temperatures, or extra strain on the HVAC system.
The closed-door warmth guide explains when this trick helps, when it does very little, and how to keep a room comfortable without blocking the heating system’s airflow. That matters because the same door that keeps warmth in can also make the rest of the house colder if the room depends on shared return air.
Does insulating paint actually help with cold walls?
Insulating paint can help a little on certain problem surfaces, but it is not a substitute for real insulation or air sealing. The supporting article explains where it may reduce heat loss, where it has little impact, and why most homes will not see a meaningful winter payoff from coating a wall alone. It also compares the claims against practical fixes, so you can avoid spending money on a product that does not address drafts, gaps, or weak insulation.
If you are weighing whether it belongs in your project list, the insulating paint guide lays out the limits, the best-use cases, and the smarter sequence for improving comfort and lowering bills.
When Windows Are Sweating, It’s Often a Moisture Problem
If you see condensation on the inside of your windows in winter, the issue is usually excess indoor humidity, poor airflow, or both—not just “bad windows.” The supporting guide explains how to tell whether the glass is cold enough to trigger sweat, why some rooms are worse than others, and how indoor moisture levels around 30% to 40% can reduce the problem.
That matters because lingering condensation can lead to mold, stained trim, and damaged sills. For a practical breakdown of causes, quick checks, and fixes, see winter window sweat.
How to Free a Window That’s Stuck in Winter
If a sash won’t budge because cold weather has locked it in place, the supporting article walks through the practical ways to get it moving again without damaging the frame, glass, or weatherstripping. It covers the basic tools you may need, how to tell whether the problem is ice, paint, or swelling wood, and the safer sequence for loosening a frozen sash. See the frozen window guide for the step-by-step approach.
This matters because a stuck window is more than an annoyance: forcing it can crack glass, split trim, or make the window harder to seal later. The article also explains when a recurring freeze-up points to a larger issue that may need repair.
How to winterize a window air conditioner
If a window AC stays in place through winter, the key is to block air leaks at the frame, seams, and exterior gaps. The supporting guide explains the three main approaches: seal around the unit with weatherstripping and caulk, insulate it if you remove it, or use a temporary draft plug when you need a fast fix. That matters because an unsealed unit can pull cold air indoors, let moisture build up, and drive up heating costs.
For a step-by-step breakdown of materials, installation choices, and common mistakes to avoid, see window AC winter sealing.
Budget Winterization: What to Fix First
If you want the biggest winter payoff without overspending, start with the basics that protect heat and water systems first. The supporting guide breaks down the lowest-cost fixes in order of impact: sealing air leaks, insulating exposed pipes, servicing the heating system, and protecting the most vulnerable windows and doors. That matters because these are the problems most likely to drive up bills or cause frozen pipes and water damage.
It also shows how the priorities change for occupied homes versus vacant or vacation properties, so you can spend where it counts. See the full budget winterization guide for the step-by-step plan.
How to Cut Heat Loss from Single-Pane Windows
Single-pane windows usually lose heat in three places: the sash gaps, the frame perimeter, and the glass itself. The supporting guide explains how to identify which problem is doing most of the damage so you do not spend money on the wrong fix. That matters because the cheapest effective repair is not always the same for every window.
It then walks through the practical options in order, from sealing stationary gaps to adding film or a storm panel when the glass is the main weak point. If you want a simple, step-by-step way to choose the right repair, reducing single-pane heat loss shows how to match the fix to the failure point.
Should you use caulk, weatherstripping, foam, or film?
Use silicone caulk for stationary joints, weatherstripping for parts that close and move, low-expansion filler for larger hidden voids, and film or interior storms for windows that still feel cold after air leaks are sealed. Match the material to the symptom, or the repair will fail early or block movement and drainage.
Use silicone caulk on cracks that should never move
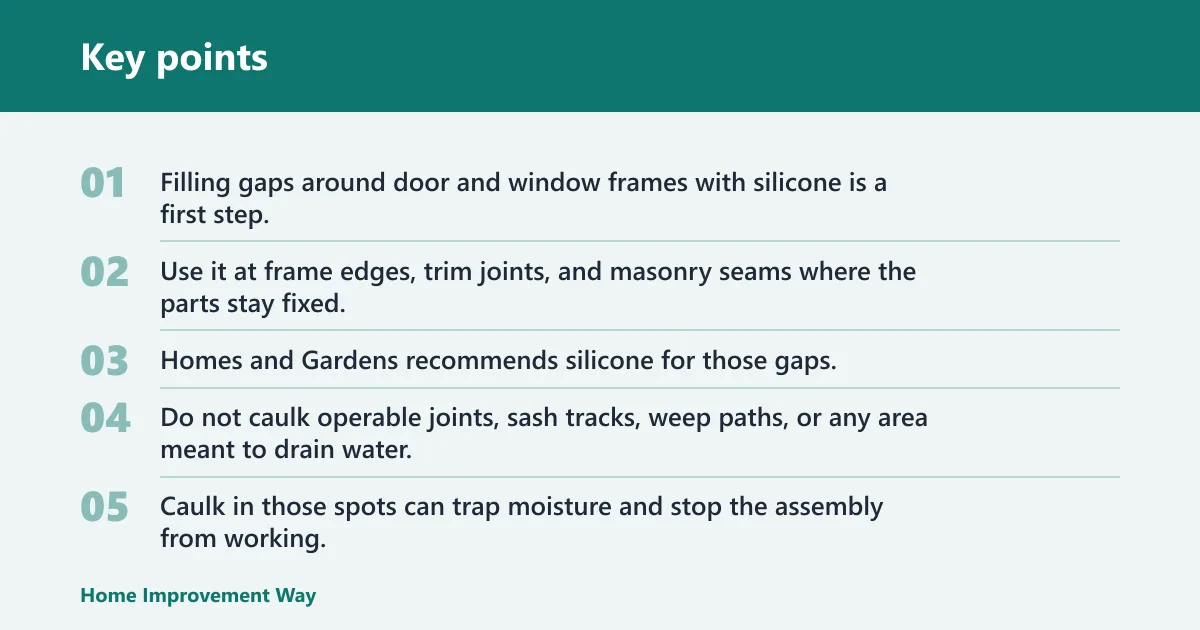
Filling gaps around door and window frames with silicone is a first step. Use it at frame edges, trim joints, and masonry seams where the parts stay fixed. Homes and Gardens recommends silicone for those gaps, and that fits stationary cracks around frame perimeters.
Do not caulk operable joints, sash tracks, weep paths, or any area meant to drain water. Caulk in those spots can trap moisture and stop the assembly from working.
Use weatherstripping at compressing joints
Draft-proofing strips are usually self-adhesive or fixed with small screws. Use foam or rubber weatherstripping around door and window frames where a panel closes against a stop. Trim it cleanly, then make sure the door or sash still closes without too much force.
Adhesive foam tape works well on the openable parts of a window. It is a practical DIY material for moving joints, especially on older double-hung windows and casement stops. It fails on dirty surfaces, peeling paint, or warped frames that cannot compress evenly.
Use expanding filler only for larger concealed voids
Expanding filler belongs between window or door frames and masonry or rough openings when the gap is too large for caulk. Choose a low-expansion product so the frame does not get pushed out of alignment. Apply it in short runs, let it expand, then add more in the same area only if the void stays open.
Picture a draft at one upper corner of a window where the trim feels icy and the tissue moves only there. Removing a small trim section may expose a hidden cavity. That calls for filler, not a second bead of caulk on the painted face.
Use film and secondary panels for whole-window weakness
Window insulation kits do help when the problem is the window assembly itself rather than a single crack. Window film is commonly said to help keep warm air in during winter and reduce summer solar glare. A window insulation kit is commonly said to help create a tighter seal and reduce frost build-up.
Shrink-wrap kits use plastic sheeting attached with double-sided tape and tightened with a hairdryer. That creates an insulating air pocket. Adhesion often fails on dusty, oily, flaking, or very cold surfaces, so frame cleaning matters as much as the film itself.
How to Install Window Insulation Film
Window insulation film is a quick way to cut heat loss from drafty windows, but only if it’s installed carefully. The step-by-step guide on window insulation film explains the full process: cleaning and prepping the frame, measuring, applying double-sided tape, laying the film smooth, and shrinking it with a hair dryer.
That matters because skipped prep is what causes peeling, wrinkles, and air leaks at the corners. The article also covers when film makes sense, which windows to avoid, and how to handle painted trim, vinyl frames, or older wood so the kit seals well and lasts through winter.
How to Remove Window Insulation Film Safely
If your seasonal film needs to come down, the safest approach is to loosen the adhesive first and lift the film only when it releases cleanly. The supporting guide walks through a paint-safe removal order, including how to test a corner, when to use low heat or a damp cloth, and when to stop if trim paint starts lifting. It also explains how the process changes for wood, vinyl, aluminum, and painted metal frames so you can avoid tearing flakes or leaving sticky residue behind. For a step-by-step breakdown, see window insulation film removal.
Why window insulation film wrinkles or won’t stay put
Window insulation film usually wrinkles or fails to stick because the frame is damp, dirty, too cold, or the tape never formed a complete seal. The supporting guide breaks down those causes one by one so you can tell whether the problem is surface prep, temperature, or installation technique. It also explains what to fix first so you do not keep reapplying film that will only loosen again.
That matters because a poorly bonded film wastes material, leaves heat loss unchecked, and can trap condensation at the glass. If you are troubleshooting a loose finish or early failure, this window insulation film guide shows how to diagnose the symptom and correct it before the season gets colder.
When an Interior Storm Window Makes More Sense Than Film
Interior storm windows are usually the better choice when you want a reusable, tighter-sealing fix that improves comfort for more than one winter. The supporting article explains how they compare with plastic film on cost, installation effort, insulation value, condensation control, and durability, so you can decide whether a quick seasonal patch or a more permanent solution fits your home. It also covers where each option makes the most sense, such as older homes, rentals, and condos, and why a better seal can reduce cold spots and drafty feel. See the full breakdown in interior storm windows.
Choosing Caulk for Cold-Weather Repairs
Cold weather changes how caulk bonds, cures, and lasts, so the right product matters more than usual. The supporting guide explains which sealants hold up best in freezing conditions, including when to choose cold-weather acrylic latex versus 100% silicone or polyurethane for wetter or more flexible joints. It also covers the minimum application temperature on the tube, which is often more important than the outdoor forecast.
That matters because the wrong caulk can shrink, peel, or fail before winter ends, letting drafts and moisture come back. For a practical breakdown of product types, prep steps, and when to wait instead of sealing, see freezing-temperature caulk.
Check spray foam temperatures before winter projects
Spray foam can fail in cold weather if the air or substrate is below the product’s minimum application temperature, so the key is to verify the label before work starts. The supporting guide on spray foam temperatures explains what “too cold” means, how winter-grade products differ, and why low temperatures can lead to poor expansion, weak adhesion, shrinkage, and costly rework.
That matters because draft sealing only works when the insulation bonds and cures correctly. If you are planning a cold-weather job, this article helps you decide whether to proceed, adjust the site conditions, or delay until temperatures are within range.
How to Warm a Cold Basement
If your basement always feels chilly, the supporting guide breaks down the fastest fixes and why they work. It starts with air leaks and then moves to insulation, moisture control, and heating choices, so you can avoid spending money on a fix that leaves the real problem untouched. For a clear walkthrough of those options, see cold basement warmth.
That matters because basement cold is often caused by a mix of drafts, uninsulated surfaces, and damp air. Matching the solution to the cause can make the space more comfortable, lower energy waste, and help prevent moisture-related problems from getting worse.
Why Baseboard Vents Feel Cold
Cold air at hydronic baseboards is often normal when the boiler is off or just warming up, but a steady draft during a heat call usually points to trapped air, a problem with the air separator, or an actual leak. The supporting guide on cold baseboard air explains how to tell those causes apart by watching when the draft happens and checking the system’s response.
That matters because the same symptom can mean anything from harmless convection to wasted fuel, uneven room temperatures, and a heating issue that will keep coming back until it is fixed.
How to Keep a Garage Warm on a Budget
If your garage feels unusably cold, the cheapest path is to seal leaks before you buy heat. This guide explains the best order for low-cost fixes, starting with weatherstripping, caulk, and foam, then moving to garage door insulation, wall or ceiling insulation, and finally a heater only if the space can hold warmth. That matters because the wrong upgrade can waste money fast while leaving the garage drafty.
For a practical step-by-step plan, see garage warming basics. It shows where cold air enters most often and which upgrades usually deliver the biggest comfort gain for the least cost.
Area Rugs and Winter Warmth
Area rugs can make a room feel warmer by insulating cold flooring and adding a softer surface underfoot, but they usually do not raise the air temperature in the room. The biggest difference comes from pairing a thicker rug with a dense pad, especially over tile, wood, or another hard floor that loses heat quickly.
If you are trying to decide whether a rug is worth the cost, the details matter: pile height, backing, pad material, and what is underneath all affect comfort. The area rugs winter guide explains when rugs help, when they barely change anything, and how to choose one that actually improves winter comfort.
How do you draft-proof your home in the right order?
Work from highest comfort return to lowest: seal obvious air leaks first, then moving joints, then larger concealed voids, then door bottoms, and only after that add film, interior storms, or thermal curtains. Finish by checking the attic opening and pressure-related leaks, because those can undo room-by-room repairs.
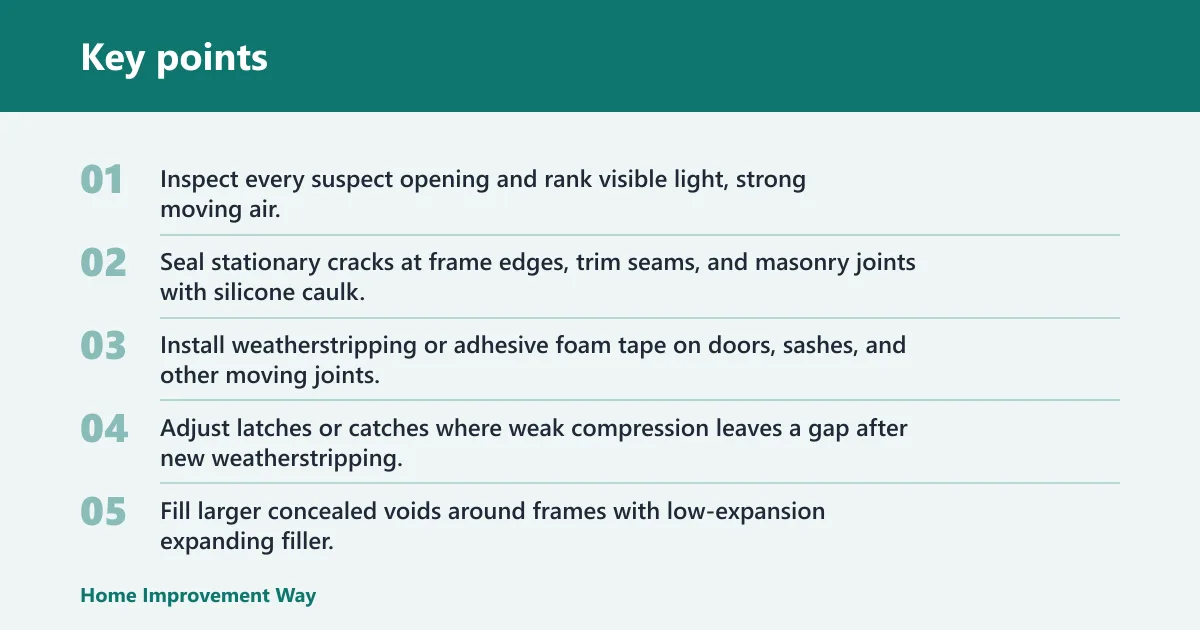
- Inspect every suspect opening and rank visible light, strong moving air, and attic leaks first.
- Seal stationary cracks at frame edges, trim seams, and masonry joints with silicone caulk.
- Install weatherstripping or adhesive foam tape on doors, sashes, and other moving joints.
- Adjust latches or catches where weak compression leaves a gap after new weatherstripping.
- Fill larger concealed voids around frames with low-expansion expanding filler.
- Fit a door sweep to each exterior door bottom, matching the threshold shape and gap.
- Add a door snake only as a temporary or seasonal block where hardware is not practical.
- Apply window insulation film to cleaned frames on drafty windows that still feel cold.
- Install interior storm windows on problem windows in older homes where replacement is premature.
- Hang thermal curtains or drapes that reach the floor with generous overlap at the sides.
- Seal and insulate the attic opening or attic door before calling the job finished.
- Re-test with tissue or smoke after each group of fixes so you know what changed.
Why this order works
HomeServe says re-caulking windows and adding weatherstripping are relatively easy, inexpensive fixes. Those should come first because they stop direct air movement. Secondary layers still matter, but they should not have to make up for an open perimeter joint or a missing latch seal.
Thermal curtains and drapes still belong on the list after sealing. The same source says thermal blinds or curtains can reduce thermal transfer by almost 20%. For better results, they should reach the floor and overlap the window trim generously, so room air is less likely to circulate behind them.
If that didn’t work, try this next
If a sealed window still feels cold with no air movement, move to window film or an interior storm panel. If a sealed door still leaks at the latch side, check hinge sag and strike alignment. If one room stays drafty after window and door work, inspect the attic hatch, nearby vent dampers, and any exhaust-fan pressure effect.
Storm Prep Beyond Drafts
Draft-stopping helps, but a true winter readiness plan also protects heat, water lines, and power. The winter storm checklist walks through the right order: secure backup heat, protect pipes in high-risk rooms, gather outage supplies, and check exterior and attic areas before temperatures drop. That matters because a short cold snap can still cause burst pipes, unsafe indoor temperatures, and longer recovery if key systems fail.
Use it as a practical room-by-room guide when you want to reduce damage fast and avoid missing the steps that matter most during a storm warning.
Pinpointing the True Source of the Draft
Replacing windows often fails to eliminate drafts because the air leak usually originates at the rough opening, rim joist, or ducts rather than the glass itself. Prioritizing the correct repair prevents unnecessary replacement costs and ensures heating efficiency. Diagnosing post-replacement drafts outlines a triage process using smoke tests to distinguish between window frame leakage and broader structural gaps. This approach helps homeowners identify the single largest air leak before applying fixes, avoiding the cycle of spending on ineffective solutions while maintaining high energy bills.
How do you stop drafts coming under your front door?
Measure the gap, inspect the threshold, and choose a sweep that matches the floor condition before you buy anything. A door sweep is the main repair because it blocks outside air, moisture and light at the bottom of doors. A door snake is a cheap seasonal backup, not a durable repair.
Match the sweep to the threshold
Use vinyl or rubber sweeps where the threshold is fairly even and the door can compress the seal without dragging. Use bristle sweeps where the floor is rough or slightly uneven. Use a U-shaped sweep when the door design accepts a wraparound profile and a cleaner, more secure fit.
Measure the bottom gap in several places, not just the center. A bowed slab or worn hinges can make one corner leak while the rest looks tight.
Know when the sweep is not the problem
The Weather Channel notes that door sweeps block outside air, moisture and light, but they cannot straighten a twisted door or repair a damaged threshold. If the latch side shows light from top to bottom, start with frame weatherstripping or alignment instead.
The same source describes a door snake as a low-tech and affordable option. That makes it useful for renters, rarely used doors, or a quick overnight fix during a cold snap. It does not stop leakage when the door opens, and it does nothing for latch-side or hinge-side drafts.
If that didn’t work: replace frame weatherstripping after installing
Replace frame weatherstripping after installing the sweep. Then tighten hinges, check for sag, and inspect the threshold cap for damage. If the slab is bowed or the jamb is out of line, a carpenter or door technician is the next step.
How to stop sliding glass door drafts
A drafty sliding door usually comes down to one of three problems: worn weatherstripping, a door that no longer closes evenly, or a latch that leaves a small gap. The fastest fix is to identify which leak path is actually letting air through before replacing parts you do not need. The sliding door draft guide shows how to check for light gaps, dragging rollers, and misalignment, then match each symptom to the right repair.
That matters because the wrong fix can leave cold air coming in even after you spend time on caulk or new strips. By separating seal problems from hardware problems, you can make the door close tighter, cut heat loss, and avoid buying the wrong replacement part.
How to stop a sliding glass door from bleeding heat in winter
A drafty sliding glass door usually needs one of three fixes: fresh weatherstripping for perimeter leaks, caulk or backer rod for frame gaps, or an interior film or thermal shade when the glass is the coldest surface. The supporting guide breaks down how to identify the leak path first, so you do not waste time sealing the wrong spot or miss a moisture problem near the track.
If your door feels cold, rattles in the frame, or leaves the room noticeably chillier, this sliding glass door insulation guide explains which repair matches the problem and what result to expect from each option.
Do Door Draft Stoppers Help at All?
Yes—door draft stoppers can reduce air leakage when the gap is small and the product fits the floor surface. The key is matching the stopper to the opening: a style that works on smooth flooring may drag or fail on carpet, while an oversized one can make the door hard to close. The supporting article breaks down door draft stoppers by gap size, floor type, and common fit issues so you can tell whether one will actually solve the problem or if a door sweep is the better fix.
That matters because the wrong choice can waste money, leave drafts untouched, and create new headaches like sticking doors, dust infiltration, and poor seal performance.
How to Stop a Mail Slot Draft
If cold air is coming through your mail slot, the fix usually starts with the slot itself: seal the interior flap, add a brush or magnetic draft cover, or replace worn hardware. If the door or frame is warped, the article explains when a quick seal is enough and when replacement is the better option.
This matters because an open or leaky mail slot can raise heating costs, make nearby rooms uncomfortable, and let dust and moisture indoors. The guide at mail slot repair guide walks through leak detection, repair choices, and compatibility so you can match the fix to your door.
Why a Front Door Sticks in Cold Weather
Cold weather can make a front door hard to close because the door slab, weatherstripping, hinges, or strike plate may shift just enough to stop the latch from catching. The supporting article breaks down those causes in a practical order, so you can identify whether the problem is swelling, shrinkage, sag, or simple binding before you start turning screws.
That matters because the wrong fix can make the fit worse or leave you with drafts, a loose lock, or extra wear on the hinges and trim. If your door suddenly won’t latch in winter, front door cold-weather troubleshooting helps you make the safest first repair and avoid bigger hardware problems.
When is sealing gaps not enough?
Sealing is not enough when the assembly is damaged, the wall cavity around it lacks insulation, or the room is affected by pressure imbalance. Rot, recurring condensation, stained trim, failed balances, and persistent cold despite no detectable air movement all point beyond simple draft-proofing products.
Separate drafts from weak insulation
If the tissue stays still but the wall around a window is cold, the issue may be missing insulation around the opening or a broader wall problem. In that case, selective trim removal, concealed filler, or insulation work will do more than another visible bead of sealant.
Attic openings need special attention. A leaky attic door or pull-down stair can hurt comfort across the whole house because warm air escapes upward and replacement air gets pulled in elsewhere. Many people seal windows carefully and still miss the strongest whole-house bypass.
How to draft-proof older homes without replacing windows
Older homes often respond well to reversible measures first: careful caulk lines at stationary trim joints, selective weatherstripping on sash contact points, interior storm windows with magnetic attachment, and seasonal film where trim condition allows it. That approach protects older trim and avoids rushing into full window replacement.
If your house has original wood windows that rattle on windy nights but the frames are sound, start with meeting-rail weatherstripping, then side-stop foam tape, then an interior storm panel on the worst room. Replace the window only if the frame is failing, not simply because the glass feels cold.
When to call a pro
Call for help when frames are rotten, doors are warped, hidden cavities are wet, pressure clues point to duct leakage, or attic bypasses are extensive and hard to reach. Sealing products cannot correct failed framing, flashing problems, or unsafe venting conditions.
Prevention: clean old adhesive residue, dust, and loose paint before each heating season, then recheck latches and sweeps. Most winter sealing failures start with poor surface prep or a door that no longer closes squarely.
Test for Leaks Before You Seal Anything
Before you buy caulk or weatherstripping, use a simple smoke or flame test to find which gaps are actually leaking. The supporting guide explains how to use incense or a candle on a still day, how to tell the difference between a real draft and normal air movement, and where to start looking first so you do not waste time on the wrong spots. It also covers how to mark and rank leaks so you can tackle the biggest energy losses first.
If you want a practical way to narrow down problem areas in your home, incense leak detection can help you identify the drafts that matter most before you seal them.
When a Whistle Means a Window Leak
A whistling window usually means air is slipping through a small gap, not that the whole window has failed. The supporting guide breaks down the most likely causes—like loose hardware, worn weatherstripping, or a weak seal—and explains how to tell a whistle from a rattle or other draft noise. That matters because the right fix depends on where the leak is coming from; sealing the wrong spot wastes time and leaves the problem in place. If you want a clear way to diagnose the noise and choose the right repair, start with window whistle causes.
When a Window Feels Cold but Isn’t Leaking
If a window feels cold in winter, the first question is whether you’re dealing with normal heat loss through the glass or a real air-leak problem. The supporting guide explains how to tell the difference by looking for clues like drafts, condensation, and uneven room temperature, so you do not waste time sealing the wrong spot. It also shows when a cold surface points to a repair issue versus simple insulation limits.
That distinction matters because the fix changes the outcome: a surface chill may call for better window treatment or insulation, while leakage or excess humidity can raise heating bills and damage trim. For a step-by-step way to diagnose the problem, see cold window diagnosis.
Common mistakes
Using the wrong product on the wrong joint
Caulk belongs on stationary seams. Weatherstripping belongs on moving joints. Expanding filler belongs in concealed larger voids. Film belongs on windows that are still weak after leakage points are sealed. Mix those up and you get sticking windows, blocked drainage, and poor adhesion.
Applying products to dirty or cold surfaces
Foam tape and film fail early on dusty, oily, or peeling paint. Clean first, let the surface dry, and trim products to fit instead of stretching them. Residue from old tape is a common reason a new strip peels away within days.
Windows and doors are obvious, but attic hatches, dryer vents, range hood dampers, and sliding door panel edges can waste as much comfort as a visibly cracked frame. If one room still drafts after easy repairs, go upward and outward before buying more products for the same window.
Treating temporary fixes as permanent repairs
Door snakes, towels, and seasonal tape have their place. They do not replace a proper sweep, aligned latch, or weatherstripped stop. Use them to get through a season or a rental restriction, then move to the hardware fix when you can.
Frequently asked questions
What is the cheapest way to draft-proof a home for winter?
The cheapest permanent fixes are usually silicone caulk on stationary frame cracks and self-adhesive weatherstripping on doors and windows that still close tightly. For a temporary option, a door snake costs less than hardware, but it only helps at the bottom edge and only when the door is shut.
Should I use caulk or weatherstripping around windows and doors?
Use caulk on any joint that should never move, such as trim-to-frame and frame-to-masonry seams. Use weatherstripping on sashes, door edges, and other closing surfaces that need compression. If the gap is hidden and larger than a caulk seam, low-expansion filler is the better choice.
Do window insulation kits really help in winter?
Yes, if the frame tape sticks well and the window is cleaned first. The plastic sheeting creates an insulating air pocket when tightened with a hairdryer, and that can reduce drafts and frost build-up. It is most useful on older, cold windows after obvious perimeter leaks are already sealed.
Can thermal curtains or shades reduce heat loss?
Yes. The same source says thermal blinds or curtains can reduce thermal transfer by almost 20%. They work best when they reach the floor, overlap the trim generously, and are closed at night. They do more for cold-glass discomfort than for a true air leak around a loose sash.
When should I replace insulation instead of sealing gaps?
Shift toward insulation work when you find cold wall cavities, attic hatch leakage, or still-air surfaces that remain very cold after cracks and moving joints are sealed. Seal first, then insulate where needed. Wet insulation, missing cavity fill, and open attic bypasses usually need more than surface draft-proofing.
What parts of the home cause the biggest heat loss in winter?
The worst comfort problems usually come from a mix of direct air leaks and weak thermal barriers: attic openings, poorly sealed exterior doors, leaky window joints, large concealed frame voids, and old windows with little insulating value. The attic hatch is often missed, yet it can affect several rooms at once.
Sponsored / affiliate links. As an Amazon Associate I earn from qualifying purchases. I may earn additional commission from eligible campaigns.