How to Stop Cold Air Coming Through Window Frames
Stop cold air coming through window frames by finding the exact leak path first, then sealing the gap with the smallest fix that fits: caulk for hairline cracks, weatherstripping for movable sashes, foam or backer rod for wider gaps, and landlord-approved temporary seals if you rent. Skipping the source wastes heat and can make windows hard to open or seal poorly. This guide shows how to trace drafts, match the repair to the gap type, and avoid over-sealing.
What you’ll need


- Flashlight for spotting daylight at gaps
- Paper strip for the seal test at the sash
- Incense stick for the smoke test on a cold day
- Infrared thermometer for finding colder sections
- Foam tape for quick fixes on small sash or frame gaps
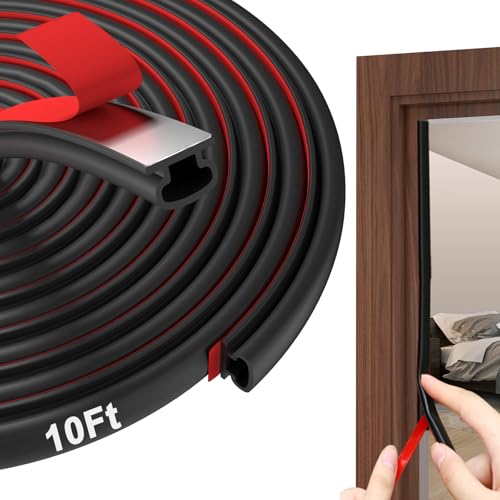
- V-strip or compression weatherstripping for operable sashes
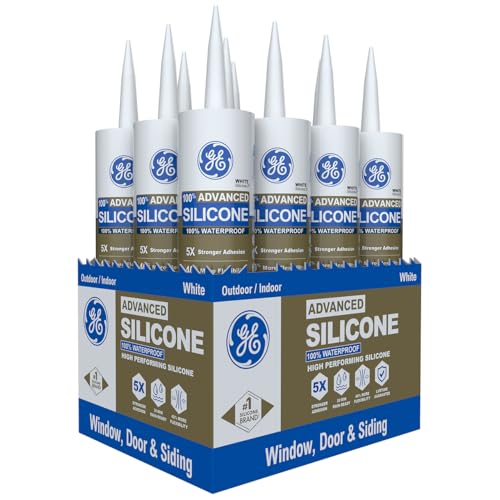
- Exterior-grade or silicone caulk for stationary joints
- Caulk gun, if you are sealing fixed joints
- Window insulation film for a temporary winter layer
- Hairdryer to shrink the film after application
- Thermal curtains for night use
- Draught snake for the sill
Why cold air comes through window frames
Cold air often enters at the sash, sill, corners, or the frame-to-wall joint rather than through the center of the glass. Worn seals, warped frames, poor installation, deteriorated caulk, and unblocked drainage paths are common causes. A window can also feel drafty because a cold pane cools indoor air, so the first job is to separate air leakage from cold-surface chill.
Signs that point to an air leak
Visible daylight, a moving paper strip, smoke flicker, or a sharp temperature drop at one spot usually means air is getting through. If the frame feels cold everywhere but you cannot detect movement, the issue may be cold-surface convection instead of a true gap. The U.S. Department of Energy advises checking for leaks around windows before choosing a sealing method.
How do you find the leak path?
Use simple checks before buying materials. Start with the sash and lock, then move to the frame, sill, corners, and any vents or drainage openings. The goal is to find where air enters, because a fix that seals the wrong spot can stop the window from opening, closing, or draining correctly.
- Close and lock the window, then slide a paper strip between the sash and frame.
- Pull the strip gently; if it slides out easily, the seal is loose.
- Hold an incense stick near the sash, frame, sill, vents, and corner joints on a cold day.
- Watch for smoke flicker or pull toward one spot; that marks the leak path.
- Scan the same areas with an infrared thermometer and compare colder sections with nearby surfaces.
- Decide whether the problem is moving air, a cold pane, or both before choosing a fix.
If a double-hung window has daylight at one upper corner and the paper test slips out on that side only, the problem usually sits at the sash perimeter. That points to a local seal issue, so weatherstripping is a better first fix than caulk.
If the frame-to-wall joint around an older window shows a colder band on the thermometer but the sash still closes tightly, the leak is more likely at a stationary joint. That is typically a caulk job rather than a sash seal job, provided the gap is not part of an intentional drainage path.
Window draft fix selector table
| Leak location | Leak symptom | Likely cause | Exact test | Best fix | Avoid using | Renter-safe option | When to escalate |
|---|---|---|---|---|---|---|---|
| Sash edge | Paper slips out, smoke pulls along the moving edge, daylight at the meeting rail | Worn compression seal, loose sash, failed weatherstripping | Paper strip test at the closed sash and smoke test around the perimeter | Foam tape, V-strip, or compression weatherstripping | Caulk on a moving sash | Removable weatherstripping or temporary interior film | If the sash will not align, lock, or seal after replacement weatherstripping |
| Frame-to-wall joint | Cold band at the perimeter, draft at trim edges, visible gap between trim and wall | Failed caulk, poor installation, shrinkage, or movement at the rough opening | Smoke test at the trim edge and infrared scan along the frame perimeter | Exterior-grade or silicone caulk on fixed joints | Sealing moving parts shut | Interior film, curtains, or a temporary draft barrier if the gap is not structural | If the gap keeps widening, trim separates, or the wall area shows moisture damage |
| Sill | Draft at the bottom edge, cold feet near the window, airflow at the track | Loose sill joint, unsealed track, or needed drainage opening | Smoke test under the sash and along the sill while the window is locked | Draught snake for the interior edge, then caulk only on fixed gaps | Blocking drainage or operable parts | Draft stopper or temporary interior barrier | If water collects, the sill softens, or the track is damaged |
| Corners | Single-point draft, corner smoke flicker, cracked paint at a joint | Split sealant, separated trim, or corner movement | Smoke test on each corner and close inspection for hairline separation | Caulk for fixed joints, weatherstripping if the sash meets there | Overfilling the joint with foam | Removable weatherstripping or film if the corner is inside the operable zone | If the corner opens again after repair or the frame seems warped |
| Vents | Draft near a vent opening, smoke movement at a slot, inconsistent airflow | Open trickle vent, required ventilation opening, or failed vent seal | Check whether the vent is meant to remain open before sealing anything | Adjust or replace the vent only if the window type allows it | Closing vents that must stay open | Do not block required ventilation; use curtains or film elsewhere | If the vent is required for the window system or local code and is damaged |
| Glass edge | Condensation between panes, fog that does not wipe off, cold center pane | Failed insulated-glass seal or low-performing glazing | Check whether fog is between panes or on the room side of the glass | Replacement of the insulated glass unit or the window, depending on condition | Caulk around the pane to “fix” internal fogging | Interior film or secondary glazing to reduce discomfort temporarily | If the seal has failed, moisture is trapped between panes, or efficiency loss is ongoing |
Which fix should you use first?
Start with the smallest fix that matches the gap. Government guidance from the U.S. Department of Energy recommends weatherstripping for movable parts and caulk for stationary joints. That general rule fits most windows, but the exact product depends on window type, gap width, and whether drainage or ventilation must remain open.
- Use foam tape on small, straight gaps where the sash meets the frame and movement is limited.
- Use V-strip or compression weatherstripping where the sash opens and closes often.
- Use exterior-grade or silicone caulk on fixed frame-to-wall joints only.
- Apply window insulation film to the inner frame when you need a temporary airtight layer for winter.
- Add thermal curtains at night and a draught snake at the sill to reduce the remaining draft path.
Window insulation film goes on the inner frame and shrinks with a hairdryer. It can help quickly, but it is temporary and should not replace sealing a real frame leak. For a more durable approach, the U.S. Department of Energy also points homeowners to weatherstripping and caulking as core air-sealing measures.
For specific products and installation details, use guidance from the U.S. Department of Energy on caulking and weatherstripping, and follow manufacturer instructions for the product you choose. Performance varies by gap size, exposure, and window operation, so a fix that works on one window may not last on another.
How do you stop drafts without damaging the window?
Match the product to the part that moves. Use weatherstripping on a sash that still needs to open, and use caulk only where the joint should stay fixed. Leave drains, vents, and operable hardware clear, or the window may trap moisture or stop working as intended. Guidance from the U.S. Department of Energy and window manufacturers generally follows this rule.

Rental-safe options
If you cannot alter trim or frame parts, choose removable weatherstripping, interior film, thermal curtains, and a draught snake. These options work better than permanent sealants when a lease limits repairs. They also let you remove the fix at the end of the season without leaving residue or blocking the window mechanism.
Do not caulk a sash shut. Do not put foam tape where the lock must compress the seal. Do not seal any vent or drainage path that the window needs for operation or moisture management. Many window manufacturers caution that drainage and weep paths should remain clear.
Window-type differences and edge cases
Different windows leak in different places. Double-hung windows often leak at meeting rails and sash edges, casement windows at the perimeter where the crank pulls the sash tight, and sliding windows at the track and interlock. Metal frames can feel colder and may transmit more chill, so condensation and true drafts need separate diagnosis. Trickle vents, if present, should only be adjusted or sealed when the window system is designed for that use.
- Double-hung windows: Focus on the meeting rail, side channels, and lower sash perimeter. If the sash is worn or out of square, weatherstripping is usually better than caulk.
- Casement windows: Check the perimeter seal and crank hardware. If the sash does not pull tightly against the frame, the issue may be hardware alignment, not just missing sealant.
- Sliding windows: Inspect the track, interlock, and side jambs. Track debris can mimic a draft, so clean the track before sealing anything.
- Metal frames: Metal conducts cold more readily, so surfaces can feel drafty even when the air seal is intact. Use temperature checks and smoke tests to separate conduction from leakage.
- Trickle vents: These may be intentional ventilation features. Do not block them unless the window manufacturer says they may be adjusted or closed.
- Condensation vs true drafts: Condensation on the room side can be from humidity and cold glass, while drafts involve moving air. Condensation between panes usually signals a failed insulated-glass seal.
- Failed insulated-glass seals: If fog sits between panes or the insulated unit shows persistent moisture, sealing the perimeter will not restore the seal. Replacement of the insulated glass unit or the full window may be needed.
Common mistakes
Most failures come from using the right product in the wrong place. A fixed gap needs caulk. A moving sash needs weatherstripping. A bottom gap can often be tamed with a draught snake, but not every sill draft should be covered with sealant. Manufacturer and government guidance both emphasize keeping moving parts and drainage features functional.
- Applying caulk to moving parts and then finding the window will not open cleanly
- Using weatherstripping on a joint that should stay rigid and airtight
- Skipping the paper test and sealing the wrong side of the sash
- Ignoring daylight at a gap, which usually means the leak is more than a cosmetic crack
- Painting before caulk has cured
- Covering vents or drainage paths with film or sealant
Allow caulk to cure before painting or stressing the joint. If the bead is still soft, movement can break the seal and reopen the draft. If repeated repairs keep failing, the issue may be frame movement, poor installation, or an aging insulated-glass unit rather than a simple gap.
When should you repair or replace the window?
Repair first when the leak is local and the frame still aligns, locks, and closes tightly. Replace or add secondary glazing when the frame is warped, the seal keeps failing, or drafts return after repeated fixes. Secondary glazing is a strong option when the window itself is sound but the cold still gets through the existing system.
When repair is still worth it
If the leak is at one sash edge, a sill corner, or a single frame-to-wall joint, targeted repairs usually make sense. If the window still operates well, a combination of weatherstripping, caulk, and a temporary interior barrier may be enough. This is especially true when the frame is square and the glazing seal is intact.
When replacement or secondary glazing makes more sense
Persistent leaks after proper sealing often point to warped frames, failed seals, or poor installation. If the window is old enough that repeated patching keeps failing, secondary glazing may be a better long-term option than another round of temporary fixes. If the insulated glass seal has failed, replacement is often the durable solution.
Weatherstripping products vary by type, and their lifespan varies with use and exposure. Foam tape is often a short-term solution, while compression and V-strip products are typically chosen for more durable sash sealing. For long-term performance, follow the window maker’s guidance and replace worn materials before the seal fully fails.
Prevention
Check seals before the first cold spell, and replace worn weatherstripping before it shrinks or splits. Small gaps are easier to fix before moisture and movement widen them. Keeping tracks clean, drainage paths open, and sealants intact helps reduce recurrence without trapping water.
Frequently asked questions
How do I stop cold air from windows?
Find the leak path first, then seal only that location. Use weatherstripping on moving sashes, caulk on fixed joints, and a draught snake or interior film for temporary help. If the frame is warped or the seal keeps failing, secondary glazing or replacement may be the better fix.
How do I prevent cold air from windows?
Inspect the sash, frame, sill, corners, and vents before each heating season. Replace worn seals, repair deteriorated caulk, and keep drainage paths clear. If a paper strip slides out easily or smoke flickers at one point, address that spot instead of sealing the whole window.
Should I use caulk, weatherstripping, or film for window drafts?
Use caulk for stationary joints, weatherstripping for moving sashes, and film when you need a removable winter layer. If the draft is at the frame-to-wall joint, caulk fits best. If the sash moves, use compression or V-strip weatherstripping instead.
How do I tell whether the draft is from the frame or the glass?
Use an infrared thermometer and compare the frame, sash edge, sill, and center pane. A draft that changes when you run smoke around the perimeter usually points to an air leak. A uniformly cold pane can cool indoor air even when no air is entering.
What is the best way to seal a drafty window frame?
Seal the smallest correct gap first. Weatherstripping is the right choice for a moving sash, while exterior-grade or silicone caulk belongs on fixed frame-to-wall gaps. If the leak is broad or the frame is warped, consider secondary glazing rather than piling on more sealant.
Do thermal curtains or secondary glazing help with cold window frames?
Thermal curtains can reduce night-time convective drafts, while secondary glazing adds an internal pane and can significantly reduce discomfort at a cold window. Neither one should replace proper sealing at the actual leak path. Use them as added layers after the main air leak is addressed.
Sources
- Caulking and Weatherstripping | U.S. Department of Energy
- Air Sealing Your Home | U.S. Department of Energy
- Residential Windows and Window Attachment Products | National Renewable Energy Laboratory
- Sealing Air Leaks Around Windows and Doors | Fine Homebuilding
- Residential Windows, Doors, and Skylights | ENERGY STAR
Sponsored / affiliate links. As an Amazon Associate I earn from qualifying purchases. I may earn additional commission from eligible campaigns.