What Is Ice and Water Shield and Where Is It Needed?
Ice and water shield is a self-adhered waterproof roof underlayment placed at eaves, valleys, rakes, and around penetrations; many codes require at least 24 inches inside the warm wall line in cold regions, often more on low-slope or complex roofs. Leave it out, or stop it too short, and meltwater can back up under shingles, rot decking, and stain ceilings. This guide explains what it is, where code usually puts it, and how roof shape, overhang depth, and leak risk change the coverage plan.
Materials and vulnerable roof areas
Ice and water shield is a self-adhering waterproof membrane made from rubberized asphalt or modified bitumen. It goes directly on the roof deck, where it bonds to the substrate and can seal around nails driven through it. That sets it apart from rolled underlayment that is fastened in place.
The roof deck matters because the membrane depends on a clean, sound surface. Plywood and OSB are the most common substrates, and they need to be dry, flat, and free of dust or loose debris before the sheet goes down. If the deck is dirty or damaged, adhesion drops and seams are more likely to fail.
Its job is targeted leak control. It is meant to help stop water that gets past the shingle layer at the most vulnerable spots, especially where ice dams, runoff concentration, or flashing transitions create higher risk. It is not a full-roof substitute for shingles, flashing, or standard underlayment.
Ice barrier coverage table
| Roof condition | Typical membrane coverage | Why it belongs there |
|---|---|---|
| Eaves with ice-dam risk | Continuous strip from the roof edge upward, often at least 24 inches inside the warm wall line where code applies | Meltwater can refreeze at the cold edge and back up under shingles |
| Valleys | Full-length coverage along the valley line | Runoff concentrates here and moves fast |
| Chimneys, skylights, vent pipes | Membrane around the penetration, coordinated with flashing | Openings interrupt the roof plane and create leak points |
| Wall intersections | Targeted strips where the roof meets a vertical wall | Water can track into the joint and under the roofing |
| Low-slope tie-ins | Broader coverage at the transition area, often beyond a simple starter strip | Water moves slowly and can pond near the change in pitch |
Where is it needed on a roof?
It is needed where the roof is most likely to see backup water or concentrated flow. The most common locations are eaves in ice-dam zones, valleys with heavy runoff, roof penetrations, wall intersections, and low-slope transitions. Broader coverage makes sense when the roof shape increases the chance of water reaching fasteners or seams.
Eaves in ice-dam zones
Eaves are the most common code-driven location. When snow melts higher on the roof and refreezes at the cold edge, water can pool behind the ice and work under the shingles. That is why the strip starts at the lowest edge and rises up the roof far enough to cover the vulnerable zone.
Roof geometry changes the risk. A deep overhang can leave more roof surface outside the heated wall line, so the needed strip may need to extend farther than a short edge patch. A steeper roof sheds water faster, but it does not remove the need for membrane where code or design calls for it.
Valleys and runoff paths
Valleys often receive full-length coverage because they collect water from two roof planes at once. That concentrated runoff can stress seams, starter edges, and shingle corners, especially during heavy rain or rapid snowmelt. Full-width strips are common here because a narrow patch leaves the centerline exposed.
A common first-timer mistake is treating a valley like a normal field area and stopping the membrane short of the full valley run. That leaves a high-flow path with a weaker surface below the shingles, which is exactly where leaks tend to show up first.
Chimneys, skylights, and vents
Penetrations need both flashing and membrane. Chimneys, skylights, and vent pipes interrupt the roof surface, so the membrane helps protect the deck and fasteners around the opening while the flashing handles the transition at the visible joint. One does not replace the other.
Say a 10-by-12-foot skylight sits near a roof valley on a mid-pitch roof. The risk is not the skylight alone. It is the combination of runoff from above, corners where flashing changes direction, and fasteners that sit close to an exposed seam.
Low-slope tie-ins and wall intersections
Low-slope tie-ins need extra attention because water moves slowly there and can sit near seams. At roof-to-wall joints, the membrane helps protect the hidden area where water may track under the flashing line. These are common points for targeted coverage even on roofs that do not need broad membrane across every slope.
That is why some roofs in warm or mixed climates still get membrane in selected spots. The roof may not need an ice-dam strip across every eave, but it may still need protection at a valley, a chimney, or a low-slope tie-in where water is more likely to linger.
How far up the roof should it go?
The needed height depends on roof pitch, overhang depth, and the rule used by the local code or manufacturer. A common code trigger is coverage extending at least 24 inches inside the exterior wall line. The exact scope depends on the project, not a single universal number.
Pitch changes the strip width
On a low-slope roof, water moves more slowly and can travel farther under wind or backup conditions, so wider coverage often makes sense. On steeper roofs, the strip still matters at the edge, but the geometry may reduce how far water can work upward. The right answer is based on the roof design, not a guess.
Overhang depth changes edge coverage
Overhang depth changes where the warm wall line sits relative to the roof edge. If the overhang is deep, the membrane may need to extend farther up the roof plane to reach the required point. If the overhang is short, the same measured distance may cover a smaller physical area on the roof.
Use the wall line, not the shingle edge, as the reference point when you review the plan. That detail matters because a proposal that says only “ice shield at eaves” does not tell you whether the membrane reaches the actual code line.
Is it the same as underlayment?
No. Ice and water shield is a self-adhering membrane used in selected areas, while regular underlayment is rolled out and fastened across the rest of the roof. The two layers do different jobs. One is a targeted leak-control layer; the other is the broader base layer under the roofing.
Underlayment, whether synthetic or felt, covers most of the roof deck outside the special-risk zones. Ice and water shield goes directly on the decking in the areas that need extra water protection. Many roofs use both materials in the same assembly.
Do not treat the membrane as a replacement for proper flashing or correct roof installation. It can seal around fasteners better than felt, but it does not fix poor shingle layout, bad step flashing, or a deck that was left dirty and uneven.
Code, climate, and when it is required
IRC R905.1.2 is the roof-covering code reference that points to ice-barrier requirements, but the exact wording can vary by IRC edition and local amendments. Local enforcement also varies. One jurisdiction may follow the IRC language closely, while another may amend it for local climate or snow history. That is why two nearby towns can have different requirements for the same roof.
One common code reading ties the requirement to areas where ice forms at eaves, with eave coverage extending at least 24 inches inside the exterior wall line. Local rules can be stricter or more specific.
Local rules can be stricter or more specific. The main point is simple: the requirement can depend on local conditions, but the final scope still depends on the local authority and the roof layout.
How to review a proposal
A good proposal should tell you exactly where the membrane goes, how far it extends, and how it ties into flashing details. If it only says “ice and water shield included,” you still do not know whether the eaves, valleys, penetrations, and transitions are covered the way the roof needs.
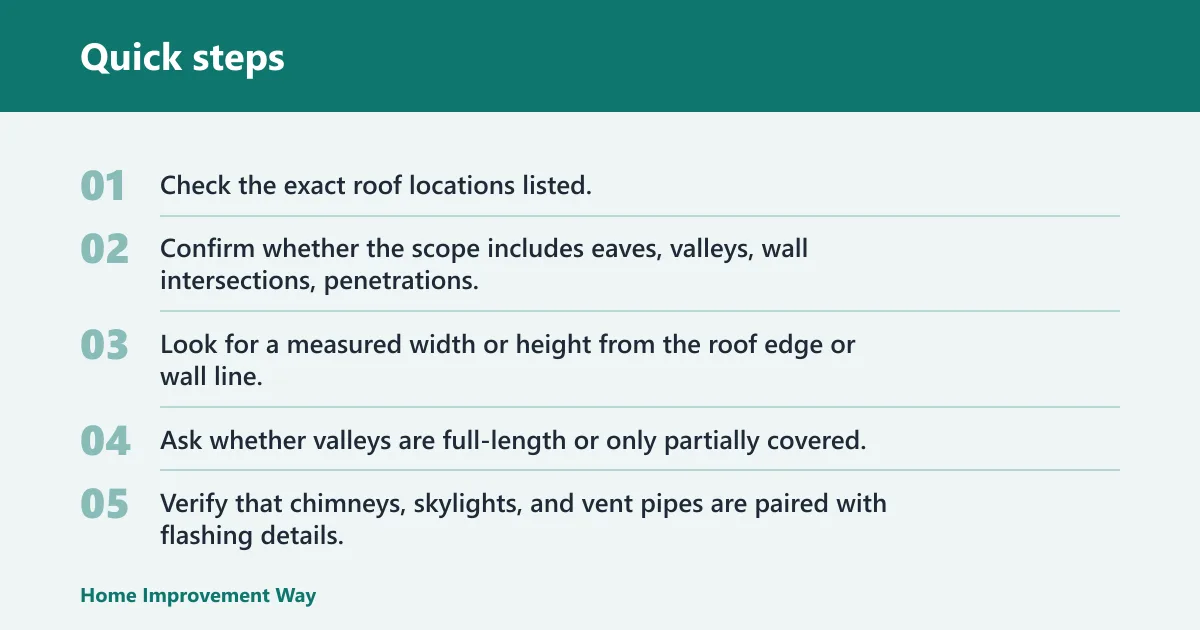
- Check the exact roof locations listed.
- Confirm whether the scope includes eaves, valleys, wall intersections, penetrations, or low-slope tie-ins.
- Look for a measured width or height from the roof edge or wall line.
- Ask whether valleys are full-length or only partially covered.
- Verify that chimneys, skylights, and vent pipes are paired with flashing details, not membrane alone.
- Confirm that the deck prep is included before membrane installation.
Say your ranch roof has a 2-foot overhang, a single valley, and a vent stack near the ridge. A proposal that lists only “eaves protected” leaves out the valley and the penetration, which are often important leak points. That is the kind of gap you want to catch before work starts.
Installation basics and common mistakes
How to apply ice and water shield starts with deck prep. The roof deck must be clean, dry, and sound. The membrane should go directly on the decking, not on top of underlayment, because it needs to bond to the substrate and seal around fasteners.
Lap direction matters too, and the laps should follow the manufacturer’s instructions. Bridging seams is a common mistake, because a membrane that spans uneven decking or a gap can fail to bond fully and leave a weak line in the assembly.
Another common error is leaving exposed fastener paths. If nails or staples are placed where water can track along them, the membrane’s sealing value drops. The material can help seal around fasteners, but only when the detail is built correctly and the surrounding layers are handled with care.
Frequently asked questions
What is ice and water shield?
Ice and water shield is a self-adhering waterproof membrane installed directly on the roof deck. It is commonly used in selected areas such as eaves, valleys, penetrations, wall intersections, and low-slope transitions. Its job is to help limit leaks where water can back up or concentrate.
When is ice and water shield required?
Requirement depends on climate zone, local code enforcement, and roof design. IRC R905.1.2 is the code reference many people check first, but local amendments can change the answer. In colder regions, eaves are often the first required area, with other locations depending on the roof and local rules.
Where should ice and water shield be installed on a roof?
Start with the highest-risk areas: eaves in ice-dam zones, valleys, chimneys, skylights, vent pipes, wall intersections, and low-slope tie-ins. It is usually installed in selected areas rather than across the entire roof. The exact layout should follow code, roof geometry, and the manufacturer’s instructions.
How far up the roof should ice and water shield go?
A common code-based figure is at least 24 inches inside the exterior wall line. The needed height changes with overhang depth, pitch, and local rules. Always check the measured line called out on the proposal, not just the shingle edge.
Is ice and water shield the same as underlayment?
No. Underlayment is rolled out and fastened over most of the roof, while ice and water shield is self-adhering and used in targeted leak-prone areas. The membrane goes on the deck first in those zones, and the rest of the roof is then covered with standard underlayment.
Can ice and water shield be used on valleys and around chimneys?
Yes. Valleys are common locations for full-length membrane coverage, and chimneys are a standard penetration detail. The membrane works with flashing, not instead of it, so the roof still needs proper metal work, shingle layout, and clean deck preparation around the opening. (PNNL)
Do I need ice and water shield if I live in a warm climate?
Maybe, but not across the whole roof. Warm climates can still have valleys, low-slope tie-ins, chimneys, skylights, and wall intersections that benefit from targeted membrane. The question is usually where it belongs, not whether every roof surface needs it.
How do you apply ice and water shield?
Prepare the deck, place the membrane directly on the clean substrate, align it so water sheds over the laps, and press it down so it bonds fully. Avoid bridging seams and do not cover it with underlayment first. The details should match the roof’s flashing plan and local code requirements.
Sponsored / affiliate links. As an Amazon Associate I earn from qualifying purchases. I may earn additional commission from eligible campaigns.