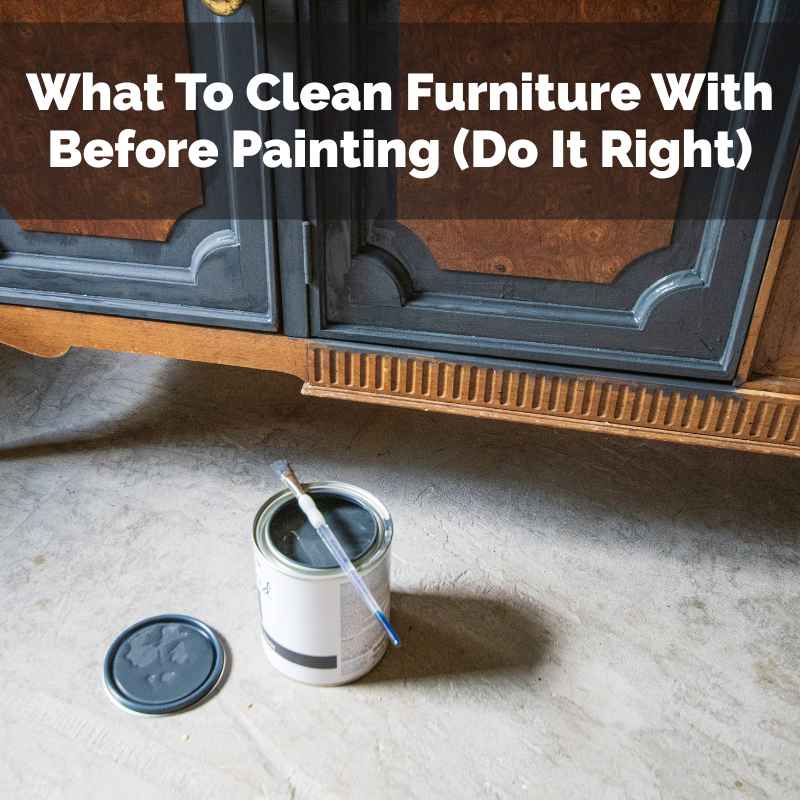
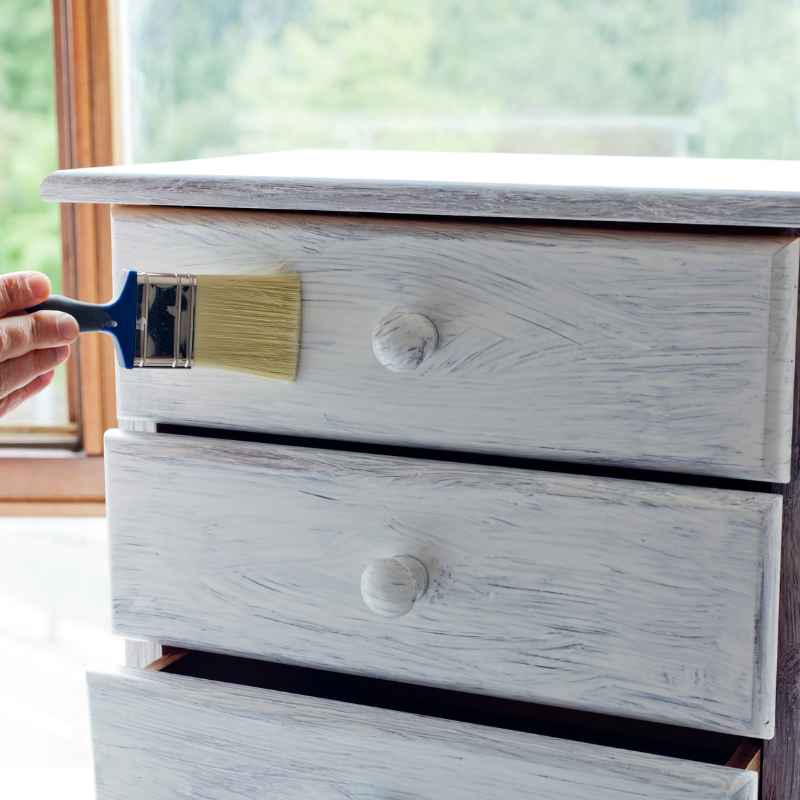
What To Clean Furniture With Before Painting (Do It Right)
The best way to clean furniture before painting involves removing all grease, grime, and dust. Use a mild soap and water solution or a degreaser like TSP substitute for tough spots. Always rinse thoroughly and let the surface dry completely before sanding and priming.
Why Cleaning Furniture Before Painting Matters So Much
Cleaning your furniture before painting is a super important step. Think of it like getting ready for a big event. You wouldn’t go without showering, right?
Your furniture needs a good cleaning too. This step gets rid of anything that could mess up your paint job. Things like dirt, dust, grease, and old wax can all cause problems.
If you skip this, the paint might not stick well. It could bubble up or peel off later. This is true for all kinds of furniture.
Whether it’s old wood, smooth laminate, or even metal. A clean surface helps the primer and paint bond properly. This makes your new paint job look smooth and last a lot longer.
It’s the secret to a professional-looking finish.

My Own Messy Moment: The Overlooked Table
I remember one time I was so eager to paint an old dining table. It was a hand-me-down, a bit worn. I thought, “It’s wood, how dirty can it be?” I gave it a quick wipe with a damp cloth.
Then I skipped the degreaser. I just sanded and primed. I was so proud of how fast I finished.
The table looked great at first. But a few weeks later, I noticed small bubbles forming in a few spots.
Then, a corner of the paint started to peel. It was so disappointing. I realized I had failed to remove some old furniture polish that had built up.
This greasy layer was invisible. But it was enough to stop the paint from sticking properly. That mistake taught me a hard lesson.
Cleaning really is the most crucial part of painting furniture. Now, I’m super careful about it.
It wasn’t just the greasy polish. Dust had settled into the wood grain. I hadn’t gotten rid of it all.
That dust also created tiny barriers. They stopped the primer from getting a good grip. I felt so frustrated.
All that work, and it wasn’t going to last. I had to strip the paint and start over. It took twice as long.
Since then, I’ve never skipped a thorough cleaning. It saves so much heartache later.
The Best Cleaning Solutions for Furniture Prep
When it comes to cleaning furniture before painting, you have a few good options. The best choice often depends on what the furniture is made of and how dirty it is. It’s all about picking the right tool for the job.
Gentle Cleaning: For Light Dust and Grime
What to Use: Mild dish soap and warm water.
How to Do It: Mix a few drops of dish soap in a bucket of warm water. Dampen a soft cloth or sponge in the solution. Wring it out well.
You don’t want it dripping wet. Wipe down the entire piece of furniture. Pay attention to corners and crevices.
This is great for removing light dust and general grime. It’s also safe for most finishes.
Tougher Jobs: For Grease and Stubborn Stains
What to Use: TSP (Trisodium Phosphate) substitute or a strong degreaser.
How to Use It: TSP is a powerful cleaner, but it can be harsh. For most DIYers, a TSP substitute is a safer bet. You can find these at hardware stores.
Mix according to the package directions. For heavy grease, like on kitchen cabinets or tables, this is your go-to. It cuts through oils and grime like nothing else.
Be sure to wear gloves and work in a well-ventilated area.
Important Note: Always test any cleaner on an inconspicuous spot first. This is especially true for older or delicate furniture.
Special Surfaces: Laminate and Metal
For Laminate: Start with mild soap and water. If there’s sticky residue, try a bit of Goo Gone. Avoid harsh abrasives.
They can scratch the laminate surface.
For Metal: A good degreaser is usually best. For rusty spots, you might need a rust remover. Make sure the metal is completely dry before painting.
The Essential Rinse and Dry Steps
Once you’ve scrubbed your furniture, the job isn’t quite done. Rinsing and drying are just as vital. Skipping them can leave behind cleaning residue.
This can harm your paint job too.
Rinsing: After cleaning, grab a fresh cloth and plain water. Dampen it and wipe down the entire piece again. This removes any soap or cleaner left behind.
You might need to rinse your cloth and repeat this a few times. It’s like rinsing shampoo out of your hair. You want to be sure all the soap is gone.
Drying: Let the furniture air dry completely. This can take several hours, or even overnight, depending on humidity. You can speed it up slightly with a fan.
Make sure you feel no dampness anywhere. Run your hand over the surface. You want it to feel completely dry to the touch.
This step ensures that no moisture is trapped. Moisture can cause problems later. It might make paint bubble or affect its adhesion.
Patience here really pays off. A perfectly dry surface is ready for the next stage: sanding.
Understanding Different Furniture Materials
Not all furniture is made from the same stuff. The material your furniture is made of will guide how you clean it. Each type needs a slightly different touch.
Knowing this helps you avoid damage.
Solid Wood Furniture
Cleaning: Mild soap and water is usually fine for general cleaning. For tougher grime or greasy spots, use a TSP substitute. Be careful not to oversaturate the wood, especially older pieces.
Too much water can warp or damage it.
What to Watch For: Old wax finishes or built-up polish. These need a good degreaser.
Veneer and Engineered Wood Furniture
Cleaning: Treat these materials gently. Use a damp cloth with mild soap. Avoid harsh scrubbing.
Excessive water can lift or damage the veneer. It can also swell the engineered wood.
What to Watch For: Peeling veneer edges. Clean these very carefully. You don’t want to worsen the damage.
Laminate and Melamine Furniture
Cleaning: These are usually easy to clean. A damp cloth with mild soap works well. For sticker residue or greasy marks, a bit of rubbing alcohol or Goo Gone can help.
Do not use abrasive cleaners or scrub pads. They can scratch the surface.
What to Watch For: Scratches or chips. These can be hard to cover with paint. Sometimes a filler is needed.
Metal Furniture
Cleaning: Degreasers are often best for metal. This is especially true for items that might have been exposed to oil or grease. For outdoor metal furniture, remove any rust first.
You might use a wire brush or a rust remover product.
What to Watch For: Rust. If left untreated, it will bleed through your new paint. Also, ensure it’s completely dry to prevent new rust from forming.
Upholstered Furniture (for Painted Frames)
Cleaning: If you’re painting a wooden or metal frame on an upholstered piece, clean the frame only. Be very careful not to get the fabric wet. Use a damp cloth for the frame.
Protect the fabric with a drop cloth.
What to Watch For: Fabric dye transfer. Some dyes can rub off onto the frame, especially when wet. Be cautious.
The Role of Degreasers
Degreasers are your best friend for tackling grease and grime. Many pieces of furniture, especially kitchen or dining furniture, can develop a greasy film. This comes from cooking oils, hand lotions, and general use.
Paint just won’t stick to grease. It acts like a barrier.
A good degreaser cuts through this oil. It lifts it from the surface so you can wipe it away. TSP substitute is a popular choice.
It’s effective and safer than traditional TSP. Other options include dedicated furniture degreasers or even a strong solution of dish soap. The key is to ensure the degreaser works without damaging the furniture’s finish.
When using a degreaser, always follow the product instructions. Wear gloves and ensure good ventilation. After degreasing, it’s super important to rinse the surface well.
This removes any degreaser residue. You don’t want that interfering with your primer or paint.
Dealing with Old Finishes and Waxes
Sometimes furniture has old wax finishes or furniture polishes. These create a slick surface. Paint will slide right off them.
You need to get rid of this slickness. A good degreaser is often effective for this. For very stubborn wax, you might need a wax remover product.
Always test these removers in a hidden spot.
You’ll know if you have a wax finish problem if water beads up on the surface instead of wetting it. Even after cleaning, if the surface still feels slick, more work might be needed. Sometimes sanding helps to break through the wax.
But cleaning it off first is always the best approach. A clean, dull surface is what you’re aiming for.
The Importance of a Clean Surface for Adhesion
Adhesion is the word that matters most in painting. It means how well the paint sticks to the surface. For paint to adhere well, the surface must be clean and slightly rough.
Cleaning removes anything that blocks this bond. Dust, grease, oil, and old finishes are the enemies of good adhesion.
When you clean properly, you prepare the surface. You make it welcoming for the primer and paint. It’s like laying a welcome mat for your new paint.
This ensures the paint forms a strong connection. This connection is what makes the paint job durable and long-lasting. A smooth, clean surface is the foundation of a great paint finish.
My Experience with a Greasy Kitchen Island
I was tackling a kitchen island makeover. It had a nice wood finish, but it was in the kitchen, after all. I knew it would have grease.
I used my usual dish soap and water. It seemed clean enough. I sanded, primed, and painted.
The first week was fine. Then, I started seeing tiny chips appear near the stovetop.
I looked closer. The paint was lifting in small spots. It was clear the grease hadn’t all come off.
The dish soap wasn’t strong enough for the built-up cooking oil. I had to scrape off the affected paint. Then I grabbed a heavy-duty degreaser.
I scrubbed the whole island again. This time, I made sure to rinse very, very well. The second paint job has held up perfectly.
That experience really drove home the point. For surfaces exposed to food grease, like kitchen islands or dining tables, a simple wash might not cut it. You need something stronger.
A dedicated degreaser ensures you get rid of that invisible greasy film. It’s a small step that makes a huge difference in how long your paint job lasts.
Common Mistakes to Avoid
It’s easy to make mistakes when preparing furniture for painting. Knowing what to avoid can save you a lot of trouble. Here are some common pitfalls.
Mistake 1: Skipping the Cleaning Step Entirely
Why it’s Bad: This is the most common error. Dust, grease, and grime prevent paint from adhering. Your paint job will likely peel or chip quickly.
The Fix: Always clean your furniture first. Even if it looks clean.
Mistake 2: Not Rinsing Thoroughly
Why it’s Bad: Soap or cleaner residue left on the surface will create a barrier. This can lead to poor adhesion or a dull finish.
The Fix: Rinse the furniture multiple times with clean water. Ensure no suds are left.
Mistake 3: Using Too Much Water on Wood
Why it’s Bad: Excessive water can warp wood. It can also cause veneer to lift or bubble.
The Fix: Use a damp, not soaking wet, cloth. Wring it out well.
Mistake 4: Using Abrasive Cleaners or Scrubbers
Why it’s Bad: These can scratch surfaces like laminate, veneer, or even painted finishes. Scratches will show through your new paint.
The Fix: Stick to soft cloths or sponges. Use mild cleaners unless a tougher job requires a specific product.
Mistake 5: Not Letting the Surface Dry Completely
Why it’s Bad: Painting over a damp surface traps moisture. This can cause paint to bubble, peel, or develop mildew.
The Fix: Allow ample drying time. Use a fan if needed. Ensure the surface is totally dry to the touch.
Preparing Specific Materials: A Quick Guide
Let’s quickly recap the best approach for different materials.
Solid Wood
Clean with: Mild soap and water. Use a degreaser for greasy areas.
Rinse & Dry: Yes, thoroughly.
Veneer/Engineered Wood
Clean with: Damp cloth, mild soap. Be gentle.
Rinse & Dry: Yes, but avoid excess moisture.
Laminate/Melamine
Clean with: Mild soap and water. Rubbing alcohol for sticky spots.
Rinse & Dry: Yes, but avoid abrasive tools.
Metal
Clean with: Degreaser. Rust remover if needed.
Rinse & Dry: Yes, ensure it’s bone dry.
What This Means for Your Painting Project
Taking the time to clean your furniture properly before painting means your project will go smoother. You’ll avoid frustrating problems like peeling paint or a dull finish. It means the final result will look more professional.
It will also be more durable and last longer.
When is cleaning definitely normal? Always. It’s a fundamental step.
When should you worry about your cleaning? If you see paint starting to lift or bubble after painting, it’s a sign cleaning might have been insufficient. Or perhaps there was a residue you missed.
A quick check of the cleaned surface before painting is wise.
You can often run a clean, dry cloth over the surface after it’s dry. If any dirt or residue comes off, you need to clean again. This simple check can save your entire paint job.
It’s a small habit that ensures your hard work pays off.
Quick Tips for a Perfect Clean Surface
Here are some final quick tips to ensure your furniture is perfectly clean and ready for paint.
- Use the Right Cloth: Opt for microfiber cloths or soft cotton rags. They absorb well and don’t leave lint behind.
- Work in Sections: Clean and rinse one section at a time. This prevents the cleaner from drying on the surface.
- Ventilation is Key: Always work in a well-ventilated area, especially when using stronger cleaners or degreasers.
- Test First: If you’re unsure about a cleaner, always test it on a hidden spot of the furniture first.
- Don’t Forget Hardware: If you can remove knobs or hardware, do so. Clean them separately. If you can’t, clean around them carefully.
- Dust is the Enemy: Even after washing, dust can settle. Wipe down with a dry cloth or tack cloth right before priming.
Frequently Asked Questions About Cleaning Furniture Before Painting
What is the best all-around cleaner for furniture before painting?
For most general cleaning, a solution of mild dish soap and warm water is best. It’s effective for removing light dust and grime. For tougher grease, a TSP substitute is highly recommended.
Always rinse thoroughly after cleaning.
Can I use Windex to clean furniture before painting?
Windex contains ammonia, which can sometimes interfere with paint adhesion. While it might clean a surface, it’s generally not recommended as a primary cleaner for furniture prep before painting. Stick to mild soap and water or a degreaser.
How do I clean wood furniture that has a lot of old wax buildup?
Old wax buildup can be tricky. Start with a good degreaser. If that doesn’t work, you might need a specific wax remover product.
Always test these in an inconspicuous area first. Sometimes, careful sanding after cleaning can help break through stubborn wax.
What if my furniture has been previously painted?
If the furniture has been previously painted, clean it thoroughly with mild soap and water. For glossy paint, it’s essential to degrease and then sand to create a dull surface. This helps the new paint adhere.
Inspect for peeling paint and remove any loose bits before cleaning and sanding.
Can I just wipe down furniture with a damp cloth?
A damp cloth is good for removing light surface dust. However, it won’t remove grease, grime, or old polishes. For a paint job that lasts, a more thorough cleaning with soap or a degreaser is usually necessary, followed by a good rinse.
Is it okay to clean furniture with alcohol before painting?
Rubbing alcohol can be useful for removing certain sticky residues or light grease spots, especially on laminate. However, it’s not a heavy-duty cleaner. For general prep, mild soap and water or a degreaser are better choices.
Always test alcohol on a small area first.
Conclusion
Cleaning your furniture before painting is a non-negotiable step for a beautiful, lasting finish. It ensures your primer and paint have a clean surface to grip. Using the right cleaner for the material and rinsing well are key.
Don’t let this crucial step be an afterthought. A little effort now saves a lot of frustration later. Your beautifully painted furniture will thank you for it.