How to Connect House Heaters to Wireless: A Step-by-Step Guide
Connecting your house heaters to wireless technology offers unparalleled convenience and control over your home’s climate. This advanced setup allows you to manage your heating system remotely, saving energy and ensuring comfort when you need it most. This guide will walk you through the entire process, from understanding the components to troubleshooting common issues, making smart home heating accessible to everyone.
In short, connecting house heaters to wireless involves pairing a smart thermostat or hub with your existing heating system, often requiring a professional to ensure compatibility and safe installation. This allows for remote control via an app, programmable schedules, and potential energy savings.
Key Takeaways
- Wireless connectivity for house heaters relies on smart thermostats or hubs that communicate with your existing system.
- Installation can range from a simple DIY setup for some systems to requiring professional assistance for complex or older heating units.
- Benefits include remote control, customizable schedules, energy efficiency, and integration with other smart home devices.
- Potential challenges include compatibility issues, initial setup complexity, and the need for a stable Wi-Fi network.
- Understanding your specific heater type and smart home ecosystem is crucial for a successful connection.
What is Wireless Heating Control?
Wireless heating control refers to the ability to manage your home’s heating system without the need for physical wires connecting every component. This is typically achieved through smart thermostats, hub-and-sensor systems, or direct Wi-Fi enabled heating units. These systems utilize radio frequency (RF) or Wi-Fi signals to communicate between the control unit and the heating appliances.
The primary advantage is flexibility. You can adjust settings from your smartphone, tablet, or computer, regardless of your location. This means you can warm up your home before you arrive or turn down the heat when you’re away, preventing unnecessary energy consumption.
It moves heating from a reactive system to a proactive one, tailored to your lifestyle.
This technology is becoming increasingly popular due to its user-friendly interfaces and the tangible benefits it offers in terms of comfort and cost savings. Many systems are designed to learn your habits and optimize heating schedules automatically, further enhancing efficiency.
Components of a Wireless Heating System
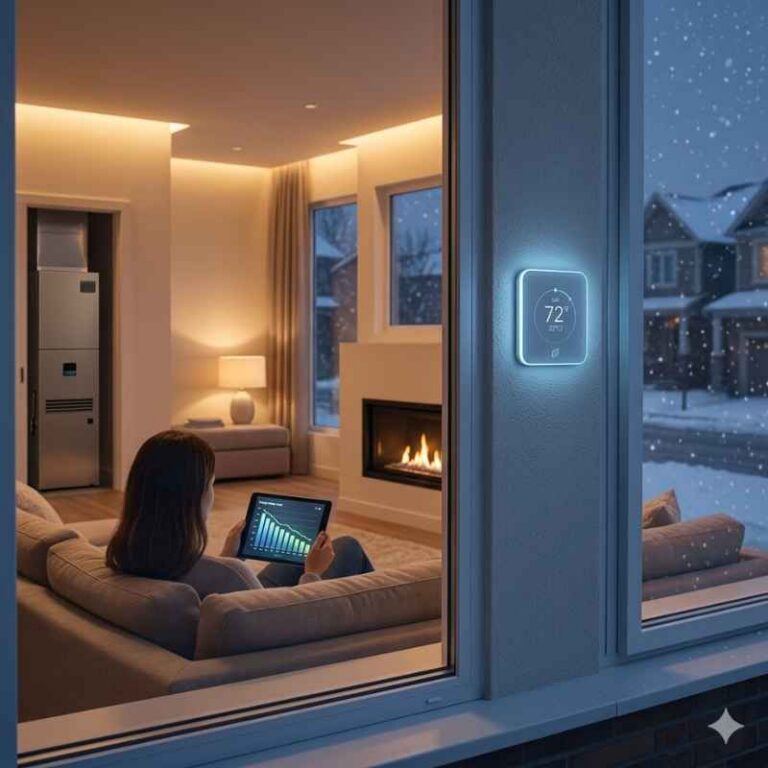
- Smart Thermostat: The central control unit that replaces your traditional thermostat. It connects to your Wi-Fi and communicates with the heating system.
- Wireless Hub (Optional): Some systems use a hub that connects to your router and then communicates wirelessly with thermostats, sensors, or even directly with smart heating elements.
- Wireless Sensors (Optional): Placed in different rooms, these sensors provide temperature readings, allowing for zone control and more precise heating management.
- Smart Heating Appliances: Some modern heaters come with built-in wireless capabilities, allowing them to connect directly to your Wi-Fi or a smart home app without needing a separate thermostat.
- Smartphone App: The interface you use to monitor and control your heating system remotely.
How Does Wireless Heating Control Work?
At its core, wireless heating control operates on a communication protocol. For Wi-Fi based systems, the smart thermostat or hub connects to your home’s router, gaining access to the internet. This connection allows it to send and receive data from a cloud server managed by the device manufacturer.
When you use the companion app on your smartphone, your commands are sent over the internet to the manufacturer’s server. The server then relays these commands back to your smart thermostat or hub. The thermostat, in turn, sends a wireless signal—often using RF protocols like Zigbee or Z-Wave, or sometimes direct Wi-Fi commands—to your existing heating system’s receiver or directly to the smart heating appliance.
For systems that don’t rely on the internet for direct control (e.g., some RF-only systems), the smart thermostat communicates directly with a receiver unit that is wired into your boiler or furnace. This creates a closed loop where the thermostat sends instructions wirelessly to initiate heating cycles based on programmed schedules or manual adjustments.
Types of House Heaters and Wireless Compatibility
The process of connecting your house heaters to wireless technology heavily depends on the type of heating system you currently have. Not all heaters are created equal, and their compatibility with smart controls varies significantly. Understanding your specific system is the first crucial step before investing in any smart home technology.
Central heating systems, typically powered by boilers (gas, oil, or electric) or furnaces, are the most common and generally the easiest to integrate with smart thermostats. These systems usually have a low-voltage circuit that a smart thermostat can easily replace and control. The smart thermostat then wirelessly communicates its instructions to the boiler or furnace.
Electric baseboard heaters and radiant panel heaters present a slightly different scenario. Many of these might not have a central thermostat connection point. Instead, they often have individual controls or thermostats built into the unit.
In such cases, you might need specialized smart electric heater controllers that wire into the existing circuit or smart plugs if the heater is a portable unit with a standard plug.
Central Heating Systems (Boilers/Furnaces)
- Compatibility: High. Most modern boilers and furnaces are designed to work with programmable or smart thermostats. The existing wiring for your current thermostat is usually compatible.
- Connection Method: Typically involves replacing your existing thermostat with a smart thermostat. The smart thermostat handles the wireless communication to signal the boiler/furnace to turn on or off.
- Considerations: Ensure the smart thermostat you choose supports the voltage and wiring configuration of your central heating system.
Electric Baseboard Heaters
- Compatibility: Moderate to Low. Many older models lack direct thermostat wiring. Newer, more advanced electric heaters may have integrated smart controls or be compatible with specific smart relays.
- Connection Method: May require replacing the existing line-voltage thermostat with a smart line-voltage thermostat or using a smart relay/contactor that the smart thermostat controls. For portable units, smart plugs can be used.
- Considerations: Line-voltage wiring can be more dangerous than low-voltage. Professional installation is highly recommended if you’re not experienced with electrical work. Check if the smart controller can handle the high amperage of your heaters.
Radiant Panel Heaters & Infrared Heaters
- Compatibility: Varies. Similar to baseboard heaters, compatibility depends on whether they have a dedicated thermostat or are controlled by a wall switch.
- Connection Method: If they have a separate thermostat, it can often be replaced by a smart one. If controlled by a switch, a smart switch or relay might be needed. Some infrared heaters are portable and can use smart plugs.
- Considerations: Verify the power draw and control mechanism of your specific radiant or infrared heater before selecting a smart solution.
Portable Electric Heaters
- Compatibility: High for plug-in models.
- Connection Method: Simply plug the heater into a smart plug that is connected to your Wi-Fi network. You can then control the smart plug via an app.
- Considerations: Ensure the smart plug’s amperage rating is sufficient for the heater’s power consumption to avoid overheating or damage. This is the easiest and most flexible option for temporary or room-specific heating.
Step-by-Step: Connecting Your Heater to Wireless Control
The process of connecting your house heaters to wireless control can be broken down into several key stages. While some steps might be simpler than others, following them systematically ensures a smooth and successful integration with your smart home ecosystem. Always prioritize safety, especially when dealing with electrical wiring.
Before you begin, identify your heating system type and check its compatibility with smart thermostats or controllers. Many smart thermostat manufacturers provide compatibility checkers on their websites. You’ll also need a stable Wi-Fi network and a smartphone or tablet for app control.
For central heating systems, the most common scenario involves installing a smart thermostat. This usually replaces your existing one. If you’re comfortable with basic wiring, you can often do this yourself.
However, if your system is older or you’re unsure about electrical connections, hiring a qualified HVAC technician or electrician is the safest approach.
Step 1: Choose Your Smart Device
Select a smart thermostat, smart hub, or smart controller that is compatible with your specific type of heater. Consider your existing smart home ecosystem (e.g., Google Home, Amazon Alexa, Apple HomeKit) to ensure seamless integration. Research brands like Nest, Ecobee, Honeywell Home, or specific controllers for electric baseboard heaters.
- Research compatibility: Check manufacturer websites for compatibility guides.
- Consider smart home integration: Ensure it works with your preferred voice assistant.
- Read reviews: Look for user feedback on ease of installation and reliability.
- Identify system requirements: Note voltage, wiring needs, and Wi-Fi standards.
Step 2: Prepare Your Existing System
For central heating, turn off the power to your HVAC system at the breaker box. This is a critical safety step. If you’re replacing an existing thermostat, carefully remove the old unit, noting the wire connections.
Take a photo of the wiring before disconnecting anything. If you’re installing a new controller for electric heaters, follow the manufacturer’s specific preparation instructions.
| Action | Details |
|---|---|
| Turn Off Power | Locate your home’s breaker box and switch off the power to your furnace, boiler, or relevant heating circuit. |
| Remove Old Thermostat | Carefully detach the old thermostat from the wall. Disconnect wires, taking a clear photo for reference. |
| Check Wiring | Identify wire labels (e.g., R, W, G, Y, C) and confirm they match the new thermostat’s requirements. A ‘C’ wire is often needed for power. |
This preparation ensures that you’re working safely and have all the necessary information for the next steps. Incorrect wiring can damage your heating system or the smart device, so caution is paramount.
Step 3: Install the Smart Device
Mount the new smart thermostat base plate to the wall, connecting the wires according to the manufacturer’s instructions and your wiring photo. For controllers for electric heaters, follow their specific mounting and wiring diagrams, which may involve connecting to line voltage circuits. Ensure all connections are secure.
Once physically installed, attach the smart thermostat’s faceplate or the smart controller unit. If using a smart plug for portable heaters, simply plug the plug into the wall outlet and then plug the heater into the smart plug.
Warning: Working with line-voltage wiring (common for electric baseboard heaters) can be hazardous and may require a licensed electrician. Always verify power is off before touching any wires.
Step 4: Connect to Wi-Fi and Set Up the App
Restore power to your heating system at the breaker box. Your smart thermostat or controller should power on. Follow the on-screen prompts or the device’s instruction manual to connect it to your home Wi-Fi network.
This usually involves selecting your network name (SSID) and entering your password.
Next, download the corresponding smartphone app from your device’s app store (iOS or Android). Create an account or log in, and then follow the app’s instructions to add your new smart device to your account. This process often involves a pairing code or scanning a QR code.
- Download App: Find the official app for your smart device.
- Create Account: Register a new user profile.
- Add Device: Follow app prompts to detect and pair your thermostat/hub.
- Connect to Wi-Fi: Enter your home Wi-Fi credentials when prompted by the device.
- Configure Settings: Set up basic preferences like heating/cooling modes and temperature units.
Step 5: Configure Schedules and Preferences
Once connected, you can begin programming your heating schedule. Most smart thermostats allow you to set different temperatures for various times of the day and days of the week (e.g., lower temperature when you’re at work, higher when you’re home). Explore features like geofencing (which adjusts temperature based on your location) or learning capabilities, where the thermostat adapts to your habits over time.
For simpler systems, like those using smart plugs with portable heaters, you’ll set schedules or routines through the smart plug’s app, often integrated with voice assistants. This allows you to turn the heater on or off at specific times, mimicking a schedule.
Important: Regularly review and adjust your heating schedules to maximize energy savings and comfort. Your needs may change with seasons or daily routines.
Benefits of Wireless Heating Control
Embracing wireless control for your house heaters brings a host of advantages that significantly enhance your home environment and utility bills. The convenience factor is immense, allowing for adjustments from virtually anywhere. This remote access means you’re no longer tied to a physical thermostat location.
Energy efficiency is a major driver for adopting smart heating solutions. By precisely controlling when and how much your heaters operate, you can avoid wasting energy on heating an empty house or maintaining excessively high temperatures. The ability to create custom schedules and the learning capabilities of some devices further optimize consumption, leading to noticeable savings on your energy bills.
Convenience and Comfort
- Remote Adjustments: Change temperature settings from your phone or tablet, whether you’re on the couch or across town.
- Pre-heating/Cooling: Warm up your home before you arrive, ensuring instant comfort.
- Geofencing: Automatically adjust temperature based on your proximity to home, saving energy when you’re away.
- Voice Control: Integrate with smart assistants like Alexa or Google Assistant for hands-free adjustments.
Energy Savings
Studies from the U.S. Department of Energy suggest that homeowners can save up to 10% annually on heating and cooling costs by simply setting their thermostat back 7° to 10°F for 8 hours a day. Smart thermostats amplify this by making it effortless to maintain optimized temperatures.
| Feature | Benefit | Impact |
|---|---|---|
| Programmable Schedules | Set specific temperatures for different times of day and days of week. | Reduces heating when not needed, lowering bills. |
| Learning Capabilities | Thermostat learns your habits and optimizes schedules automatically. | Maximized efficiency without manual input. |
| Remote Access | Adjust settings from anywhere via smartphone app. | Prevents accidental energy waste and ensures comfort upon arrival. |
| Energy Reports | Provides insights into your energy usage patterns. | Helps identify further opportunities for savings. |
The ability to monitor energy usage through app reports is invaluable for understanding your consumption and making informed decisions about further optimizing your heating strategy.
Smart Home Integration
- Unified Control: Manage your heating alongside other smart devices (lights, locks, speakers) through a single app or voice assistant.
- Automated Routines: Create scenarios like “Good Morning” that turn on lights, adjust the thermostat, and start your coffee maker.
- Enhanced Functionality: Leverage integrations like weather forecasts to automatically adjust heating needs.
Potential Challenges and Troubleshooting
While connecting house heaters to wireless systems is largely beneficial, some challenges can arise. Understanding these potential pitfalls and knowing how to address them can save you time and frustration. Compatibility issues are perhaps the most common, especially with older heating systems.
Wi-Fi connectivity is another frequent hurdle. A weak or unstable Wi-Fi signal can lead to intermittent control or complete loss of connection. Ensuring your router is centrally located and functioning optimally is crucial for a reliable smart home experience.
Some systems might also require specific Wi-Fi band support (2.4GHz vs. 5GHz).
Installation can also be a point of difficulty, particularly for those not accustomed to electrical work. Incorrect wiring is not only frustrating but can also be dangerous and damage your equipment.
Compatibility Issues
Some older boilers or furnaces might not have the standard low-voltage wiring that most smart thermostats require. Similarly, electric heaters might use line-voltage controls that aren’t directly compatible with common smart thermostats.
- Solution: Double-check your system’s wiring against the smart device’s requirements before purchasing. Look for specific models designed for line-voltage or alternative connection methods. Consulting an HVAC professional can help identify compatible solutions.
Wi-Fi Connectivity Problems
Your smart device might frequently disconnect from your Wi-Fi, leading to lost control. This can be due to a weak signal, an overloaded router, or interference from other devices.
- Solution: Ensure your router is within range and functioning correctly. Consider a Wi-Fi extender or mesh system if your home is large or has dead spots. Reboot your router and the smart device. Check for firmware updates for both your router and smart device.
Installation Errors
Incorrectly wired smart thermostats or controllers can lead to the heating system not working, damage to the equipment, or even safety hazards.
- Solution: If you are not confident with electrical wiring, hire a certified HVAC technician or electrician. Always turn off power at the breaker before starting any wiring. Follow the manufacturer’s instructions meticulously.
App and Software Glitches
Sometimes the smartphone app or the device’s firmware can have bugs that affect functionality.
- Solution: Ensure both your app and the smart device’s firmware are updated to the latest versions. Try uninstalling and reinstalling the app. Contact the manufacturer’s support for advanced troubleshooting.
Tip: Keep your smart device’s manual and your Wi-Fi password readily accessible, as you may need them for troubleshooting or re-setup.
What About Zone Heating?
Many homeowners have distinct zones within their house, each requiring different heating levels. Wireless control systems excel at managing multi-zone heating, offering a level of control and efficiency that traditional single-thermostat systems cannot match. This is often achieved using multiple smart thermostats or a central hub with wireless sensors.
Each zone can be managed independently. For example, you might want to keep unoccupied guest rooms cooler than your primary living areas or the master bedroom. Smart thermostats can be installed in each zone, or a single smart thermostat can control multiple zones if your HVAC system is set up for it (often called “zoning” by an HVAC professional).
Wireless sensors placed in different rooms can relay temperature data back to a central smart thermostat or hub. This allows the system to maintain the desired temperature in each specific area, rather than relying on a single thermostat to guess the temperature of the entire house. This granular control maximizes comfort and minimizes energy waste by only heating occupied or designated areas to their setpoint.
Implementing Zoned Heating
- Multiple Smart Thermostats: Install a separate smart thermostat in each zone. Each thermostat can then be controlled independently via its app.
- Smart Hub with Wireless Sensors: A central hub connects to your Wi-Fi, and wireless temperature sensors are placed in each zone. The hub uses this data to control your HVAC system or individual smart heaters.
- Zone Dampers: In central HVAC systems, motorized dampers installed in ductwork can open or close to direct airflow to specific zones. Smart thermostats can be programmed to control these dampers.
Benefits of Zoned Wireless Heating
| Benefit | Description |
|---|---|
| Personalized Comfort | Set different temperatures for various rooms or areas based on occupancy and preference. |
| Enhanced Energy Efficiency | Avoid heating unused rooms, leading to significant energy savings compared to single-zone systems. |
| Improved Air Quality Management | Some systems allow for smart ventilation control within zones. |
| Flexibility | Easily adjust zone settings remotely or create custom schedules for each area. |
Implementing zone heating can sometimes involve more complex installation, especially if your HVAC system doesn’t already support it. Professional consultation is often recommended to assess the feasibility and best approach for your home.
Frequently Asked Questions
What is the average cost to install a wireless heating system?
The cost can vary widely. A basic smart thermostat might range from $100 to $250, with professional installation adding another $100-$300. For more complex multi-zone systems or specialized controllers for electric heaters, costs can go up to $1000 or more, especially if ductwork modifications or new wiring are required.
Do I need a C-wire for my smart thermostat?
Many smart thermostats require a common wire (C-wire) to provide continuous power, as they have higher power demands than traditional thermostats. If your system doesn’t have a C-wire, some thermostats offer workarounds like power-sharing adapters or require professional installation to run a new wire.
Can I control different types of heaters with one smart system?
Generally, a single smart thermostat is designed to control one type of system (e.g., central heating, or specific electric heaters). For mixed systems (e.g., central heating plus electric baseboard heaters), you would typically need separate smart controls for each type of heating, possibly integrated into a broader smart home ecosystem.
How often should I update my smart thermostat’s software?
Most smart devices update their software automatically over Wi-Fi. However, it’s a good practice to check for manual updates periodically via the device’s app or settings to ensure you have the latest features and security patches.
What happens to my heating if my Wi-Fi goes down?
If your Wi-Fi is down, your smart thermostat will usually continue to operate based on its last programmed schedule or manual settings. You won’t be able to control it remotely via the app, but the basic heating functions should still work locally.
Final Thoughts
Connecting your house heaters to wireless technology transforms your home’s comfort and efficiency. From smart thermostats that learn your habits to apps that give you complete control from anywhere, the benefits are substantial and increasingly accessible. While some installations require professional expertise, especially for older or electric heating systems, the long-term advantages in convenience, energy savings, and smart home integration make it a worthwhile investment for modern living.
Sponsored / affiliate links. As an Amazon Associate I earn from qualifying purchases. I may earn additional commission from eligible campaigns.