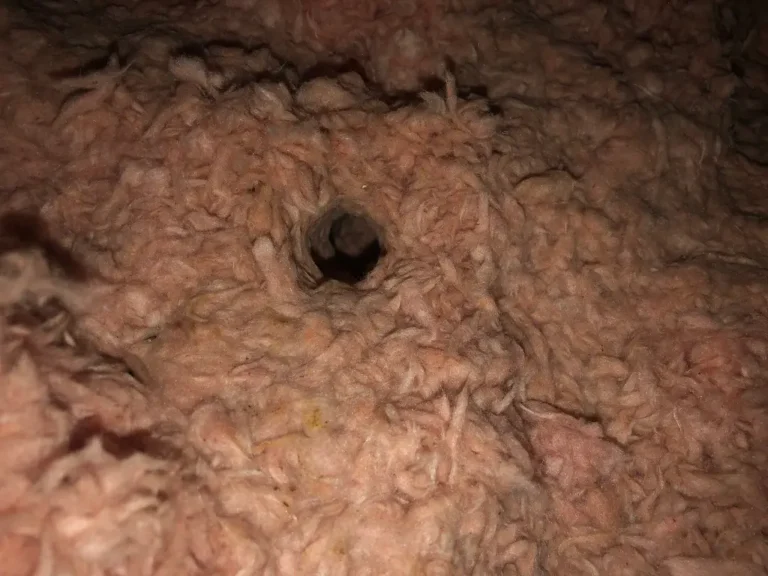
Why Is Cold Air Coming From My Recessed Lights?
Cold air from recessed lights usually means attic air is leaking through the fixture, trim, or housing. The right fix depends on whether the can is IC-rated, airtight, and covered by insulation. If you ignore it, that leak can waste heat, stain ceilings, and raise the risk of condensation around the light. This guide shows how to find the leak path and choose the right repair for your fixture type.
Why recessed lights feel cold

- Built-in E26 base for 6-inch systems
- IC rated and airtight for insulation contact
- ETL listed for safety standards
Recessed lights feel cold when air moves through the ceiling assembly, not because the bulb opening itself is pulling in outside air. In winter, the attic is often colder and under different pressure than the room below, so gaps around the fixture can send room air up or attic air down.
The size of the draft depends on three things: the leak path, the pressure difference between attic and room, and whether the housing is sealed to the ceiling plane. A light can feel cold at the trim even when the real problem is above it at the can, wiring entry, or junction box.
How the fixture becomes a draft path
A recessed light can leak air through the trim ring gap, open knockout holes, wire penetrations, or the junction box attached to the housing. Metal can housings can also act as a pathway if the attic-side gaps around the housing are open and connected to the room below.
Suppose a ceiling light sits under a vented attic and the same room also has cold spots at the top plate and an outlet on an exterior wall. That pattern points to a broader ceiling air leak, not a bad bulb or a trim ring alone.
When cold air points to a bigger ceiling leak
If several ceiling fixtures feel drafty, or the problem gets worse on windy days, the lights may be part of a larger attic air leakage issue. Recessed fixtures often share the same pressure pathway as attic access hatches, bathroom fan housings, wire chases, and top plates.
That is why sealing only the visible trim can leave the main leak untouched. The biggest loss often happens above the drywall, where the housing connects to the attic.
What usually leaks around recessed lighting
The common leak points are predictable: the trim ring gap, open knockout holes, wire penetrations, junction box leakage, and gaps where the housing meets the ceiling or attic insulation. The room-side opening is only one part of the assembly.
Trim ring gaps
The narrow gap between the trim and the ceiling can let air move through the finished opening. An airtight retrofit gasket can reduce that leak, but only if the fixture and trim are listed as compatible with that accessory.
Open knockouts and wire penetrations
Older housings often have open knockouts where a cable enters the can. Those openings can leak directly into the attic cavity. A fire-safe sealant may be allowed around certain penetrations, but you should not block ventilation slots or cover parts the manufacturer requires to stay open.
Junction box leakage
Many recessed fixtures include an attached junction box on top of the housing. If the box cover is loose or cable clamps are not seated properly, air can move through that box into the room. This is an attic-side sealing issue, not just a trim issue.
Metal can housing and attic-side gaps
A metal can housing can become a draft pathway if the attic side is open to moving air. The leak may be at the framing cutout, at seams in the housing, or where the fixture meets the ceiling drywall. Closing those gaps from the attic side is usually more effective than caulking the trim only.
Is your recessed light IC-rated or not?
IC-rated fixtures can often be covered with insulation if the manufacturer allows it, while non-IC fixtures generally need clearance from combustible insulation and framing. That difference matters because the wrong repair can create an overheating hazard even if it stops the draft.
IC-rated versus non-IC clearance rules
IC means insulation contact. A fixture with that rating is built for contact with attic insulation, within the limits in the listing. A non-IC can must keep clearance from insulation and combustibles, so you should not bury it under loose fill or pack fiberglass against it.
New-construction versus remodel housings
New-construction housings are usually installed before the ceiling is finished and are often tied into framing from above. Remodel housings fit through a cutout from below and can have different air-sealing details. Either type may be airtight or non-airtight, so the mounting style alone does not tell you the leak risk.
Older incandescent cans
Older incandescent can lights are often among the draftiest fixtures in a house. They generate more heat, are commonly non-airtight, and may have loose openings or outdated wiring details. If the housing is damaged, badly sealed, or not rated for insulation contact, full replacement is often the safer fix.
How to stop cold air from recessed lighting
Start with the least invasive checks, then move to attic-side sealing, and replace the fixture if its rating or condition makes repair unsafe. Sealing the visible trim helps only when the main leak is small and the housing is already suitable for the repair.
-
Check the room-side opening.
Look for gaps between the trim and drywall, loose trim springs, or a missing gasket. If the fixture is listed for an airtight retrofit gasket, install one between the trim and ceiling so it seals the room-side opening without blocking required vents.
-
Inspect the attic-side housing.
From the attic, look for open knockout holes, cable entry gaps, loose junction box covers, and a housing edge that is not sealed to the ceiling plane. Seal only where the fixture listing allows it, and keep ventilation paths clear if the housing is not designed to be fully airtight.
-
Restore missing insulation.
For IC-rated fixtures, put the insulation back around the housing as the manufacturer allows. For non-IC fixtures, keep the required clearance instead of packing insulation against the can. If service work left a gap around the fixture, close the opening without burying a non-IC housing.
-
Replace the fixture if needed.
If the housing is old, damaged, non-IC, or cannot be sealed safely, replacement may be the right answer. A modern airtight IC-rated fixture is often a better long-term fix than trying to patch a leaky metal can with caulk alone.
A common first-timer mistake is sealing the trim from below and stopping there. If the leak is at a knockout or the junction box cover, the room-side patch may reduce the draft only a little while the attic leak stays open.
Recessed light troubleshooting matrix
This matrix helps you match the symptom to the likely leak source and the safest first move. If any row points to a damaged housing, poor wiring, or an unknown rating, stop the DIY work and call an electrician.
| Symptom | Likely leak source | Safe homeowner check | Best fix | When to call an electrician |
|---|---|---|---|---|
| IC-rated can feels cold at the trim, but housing is intact | Trim ring gap or small attic-side air leak | Check for a missing gasket, loose trim, or visible attic gaps around the can | Add a listed airtight retrofit gasket and seal allowed attic-side openings | Call if the housing is damaged or the listing is unclear |
| Old non-IC can drips cold air and the attic feels drafty nearby | Open knockouts, leaky junction box, or large housing gaps | Look for insulation clearance labels and visible openings above the ceiling | Do not cover with insulation; plan for replacement with an IC-rated airtight fixture | Call before adding sealant if the wiring, box, or housing is compromised |
| Remodel housing leaks more on windy days | Ceiling cutout gap or loose mounting clips | Check whether the trim sits flat and whether air moves at the drywall edge | Seal allowed gaps from the attic side and use a compatible gasket if listed | Call if the housing shifts, overheats, or the wiring is exposed |
| Bathroom fixture smells damp or foggy after showers | Moisture-laden air leaking into the attic and condensing | Look for rust, staining, or condensation around the housing and trim | Improve attic-side air sealing and keep the fixture suitable for wet or damp locations | Call if corrosion, loose wiring, or fan-sharing issues are present |
| Light near attic access point feels colder than others | Shared pressure pathway with attic hatch, top plates, or adjacent penetrations | Check the attic access cover, weatherstripping, and nearby ceiling gaps | Seal the access point first, then return to the fixture | Call if the fixture itself is damaged or the attic opening is unsafe to enter |
Bathroom and kitchen recessed lights
Bathroom and kitchen recessed lights can show draft symptoms faster because warm, moist indoor air moves through them and condenses on cold attic surfaces. That moisture can make a minor air leak look worse, and it can also stain trim or corrode parts above the ceiling.
Moisture and condensation clues
If the trim feels damp, the housing has rust spots, or the ceiling around the light discolors after showers or heavy cooking, think moisture movement as well as heat loss. The fixture may be pulling humid room air into the attic, where it cools and condenses.
Why steam can make draft symptoms worse
Steam increases the amount of air and moisture moving toward the attic. A fixture that seems only mildly drafty in a living room can become a bigger problem in a bathroom because the same leak path also carries humid air.
Picture a bathroom recessed light directly below a vented attic. If the trim is sealed but the housing has open knockouts, the room may still send moist air into the attic, where insulation can get damp and lose performance.
Can you insulate around recessed lights safely?
You can insulate around some recessed lights safely, but only when the fixture is IC-rated and the manufacturer allows insulation contact. Non-IC fixtures need clearance, so covering them with fiberglass or cellulose can create a heat-safety problem even if it helps with drafts.
Fiberglass and cellulose coverage rules
Loose-fill cellulose and fiberglass should cover an IC-rated fixture only if the listing permits it. Keep insulation out of the can’s ventilation or hot-zone areas if the fixture is not listed for full contact. When in doubt, read the label on the housing before adding more insulation.
Attic access points and adjacent leak paths
Do not fix the light and ignore the nearby hatch, attic stair, or top plate gaps. A blower-door-style air-sealing approach means reducing the biggest leaks first, then returning to smaller ones like the recessed light trim.
Weatherstrip the attic access cover if it leaks, and seal adjacent ceiling penetrations that share the same pressure pathway. If the same room also has cold outlets or a chilly top plate, the recessed light may be only one symptom of the attic leak.
Frequently asked questions
Why is cold air coming from my recessed lights?
Cold air usually comes from a leak in the ceiling assembly above the light, not from the bulb opening itself. Common paths include trim gaps, open knockouts, wire entries, and junction box leakage. In winter, attic-to-room pressure differences make those leaks easier to feel.
How do I stop cold air from coming through recessed lighting?
Start by finding the leak path. Seal the room-side trim only if the fixture is compatible with a gasket, then seal allowed attic-side gaps around the housing and wiring. If the can is old, non-IC, or damaged, replacement is often the better fix.
Can recessed lights cause heat loss in winter?
Yes. Recessed lights can leak heated indoor air into the attic and pull cold attic air back down when pressure changes. That can waste energy, cool the room, and contribute to condensation around the fixture and nearby ceiling surfaces.
How do you air seal recessed lighting?
Air seal recessed lighting by matching the fix to the fixture type. Use a listed retrofit gasket at the trim if allowed, then seal attic-side penetrations such as knockouts and cable entries with a fire-safe sealant where permitted. Do not block required ventilation or insulation-clearance space.
Are IC-rated recessed lights less drafty?
Often, yes, but not automatically. IC-rated fixtures are built to sit in contact with insulation, and many newer models are also better sealed than older cans. Even so, an IC-rated fixture can still leak if the trim, wiring entry, or junction box is open.
Why are my recessed lights cold to the touch?
The trim feels cold because attic air is moving through or around the fixture, cooling the metal and the ceiling edge. That usually points to a leak path above the room, especially if other ceiling penetrations, outlets, or top plates feel chilly too.
Do I need to replace old recessed can lights to stop drafts?
Sometimes yes. Older non-airtight cans, especially incandescent types, are often so draft-prone that caulk and gaskets do not solve the whole problem. If the fixture is non-IC, damaged, or poorly sealed, replacement with an airtight IC-rated unit is often the safer long-term fix.
How do I air seal recessed lighting?
Find the leak first, then seal from the correct side. Use a compatible gasket at the trim if listed, seal attic-side gaps around the housing and wiring, and keep insulation rules in mind. If the fixture is non-IC or the wiring looks unsafe, call an electrician before sealing anything.
Sponsored / affiliate links. As an Amazon Associate I earn from qualifying purchases. I may earn additional commission from eligible campaigns.