How to Install Radiant Floor Heating in Crawl Space
Installing radiant floor heating in a crawl space offers a unique way to combat cold floors and improve overall home comfort, but it requires careful planning and execution. This often-overlooked area can become a significant source of heat loss, making it a prime candidate for an efficient heating upgrade. This guide will walk you through the essential steps and considerations for successfully implementing radiant floor heating beneath your living space.
Simply put, installing radiant floor heating in a crawl space involves securing heating elements like PEX tubing or electric mats to the underside of the subfloor, ensuring proper insulation, and connecting it to a heat source and controls, all while meticulously sealing the crawl space for optimal efficiency and comfort.
Key Takeaways
- Installing radiant floor heating in a crawl space requires meticulous sealing and insulation of the crawl space environment for maximum effectiveness.
- Choose between hydronic (PEX tubing) or electric radiant systems, each with distinct installation processes and benefits for crawl space applications.
- Properly securing the heating elements to the underside of the subfloor and ensuring good heat transfer is crucial for performance.
- Comprehensive system planning, including manifold placement, control strategies, and professional plumbing/electrical connections, is essential for a safe and efficient installation.
- Addressing moisture and pest issues in the crawl space before installation is paramount to protect the new heating system and the home’s structure.
What is Radiant Floor Heating in a Crawl Space?
Radiant floor heating in a crawl space is a system designed to warm the floor above by transferring heat directly from the underside of the subfloor. Unlike traditional forced-air systems that heat the air, radiant systems heat objects and people directly, creating a more even and comfortable warmth. This method is particularly effective in older homes or those with notoriously cold floors stemming from unconditioned crawl spaces.
The primary goal is to create a thermal barrier and an active heating zone directly beneath the living areas. This significantly reduces heat loss through the floor and ensures a pleasant temperature underfoot, even during the coldest months. It’s an advanced solution that tackles a common source of discomfort and energy inefficiency.
This approach aims to transform a typically neglected and cold zone into an efficient heat emitter. By heating the floor from below, the entire room feels warmer and more inviting, eliminating cold spots and drafts often associated with traditional heating methods.
- Provides even, comfortable heat directly to the living space above.
- Reduces heat loss through the subfloor, improving energy efficiency.
- Eliminates cold floors, a common complaint in homes with crawl spaces.
- Can be integrated with existing HVAC systems or used as a primary heat source for specific zones.
- Improves overall home comfort by creating a consistent thermal environment.
The effectiveness of this system hinges on a well-sealed and insulated crawl space, as any air leaks or poor insulation will diminish the heat transfer to the living space and increase energy consumption.
Types of Radiant Floor Heating Systems for Crawl Spaces
When considering radiant floor heating for a crawl space, two main types of systems are typically available: hydronic and electric. Each offers distinct advantages and installation challenges, making the choice dependent on your specific needs, budget, and existing infrastructure.
Hydronic systems use heated water circulating through flexible PEX tubing. Electric systems, on the other hand, use resistance heating cables or mats. Both aim to deliver warmth upwards, but their installation, maintenance, and long-term costs vary considerably.
Understanding the nuances of each type is critical for making an informed decision that best suits your crawl space environment and heating requirements.
Hydronic Radiant Floor Heating (PEX Tubing)
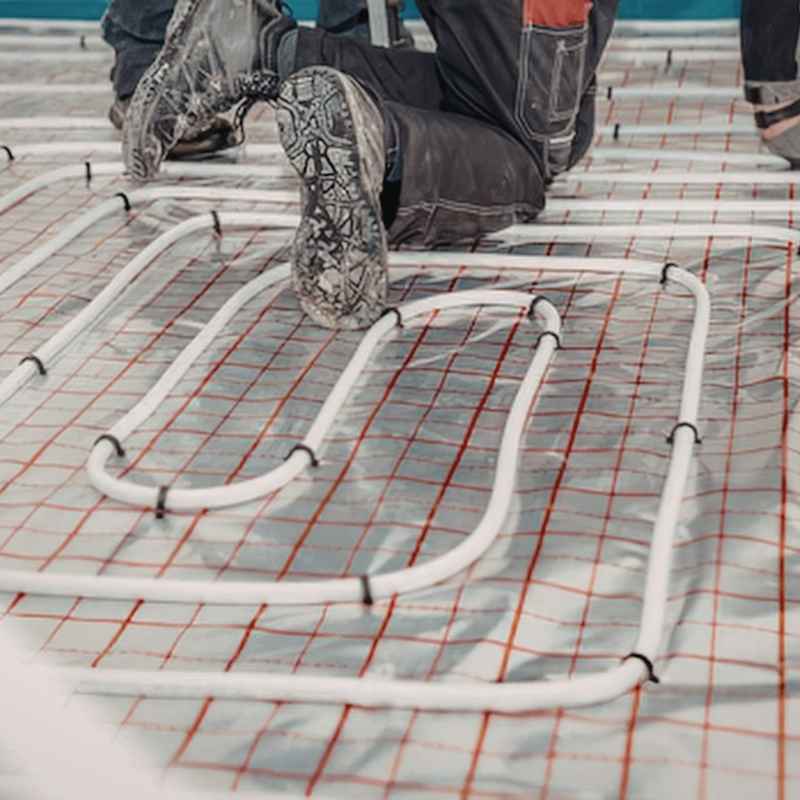
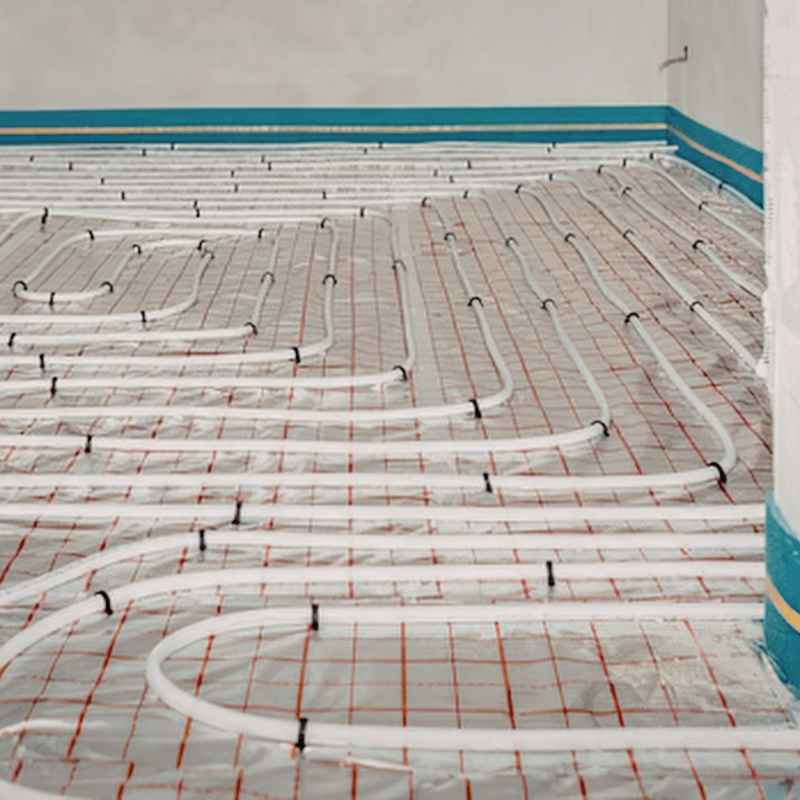
Hydronic systems are often favored for their efficiency and the ability to be zoned for precise temperature control. They utilize a boiler or a high-efficiency water heater to warm water, which is then pumped through PEX (cross-linked polyethylene) tubing installed beneath the subfloor. The tubing is typically secured in a serpentine or spiral pattern to ensure even heat distribution.
Installation involves carefully laying out and attaching the PEX tubing to the joists or a substrate installed between the joists. Manifolds are used to control the flow of water to different zones, allowing for customized heating in various areas of the home. This system offers a consistent and comfortable heat output.
The main components include PEX tubing, a heat source (boiler/water heater), pumps, manifolds, expansion tanks, and a control system. Proper installation requires knowledge of plumbing and heating systems to ensure leak-free operation and efficient heat transfer.
- Heat Source: Boiler or tankless water heater.
- Tubing: Flexible PEX pipes, typically 1/2″ or 5/8″ diameter.
- Distribution: Manifolds with flow meters and balancing valves.
- Controls: Thermostats, zone valves, and pump controls.
- Installation Method: Tubing is attached to the underside of subflooring or to specially designed heat transfer plates.
- Energy Efficiency: Generally high, especially when paired with condensing boilers.
Electric Radiant Floor Heating (Mats and Cables)
Electric radiant systems are simpler in concept, employing electrical resistance to generate heat. These systems consist of heating cables or mats that are laid out and secured beneath the subfloor. They are directly connected to the home’s electrical system and controlled by a thermostat.
While often less expensive to install upfront compared to hydronic systems, electric radiant heating can be more costly to operate due to electricity rates. However, they offer the advantage of rapid heating and are ideal for smaller areas or supplementary heating.
The key components are heating elements (cables or mats), a thermostat, and appropriate electrical connections. Installation requires an electrician to ensure safety and compliance with building codes.
- Heat Source: Electricity passing through resistance heating elements.
- Elements: Electric cables or pre-woven mats.
- Controls: Dedicated thermostat, often programmable.
- Installation Method: Mats or cables are secured to the underside of the subfloor.
- Energy Efficiency: Can be less efficient for whole-house heating compared to hydronic systems.
- Zoning: Easily zoned by thermostat, but may require dedicated circuits for larger areas.
| Feature | Hydronic System (PEX) | Electric System (Mats/Cables) |
|---|---|---|
| Installation Cost | Higher upfront | Lower upfront |
| Operating Cost | Lower, especially with efficient boilers | Higher, depends on electricity rates |
| Heat Output | Even, consistent warmth | Can be quicker to heat up |
| Complexity | More complex plumbing and boiler integration | Simpler electrical hookup |
| Maintenance | Low, but requires periodic boiler checks | Very low, but potential for electrical faults |
Choosing between hydronic and electric systems depends on your budget, desired comfort level, and the scale of the project. Hydronic systems are generally a better long-term investment for whole-house heating, while electric systems can be a good solution for targeted heating needs.
Preparing Your Crawl Space for Radiant Heating
Before any heating elements are installed, the crawl space itself must be properly prepared. This is arguably the most critical phase, as an unprepared crawl space can lead to significant performance issues, moisture problems, and even structural damage to your heating system.
The primary goal is to create a sealed, insulated, and dry environment. This will prevent conditioned air from escaping, keep out moisture, and ensure that the heat generated by the radiant system is directed effectively upwards into your home.
A well-prepared crawl space is the foundation for a successful and efficient radiant floor heating installation.
Crawl Space Encapsulation
Encapsulation is the process of sealing off the crawl space from the outside environment and the interior of the home. This involves covering the crawl space floor with a durable vapor barrier (typically 6-mil or thicker polyethylene sheeting), sealing all vents and openings, and potentially insulating the foundation walls.
Sealing vents prevents humid outside air from entering, which can lead to mold growth, wood rot, and pest infestations. An encapsulated crawl space maintains a more consistent temperature and humidity level, creating a healthier environment for your home and protecting the new heating system.
Encapsulation is essential for any radiant floor heating installation in a crawl space to maximize heat retention and prevent energy loss.
- Cover the entire crawl space floor with a heavy-duty vapor barrier (e.g., 6-mil or 10-mil polyethylene).
- Overlap seams by at least 12 inches and seal them with specialized tape.
- Extend the vapor barrier up the foundation walls and seal it to the sill plate.
- Seal all crawl space vents permanently with rigid foam board or specialized vent covers.
- Consider insulating the foundation walls with rigid foam board or spray foam for added thermal performance.
- Ensure proper drainage is in place to prevent water accumulation.
Insulation Requirements
Once encapsulated, insulation plays a vital role in directing heat upwards. While the encapsulation itself provides a thermal break, additional insulation can further enhance efficiency. The focus is on insulating the underside of the subfloor to prevent heat from escaping downwards into the crawl space.
Rigid foam insulation boards (like XPS or polyiso) are often recommended for crawl spaces due to their moisture resistance and high R-value. They can be attached directly to the joists or between them.
The goal is to create a highly insulated barrier between the heated living space and the crawl space environment, ensuring that the radiant heat does its job effectively.
- Install rigid foam insulation panels between floor joists, ensuring a snug fit.
- Seal all edges and seams of the insulation panels with appropriate tape or spray foam to prevent air gaps.
- Consider the R-value requirements based on your climate zone; aim for the highest practical R-value.
- Ensure insulation does not obstruct any necessary ventilation or access points for the radiant system’s components.
- The vapor barrier should be on the warm side of the insulation – in this case, between the insulation and the subfloor.
Installing Hydronic Radiant Floor Heating (PEX Tubing)
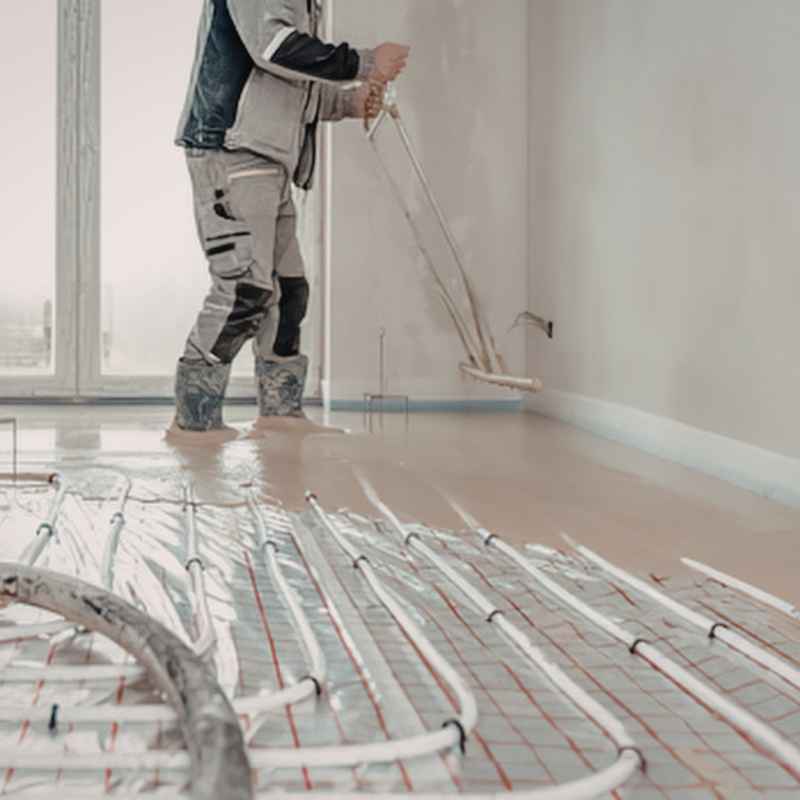
Installing a hydronic system involves laying PEX tubing beneath the subfloor. This requires careful planning to ensure even heat distribution and proper attachment to the joists or a specialized substrate.
The process generally involves running the PEX tubing from the manifold in a predefined pattern, securing it firmly, and ensuring it is protected from potential damage.
Proper installation is key to achieving the desired comfort and efficiency from your hydronic radiant floor heating system.
Securing the PEX Tubing
The PEX tubing is typically attached to the underside of the subfloor. One common method is to use specialized aluminum heat transfer plates that clip onto the tubing and then screw into the subfloor. These plates help distribute the heat evenly from the tubing to the floor above.
Alternatively, the PEX tubing can be secured directly to the joists using plastic or metal clamps designed for this purpose. This method requires careful spacing to ensure consistent heat output across the entire floor area.
The pattern of tubing installation (serpentine or spiral) is crucial for preventing hot or cold spots.
- Lay out the PEX tubing according to your design plan, maintaining consistent spacing (typically 6-12 inches on center).
- Use aluminum heat transfer plates for superior heat distribution, screwing them securely to the subfloor with the tubing nested inside.
- If direct attachment to joists is preferred, use appropriate PEX clamps or straps to hold the tubing firmly in place.
- Ensure the tubing is not kinked or stressed during installation.
- Plan for expansion and contraction of the tubing by allowing slight slack where appropriate, especially at connection points.
Manifold Placement and Connections
The manifold is the central hub for the hydronic system, distributing hot water to the different zones and returning cooler water. It should be located in an accessible area, typically within the crawl space or a nearby utility closet.
All PEX tubing runs connect to the manifold. Each zone is controlled by a valve, which is linked to a thermostat. This allows for independent temperature control in different areas of the home.
Professional plumbing expertise is highly recommended for manifold installation and connection to the main heating source.
- Choose a manifold location that is easily accessible for maintenance and adjustments.
- Connect each loop of PEX tubing to the corresponding ports on the manifold.
- Install flow meters on the supply side of the manifold to monitor and balance water flow to each zone.
- Install isolation valves on both the supply and return sides of the manifold for servicing.
- Connect the manifold to your boiler or water heater via insulated piping.
- Ensure all connections are secure and leak-free.
Installing Electric Radiant Floor Heating
Electric radiant floor heating offers a more straightforward installation process, particularly for smaller areas. The focus here is on the secure placement of the heating elements and proper electrical connections.
The key is to ensure the heating elements are laid out evenly and that they are protected from potential damage once installed.
Safety and adherence to electrical codes are paramount when working with electric radiant heating systems.
Attaching Heating Cables or Mats
Electric heating cables are typically laid out in a serpentine pattern and secured to the underside of the subfloor using provided clips or adhesive. Heating mats, which have the cables pre-woven into a flexible mat, are also secured in a similar fashion.
It’s crucial to maintain consistent spacing between cable runs to avoid hot spots and ensure even heat distribution. The manufacturer’s instructions for spacing and attachment methods must be followed precisely.
Care must be taken to avoid damaging the heating elements during installation, as they are not easily repaired once embedded.
- Plan the layout of the heating cables or mats to cover the desired area evenly.
- Use the manufacturer’s recommended clips, tape, or adhesive to secure the elements to the subfloor.
- Ensure consistent spacing between cable runs (refer to manufacturer’s specifications).
- Avoid crossing heating cables over themselves, as this can create hot spots and damage the elements.
- Carefully route the “cold leads” (the unheated portion of the cable that connects to the thermostat) to the designated junction box.
Electrical Connections and Thermostat Installation
All electric radiant floor heating systems require a dedicated circuit from the electrical panel. The heating elements are connected to a thermostat, which controls the system’s operation. This step should only be performed by a qualified electrician.
The thermostat is typically installed in a location accessible from the living space above. It monitors the floor temperature and activates the heating elements as needed to maintain the desired temperature.
Proper grounding and wiring are essential for the safe operation of electric radiant heating systems.
- A qualified electrician must perform all electrical connections.
- Install a dedicated circuit breaker in the electrical panel for the radiant heating system.
- Connect the cold leads of the heating elements to the thermostat according to the manufacturer’s wiring diagram.
- Install the thermostat in an accessible location in the living space above, ensuring it is wired correctly to the heating elements and the electrical supply.
- Ensure all connections are made in a junction box and are properly insulated and secured.
- Test the system for continuity and resistance before energizing it.
Testing and Commissioning the System
Once installation is complete, thorough testing and commissioning are vital to ensure the radiant floor heating system operates correctly and safely. This phase verifies that all components are functioning as intended and that the system delivers heat effectively.
Testing should be done in stages, starting with basic continuity checks and progressing to full system operation under load.
Proper commissioning provides peace of mind and confirms the system’s readiness for long-term use.
Hydronic System Testing
For hydronic systems, initial testing involves a pressure test to check for leaks. The system is filled with water (or air, as per manufacturer instructions) and pressurized, and then monitored for any drop in pressure over a set period.
After confirming no leaks, the system is connected to the heat source and commissioned. This involves adjusting flow rates, checking thermostat operations, and verifying that each zone heats up as expected.
Full system operation is typically tested for at least 24-48 hours to ensure stability and consistent performance.
- Perform a pressure test on the PEX tubing system using water or air at the manufacturer’s recommended pressure for at least 24 hours.
- Monitor pressure gauges for any signs of leakage.
- Once leak-free, fill the system with water from the boiler or water heater.
- Purge all air from the system using the bleed valves on the manifold.
- Turn on the heat source and set the thermostat to the desired temperature.
- Monitor water temperature, flow rates, and return temperatures for each zone.
- Verify that each zone reaches and maintains the set temperature.
Electric System Testing
Electric systems are tested for continuity and resistance using a multimeter before and after installation. This ensures the heating elements are intact and haven’t been damaged during the installation process.
Once connected to power, the thermostat is used to operate the system, and the floor temperature is monitored to confirm it reaches and maintains the set point. This is usually done after the surrounding materials have stabilized.
The primary goal is to ensure the system heats reliably and safely.
- Use a multimeter to check the resistance of the heating elements against the manufacturer’s specifications.
- Ensure the resistance falls within the acceptable range, indicating no breaks or shorts.
- After connecting to the power supply and thermostat, turn on the system.
- Allow the system to run for a period and use an infrared thermometer or contact thermometer to check for even heating across the surface.
- Verify that the thermostat accurately controls the system’s on/off cycles.
- Confirm that no error codes or unusual noises are present.
Frequently Asked Questions
What is the most effective way to seal a crawl space for radiant heating?
The most effective method is full encapsulation, which involves covering the entire floor with a heavy-duty vapor barrier, sealing all vents, and insulating the foundation walls. This creates a conditioned, sealed environment that maximizes heat retention and prevents moisture issues.
Can I install radiant floor heating in an existing crawl space without encapsulation?
While technically possible, it is highly unadvisable. Installing radiant heating without proper encapsulation and insulation will result in significant heat loss into the unconditioned crawl space, making the system inefficient and costly to operate, and potentially leading to moisture problems.
What are the typical costs associated with installing radiant floor heating in a crawl space?
Costs vary widely depending on system type (hydronic vs. electric), the size of the area, and whether professional installation is used. Hydronic systems generally have higher upfront costs due to the boiler and plumbing, while electric systems are less expensive initially but more costly to run.
Expect costs to range from $20-$50+ per square foot for materials and installation.
How much insulation do I need for my crawl space?
The amount of insulation needed depends on your climate zone. In most regions, aim for an R-value of R-15 to R-30 for crawl space walls and undersides of floors. Consult local building codes and energy efficiency guidelines for specific recommendations in your area.
How long will a radiant floor heating system last in a crawl space?
With proper installation and maintenance, both hydronic PEX tubing and electric radiant systems can last for many years. PEX tubing systems are generally designed to last 50 years or more, while electric heating elements can also provide reliable service for 25-30 years or longer, provided they are installed correctly and protected.
Final Thoughts
Installing radiant floor heating in a crawl space is a project that can dramatically improve home comfort and energy efficiency. By meticulously preparing the crawl space through encapsulation and insulation, and carefully selecting and installing either a hydronic or electric system, you can transform cold, uncomfortable floors into a source of consistent warmth. While the installation requires diligence and potentially professional assistance, the long-term benefits of a cozy, well-heated home are well worth the effort.
Sponsored / affiliate links. As an Amazon Associate I earn from qualifying purchases. I may earn additional commission from eligible campaigns.
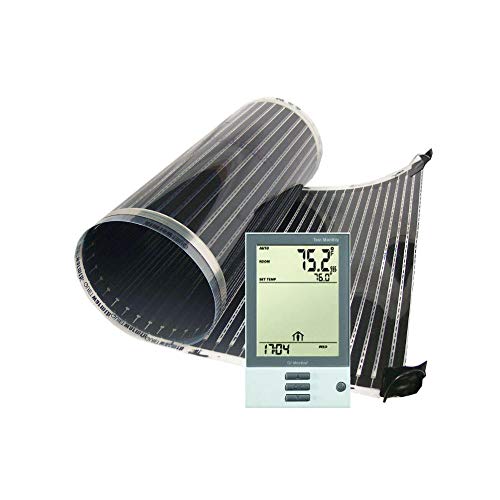 QuietWarmth Float QWARMKITFF Radiant Floor Heating Starter Kit Mat w/Programmable Thermostat for Laminate, Wood, Luxury Vinyl Floating Flooring- Cuttable Mat Size 3’x10' 120Volt (Covers 30sf)
 Crawl Space Vapor Barrier, 12 Mil Vapor Barrier, 12'x50', Thick White Plastic Sheeting, Drop Cloth White Vapor Barrier Covering for Crawlspace Encapsulation, Basement, Heavy Duty Polyethylene Film